There are a number of times when it’s useful to have screen recording software on your Mac. Maybe you want to create a tutorial. Or, you might just need to record a video of a pesky problem you’re running into in macOS. A mostly unsung hero for screen recording on the Mac is a free, built-in tool, but if you want to try apps like Movavi is also fine because it has an intuitive screen recording feature alongside other nice tools.
Nonetheless, let me show you how QuickTime Player can help you get started with screen recording your Mac.
QuickTime Player, Apple’s Built-In Free Option for Screen Recording Your Mac
If your needs are simple and you just need to grab a video recording of your Mac’s desktop, QuickTime Player has you covered. This is, however, a very simple solution with almost no bells or whistles. You can’t, for example, easily record your Mac’s internal sound in your video.
If you want to use QuickTime Player to record your screen, just open the app from Applications. Then you can begin recording your screen in seconds.
Time needed: 1 minute
Beginning a screen recording of your Mac with QuickTime Player is a cinch using these steps.
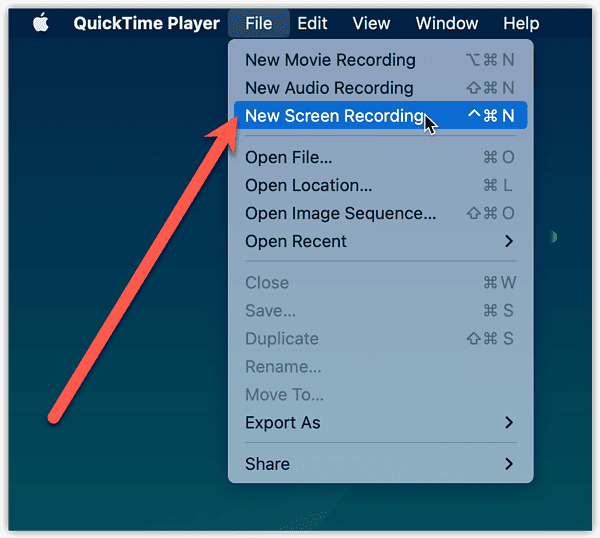
- With QuickTime Player selected, from the top left of the menu bar, click File.
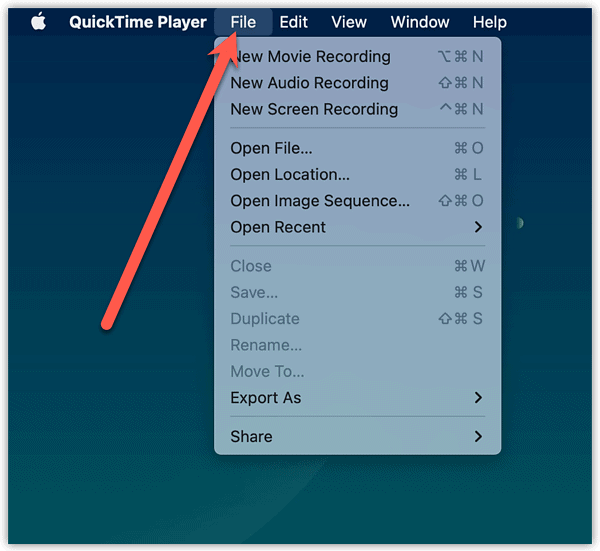
- Click New Screen Recording.
- Your cursor will turn into a camera icon. A menu will also appear, allowing you to configure a few options before you begin recording. We’ll cover that in a moment.
- If you have multiple displays, move the cursor to the display you want to record.
- Click once to begin recording.
- When done, simply click the Stop Recording button in the top left of the menu bar.
Defining How Much of the Screen to Record
While you can allow QuickTime Player to screen record your entire display, sometimes that’s overkill. The software does offer you the ability to narrow down what you record.
In the options menu that appears when you select New Screen Recording, you’ll note a few icons. These allow you to define screenshots or screen recordings.


If you’re not quite ready to pick, you can also click the x button at the far left of the Options menu to cancel.
The next two icons will let you define a screen recording video.


Adding Sound to Your Screen Recording
QuickTime Player also allows you to include sound from an input source when you’re screen recording. Strangely enough, the audio from your Mac itself isn’t available here.
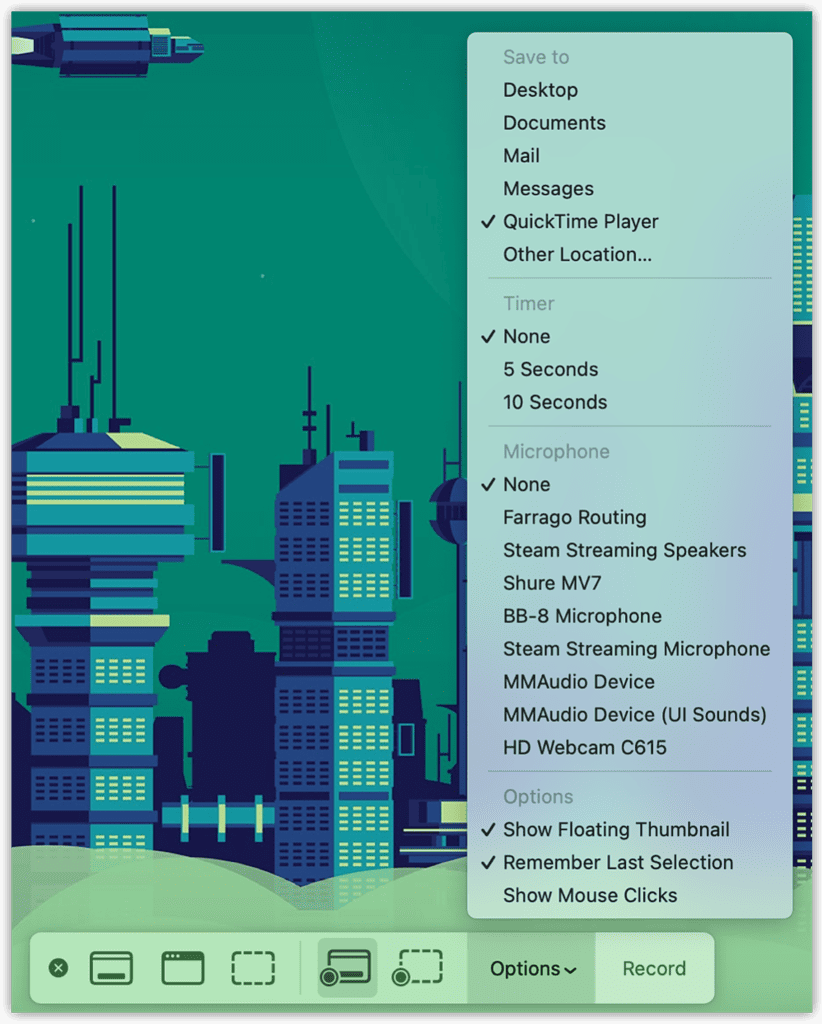
You can, however, record from any microphone attached to your Mac. Several solutions come to mind for capturing your Mac’s sound, from putting a mic right at your computer’s speaker to using third-party audio capture options.
As one example, you could use Rogue Amoeba’s Loopback software to create a virtual “microphone” out of one or more running applications on your Mac. You could even add your macOS internal sound effects to the mix.
As you can see from the “Farrago Routing” option in my screenshot above, you might select that as an input source to capture your Mac’s sound during your screen recording.
Other Options to Check Before You Record
You can see there are a couple other things you can change before you begin screen recording. QuickTime Player allows you to change where your video saves. You can also choose to set a timer that runs down before the recording begins. This is good for giving yourself time to get things ready and not have to trim the video later.
Finally, the bottom of the menu allows you to turn the floating thumbnail on or off. This only applies to screenshots, however.
You can also set QuickTime Player to remember your last selection. Finally, you can configure the recording to show mouse clicks, very useful for tutorials or walkthroughs.
A Simple, But Effective, Tool for Screen Recording On Your Mac
Just as iOS has its own built-in tool for recording your iPhone screen, so does macOS. While it may not offer a feature-rich experience like that used by the pros, QuickTime Player could suit your needs just fine. Since it’s free and already installed, it’s most definitely worth exploring if you have a need for screen recording options.
