Apple’s transition to its Silicon chips has brought an awesome feature to the Mac. You can install and run iOS and iPadOS apps, because the new Macs are using the same processor architecture, an Arm-based CPU, as the mobile devices. Let’s take a look at how you can (finally) run your favorite iPhone or iPad app on your Mac.
It All Begins In the Mac App Store
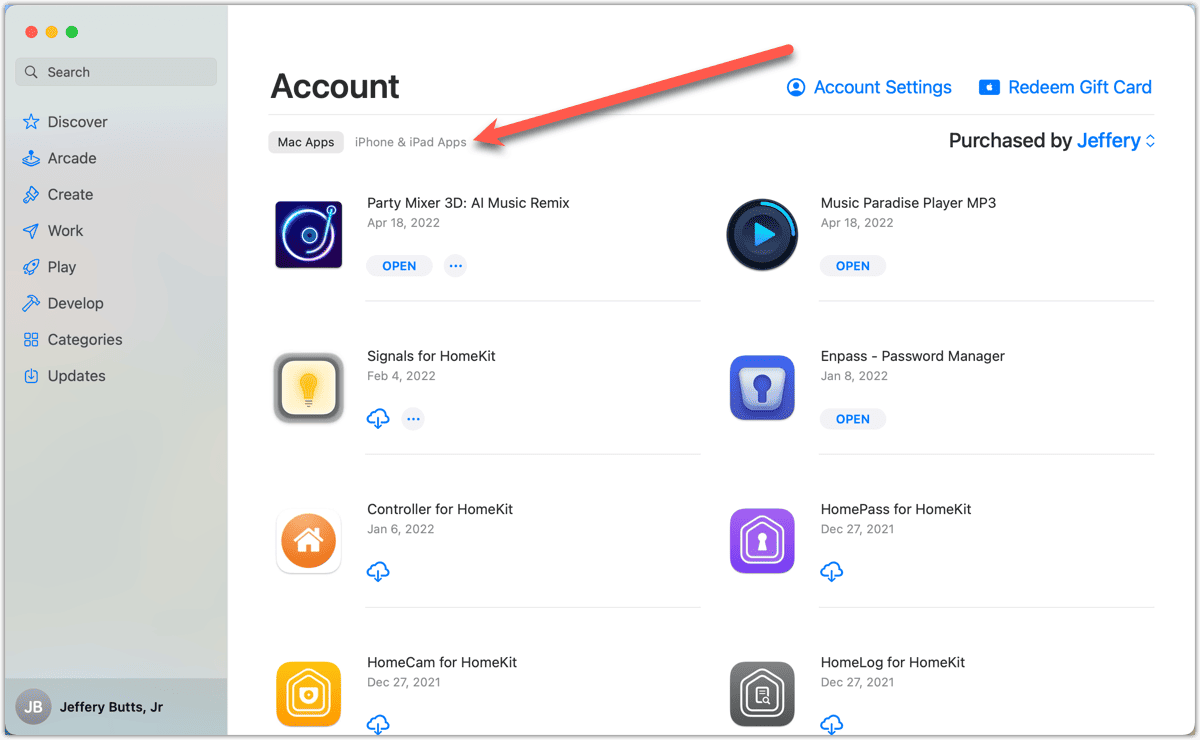
You’ll find the iOS and iPadOS apps available to run on your Apple Silicon Mac the same place you normally download software: the Mac App Store. The apps you’ve previously purchased on your iPhone or iPad show up in their own tab. Just open the Mac App Store, tap your Apple ID at the bottom left, and look for the tab labeled iPhone & iPad Apps.

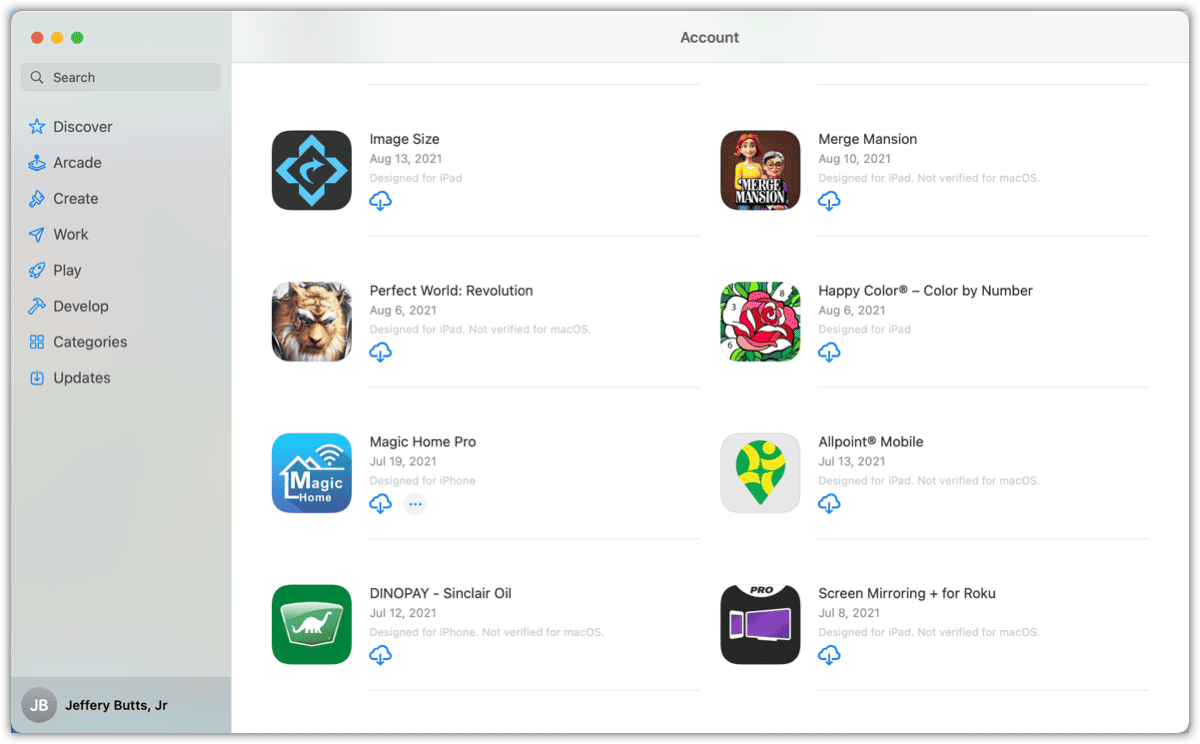
Tap the cloud download icon, and you’ll soon be in business. Many of the available apps may include a disclaimer they aren’t verified for macOS. This doesn’t necessarily mean they won’t work, just that the screen may look decidedly different from native Mac apps.

You can also search for apps by name, if you either haven’t yet purchased it or don’t want to try finding it through your account. After typing your search phrase, you’ll see the same iPhone & iPad Apps tab. If you click on that tab, you’ll see more options.
You may not find every app you’ve ever purchased on your mobile device. Developers can choose not to make their iPhone and iPad apps available on the Mac. Once upon a time, you could use iMazing to sideload those apps to your M1 Mac, but that route no longer works.
Running iPhone and iPad Apps on Mac
You’ll find that macOS doesn’t put your iPhone and iPad apps in any sort of special location. Just look in Applications and click the one you want to run. Sometimes, you’ll get a notification about system preferences for that app, such as allowing notifications or location services.
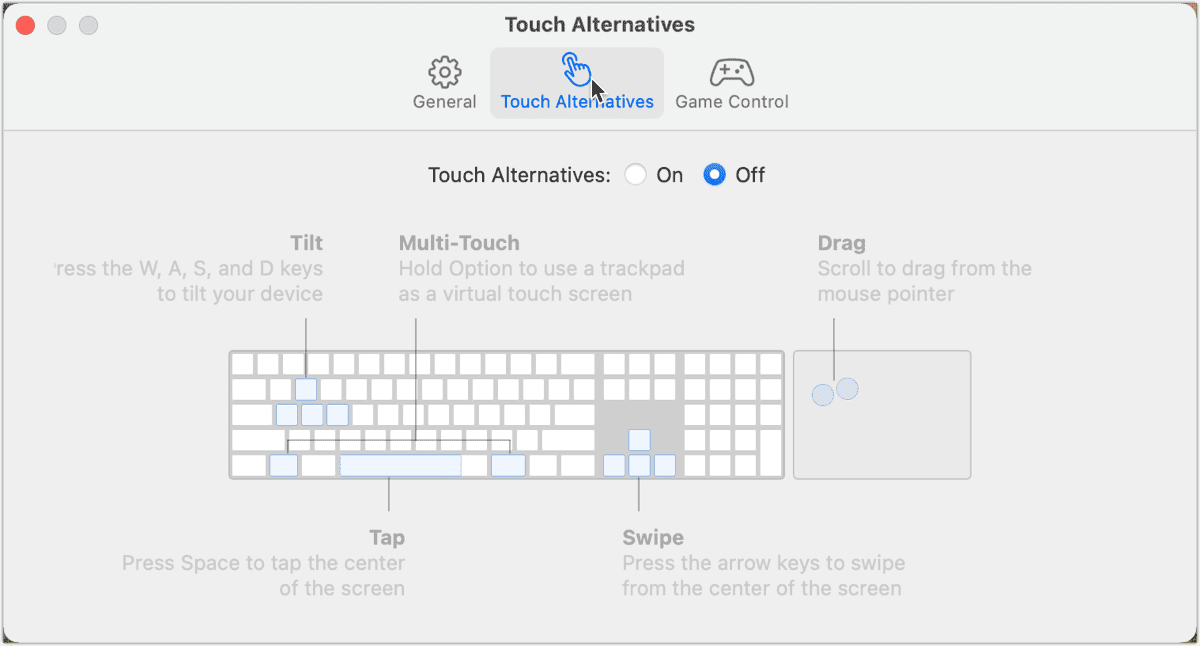
Should you want to change anything about the performance of an app, just click its name in the menu bar, then Preferences. Depending on the app in question, you can configure its window size, game control preferences, or touch alternative preferences. These can include setting certain keys to send tilt commands that you’d otherwise do simply by, well, tilting your device. Clearly, you can’t just tip your Mac from one side to the other.

For apps that use Notifications and other system settings, you’ll also see a tab for those. Labeled System Preferences, it shows all the applicable settings. It also includes a button to go into your System Preferences app to change them.
