One of the highlighted new features of the iPhone 14 Pro and Pro Max is the ability to capture 48MP photographs. The new Main Camera represents a huge leap in the power of iPhone photography, but how can you capitalize on it? Let’s walk through how to capture those deep, rich, detailed 48MP ProRAW photographs on your iPhone 14 Pro or Pro Max.
These Images Are Gonna Be Huge
First things, first. ProRAW images are, by the nature of the image format, much larger than the compressed photographs you might be used to seeing. This is because the camera is capturing everything it can, not discarding any details whatsoever. Furthermore, ProRAW images aren’t compressed like HEIC and JPEG images are.
According to Apple, the average file size for a ProRAW image at 12MP resolution is approximately 25MB. This is what you’ll get on your iPhone 12 Pro and iPhone 13 Pro. It’s also the default setting on the iPhone 14 Pro family. When you enable 48MP ProRAW images, that jumps up to around 75MB.
With this in mind, you’ll need to carefully consider how much you’re going to use the feature. If you plan on shooting and keeping a large number of 48MP ProRAW photos, you’ll want to have plenty of storage available on your iPhone 14 Pro. You may want to consider upgrading your iCloud storage plan, too, to make sure you have enough space.
Flipping the Switch for 48MP ProRAW Images on the iPhone 14 Pro or Pro Max
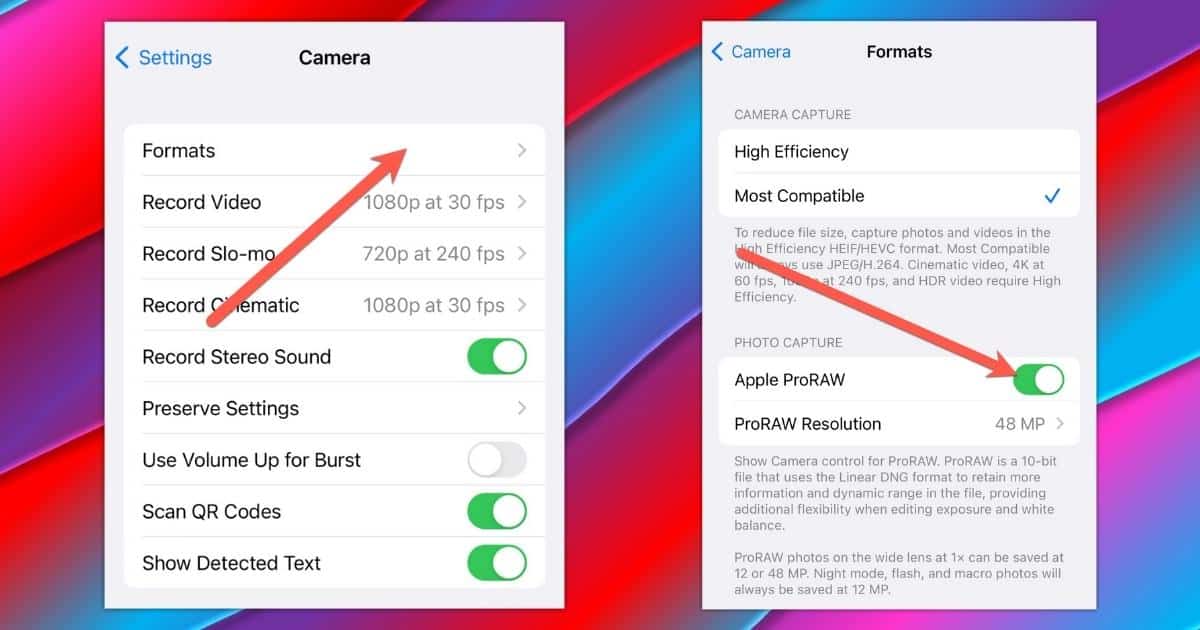
Now onto turning the feature on. Before you can capture anything using the new 48MP ProRAW capability, you’ll need to go to Settings > Camera > Formats. Once there, turn on Apple ProRAW and choose 48MP in ProRAW Resolution. Of course, if you later decide you don’t need quite that much power, you can change it to 12MP.
Next, open the Camera app to start taking pictures. It’s important to note that only the main camera supports 48MP, so changing your zoom level beyond 1X will drop the resolution back to 12MP.
Next, look for the RAW emblem in the top right corner, right beside the Live Photo button. It likely has a slash through it, but if you tap the RAW emblem, the slash goes away.
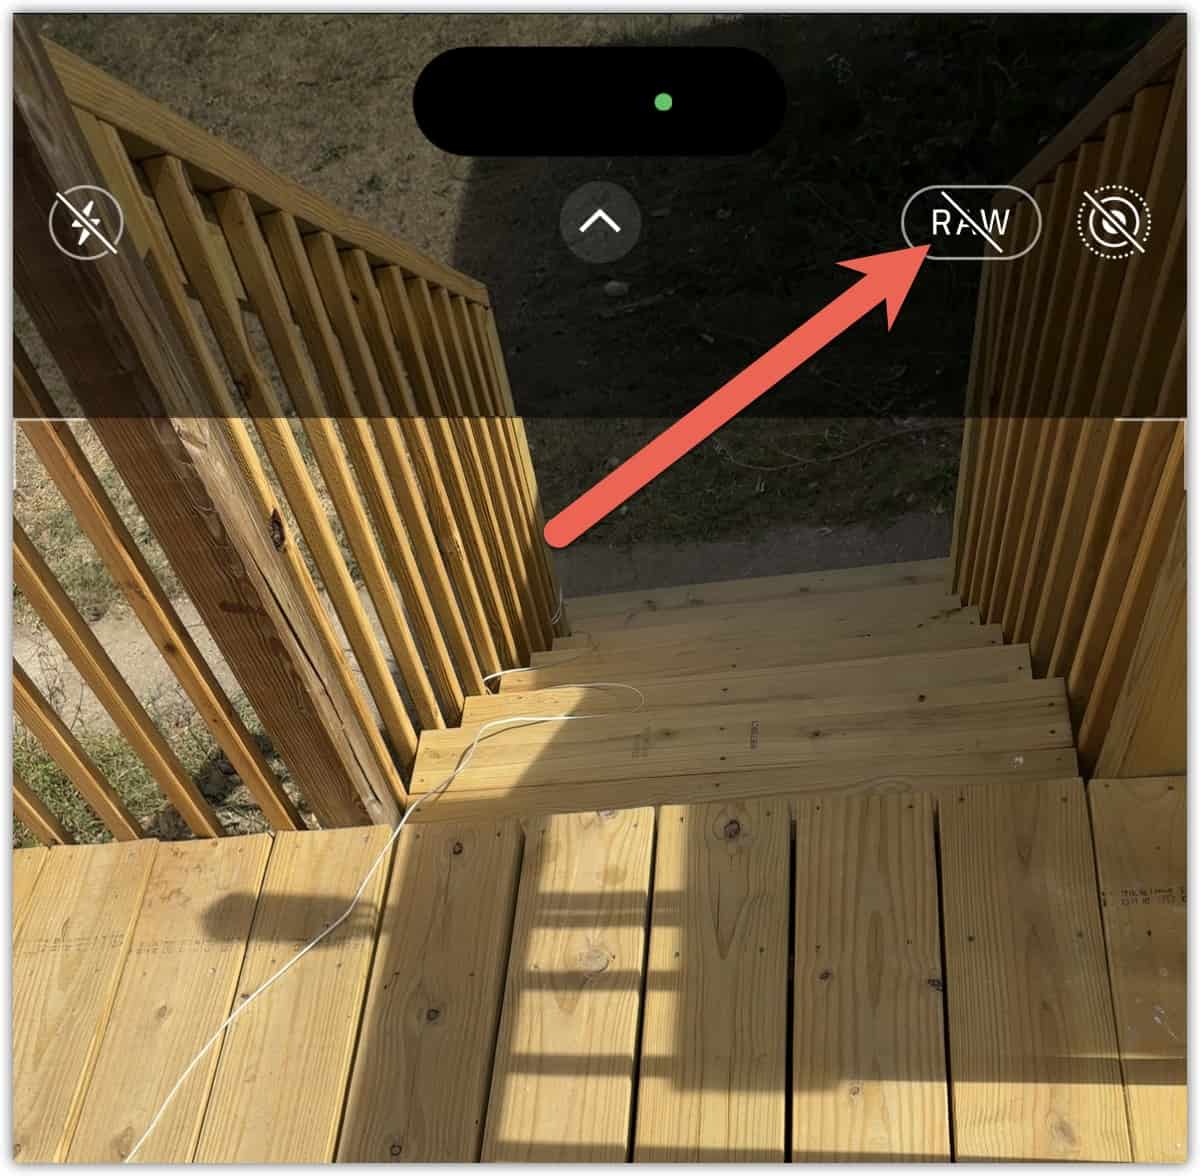
From this point forward, you’ll be capturing photographs using the ProRAW image format. When the main camera is used, you’ll get 48MP captures. You can later edit these in the Photos app, both on your iPhone and your Mac.
Other, third-party apps can also edit ProRAW, but your mileage may vary with these. In particular, though, Adobe’s Lightroom and Photoshop apps work well with Apple’s ProRAW image format. Since the format uses an industry standard (digital negative, or DNG) as its foundation, other apps capable of editing that format may still work fine.
How to Tell Your Images Are 48MP ProRAW on the iPhone 14 Pro Family
Want to make sure it all worked? After taking a picture (or 10) using the RAW setting, just open the Photos app on your iPhone 14 Pro or Pro Max. Select one of your pictures, and tap the blue information icon at the bottom. This is a lower-case “i” with a circle around it.
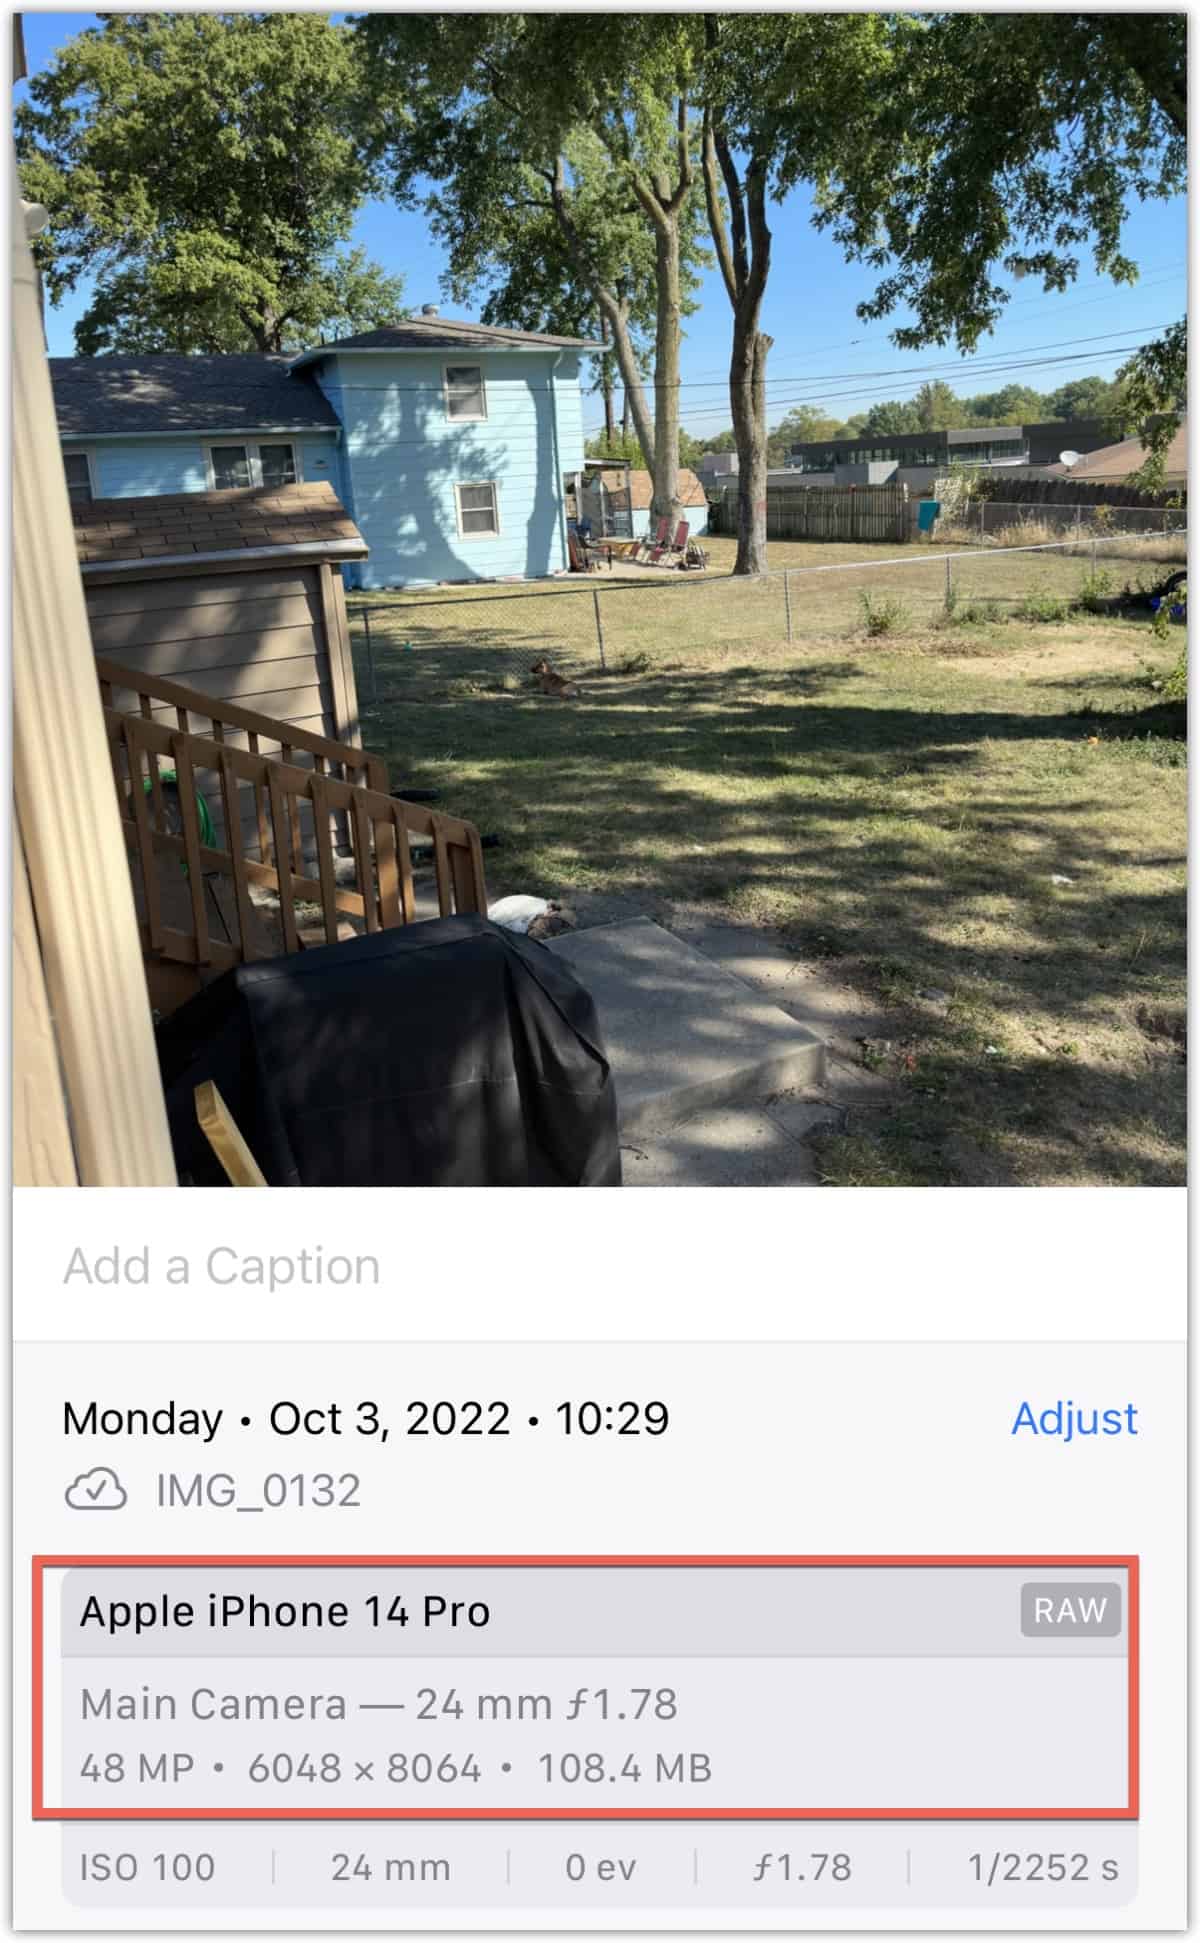
Amongst the details offered, you can see the specifics of how the image was captured. For example, the image above shows it was captured with the main camera. You can see it’s a 48MP image, 6048 x 8064 in dimensions and 108.4MB large (I told you these images were big.)
You’ll also see other details, such as the f-stop employed, shutter speed and ISO equivalent. If you have Location Services enabled for your camera, you may also see your image on a map.
Fine-Tuning Your Camera Setup
There are a few other settings you may want to tweak, especially if you expect to do a great deal of your iPhone photography using ProRAW. In Settings > Camera > Preserve Settings, you’ll find these toggles. See, usually many of the advanced camera settings will reset after you close and re-open the Camera app.
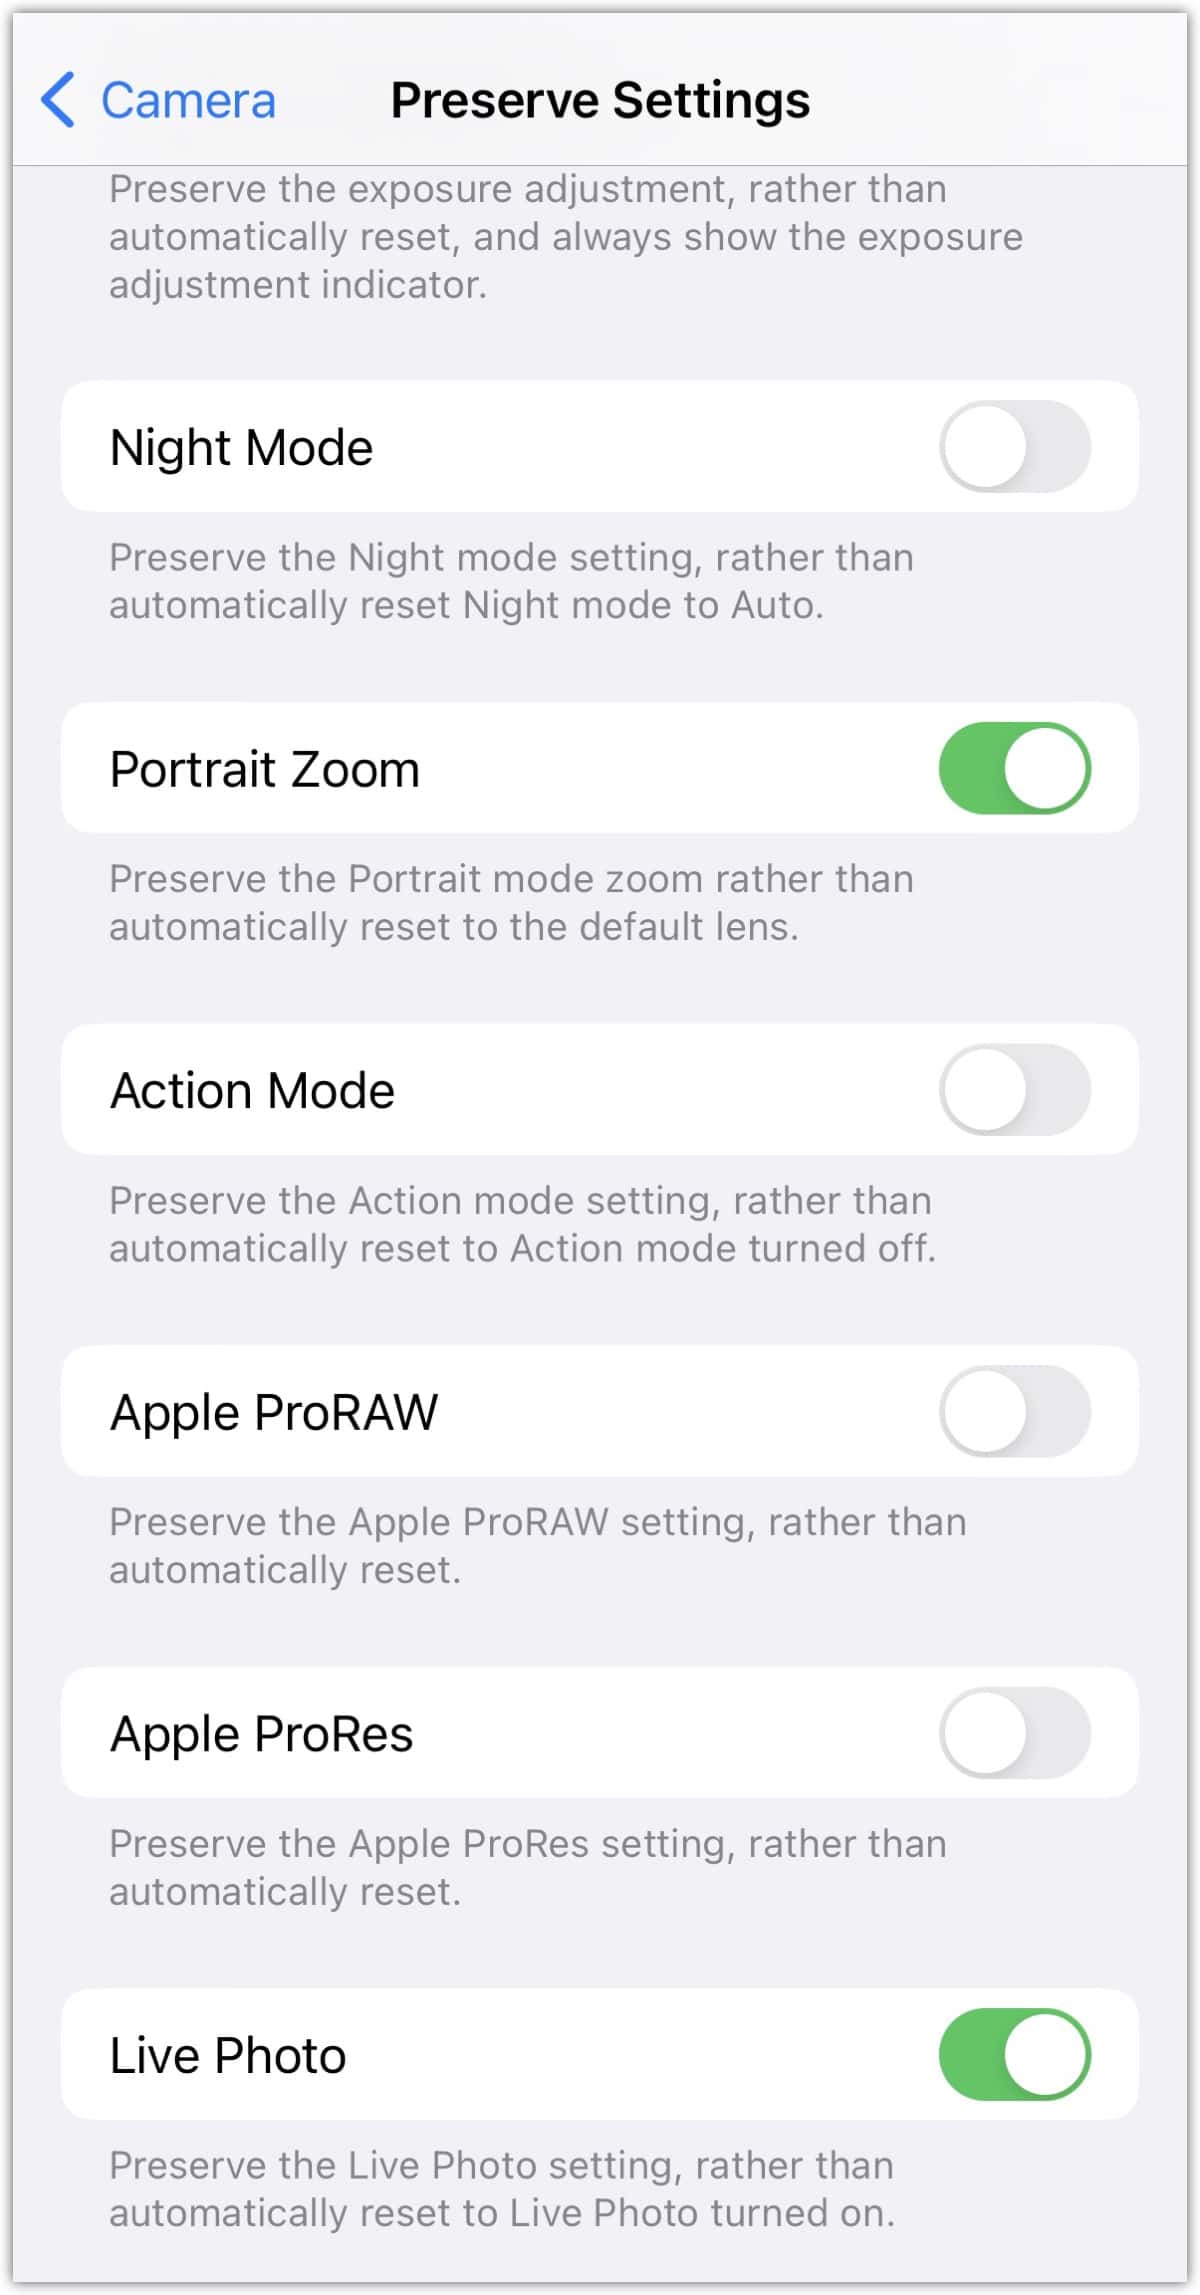
Some of the popular ones to preserve settings for are Live Photo, Apple ProRAW and Apple ProRes. Also there, you can set the camera to stay in Night Mode, Portrait Zoom and Action Mode rather than resetting.
There you have it, the iPhone 14 Pro and Pro Max camera’s 48MP ProRAW format in a nutshell. What sort of images are you most excited about capturing using this new advance in iPhone photography? Let us know in the comments.
