With the AirPods’ small form factor, it’s not surprising that users keep losing them. The worst thing that could happen is that a user loses the AirPods without enabling Find My on their iPhone. But for those of you who have done this crucial step, you should know how to mark AirPods as lost. Here’s how to do it.
Make Sure that You Enable Find My on Your iPhone, iPad, or Mac
Enabling Find My on your Apple devices can play an important role in finding or keeping track of the whereabouts of your Apple devices. You can quickly and easily learn the current or most recent locations through the Find My app. See the steps below to enable Find My on your iPhone, iPad, or Mac.
On your iPhone or iPad:
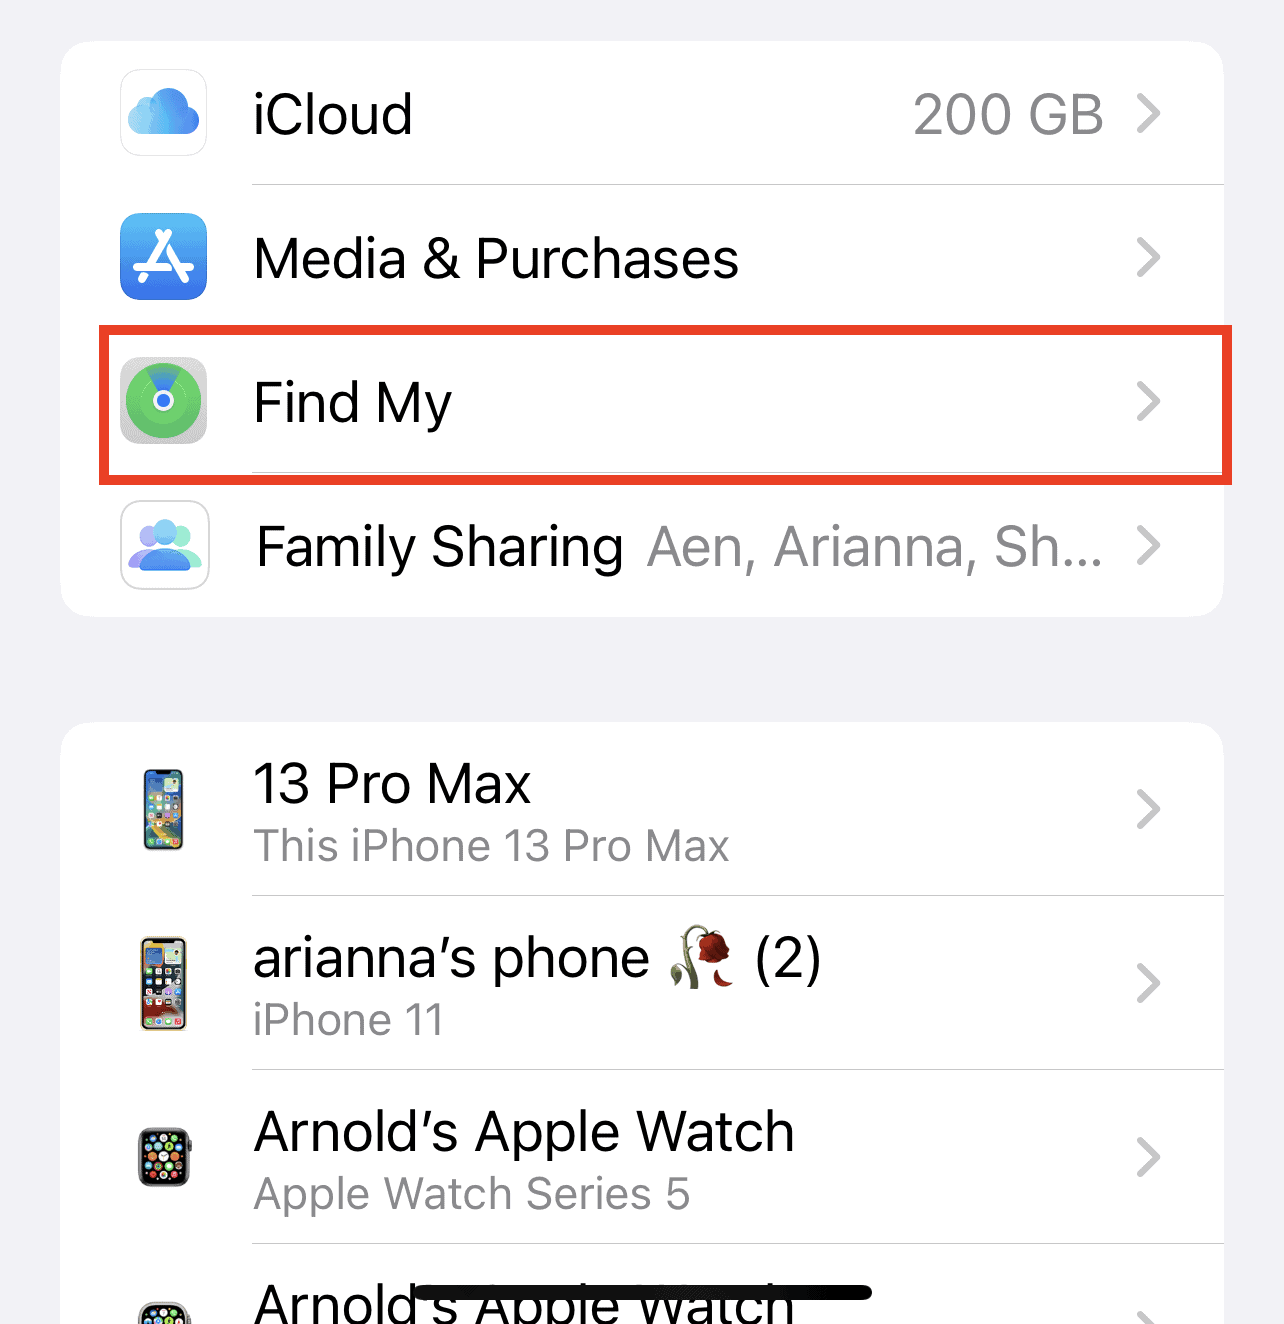
- Go to Settings, then tap your name on the upper-left sidebar.
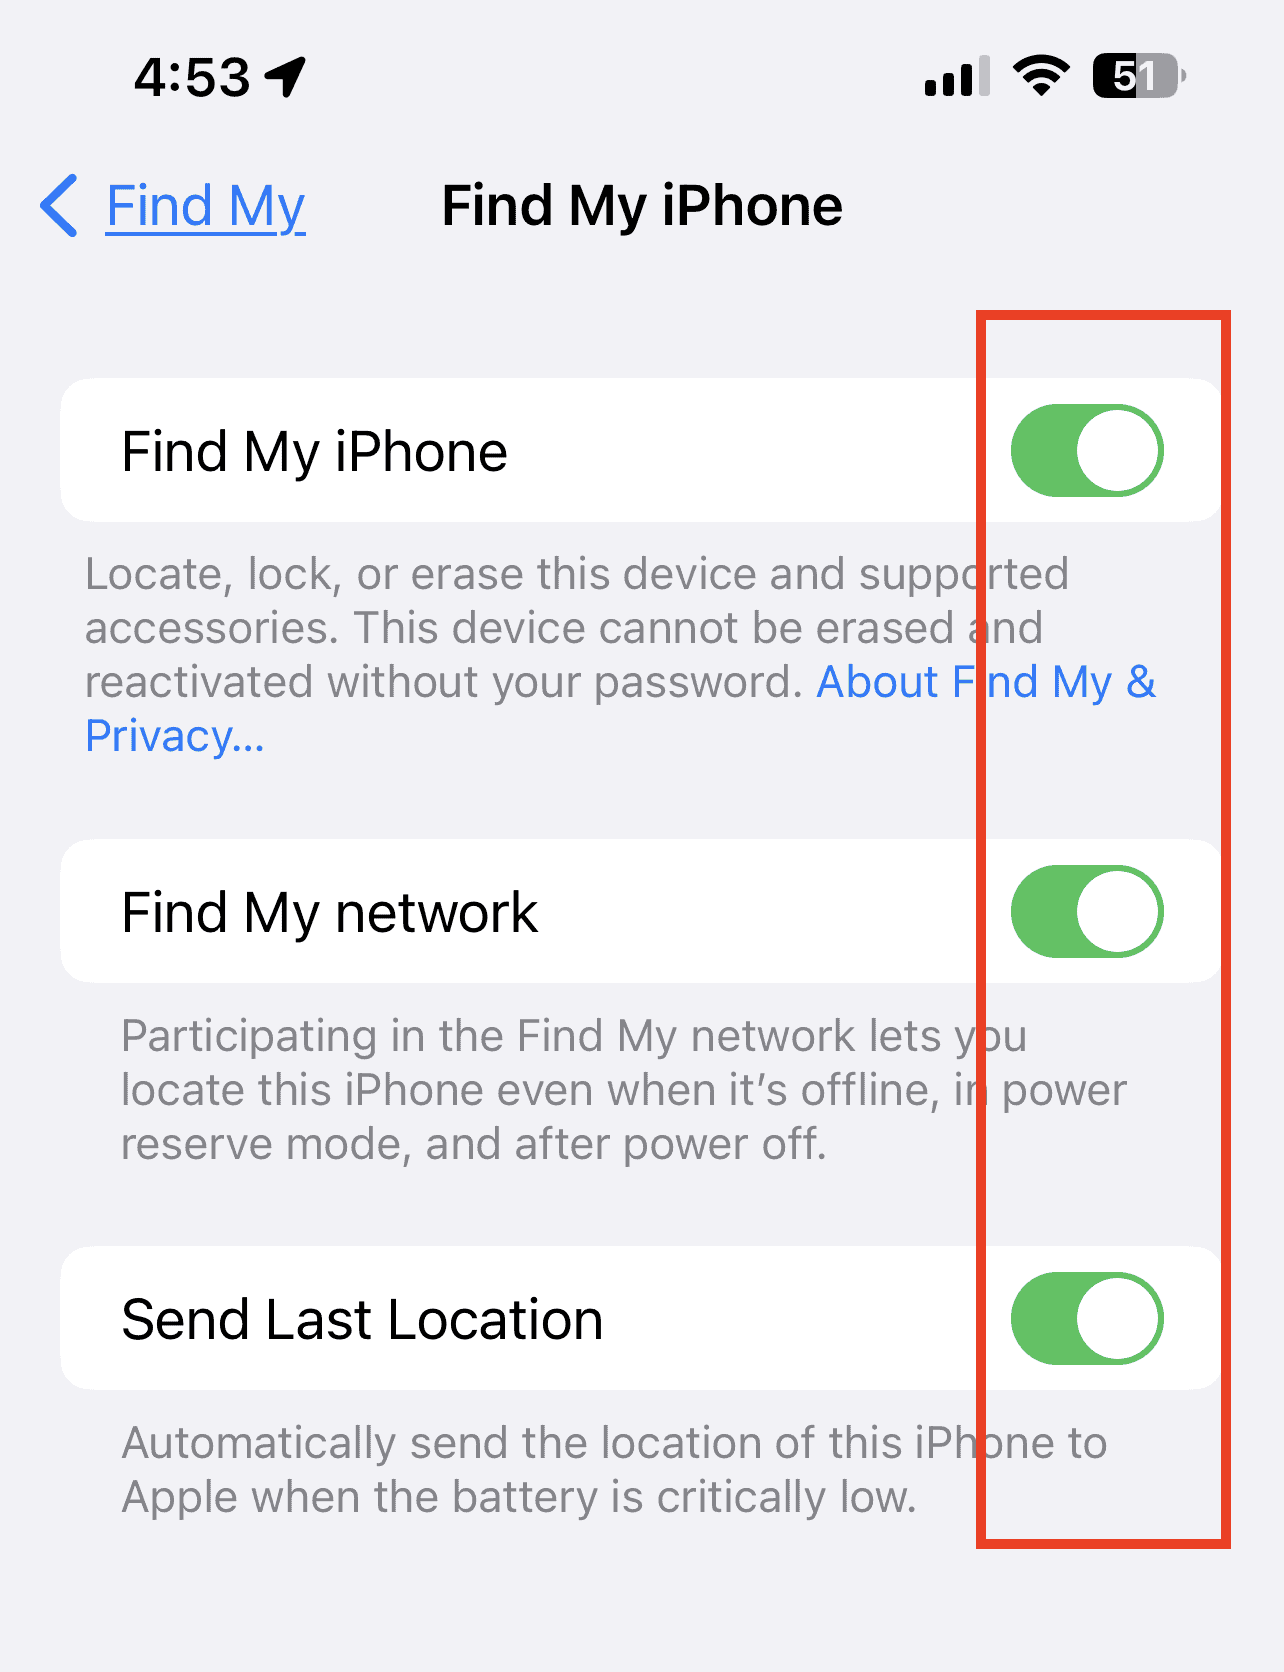
- Tap on Find My > Find My iPhone.
- Toggle on Find My iPhone, Find My Network and Send Last Location.
On your Mac:
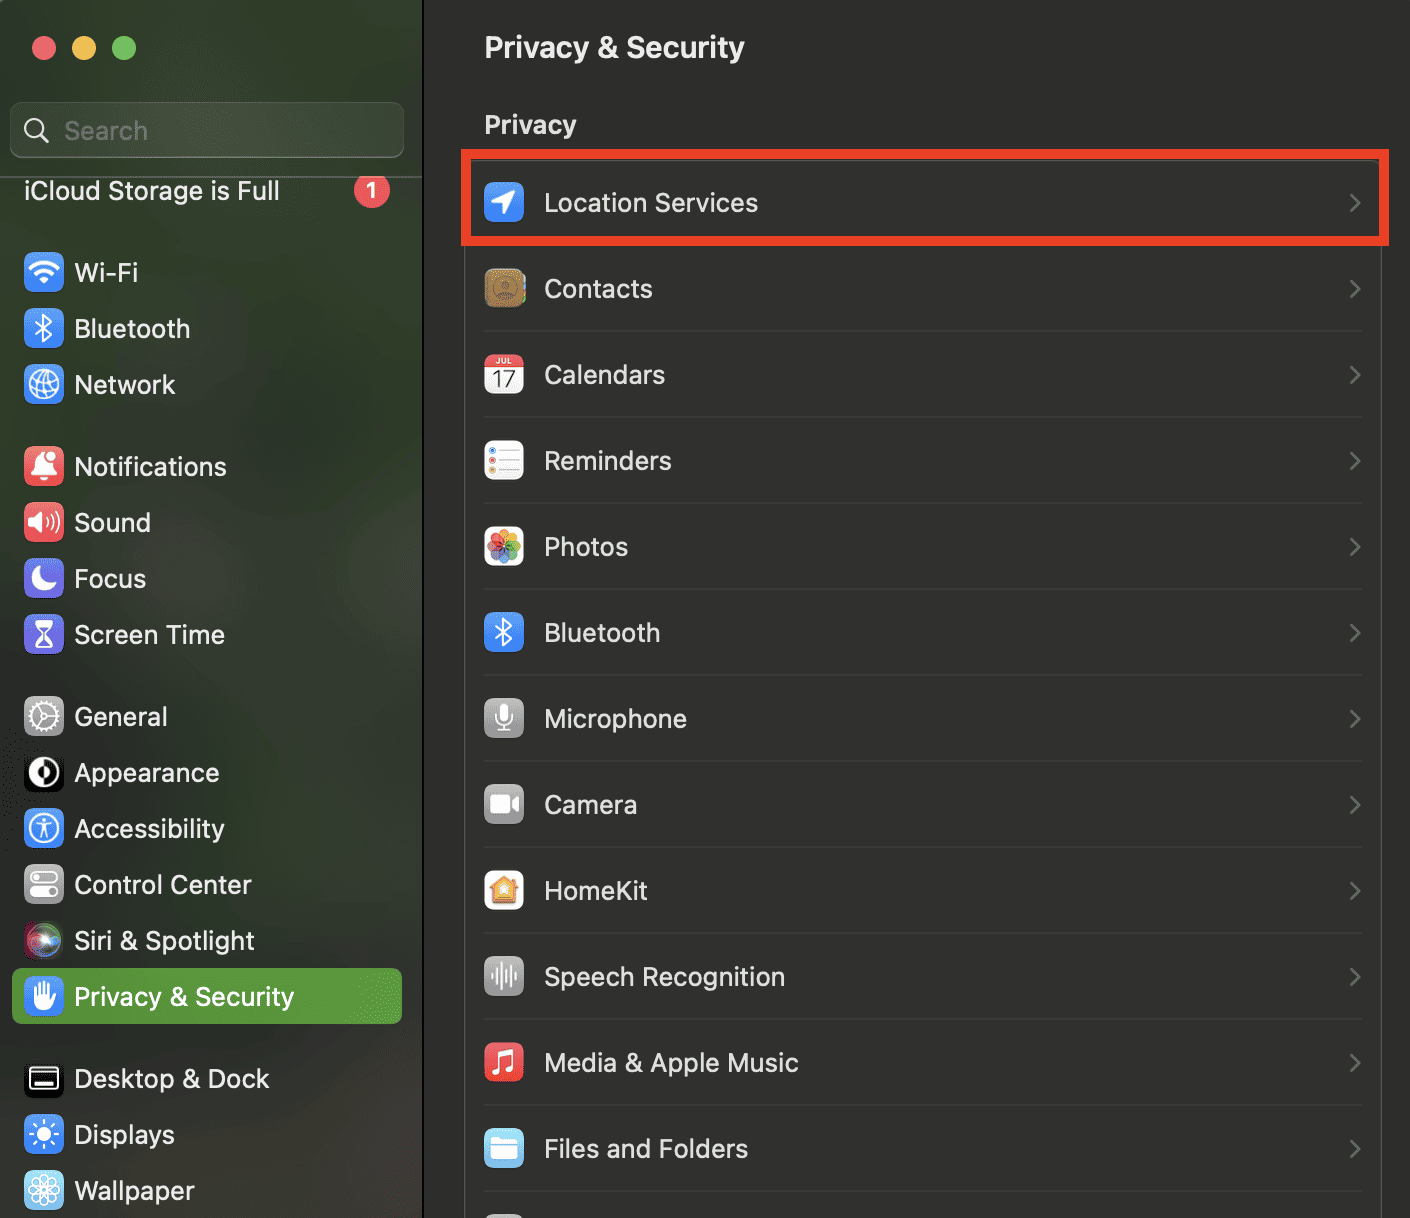
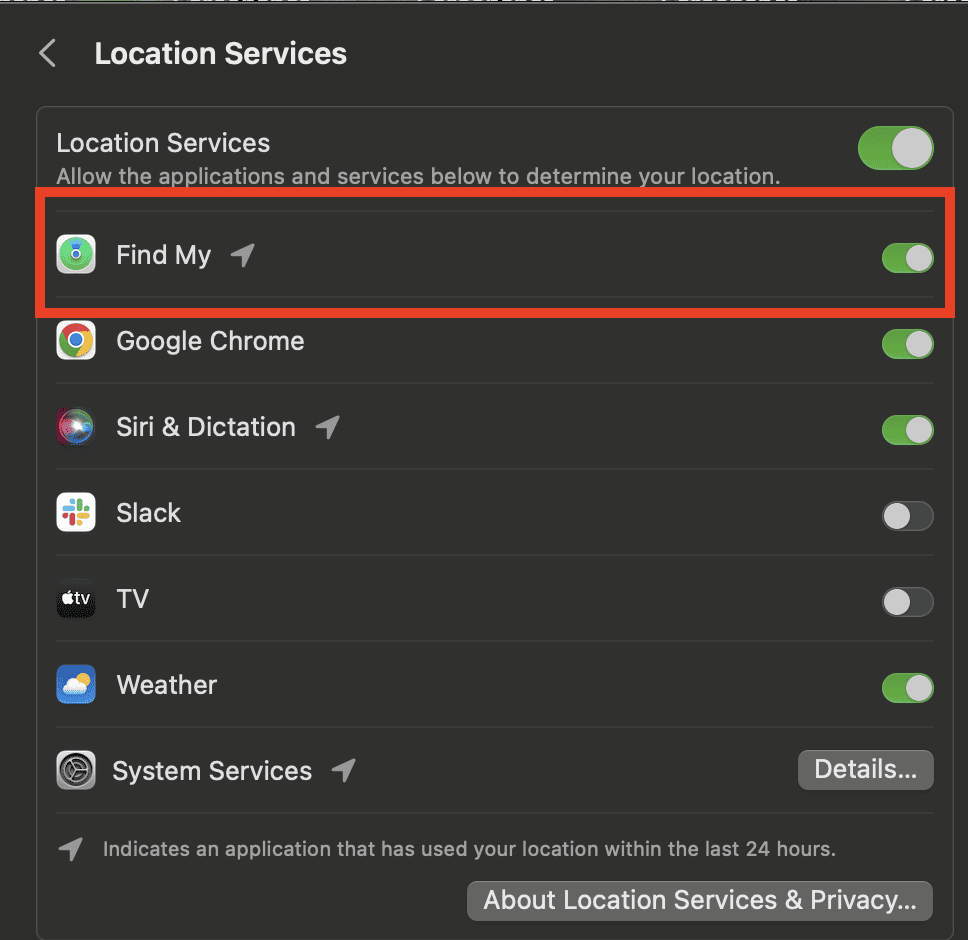
- Go to System Settings.
- Click Privacy and Security > Location Services.
- Toggle on Find My.
If you’ve enabled Find My on your iPhone, iPad, or Mac, you can turn on Lost Mode for a lost or missing Apple device, including AirPods or items such as AirTags.
How to Mark AirPods as Lost
Time needed: 1 minute
To flag AirPods as lost from your Mac, follow these steps.
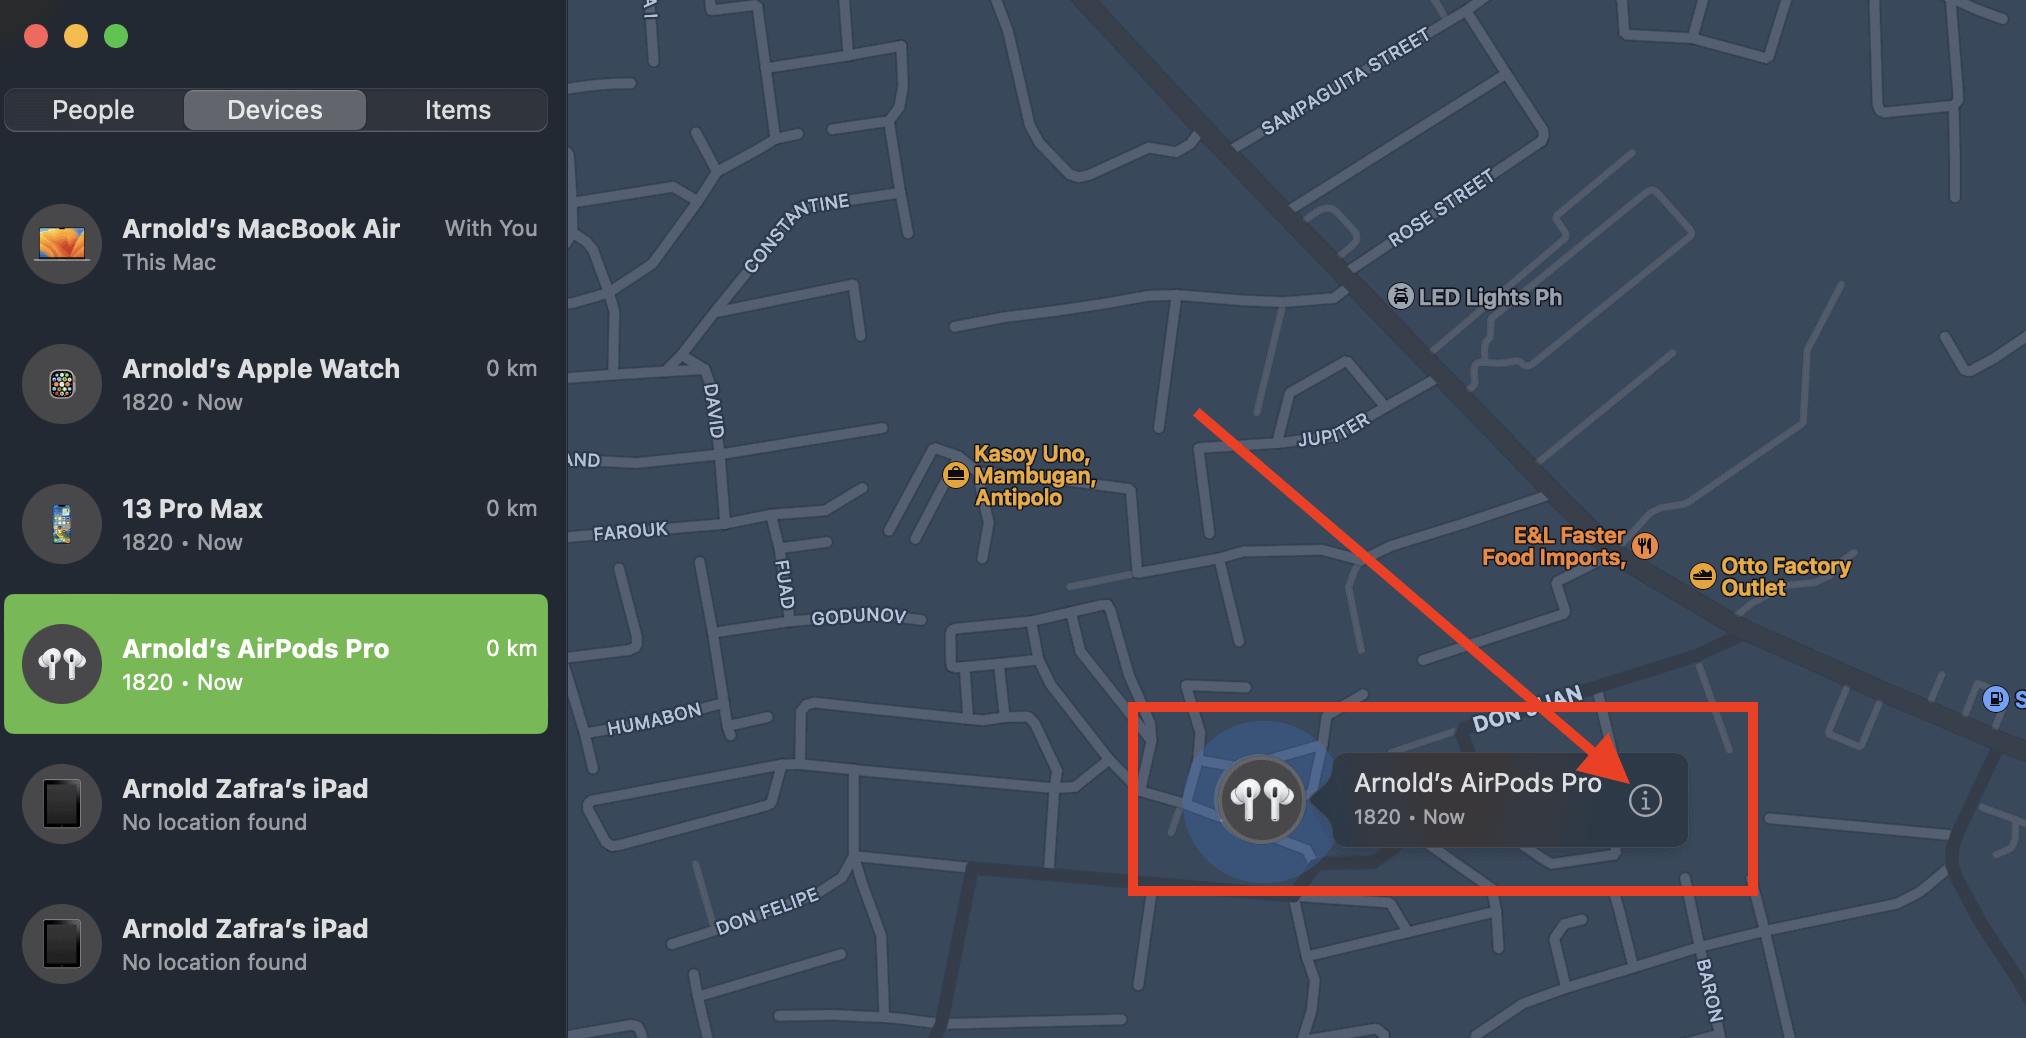
- Open Find My app, then click Devices.
- Click on the name of your AirPods > More info button
- Under Mark as Lost, click Activate.
- Follow the onscreen instructions to proceed.
The steps are similar on your iPhone or iPad.
- Open the Find My app, then click the Device tab.
- Choose your AirPods.
- Scroll down to Mark as Lost, then tap Activate.
- Follow the onscreen instructions to proceed.
What Happens If You Mark Your AirPods as Lost
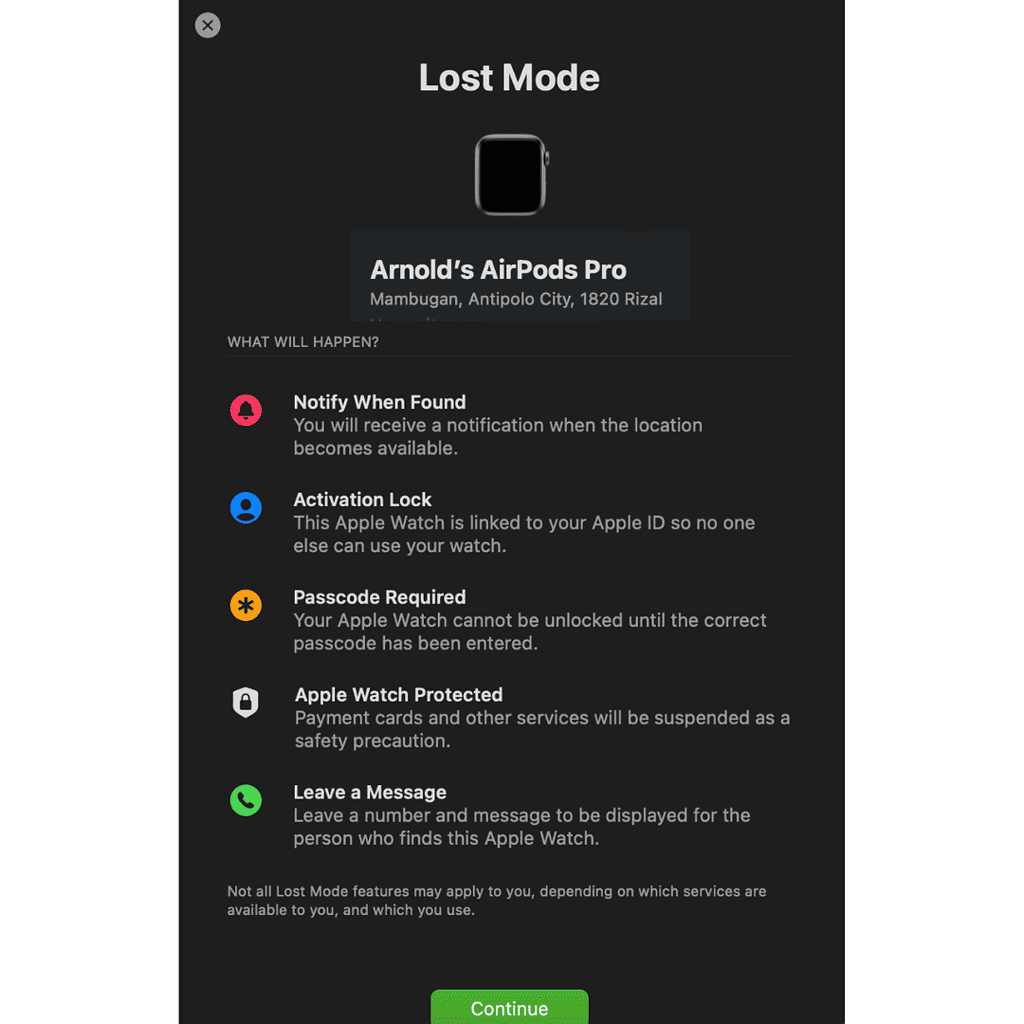
When you enable Lost Mode on your AirPods, you will receive a confirmation email sent to your Apple ID email address. You don’t have to do anything with the email, though. Since AirPods cannot connect to the internet on their own, whoever got your AirPods won’t know that you enabled Lost Mode. But there’s nothing stopping the person from connecting it to his own Apple device. Once paired with another device, you will be immediately notified of their location.
Now here’s the more exciting part. You can customize the message that will appear once your AirPods are paired with a new device. For instance, if you think somebody stole your AirPods, you can say, “The AirPods you are using were lost by someone else. He has reported to the police and they know your location.”
How to Change the Message for Your Lost AirPods
You can change the default message that will appear once the person who got your lost AirPods pairs them with their device. Follow the steps below to do so using your Mac, iPhone, or iPad.
On your Mac:
- Open the Find My app, then click Devices.
- In the device list, click on the device you declared as lost, then click the more info button.
- Under Mark as Lost, click Pending or Activated.
- Update the message, including the phone number, then click Done.
Additionally, while the person who got your AirPods can use and pair them with their device, your iCloud data will remain on the AirPods. So, if the person checks their iCloud data, the AirPods will be marked as, “Not Your AirPods.”
Bonus Tip: Turn on Notifications When You Leave Your AirPods Behind
From my experience, this could be annoying. Then again, I don’t really bring my AirPods with me every time I leave the house. But enabling separation alerts so that you don’t leave your AirPods behind could also be useful. That way, if you get alerted that you’ve left your AirPods behind and it just so happens that you need to bring them, you can always go back home and get them.
Follow the steps below to enable separation alerts if you have an iPhone 12 or later, AirPods 3, or AirPods Pro 1 and 2.
- Open the Find My app.
- Tap Devices and choose your AirPods.
- Tap Notify When Left Behind under Notifications.
- Toggle on Notify When Left Behind.
If you’re interested in learning how to use the Live Listen feature with AirPods or Beats, check out our dedicated guide.
