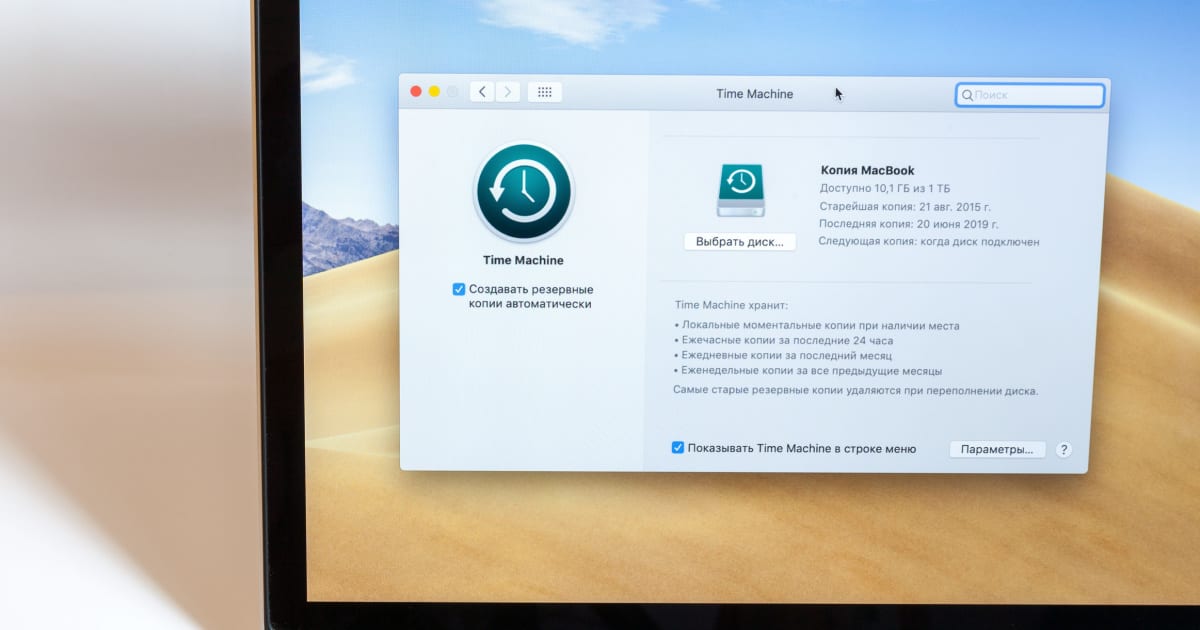
Time Machine is Apple’s built-in backup software for Mac users, offering an efficient way to keep data safe. However, you might experience issues when trying to copy files to your Time Machine drive. In this article, I’ll explain why this happens and how to address it, as well as other common problems and concerns related to Time Machine. Follow along!
What Does Time Machine Do?
Time Machine offers an automated, incremental backup solution that keeps multiple versions of files, allowing you to restore previous versions or recover deleted files.
It simplifies data backup, helps protect against data loss, and makes restoring files or entire systems easier in case of hardware failure or accidental deletion.
Does Time Machine Need Its Own Drive?
While Time Machine can share a drive with other files, using a dedicated drive for backups is recommended to ensure optimal performance and minimize potential conflicts.
For the best backup experience, use a dedicated drive for Time Machine, ensure it has ample storage capacity, and format it with a Mac-compatible file system, preferably APFS.
What Happens When Time Machine Drive Is Full?
When a Time Machine drive becomes full, the software automatically deletes the oldest backups to make room for new ones. Time Machine will notify you when it starts deleting old backups.
To avoid losing older backups, you can either replace your current backup drive with a larger one or add a second drive to your Time Machine setup.
Why Can’t I Copy Files to My Time Machine Drive?
A primary reason you can’t copy files to your Time Machine drive is that the Time Machine app takes ownership of the drive, making it read-only. Consequently, only macOS can alter the contents of the drive. But don’t worry, we’ll walk you through troubleshooting steps to resolve this issue!
With APFS, Apple’s innovative file system, you have the ability to effortlessly add an APFS Volume in a non-destructive manner, eliminating the need for size allocation. Sharing the same container, APFS Volumes collectively contribute to the free space available across all volumes. Just bear in mind, as you populate the second APFS Volume with data, the overall capacity of your Time Machine volume experiences a decrease.
Time needed: 1 minute
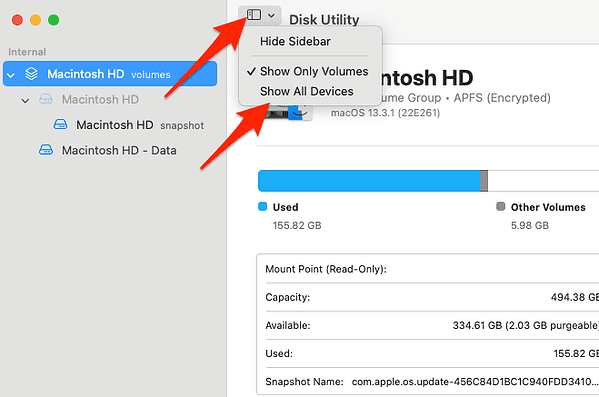
- To do this, open Disk Utility, click the View menu, and choose Show All Devices.
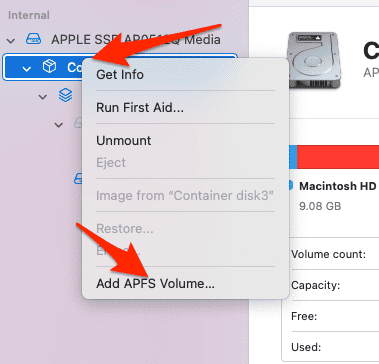
- Locate the drive on the left-sidebar, highlight the Container on that drive, control-click, and select Add APFS Volume.
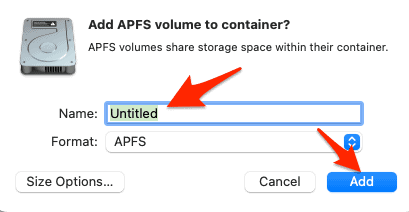
- Name the volume then click Add.
- Afterward, you will see two volumes inside the container. One will be your Time Machine drive (read-only), while the other will be a data drive that you can read/write as you wish.
Frequently Asked Questions About Time Machine
Time Machine is not the only backup solution for Mac owners. Alternatives include third-party software, such as Acronis, Freefile Sync, and SuperDuper. Check out our dedicated guide for more alternatives.
Each backup method has its pros and cons. Time Machine is built-in and easy to use, while third-party software may offer more features and flexibility. Cloud services provide offsite backups and easy access to files but may have privacy concerns and recurring costs.
Time Machine is generally safe, but there are risks, such as drive failure or data corruption. Ensuring your backup drive is in good condition and running periodic disk checks can minimize these risks.
Moreover, to keep your backups secure, consider encrypting your Time Machine drive, using a strong password, and maintaining multiple backups in different locations.
Time Machine backs up your Mac’s system files, applications, accounts, preferences, music, photos, movies, and documents.
On the other hand, time Machine doesn’t back up Boot Camp partitions or some external hard drives. For a more comprehensive backup solution, consider using third-party software or cloud services in addition to Time Machine.
If your files aren’t copying to your Mac’s hard drive, the disk format may be incompatible. Make sure your hard drive is formatted in a Mac-compatible file system, such as APFS or HFS+.
Another possible reason is insufficient storage space on your hard drive. Check your available storage and delete or move unnecessary files to free up space.
Lastly, several other issues could prevent files from copying to your Mac’s hard drive, including software glitches and corrupted files. Restarting your Mac or using Disk Utility to repair the drive might help.
Some external hard drives feature write protection, preventing unauthorized changes. Check if the write protection switch is enabled and disable it if necessary.
Your external hard drive may be formatted with a file system that isn’t compatible with macOS. Reformat the drive using a Mac-compatible file system, such as APFS or HFS+.
And lastly, loose or damaged cables can lead to connection issues. Thus, ensure your cables are in good condition and securely connected.
Time Machine is an essential tool for safeguarding your data, but understanding its limitations and quirks is crucial. By regularly backing up your data and implementing the tips provided in this article, you can protect your files and enjoy peace of mind. Thanks for reading!


