Outlook has many unique features which make it a very popular email client. The Rules feature allows you to automate actions for incoming email messages. It is one of the most loved tool among Outlook users. However, many people are getting the “Rules are not supported for this account” error message on their Macs. If you’re one of them, read along to learn how to fix the Outlook rules not supported for this account on your Mac devices.
How to Fix Outlook Rules Not Supported for This Account on Mac Error
1. Switch Back to Legacy Outlook for Mac
Microsoft no longer supports Client Rules on Outlook for Mac; you can only use Server Rules. However, this change applies to the new version of the Outlook app. You can still use Client Rules by reverting to the legacy (older) version. Read along to learn how to switch back to the legacy version of Outlook and use Client Rules on your Mac.
Time needed: 5 minutes
Steps to Switch to Legacy version of the Outlook app on Mac in order to use Client Rules.
- Open the Outlook app on your Mac.
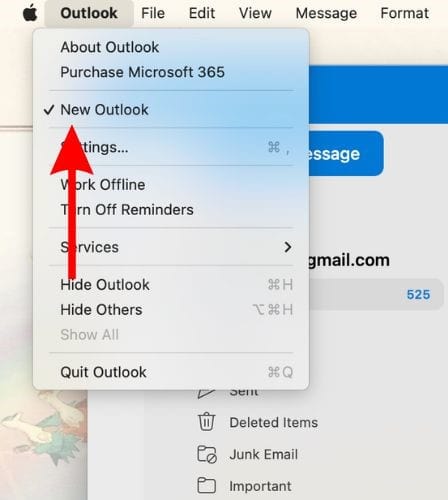
- Click on the Outlook option in the menu bar and click on the New Outlook option to deselect it.
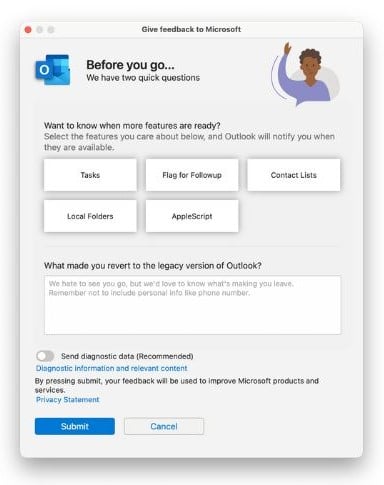
- If a feedback window pops open, enter your feedback and click the Submit button or select Cancel.
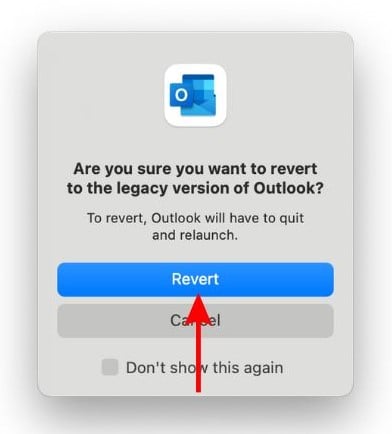
- Now, click the Revert option to confirm your selection.
- Alternatively, you can also click the Help option in the menu bar and select the Revert to Legacy Outlook option.
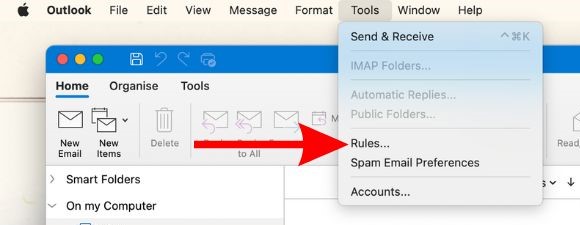
- Once Outlook restarts to the Legacy version, click the Tools option in the menu bar and select the Rules… option.
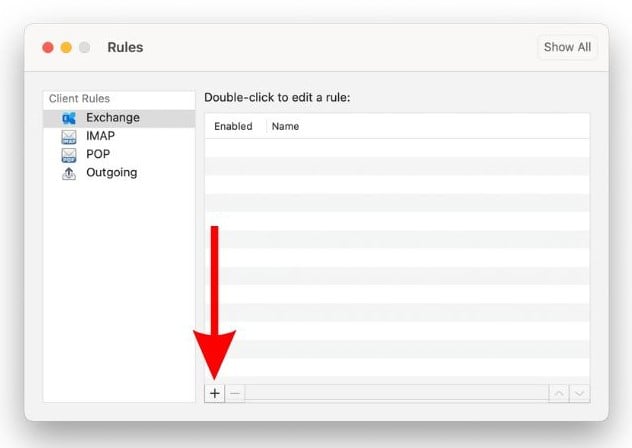
- Click the + Add button in the Rules window.
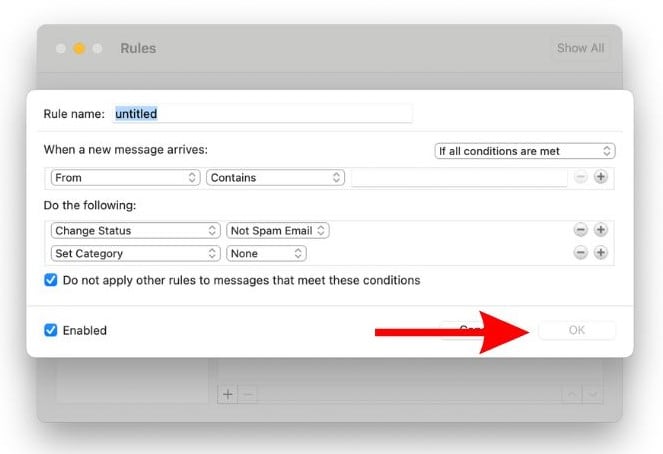
- Next, configure all the settings on the next window and click the OK button to save the changes.
2. Set Rules Through the Outlook Web
You can also configure Outlook Client Rules using the web browser. Yes, you will still have to use the Legacy version of the Outlook app if you want Client Rules to work on the app. However, here’s how to set Client Rules through Outlook.com.
1. Open Safari (any web browser), head to Outlook.com and sign in to your account.
2. Click the Settings (gear icon) button at the top right corner.

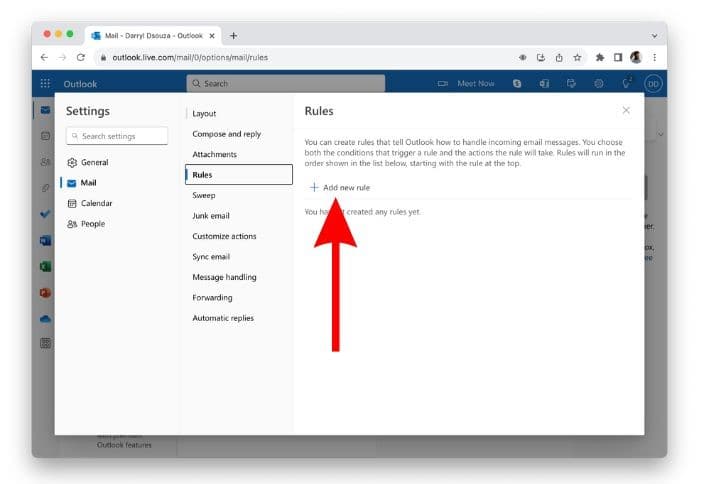
3. Select the Rules option located in the Mail settings.
4. Click the + Add new rule option.
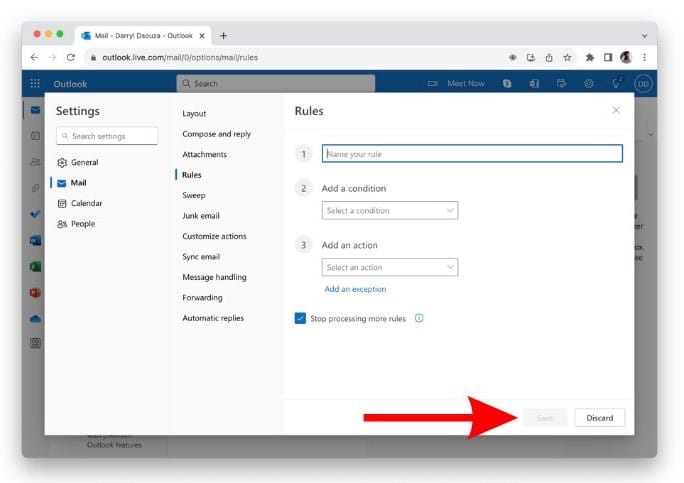
5. Configure all the settings and click the Save button to save the changes.
3. Force Quit and Restart Outlook on Your Mac
Sometimes, even after switching to the Legacy version of Outlook, Client Rules might need to be fixed on your Mac. In that case, we suggest that you force quit and restart the Outlook app on your Mac.
1. Click on the Apple logo at the top left in the menu bar and select the Force Quit Outlook option.
2. Select the Microsoft Outlook option from the list and click the Force Quit button.
3. Finally, select the Force Quit button to confirm your selection.
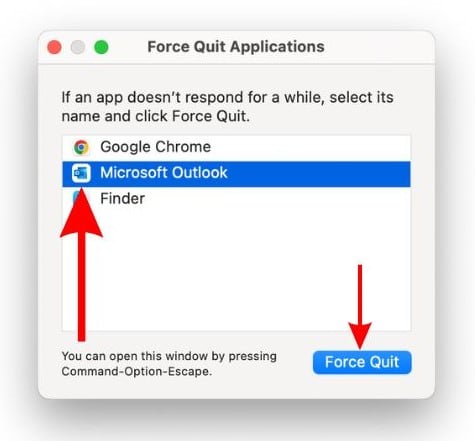
4. Wait for a few minutes and open the Outlook app again.
You can now check if the Client Rules are working as intended on the Outlook app. If not, move along to the next step.
4. Delete and Recreate the Rules in Outlook
If nothing works, the last option you are left with is to delete the existing Client Rules and recreate them. It is time-consuming, especially if you have many Client Rules. Follow the steps mentioned below to delete and recreate rules in Outlook.
1. Open the Outlook mail app on your Mac.
2. Click the Tools option in the menu bar and select the Rules… option.
3. Select the Client Rule you want to delete from the list of rules and click the – Remove button at the bottom.
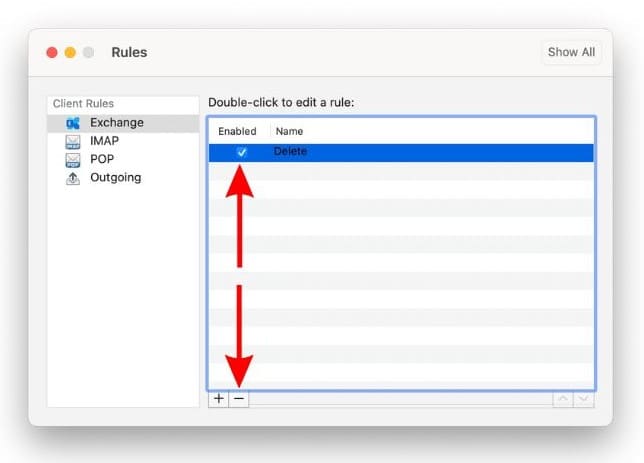
4. In the pop-up, click the Delete option to confirm your selection.
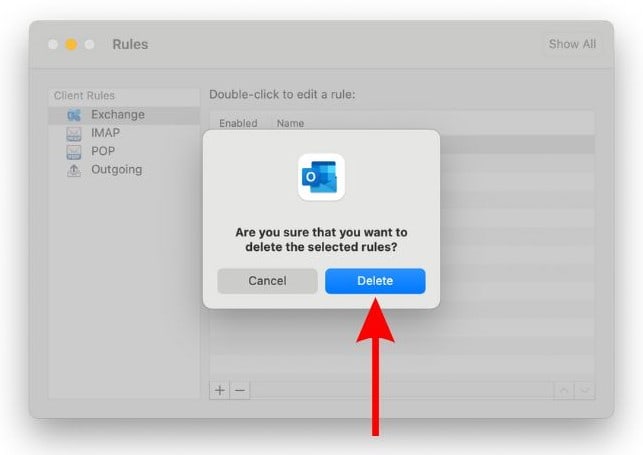
5. Repeat the process and delete all the rules.
6. Now, on the Rules window, Click the + Add button.
7. Configure all the settings and click the OK button to save the changes.
8. Repeat the process and create every Client Rule you need.
Use Outlook Rules on your Mac
We hope this article helps you fix the “Rules are not supported for this account” error message on your Mac. If we’ve missed out on any troubleshooting method that has helped you fix the error or if you have any other doubts, please let us know in the comments below.

