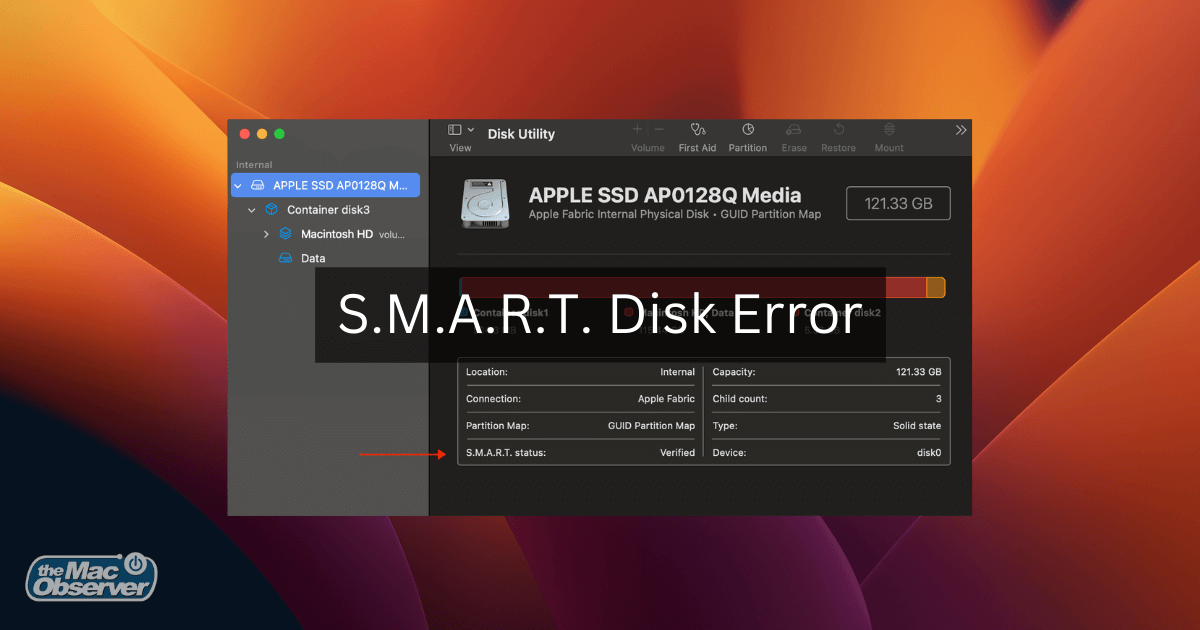
If the message “This disk has S.M.A.R.T errors” appears on your Mac, it’s basically giving you a heads-up to replace the hard drive before a complete disk failure. And while you may be worried about swapping out such a vital part of your Mac, there are some other fixes you can try to bypass the Mac S.M.A.R.T error. On that note, keep reading to learn how to fix the S.M.A.R.T. error on your hard disk.
Can SMART Errors Be Fixed?
Yes, S.M.A.R.T. errors can sometimes be fixed. A S.M.A.R.T. error means the disk has a hardware problem that cannot be repaired, but not all SMART errors genuinely indicate an imminent hard drive failure. In fact, the Self Monitoring and Reporting Technology System (SMART) isn’t foolproof and can sometimes give false alarms. For instance, one common reason for a SMART error is overheating, which can be fixed with proper ventilation. So, while the error message won’t always mean unpredictable drive failure, it indicates potential issues you can fix before disaster strikes.
How Can I Fix the SMART Error on My Mac?
When you receive a SMART error message, you should immediately backup your data. You can use Apple’s Time Machine or a trustworthy backup tool like Acronis Backup to back up all your images, videos, documents automatically, and other personal data to an external drive. This way, you avoid losing files while troubleshooting your disk hardware. Here are some fixes you can try after you back up your Mac.
1. Run First Aid With Disk Utility
Your Mac’s Disk Utility app is a Swiss army knife for disk-related tasks, and one of its primary functions is repairing your Mac disk with ‘First Aid.’
Time needed: 10 minutes
The ‘First Aid’ feature scans for errors and, when possible, repairs them. However, the repair can sometimes run for hours, depending on the state and size of your disk. Here’s how to run First Aid with disk utility:
- Open the Disk Utility App.
- Select the affected disk drive on the left pane.
- Click First Aid at the top of the disk utility window.
- Click Run and then click Continue on the next pop-up.
2. Erase Your Hard Drive
If the error persists even after using Disk Utility’s First Aid, a more drastic measure might be needed – formatting your drive. A word of caution: formatting erases every file and document, so ensure you’ve backed up everything you’ll need. Follow these steps to factory reset your Mac:
1. Click the Apple logo at the top left corner of your screen.
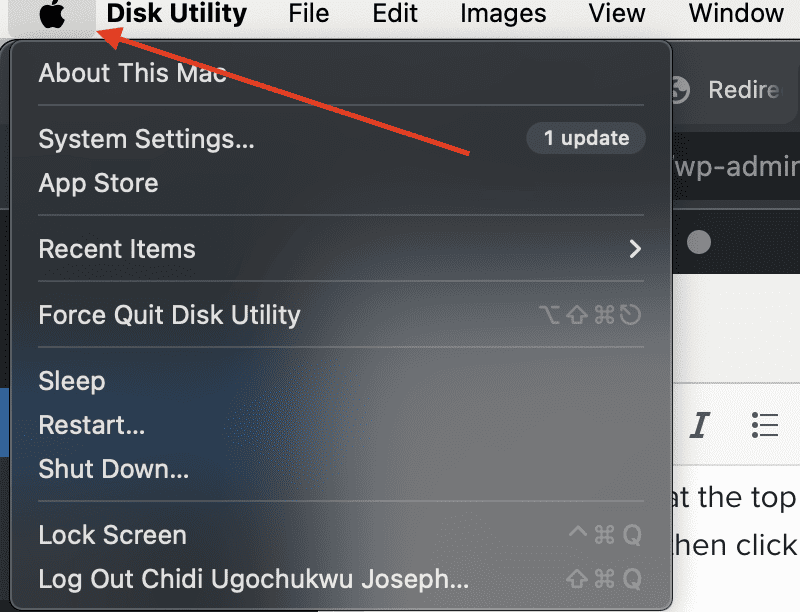
2. Select System Settings, then click General.
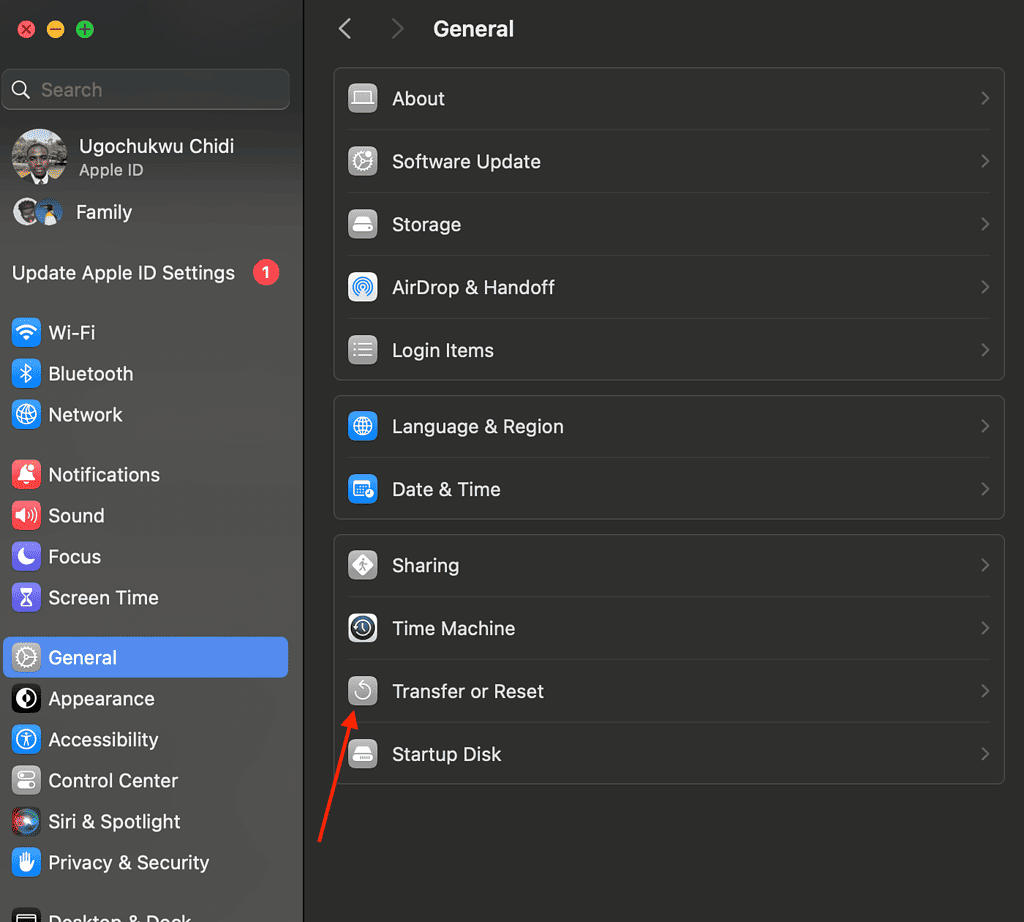
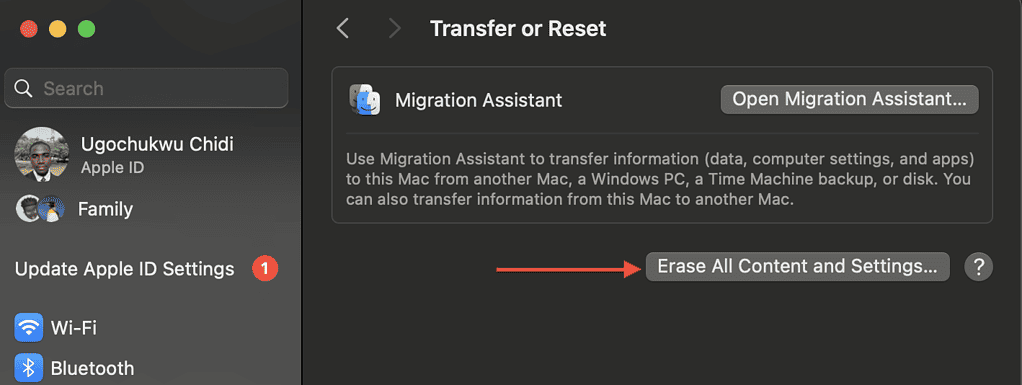
3. On the right pane, select Transfer or Reset.
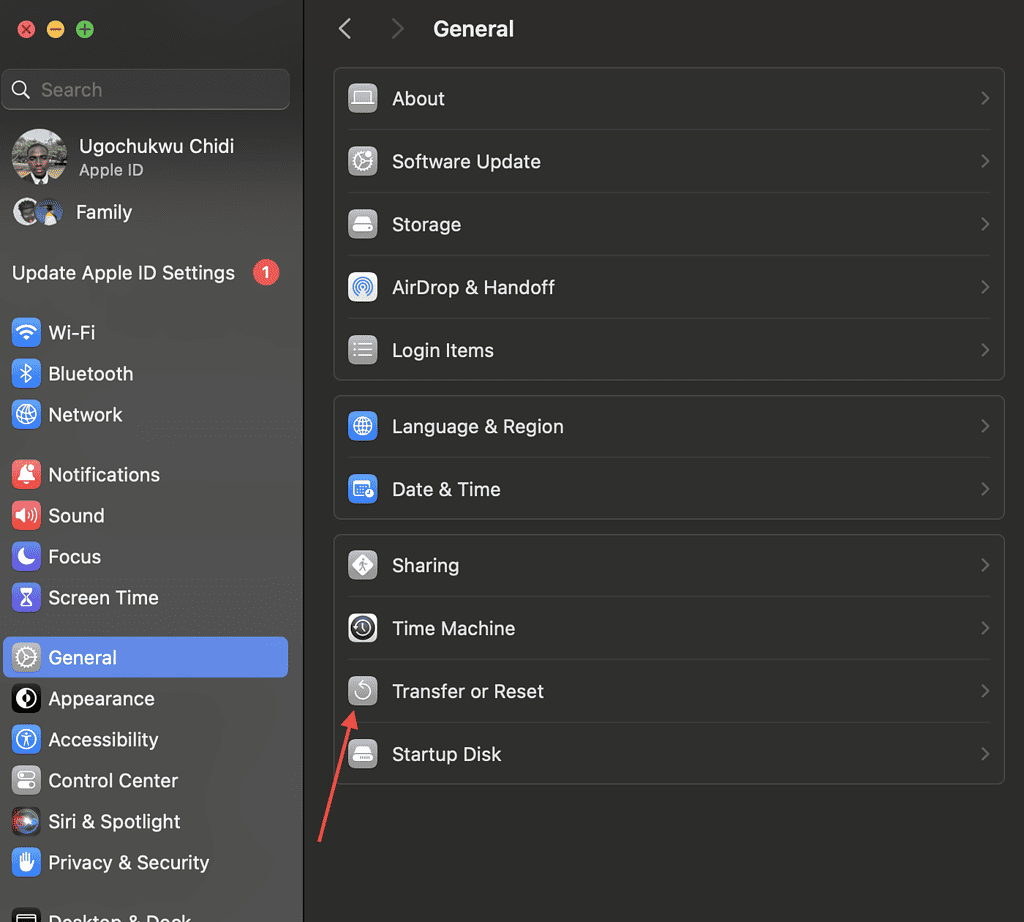
4. Click Erase All Content and Settings.
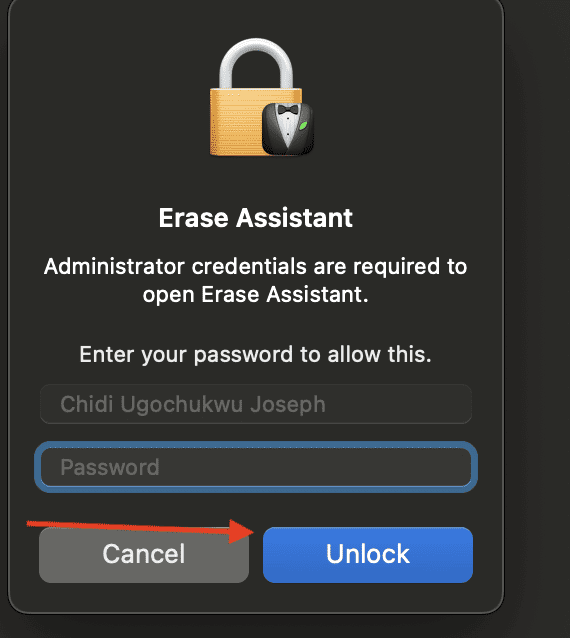
5. Enter your admin credentials, then Select Unlock.
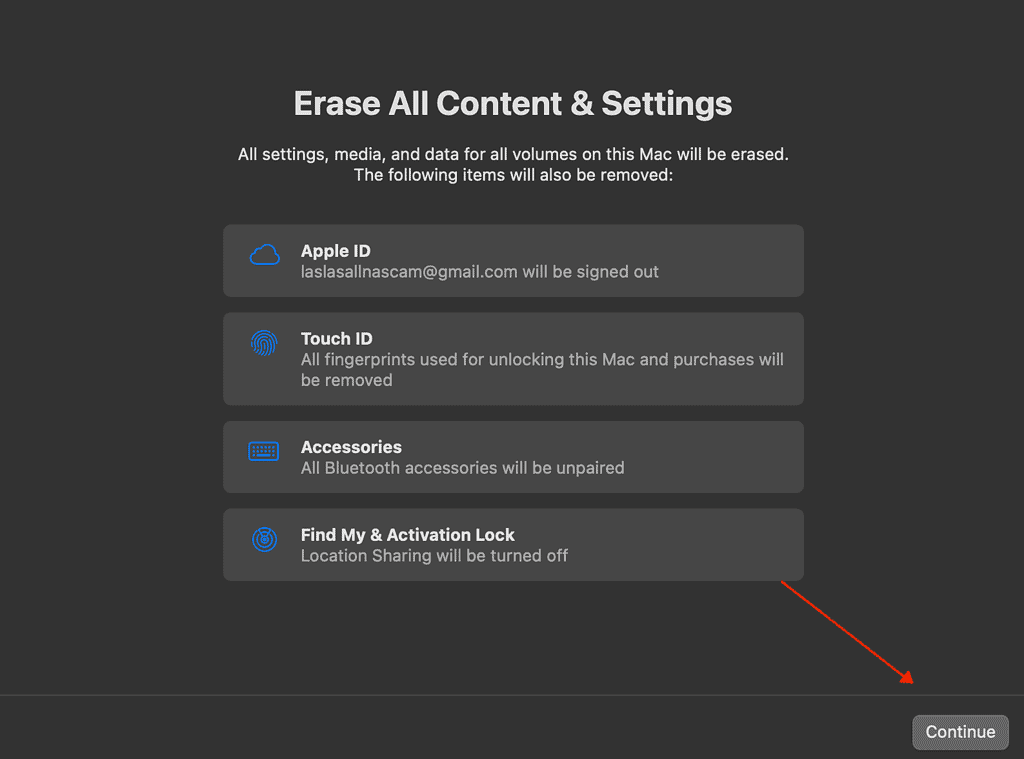
6. Look through what will be erased, then click Continue.
Follow the prompts to erase your device.
3. Replace Your Hard Drive
The recommended solution to the SMART error is to replace your hard drive. Now, you might be tempted to pop open your MacBook and do a little DIY. But opening up your MacBook without the proper know-how may leave you with a bigger mess and even void your warranty.
So, the best call is to let the professionals handle it. You can contact Apple Support or visit the nearest Apple-authorized service center to replace your hard drive.
What Does the SMART Status Is Failing Mean?
As mentioned earlier, the SMART system is like a health check tool for your Mac’s hard drive and gives you a heads-up if something is wrong, even before you start experiencing any hiccups.
Generally, there are two primary SMART statuses: “Verified” and “Failing.” Verified means you’re all good, and your drive is in good shape. However, “Failing” is a bit more ominous.
When your Mac SMART status shows ‘Failing,’ it’s your Mac’s way of raising a red flag and it shows this disk has SMART errors and it needs replacing. Some common reasons for this hardware issue include mechanic failure, physical damage, electrical damage, humidity and moisture, and excessive heat.
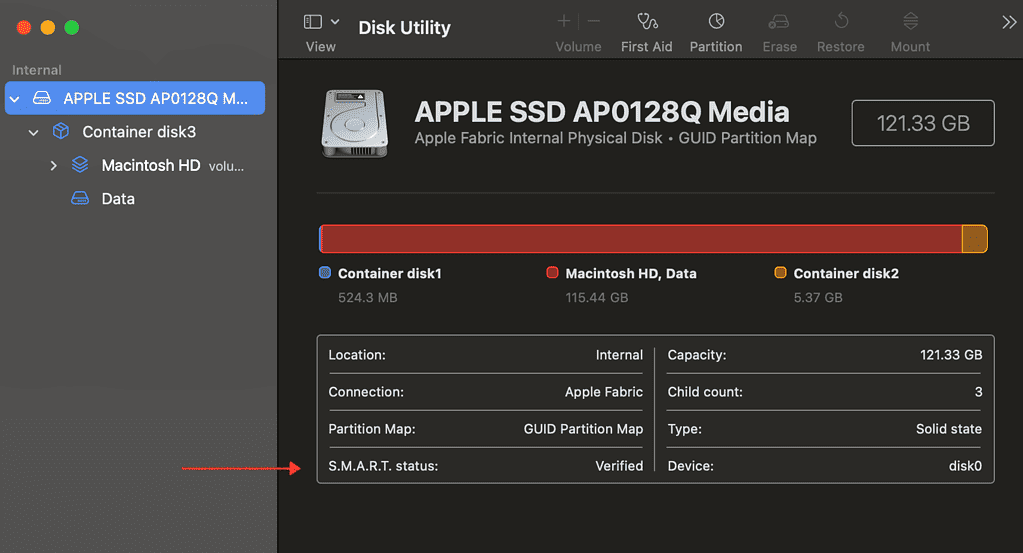
Follow these steps to check your SMART status:
1. Open Disk Utility on your Mac.

2. Click View, then select Show All Devices.
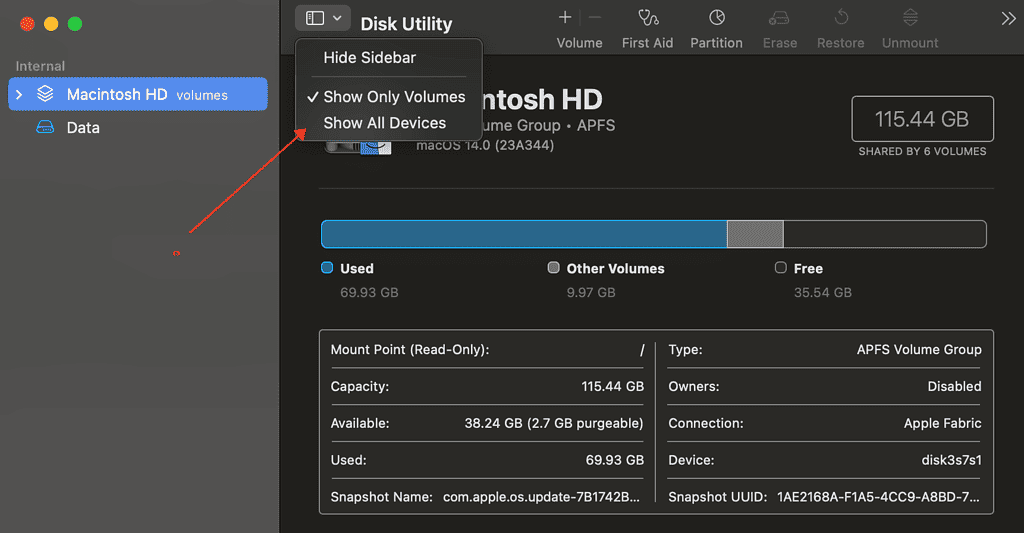
3. On the last row of the drive details, you should see the SMART status.
Conclusion
Much like the warning lights in a car that alert you of potential issues, the SMART system is designed to forewarn you of hard drive troubles. If you encounter a ‘Failing’ status, it’s not the end of the world but a sign to take action. Back up your data, consider a hard drive replacement, and always stay proactive.
The best fix to a Mac SMART error is to prevent it altogether. You can do this by properly caring for your Mac and running routine maintenance. Remember to use Time Machine to back up your personal data routinely to an external drive. By taking these precautionary steps, you can save yourself from unexpected data loss and ensure your Mac serves you well into the future.
