The latest iteration of Apple’s mobile, tablet, and desktop operating systems reinforce the company’s commitment to privacy in interesting ways. One that’s especially notable is the crackdown on the fingerprinting and cross-website tracking employed by advertising agencies and analytics firms.
Dubbed Advanced Tracking and Fingerprinting Protection by Apple, this feature is automatically activated for private browsing. However, you also have the option to enable it for your regular browsing sessions. In just a moment, I’ll guide you through the steps to do so. But first, let’s delve into what exactly this feature accomplishes.
What Does Advanced Tracking and Fingerprinting Protection Do?
To fully understand the feature, let me explain the danger it protects you from. Few industries have benefitted more from the growth of internet usage than marketing agencies. As communication technology advances, advertising and analytics firms have evolved their methods of gauging campaign effectiveness to keep up. For a while now, tools such as cross-site cookies have become standard practice.
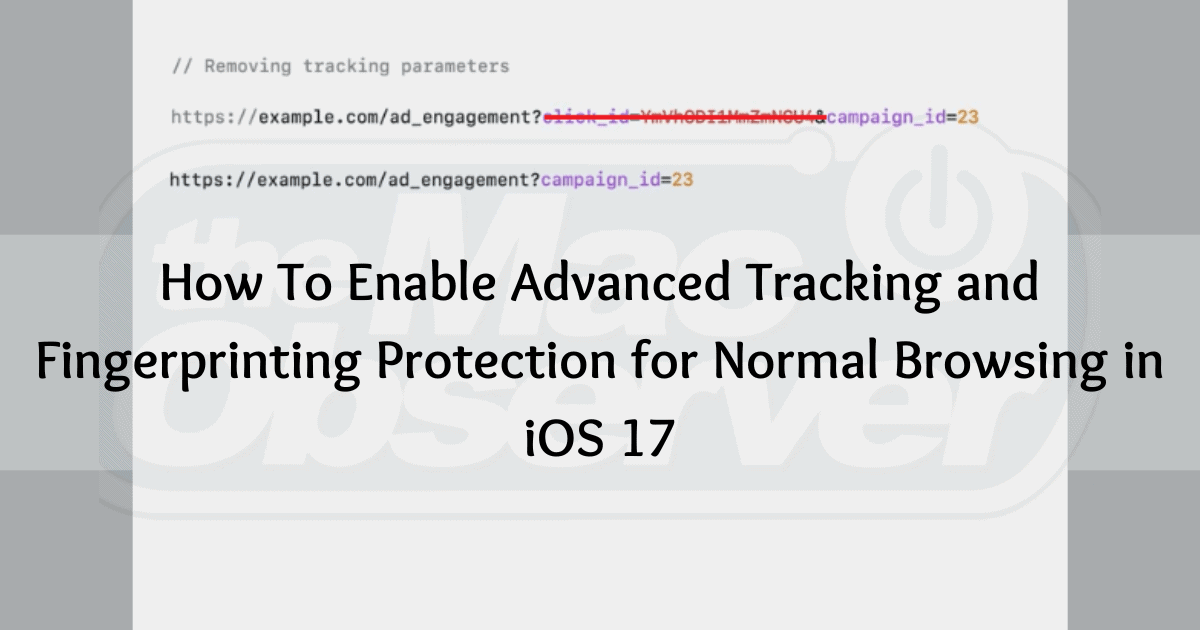
More recently, unique tracking parameters, such as an ID, are being embedded in links. If you click such a URL and visit the webpage, an advertising or analytics service on the page extracts the appended ID and associates it with the relevant backend profile to serve you personalized ads. Unfortunately, the ID can allow a marketer to track your activity across various websites – a clear invasion of privacy.
Apple introduced Advanced Tracking and Fingerprinting Protection to prevent the use of such tools. Beginning in iOS 17 and macOS Sonoma, Safari now autonomously strips tracking parameters from URLs as you navigate or copy links. It will analyze the URL, and automatically detect and remove any identifying parts. The non-identifying parts of the link remain untouched, so the page will work normally.
Further, Safari will prevent known fingerprinting and tracking resources from loading on pages you visit. Apple says Advanced Tracking and Fingerprinting Protection will also work on links shared with you via Mail or Messages. Now, let’s get you set up to enjoy the feature.
How To Enable Advanced Tracking and Fingerprinting Protection for Normal Browsing in iOS 17
It goes without saying that you must be running iOS 17 on your iPhone to be able to use this feature. So, if you haven’t already, now’s the perfect time to upgrade. Simply navigate to Settings > General > Software Update and select Upgrade to iOS 17.
Time needed: 2 minutes
If you cannot find the Upgrade to iOS 17 option, your iPhone may not be eligible to install the update. Confirm whether your iPhone supports update here. Once that is done, continue by following the instructions below:
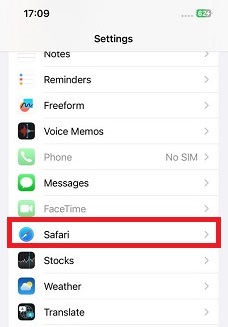
- Open Settings, scroll down to Safari and click it.
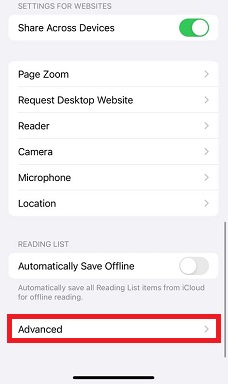
- In the Safari settings menu, select Advanced.
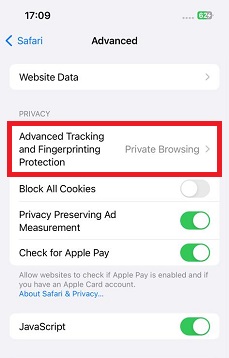
- Click Advanced Tracking and Fingerprinting Protection.
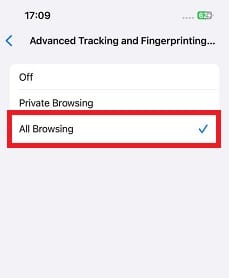
- Finally, choose All Browsing.
Follow the same steps and select Off to disable the feature for both regular and private browsing modes. This move by Apple will force advertisers and analysts to adopt methods of collecting campaign statistics that uphold customer privacy and shield them from online security vulnerabilities.
Now, Advanced Tracking and Fingerprinting Protection is not the only privacy-centered feature that comes with iOS 17.
Other Privacy and Security Features in iOS 17
iOS 17 introduced a slew of privacy-enhancing features to the already extensive measures Apple has taken in that department. Here are some of the standout enhancements:
1. Lock Private Browsing Tabs
Safari now restricts unauthorized access to your open private browsing tabs. These tabs automatically lock whenever you switch from private browsing mode to normal browsing or another app. Regaining access to them will require authentication through Face ID, Touch ID, or your passcode.
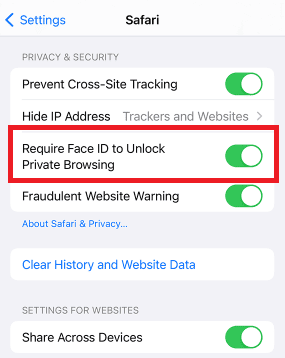
To manage this feature, navigate to Settings > Safari > Require Face ID to Unlock Private Browsing, and toggle the switch to your preference.
2. Customize Search Engine Option for Private Browsing Mode
iOS 17 also ushers an improvement on the ability to change the default search engine in Safari. Now, iPhone owners can set a different search engine for private browsing from regular browsing.
For instance, you may retain Google or Bing as the regular browsing search engine, while making DuckDuckGo the default for your private browsing tabs.
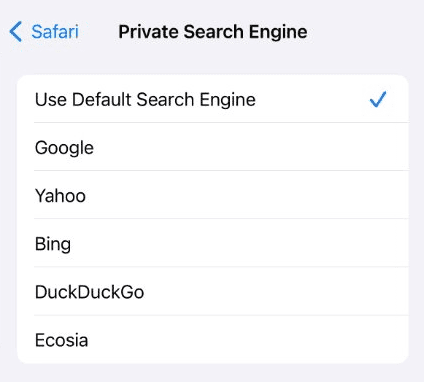
To specify search engine for private browsing, simply navigate to Settings > Safari > Private Search Engine. From there, you can choose from a list of available search engines.
3. Customize Active Extensions in Private Browsing
In iOS 17, you now have the power to activate extensions in your private browsing tabs selectively. By default, extensions that inject scripts or access on-page content are disabled, providing an additional layer of privacy. If you’re comfortable with it, you can re-enable them.
This update serves as a safeguard, so rest assured that third-party extensions are not sending your information to their developers without your consent.
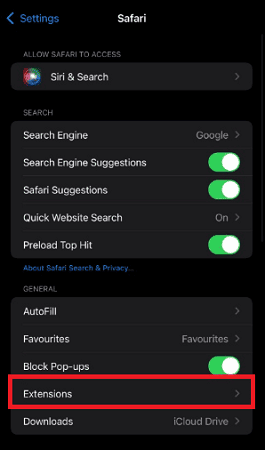
To manage private browsing extensions, go to Settings > Safari > Extensions, select the desired extension, and toggle the Private Browsing switch as needed.
Conclusion
Advanced Tracking and Fingerprinting Protection was introduced to ensure that privacy remains private on Apple devices, which is one area where iOS 17 really shines.
Understandably, though, you may be skeptical about installing iOS 17 just yet. After all, can you be sure that Apple doesn’t need more time to fine-tune and address any potential bugs. Our insightful overview, however, argues why you might not need to delay the update any further.
Furthermore, I’m eager to hear about your firsthand experience with the new Safari features. Feel free to share your thoughts in the comments section below.
