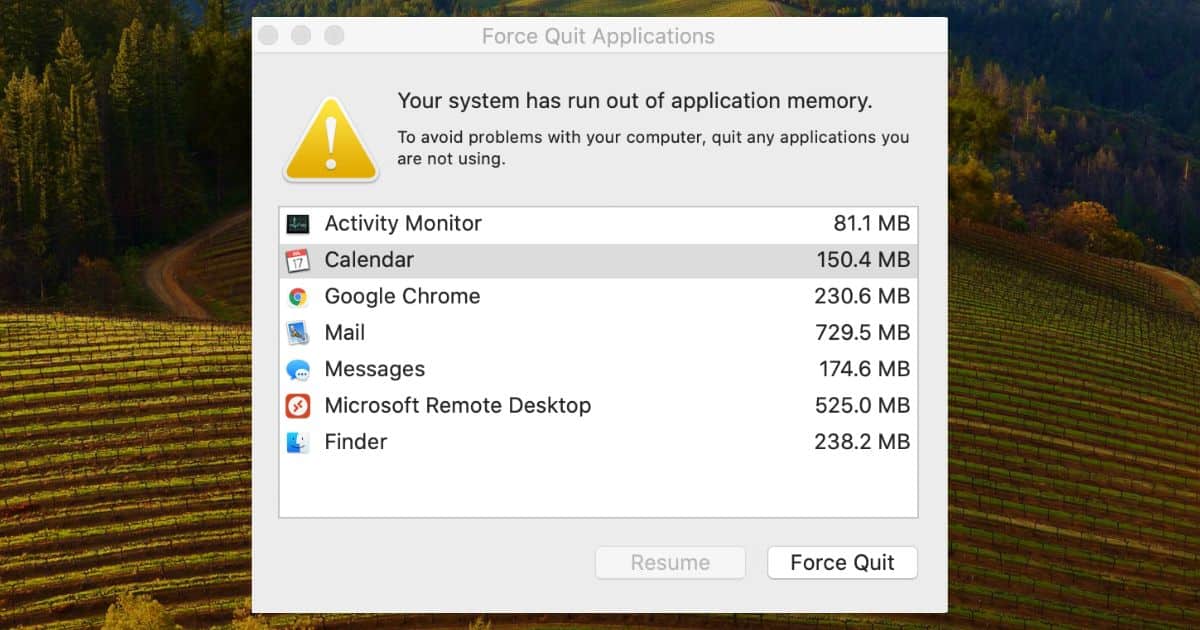
XProtect, Mac’s built-in antivirus tool, uses signature-based malware detection to spot and remove potential threats. It typically doesn’t require much processing power. However, I recently noticed that XprotectService was making my Mac lag. As I suspected, it turned out to be a widespread update issue. Here are the most effective ways to cut the high memory usage of XProtect on macOS Sonoma.
How To Reduce the Memory Usage of XProtect on macOS Sonoma
Turn off your Mac if XProtect has an unusually high memory usage on macOS Sonoma. A quick reboot could reset any minor glitches and software bugs that are causing your built-in anti-malware system to work overtime. Also, check for macOS updates. XProtect might run more efficiently on recent major or minor releases.
Here are other troubleshooting steps to help you stop XProtect from using too much memory:
1. Deselect Installed Security Responses
Time needed: 5 minutes
Generally, you should enable XProtect 24/7 since it’s your first line of defense against malware infections. Your Mac is vulnerable to viruses without it. However, some issues might require you to disable it temporarily, e.g., incorrectly blocked networks, app incompatibilities, or high memory usage. Here’s where you’ll find XProtect in System Settings:
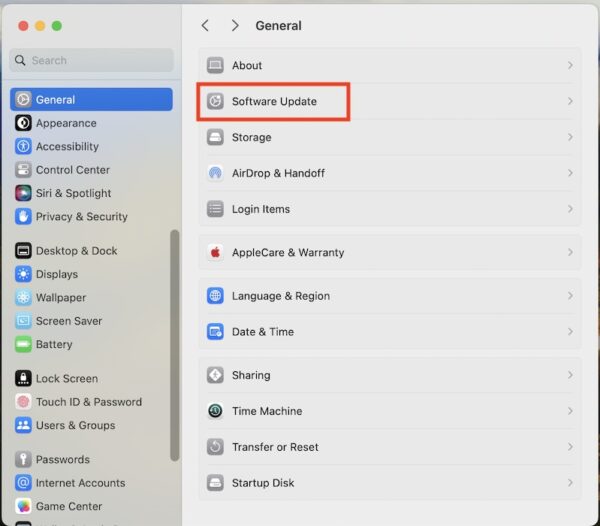
- Click the Apple menu icon > System Settings > General.
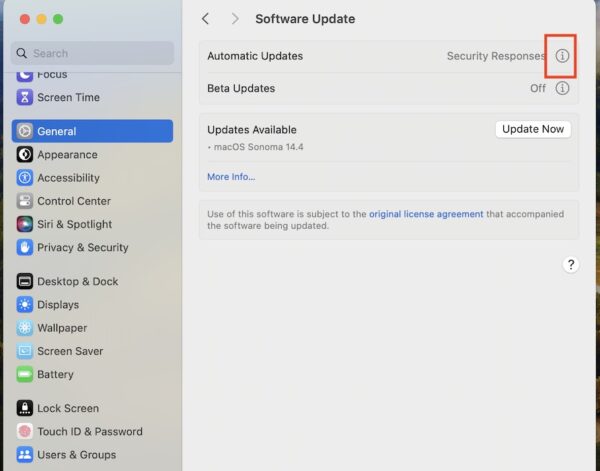
- Open Software Update and click the information icon (i) beside Automatic Updates.
- Toggle off the button for Install Security Responses and system files.
 NOTE
NOTE
2. Kill XProtectRemediatorSheepSwap on Activity Monitor
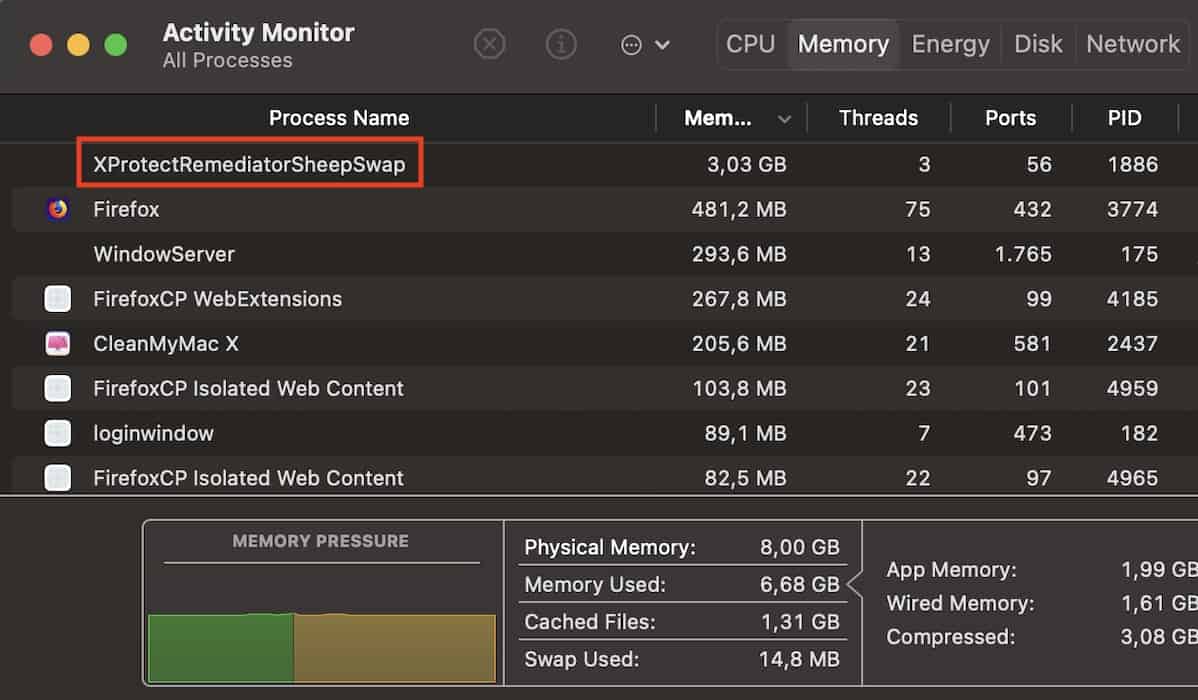
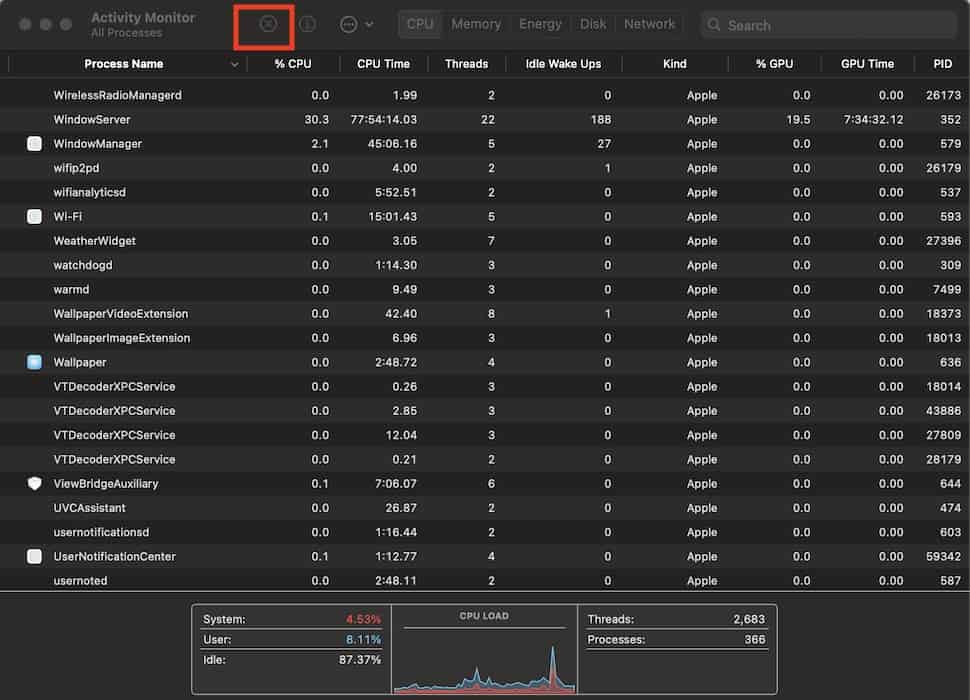
If XProtect still runs in your background even after you disable it, kill it through Activity Monitor. You can also check how much memory it’s consuming.
- Open Launchpad > Activity Monitor, which you’ll find in the other folder.
- Go to the CPU or Memory section and type XprotectService or XProtectRemediatorSheepSwap in the search bar.
Image Credits: Apple - Select the corresponding process and click the stop icon (X) at the top of the window.
 NOTE
NOTE
3. Factory Reset Your Mac
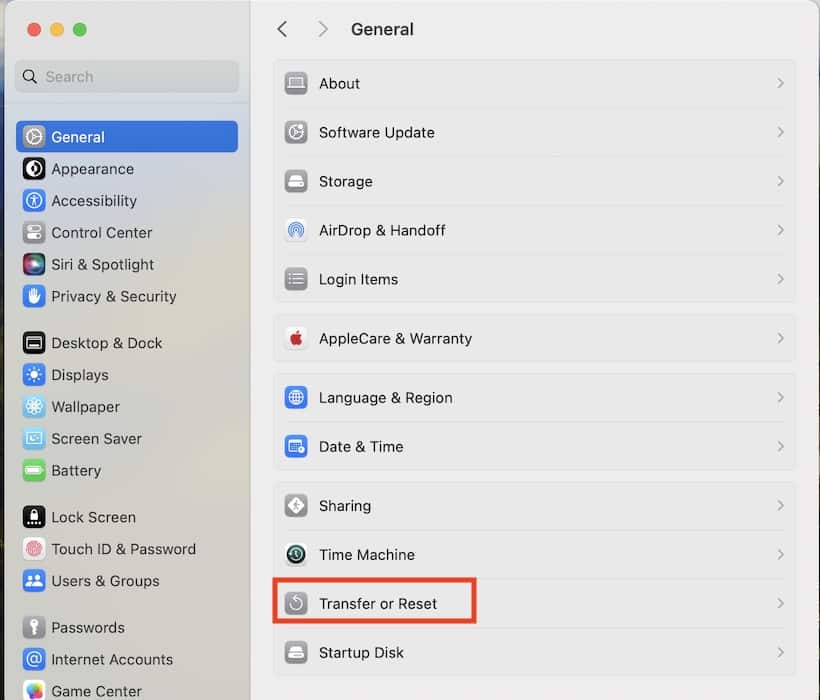
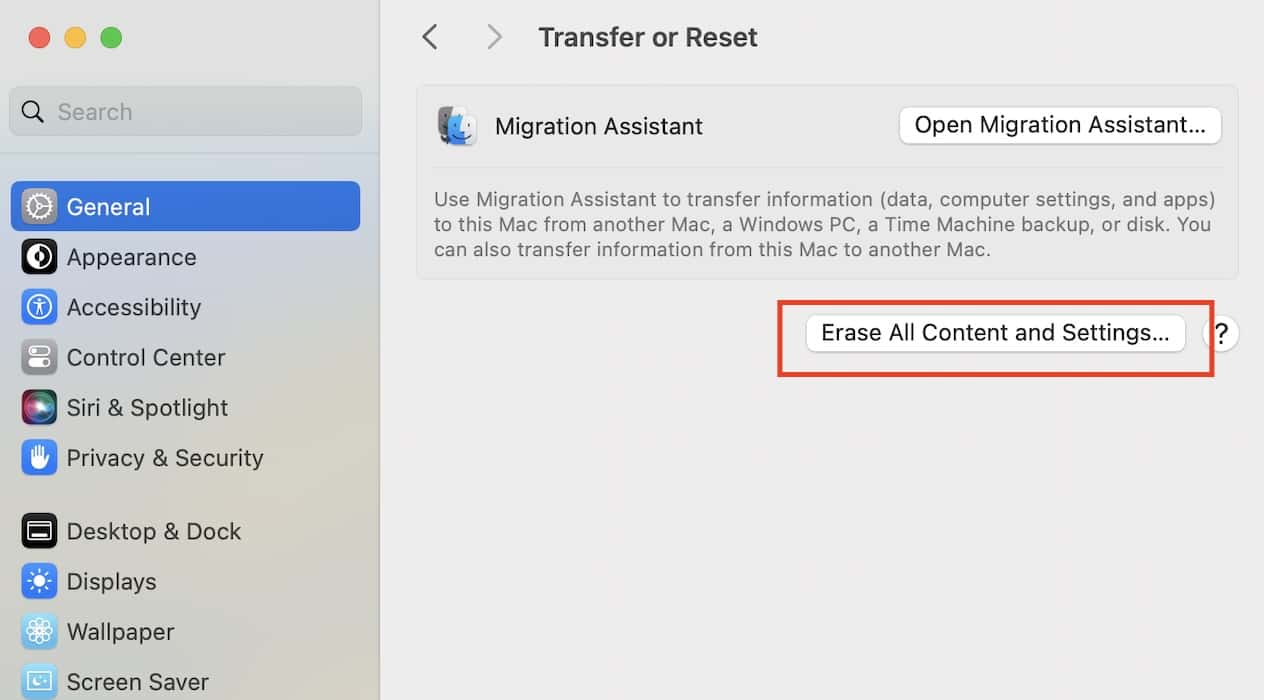
Try resetting your Mac back to its factory settings. It’s a quick way to revert any hidden function or feature that’s making XProtect use so much memory. Just note that you’ll lose all your data afterward.
- Click the Apple menu icon > System Settings > General > Transfer or Reset.
- Select Erase All Content and Settings, then input your Mac’s password.
4. Opt for an Alternative to XProtect
Don’t leave XProtect disabled for too long. Although you can turn it off while troubleshooting, surfing the web unprotected poses several security issues. Remember: hacking attacks could stem from even seemingly harmless everyday tasks.
But if you decide to turn off XProtect for extended periods, install a reliable Mac antivirus tool to take its place. Some good options include:
- Intego Mac Internet Security: Intego offers a sophisticated anti-malware system specifically made for Apple’s unique operating systems. It’s an excellent alternative to XProtect. You can even choose between the different security plans it offers Mac users—you’re not limited to just one paid tier.
- Norton: Norton is one of the longest-standing antivirus brands on the market. Its robust system comes with all the bells and whistles, from standard malware detection to dark web monitoring protection. Just note that it’s relatively expensive. See if you can find any promos, discounts, or free trials before going for an annual plan.
- McAfee: McAfee has been around for nearly four decades now. It secured and maintained its large market share by providing a simple, streamlined system with intuitive features. The only downside is it isn’t tailored for macOS devices. Of course, it’s still worth installing McAfee on Macs, but you should configure its settings appropriately.
- Bitdefender: Bitdefender is a lightweight antivirus tool you can run alongside as many apps as you want. Its background processes are barely noticeable. What’s more is that it has a fast, secure VPN that can maintain a stable connection for several hours.
Call Apple Support if the high memory usage of XProtect makes your Mac unusable—Apple’s technicians might have to check for underlying software or hardware damage. Just copy your files on Time Machine or any reliable backup software before sending your Mac for repairs. Otherwise, you won’t be able to recover them afterward.
