I create a lot of user accounts on my Mac. That sounds weird, I know, but it’s often a handy step for testing or troubleshooting. And recently I realized that every time I add a new administrator account, it’s allowed by default to unlock my encrypted FileVault volume, which is, er…less than ideal, security-wise. After all, I have been known to create accounts with the username “test” and the password “test.”
Imagine my shock when I rebooted my Mac the other day and saw a user account with a very insecure password being offered as an option for unlocking my disk! I mean, I could take this as a lesson and always use strong passwords for these temporary accounts I create. But where’s the nerdy fun in that?
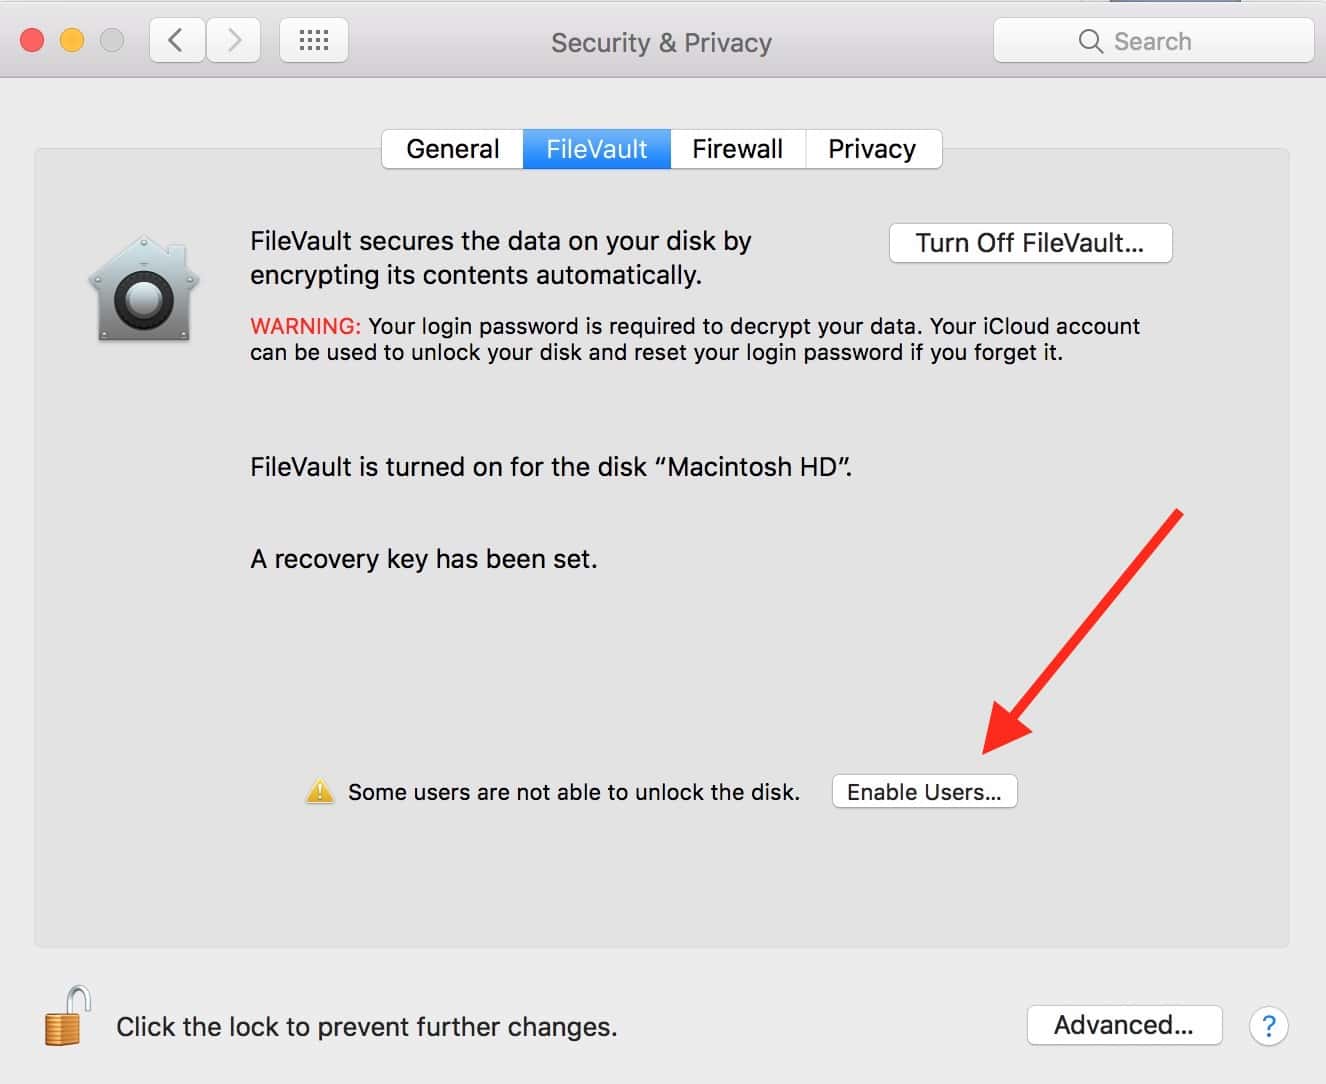
So what to do? I should be able to revoke new users’ FileVault-unlocking ability, right? Not through normal means, apparently. If you visit System Preferences > Security & Privacy and click on the “FileVault” tab, you’ll note that you can enable users but not disable them.

Luckily, I ran across this excellent Der Flounder post, which had the answer I was looking for. As the author, Rich Trouton, points out, what you’ll have to do is open the Terminal program (it lives within your Applications > Utilities folder) and then type in the following:
sudo fdesetup remove -user username
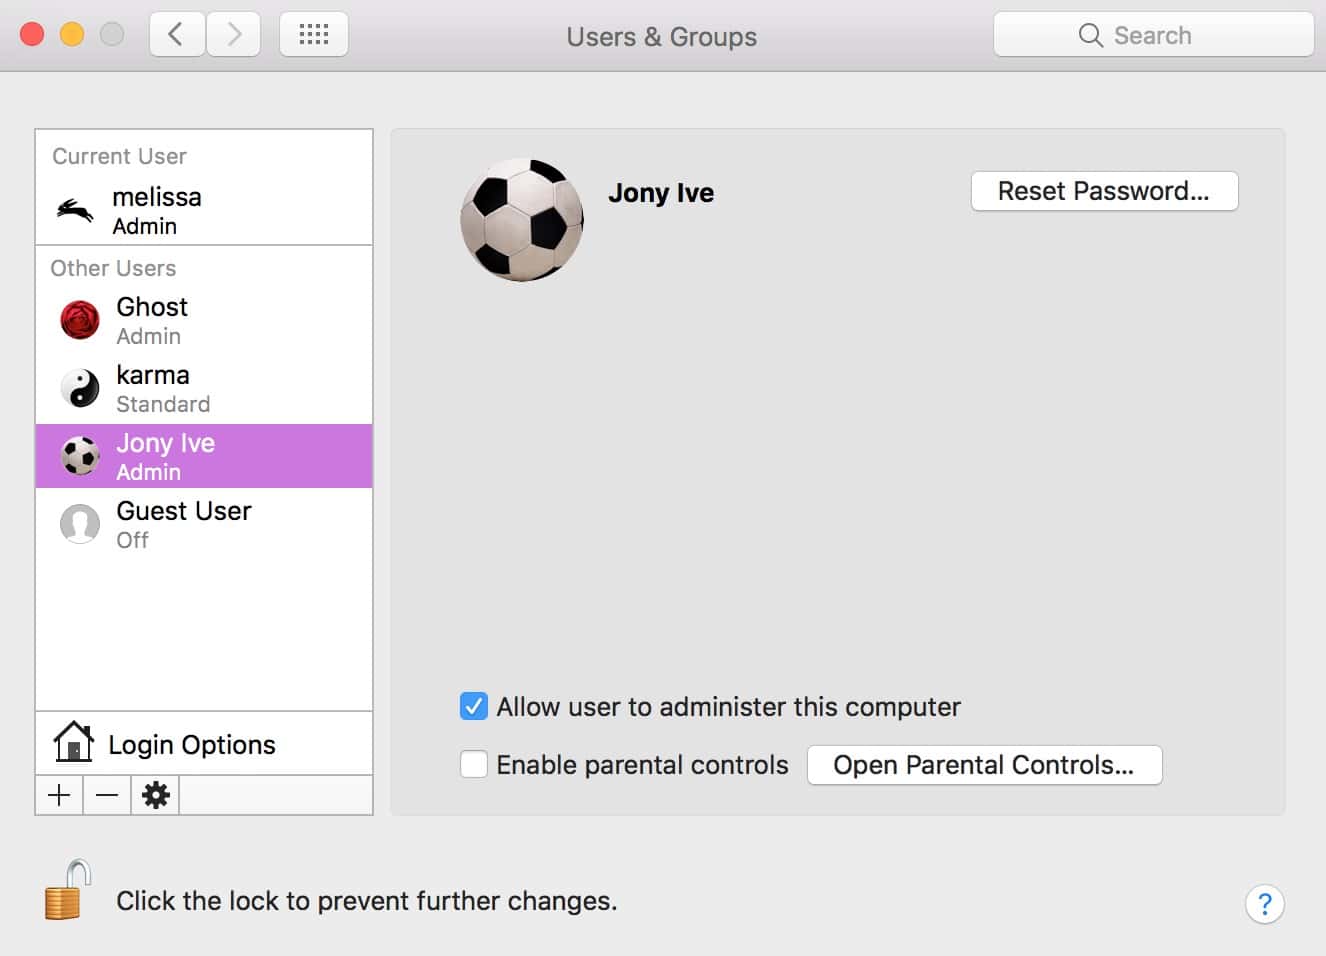
For the “username” part, you’ll want to replace that with, well…the username of the account you’d like to revoke access for. You can see all of your users within System Preferences> Users & Groups in the left-hand list.

So if I wanted to prevent my “Ghost” account from being able to unlock my disk, I’d type this into Terminal and press Return:
sudo fdesetup remove -user Ghost
If you’re not familiar with Terminal, know that if you have a username with spaces (like my Mr. Ive above), you can’t just type it in as is. You’ll need to use a backslash to tell Terminal to ignore the upcoming space, like so:
sudo fdesetup remove -user Jony\ Ive
If you put the username in wrong, Terminal will tell you, though. Note that I did it incorrectly the first time here and correctly the second.

Anyway, once you type in that command and press Return, you’ll be asked for your administrator account password to authorize the action. (You won’t be able to see anything changing as you’re typing your password in, but just trust that Terminal is paying attention.) Press Return again when your password is finished, and voilà! That user won’t be able to unlock FileVault anymore, and sweet, sweet nerdy security will be yours. But know that if you’re not logged in as an administrator, you’ll get scolded by Terminal.

In that scenario, you could use the su command to escalate your privileges temporarily, but I’d suggest you just go log in with your administrator account to run this command instead. It’s easier and safer. And because I always have to say this, here goes: Be really super-duper careful with what you type in Terminal. Messing stuff up can have unfortunate consequences, so check your work like forty times before you execute commands, OK? And I wouldn’t be me if I didn’t suggest you have several backups in place before you do anything at all, like even opening the lid of your laptop. I’m so predictable.
Thanks go out to Rich Trouton of Der Flounder for being nice enough to let me write this up! Now go read some more of his stuff.

Nice to know the function exists and possibly I’ll never need to use that command (I’m more likely to just delete a “test” user) but I think this is another of those cases where somebody at Apple has decided to not include a function in the GUI so as to protect the “innocent” – without thought for the “experienced” amongst us.