This article is intended primarily for students leaning C++ for the first time on a Mac. It’s not a step-by-step tutorial on how to write and compile code in the applications described. That will require digging in and mastering the mechanics of each method described. Rather, it’s a quick start guide that points to the basics and provides simple examples of how C++ coding can be accomplished on a Mac.
Scope of Article
All of the solutions provided can be used in the writing of the kinds of code beginners write: 20 to 50 lines of code that assist with the learning of C++. Stdin and stdout are the focus. Others can do much more. The writing of a full-featured GUI app for macOS is not covered.
The article could also be used by professionals who’ve already been doing professional C++ on, say, a corporate Linux system. However, it may not be clear how to get started and which tools to use in a transition to a Mac.
This article provides an overview of five good ways to write C++ on a Mac. There may be more. Most discussed are free, but one incurs a modest cost. Some are full featured, and some have limitations. For example some solutions presented don’t lend themselves to debugging thanks to decisions Apple has made. For all these reasons, it’s hard to rank the various solutions by some standard. After you’ve read about them, it may well be that one is the obvious way to proceed initially. See the spreadsheet on page 6.
First, a bit of nomenclature. We’ll talk here about an Integrated Development Environment (IDE). From Techtarget:
An integrated development environment (IDE) is a software suite that consolidates the basic tools developers need to write and test software. Typically, an IDE contains a code editor, a compiler or interpreter and a debugger that the developer accesses through a single graphical user interface (GUI).
What follows is a thumbnail sketch of each approach. As always, it’s up to the student to install and learn the nuances of each one. We’ll provide merely a grand tour and some overall guidance.
Finally, in the screen shots below, for clarity, the important area only is shown. That’s because showing the entire window often makes the key region too small to read.
1. Apple’s Xcode IDE
As mentioned above, Apple’s Xcode is a free, full featured IDE for native apps. However, it’s not very hard to press it into service for beginning C++ code on a Mac, and it includes a GUI debugger.
Note that Xcode is designed specifically for developers to write macOS, iOS, tvOS and watchOS applications in Swift or Objective-C. Because of that, it’s not widely used in industry or education as a C++ development system. In those situations, the focus is on Linux and Java-based IDEs. But Xcode is free, powerful and turns out to be amazingly useful for the student with a Mac.
All you need is a (free) AppleID and then you can download it from the Mac App Store found in macOS: Apple Menu > App Store. The latest version as of this writing is 8.3.3 and is designed to work with macOS Sierra.
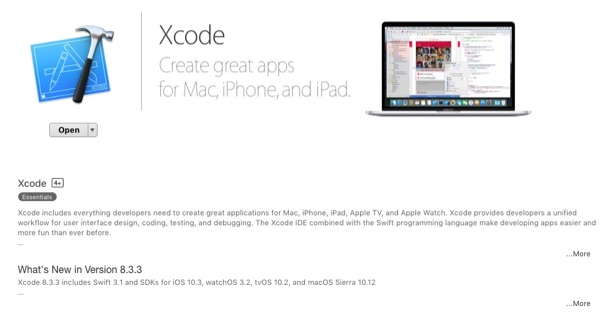
1.1 After you install Xcode, there will be an app in /Applications called Xcode.app. When you lunch it, you’ll see:
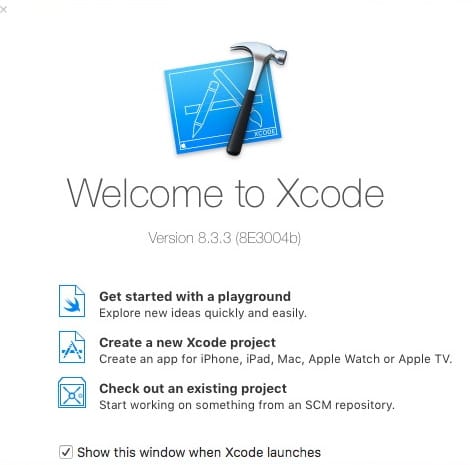
1.2. Select “Create a new Xcode Project.” Then click on “Command Line Tool.”
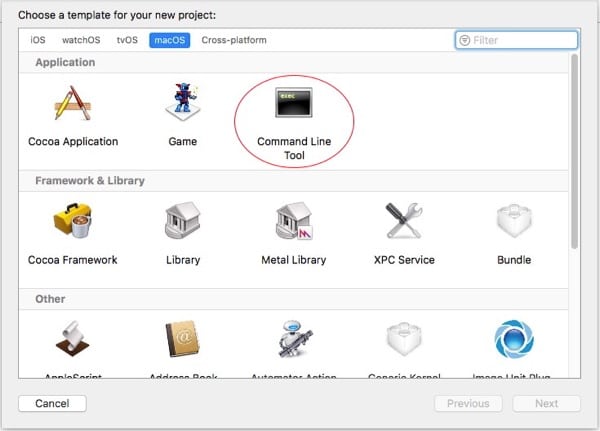
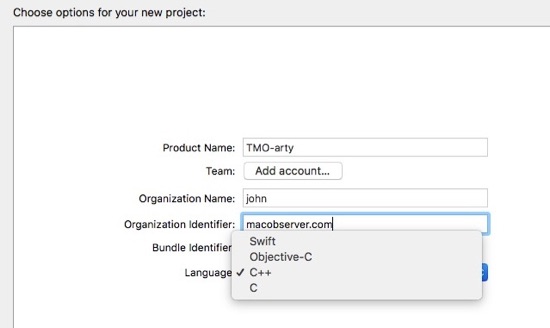
1.3. Fill in the various fields, as you wish, and select C++ from the Language popup.
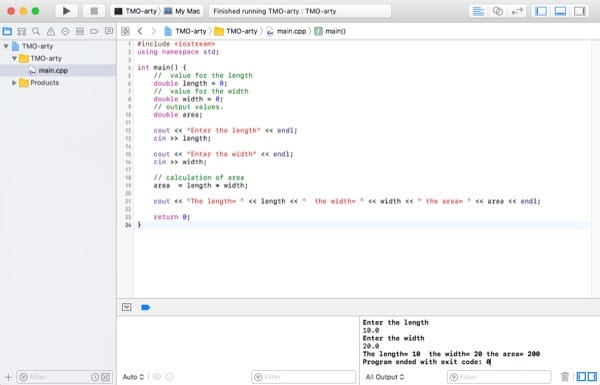
1.4. At this point, you’ll need to learn about how to enter code into the editor, build (compile and link), display the stdin/stdout and debug windows, and run the app. Here’s how it looks with some sample C++ code designed to calculate the area of a rectangle..
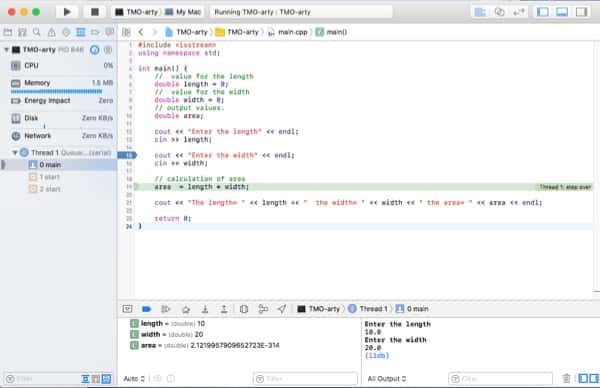
A final note. You’ll be able to create breakpoints and display variables in Xcode like this:
For the beginning C++ student who is familiar with the Mac, this is a great way to go. But there are more options, so off we go.
Method #2 – Install Linux as a Virtual Machine in macOS
Most professional C++ development is done in Linux along with its suite of GNU compilers and debugger, and Java-based IDEs. If you’d rather gear your C++ learning to more industry standard tools, this is a slightly more complex but very satisfying and capable solution.
The approach involves acquiring a capable Virtual Machine system for macOS. We recommend using Parallels Desktop as VM, that’s because it’s been around for years and it’s highly debugged and capable. Plus consider that Parallels Desktop Student edition is available for $39.99.
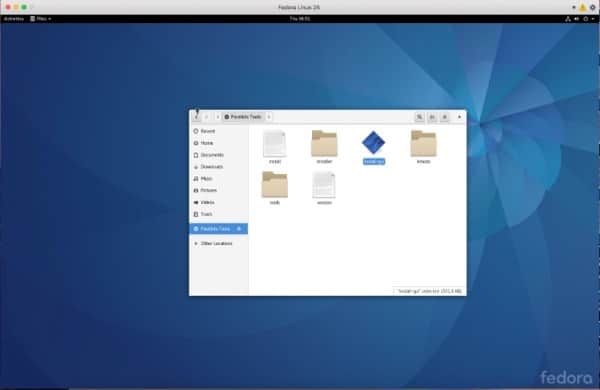
Once you have your VM system running, you can then download the ISO image of the Linux distribution of your choice and install it as a guest OS. We recommend Fedora or CentOS because they’re free and come with the required GNU compilers (g++) and debugger (gdb). Ubuntu, out of the box, does not. Plus, Fedora comes with an install of the very capable Eclipse IDE (more on that below). Make sure you specify the full developer options during install.
Once you have, say, Linux Fedora installed as a guest VM on your Mac, the sky’s the limit with C++. But you’ll have your work cut out for you learning your VM setup, Linux install and maintenance, IDE of choice install and use. You’ll be able to debug your code, and it can get as complex as you need it to.
This solution may be a challenge for many beginning C++ students, but it would work very well for very technical students or programmers already familiar with development in Linux and who are transitioning to a Mac.
Moving on, for simple, beginning C++ learning, there is a quick and easy solution. Namely, the command line on the Mac. That’s next.
3. The macOS Command Line, Short and Sweet
One good way to start learning C++ with zero cost and complexity is to write your C++ code in a standard Unix editor, like “vi” (which really points to vim) and compile on the command line. However, the default distribution of macOS doesn’t come with GNU compilers, so you’ll need to install Xcode anyway.
Then you’ll need to teach yourself “vi.” Learning the Unix editor “vi” is easy and actually a rite of passage for students. For example, we took the rectangle code from above and compiled it with g++.
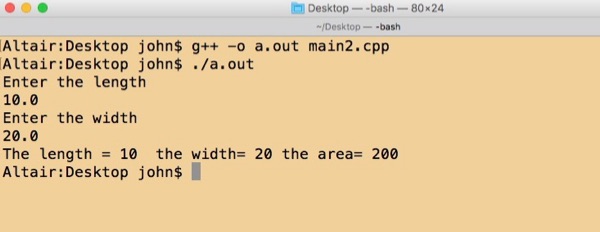
This method will work for the kinds of short code snippets described above—the kind beginning C++ students write. The downside is that while you can use g++, gdb isn’t included anymore with Xcode. (Apple uses lldb). An alternative is to use the llvm suite on the command line.
Also, if your C++ code starts to extend to multiple files, it can get more complicated than you might prefer. Since you already had to install Xcode for the compilers, consider going back to that.
4. Eclipse or NetBeans IDEs
If you’d like to use a more industry standard IDE, like Eclipse, directly on your Mac, you can do that. Eclipse is very similar to Xcode, but it’s more likely to be found on Linux systems and used by the pros, and so it better prepares students for more advanced C++ development.
One problem with Eclipse is that it’s written in Java SE. Java is no longer included in macOS because of legacy security issues. The installation of Eclipse requires the installation of Java, which you may or may not be comfortable with. But if you’re familiar with Eclipse, knowledgable about security, you may wish to go ahead with Java SE, now at version 1.8.
Your Eclipse iDE will use g++, as you did on the command line above, but it expects to find the debugger gdb, which is not there. As a result, you won’t be able to debug your C++ code unless you jump through some non-beginner hoops described at stackoverflow. This solution is beyond the scope of this article, but presented for reference.
Here’s where you can download Eclipse for C++ for macOS (64-bit). Again, you’ll also have to download Apple’s Xcode first to get the compilers.
Getting started with Eclipse, after you install it is a bit tricky. So here are some hints.
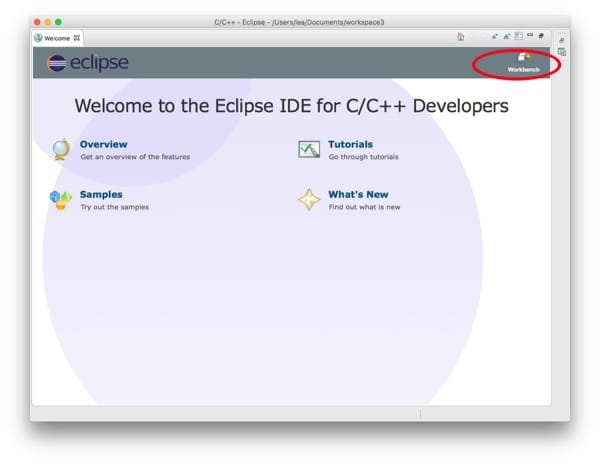
4.1 The welcome screen isn’t very forthcoming about how to get started. Click in the workbench icon on the top right.
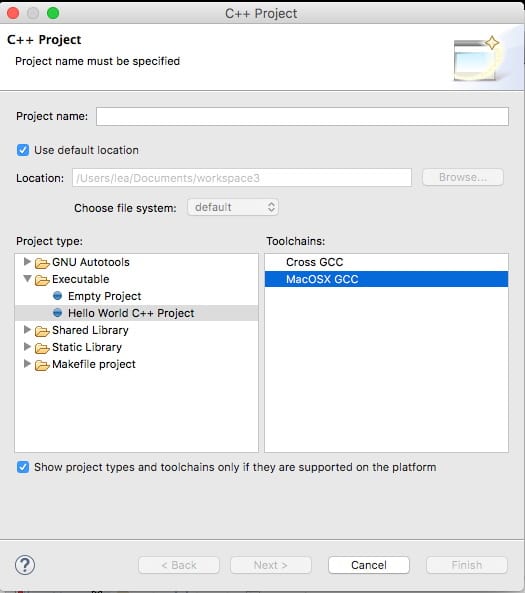
4.2 Then select File > New > C++ project. Like Xcode, you’ll see a window that defines your project profile. Note the options we’ve highlighted. (Do not select Empty Project.) Give your project a name. When done, delete the skeleton “Hello World” code and enter your own.
Again, you’ll have to learn the details of using Eclipse. There are tutorials on the Eclipse.org website. Finally, we present the rectangle code, compiled and running in Eclipse along with stdout display at the bottom.
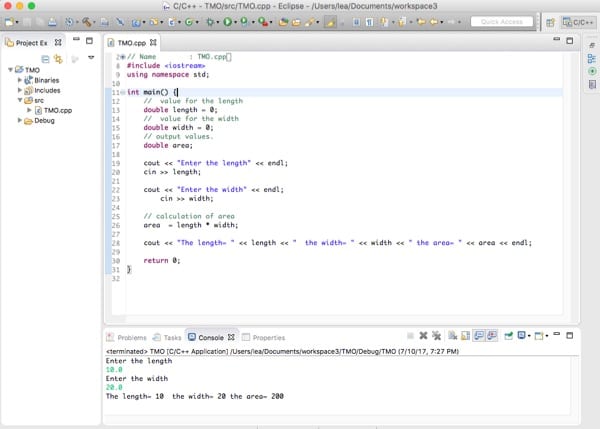
Eclipse is a great IDE, on par with Xcode, but if you need a graphical debugger you’ll have to explore the hack linked to above. Otherwise, for the sake of learning the language quickly and easily, your best choice may well be Xcode or the command line.
Finally, NetBeans is another very good Java-based IDE. If you prefer it to Eclipse, you can download it from the NetBeans.org website.
5. Microsoft Visual Studio for Mac
Not long ago, Microsoft released Visual Studio for the Mac. We don’t know a lot about this solution except that one can certainly use it to learn and write C++ code. There is a free version of Visual Studio for students and non-commercial developers.
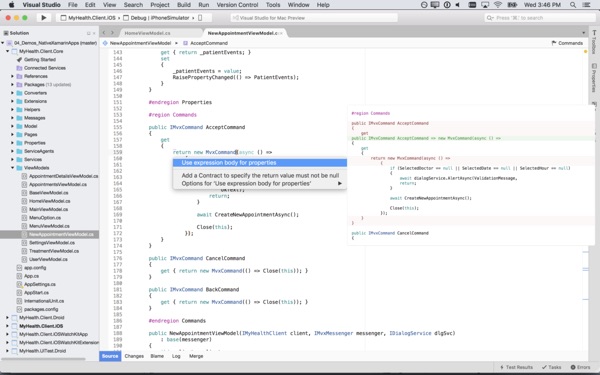
If your goal is to learn C++ as a student, this solution will certainly work as well as Xcode, and it’s free. You can even build full-featured macOS, iOS and Android apps with it down the road as your expertise develops. Plus, it has its own debugger. From Microsoft:
With Xamarin’s advanced debugging, profiling tools, unit tests, and UI test generation features, it’s faster and easier than ever for you to build, connect, and tune native mobile apps for Android, iOS, and macOS.
Hats off to Microsoft for creating this tool.
Final Words
This has been a long and complex article to explain some things that should be a lot easier. And yet, as you’ve no doubt concluded, an enormous amount of technical detail has been omitted either for space or because it’s just beyond the scope of a survey article. You’ll have a lot of work to do filling in the blanks. But now you know it can be done.
As you may suspect by now, preparing to write code in an environment is just as much of a challenge as learning a language itself. That endeavor requires considerable preparation and patience. Once you do that, however, the pleasures and rewards of writing code are considerable.
We hope this article will help you get starthed with the method of choice. Now go have some fun.

s/right of passage/rite of passage/
Microsoft Visual Studio doesn’t allow C++
It’s only allows C# and F# …..
But it’s good suggests. I try to use Xcode for write C++
Yep… Visual Studio for Mac is lacks
C++… confirmed on Microsoft docs, support and forum …1. docs: Microsoft: Introducing Visual Studio for Mac
2. support: VisualStudio: How can we improve Microsoft Visual Studio for Mac?
3. forum: How do I get c++ to work on Visual Studio for Mac?
Note: That said, the Microsoft alternative is Visual Studio Code which can install on macOS and be used with C/C++.
OF COURSE you can use Xcode to code and compile C++. That’s how the engineers at Apple do it!
Chris Lattner and his compiler team were well known to be big fans of C++.
Many of the low-level libraries in OS X, especially audio and I/O are written in C and C++.
They discourage third party application programmers from using it because of all the sharp edges and dangerous curves, but they use it plenty themselves.
Qt Creator IDE was written by C/C++ programmers for C/C++ programming.
Wikipedia: Qt Creator
Qt Creator
Dual license: Free & Open Source and Commercial.
Qt Downloads
Plain vanilla C/C++ code can be written without using the Qt Cross Platform Framework libraries. (Yet, with Qt Framework, one can also write C/C++ apps for iOS and Android on macOS.)
For me, Qt Creator has been an nice replacement for Lightspeed C (aka THINK C). 😉
That looks like a good one. I’ll explore CLion when I get a chance, but practically, it was a long article and it was good to draw the line somewhere.
For those interested:
https://www.jetbrains.com/clion/specials/clion/clion.html
Thanks ruurd!
Why did you leave out CLion? Or Sublime Text that is pretty OK with a myriad of build systems?