It happens frequently with OS updates: some users love them, some hate them, and some can’t even tell the difference. Those in the dissatisfied group may wonder if there’s a way to downgrade from iOS 18 to iOS 17. The answer is: sort of. Let’s understand what that means and how you can try to go back to the old version.
Requirements and Warning
For starters, you’ll need a Mac or a Windows computer with iTunes and compatible firmware for your iPhone model. These are not hard to come by, but there’s one more thing. You’ll also need a lot of storage space on your computer if you want to downgrade without losing data.
Now, for the warning: this procedure is risky. It involves modifying the backup files, and even if you’re okay with losing data, there’s a chance it won’t work. Apple only allows installing signed OSes, and while some iOS 17 releases are still signed, this may change at any minute.
Because of that, make sure to follow the procedures to the letter. And remember: this may brick your iPhone. Don’t try it unless you’re willing to spend some hours figuring out what went wrong and how to fix it.
Downgrading From iOS 18 To iOS 17 By Wiping Your iPhone
This is the easiest and fastest way. If you’re ok with losing all your data and reinstalling your apps manually, you’ll just need to do the following:
1. Download the Firmware

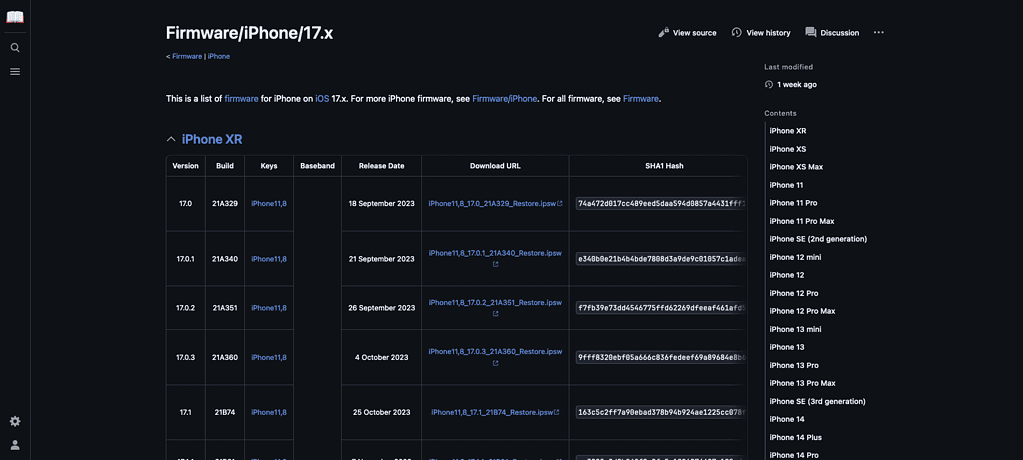
There are quite a few sites out there that allow you to download iOS for installation. They are generally safe, since they don’t host the firmware themselves, instead pointing to a link in Apple’s own servers.
For this guide, I’ll recommend The Apple Wiki. Their firmware page seems more up to date than other alternatives, with iOS 17.7 — which is what we need — listed.
Open the link above, select your iPhone model, and download the firmware. It’s quite a large transfer, at over 7GB, so it may take a while. You’ll end up with a .IPSW file, which is Apple’s format for OS updates.
2. Place Your Device In Recovery Mode
The specific button combination to put iPhones in Recovery Mode varies. You can find out the exact one for your model in this Apple Support page.
3. Flash iOS 17 on Your iPhone

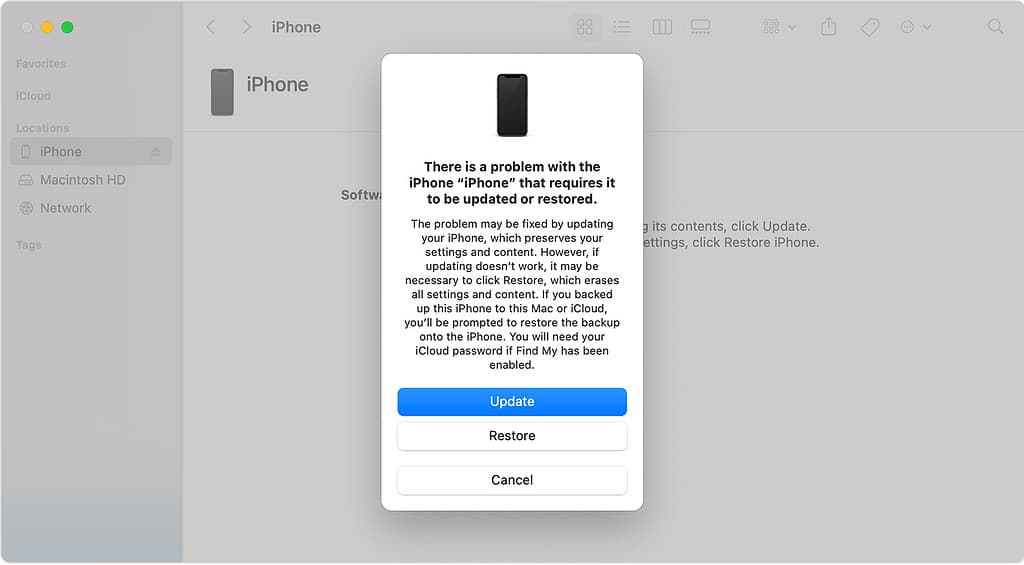
With the iPhone on Recovery Mode, connect it to your computer. A dialog will appear, saying you’ll need to restore the iPhone firmware. Click the Restore button while holding Option (on macOS) or Shift (on Windows) and select the .IPSW file you downloaded. This procedure will also take some time, but your iPhone should reboot, running iOS 17.7 afterward.
How To Downgrade From iOS 18 To iOS 17 Without Losing Data
This procedure takes even longer, because it requires you to transfer lots of data between your iPhone and your computer. You’ll also need to have, on your computer, free disk space over twice your iPhone’s storage.
1. Make a Full Device Backup

First of all, make a local backup of your iPhone using the Finder or iTunes. Make sure to select the Back up all of the data on this iPhone option.
2. Download the Firmware
Download the IPSW file from Apple, just as stated in step #1 of the previous method. You can do that while backing your iPhone up.
3. Edit the Backup File
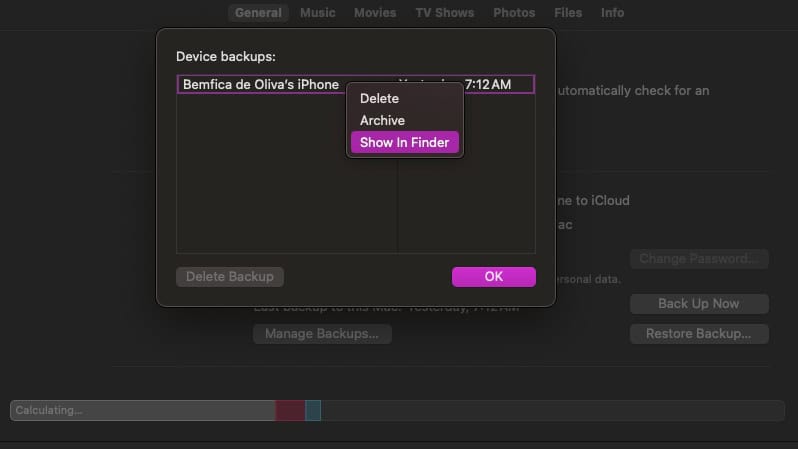
- After the backup is complete, click Manage Backups.
- Right-click the backup you just made and select Show in Finder (or the Windows alternative).
- This should open a folder containing multiple other folders; the one we need is pre-selected when the window opens.
- Make a copy of this folder somewhere else. This is very important so you can have a fallback option if things go wrong.
- On the original folder, open the Info.plist file and search for the line Product Version.
- Right below it, you’ll find the following text:
18.0
Or, if you are on the iOS 18.1 Beta:18.1 - Change this line to:
17.7 - Save the file and close.
4. Place Your Device In Recovery Mode
Just follow the same procedure as in step #2 of the previous method.
5. Flash iOS 17 on Your iPhone
Similarly, step #3 of the previous method also applies here.
6. Restore the Modified Backup
After the iOS 17.7 installation is complete, you should see a dialog on your computer asking if you want to restore a backup. Confirm it and select the modified version.
There are many reasons you may want to revert an OS upgrade. You may be facing instabilities, battery drain, your iPhone may be running slow, or you may simply dislike the changes. Officially, Apple makes things hard for those who regret upgrading, but luckily there’s a workaround for that.


In addition, there is a fundamental question about iTunes, which biginning with Catalina was extirped..
Thanks a lot for this tutorial. For me fails at the How To Downgrade From iOS 18 To iOS 17 Without Losing Data 5. step. Is a must being logged in iCloud for it to succeed? I hope not, because I don’t use iCloud account, and I never wish to use it,
Hi there, sorry I took so long to reply. There’s no need to be logged in to an iCloud account.
Also, about the iTunes point, this is for Windows users. On macOS, the procedure is done using Finder.