
With the Messages app in iOS 18, you can use Send Later to schedule important messages to be sent later up to 14 days in advance. While this feature is pretty useful, sometimes the option may not appear in the app. If you have encountered a similar problem, follow the solutions below.
6 Ways to Fix Send Later Not Appearing in the Messages app
Ideally, you should be able to locate the option for Send Later along with your other iMessage apps by tapping the Plus button (followed by More in some cases) inside an iMessage thread. However, if you aren’t able to locate the option for Send Later to schedule your messages, here’s what you can do:
1. Ensure the Recipient has an iPhone
Send Later is an iMessage-exclusive feature. While any iPhone user can receive the scheduled messages if they have enabled iMessage, users with an Android phone can’t. If you attempt to schedule messages for a non-iPhone contact, the option for Send Later will simply disappear from the list of iMessage apps.
To check if the recipient uses an iPhone or an Android device, tap the compose button in the Messages app and select the recipient’s number to see if it turns blue or green. If it turns blue, it means they have an iPhone, and if it turns green, they have an Android device or haven’t enabled iMessage.
In case the recipient uses an Android phone, there’s nothing you can do until Apple figures out a way to implement the feature using RCS Messaging. However, if the recipient uses an iPhone and you still can’t schedule text messages for them, something else may be causing the feature to misbehave.
2. Try to Force Restart Your iPhone
Sometimes, minor software glitches related to the Messages app or iOS can cause the Send Later option to unexpectedly disappear from the list of iMessage apps on your iPhone. Generally, you should be able to fix such minor glitches by force restarting your iPhone quickly. Here’s how to do this on your device:
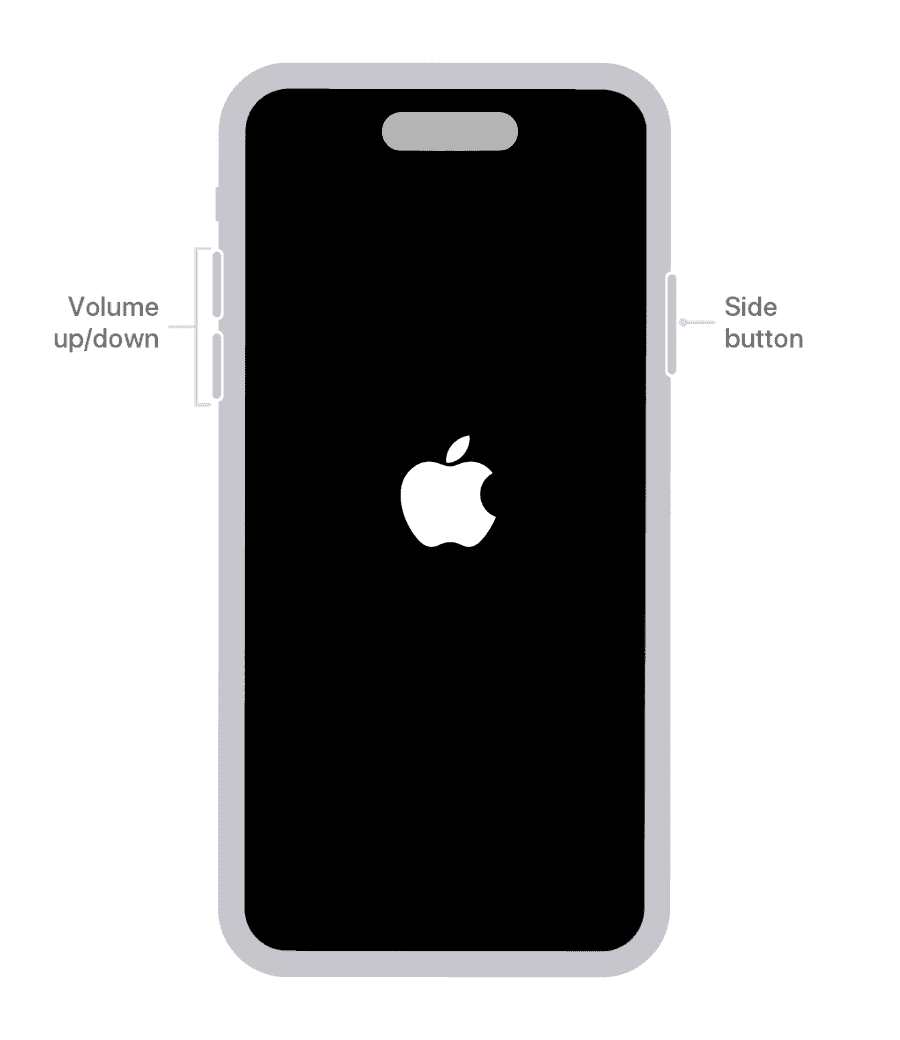
- Quickly press and release the volume up button.
- Quickly press and release the volume down button.
- Now, press and keep holding the side/power button.
- Let go of the side button once the Apple logo appears.

3. Check if iMessage is Turned On
As I have mentioned previously, Send Later is an iMessage-exclusive feature. This means that the feature will not work if iMessage for your Apple Account or iPhone is turned off. To ensure this isn’t the case on your iPhone, follow the steps below to check if iMessage is toggled on.
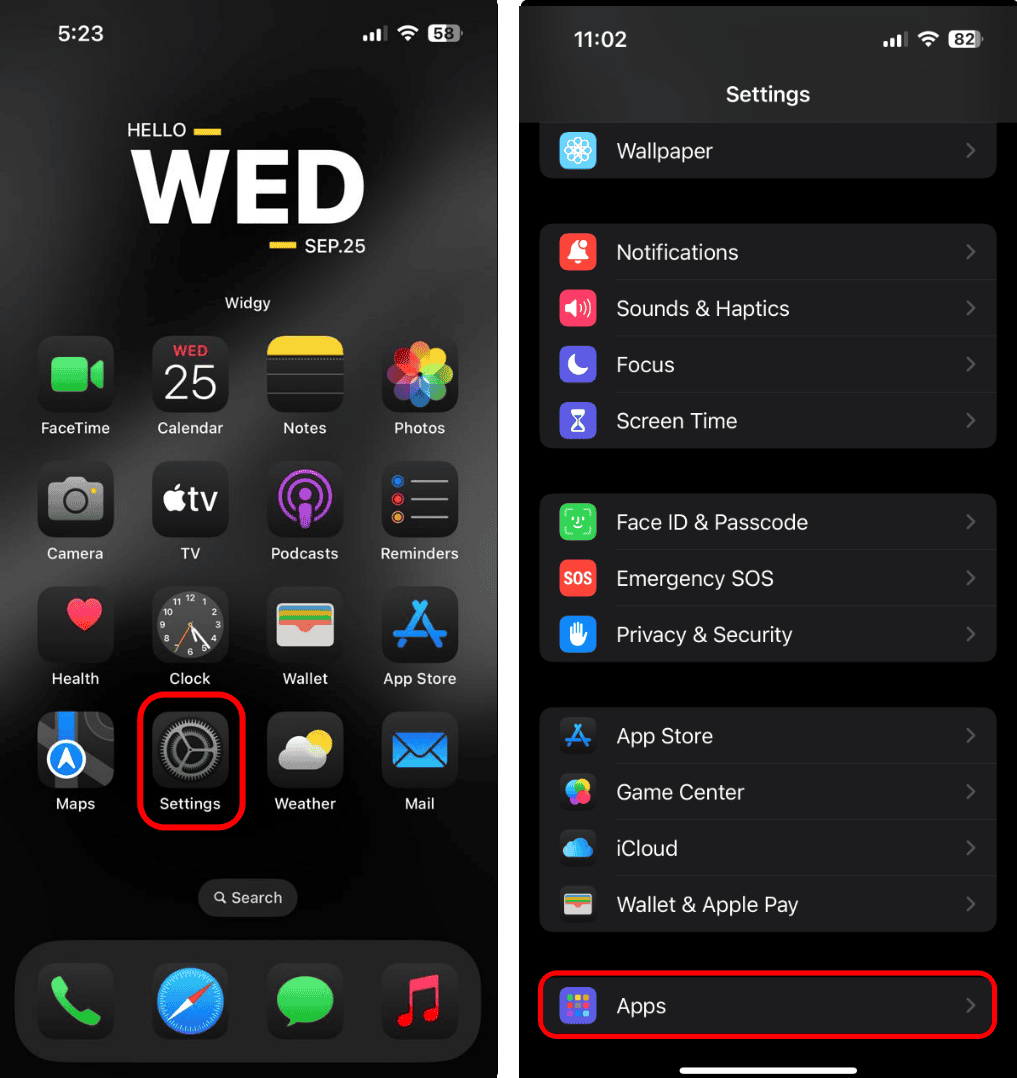
- Open the Settings app on your iPhone.
- Scroll down to the end and tap on Apps.

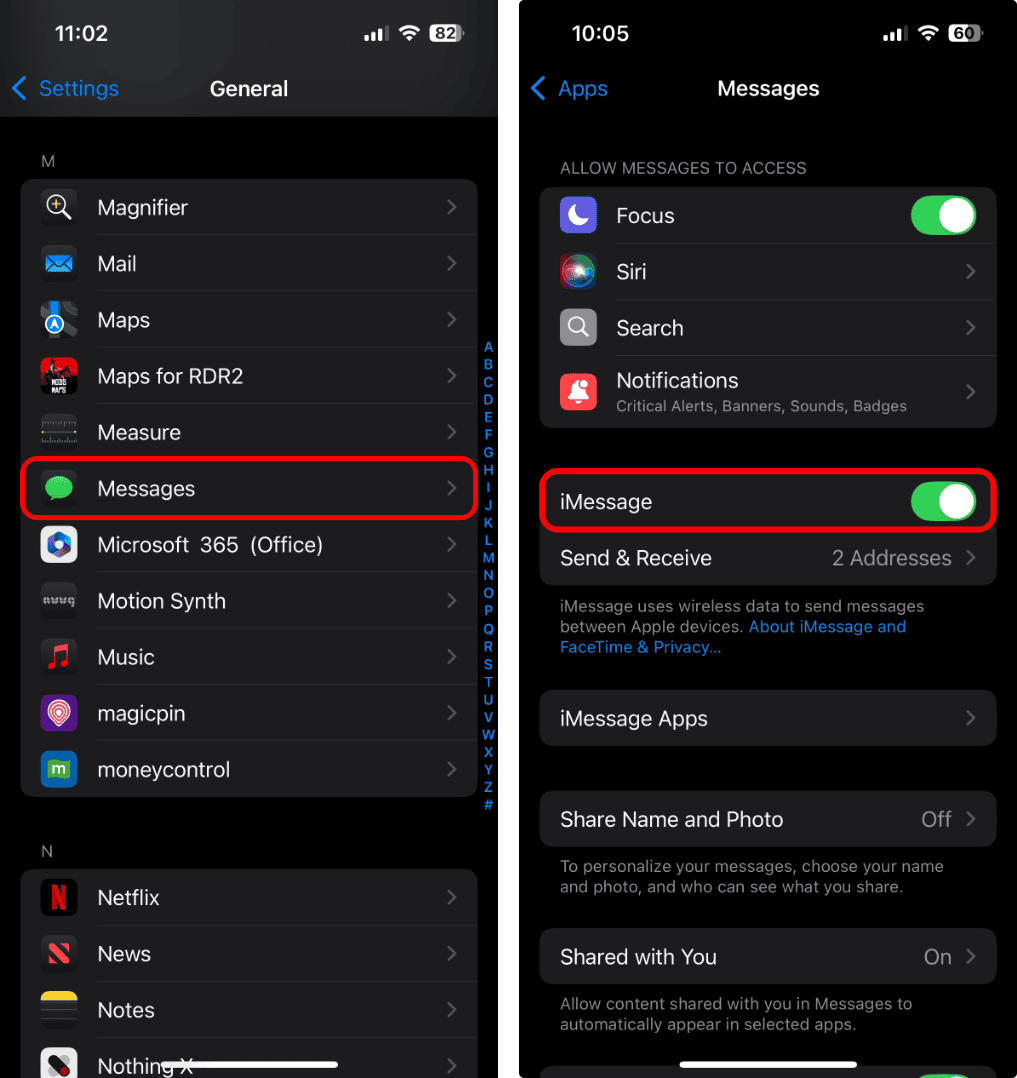
- Scroll down and tap on the Messages option.
- Check if the toggle next to iMessage is enabled.
If iMessage is already enabled on your device, you may toggle the feature on and off. This can help you get rid of software glitches that can sometimes cause some features, like Send Later, to stop functioning.
4. Get the Latest Version of iOS
Every iPhone user can receive scheduled messages with Send Later, regardless of their iOS version. However, you can only send scheduled messages from an iPhone running iOS 18. If Send Later is not showing up for you, it’s possible that you are running an older version of iOS or the current version has some sort of bug. You should install the latest version of iOS to resolve this issue. Here are the steps for it:
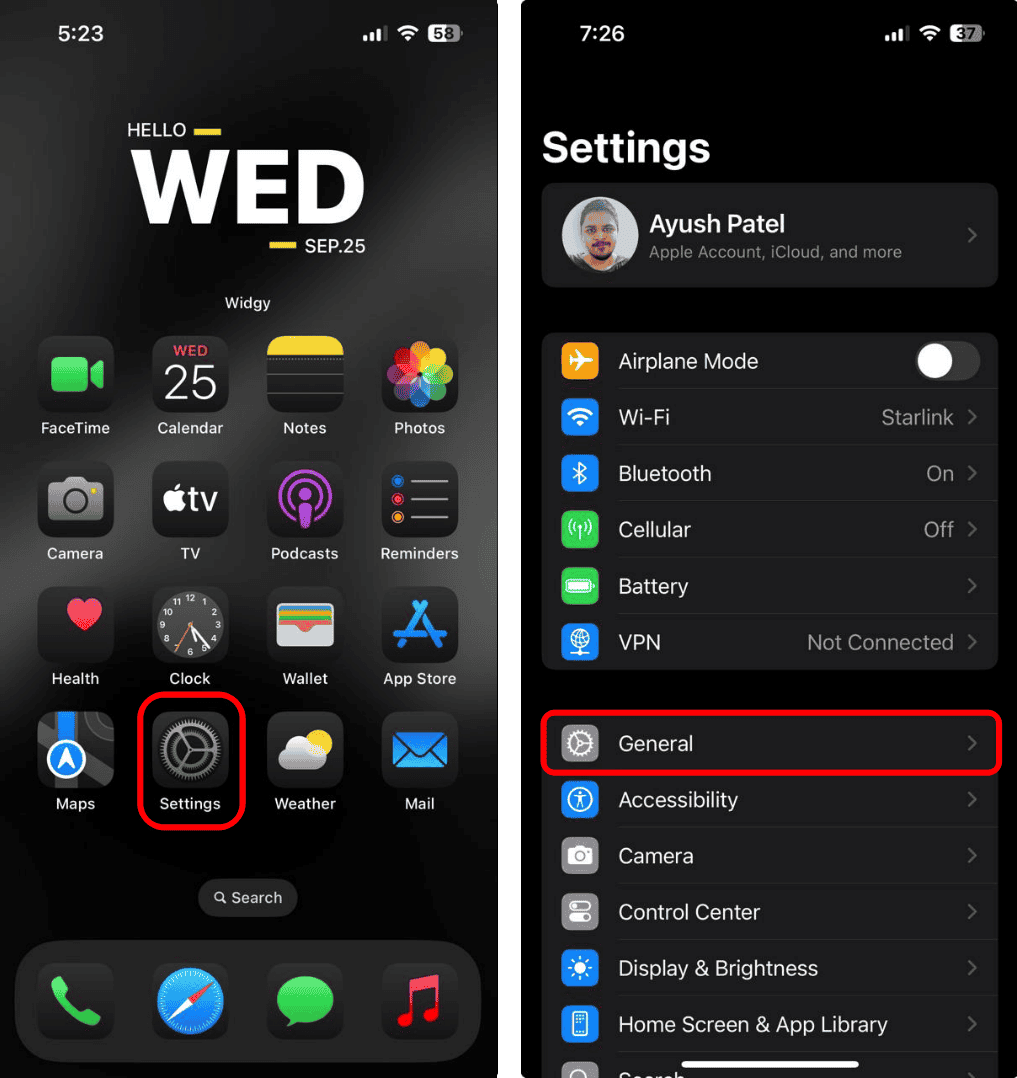
- Open the Settings app and navigate to General.
- Tap Software Update and wait for your iPhone to check for updates.
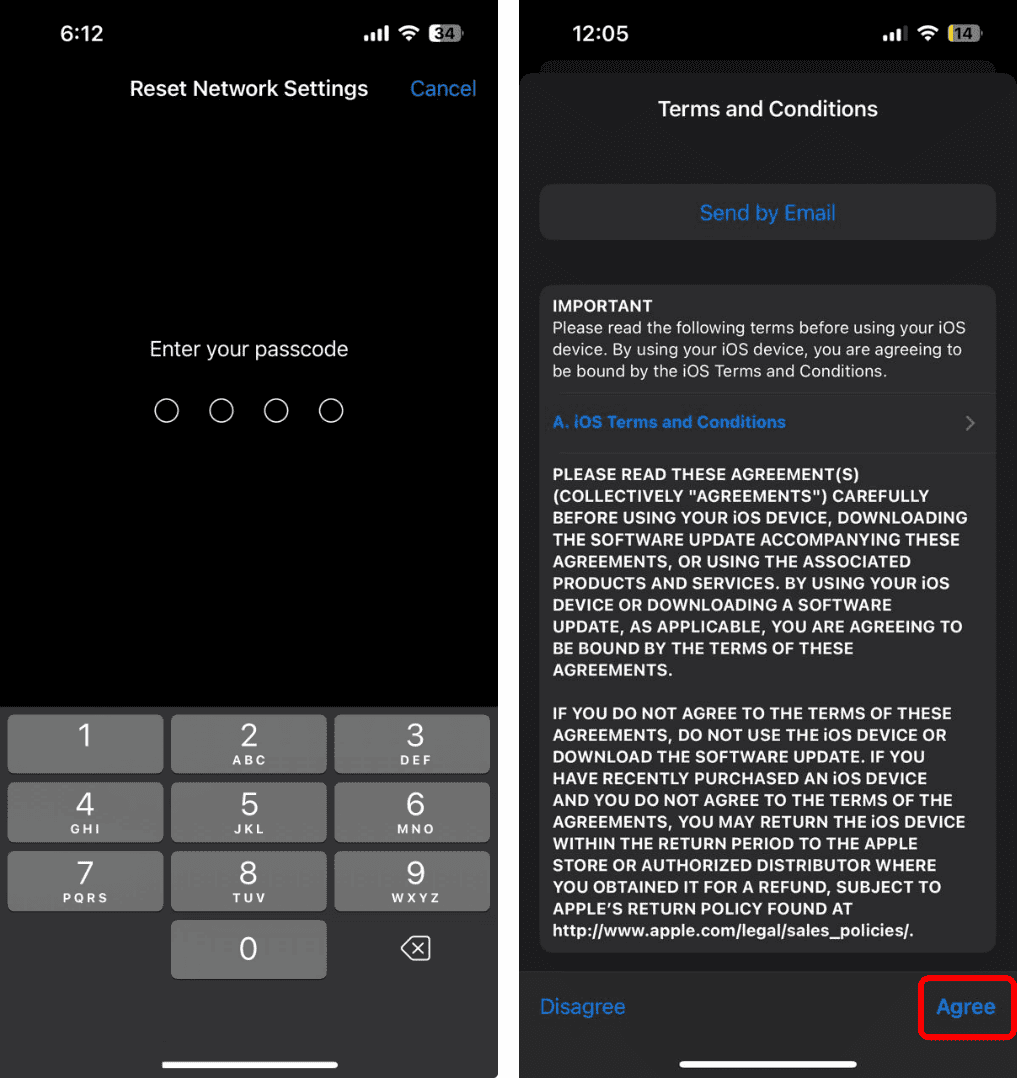
- If a new iOS update is available, tap Update Now (or Install Now).
- Enter your iPhone’s passcode and agree to the terms and conditions.

5. Reset All Settings on iPhone
In some cases, you may face problems using Send Later on your iPhone due to misconfigured settings. To ensure this isn’t the case, you may reset all settings on your iPhone, as explained below. Doing this should help you reverse any unwanted changes on your iPhone without erasing your files and apps.
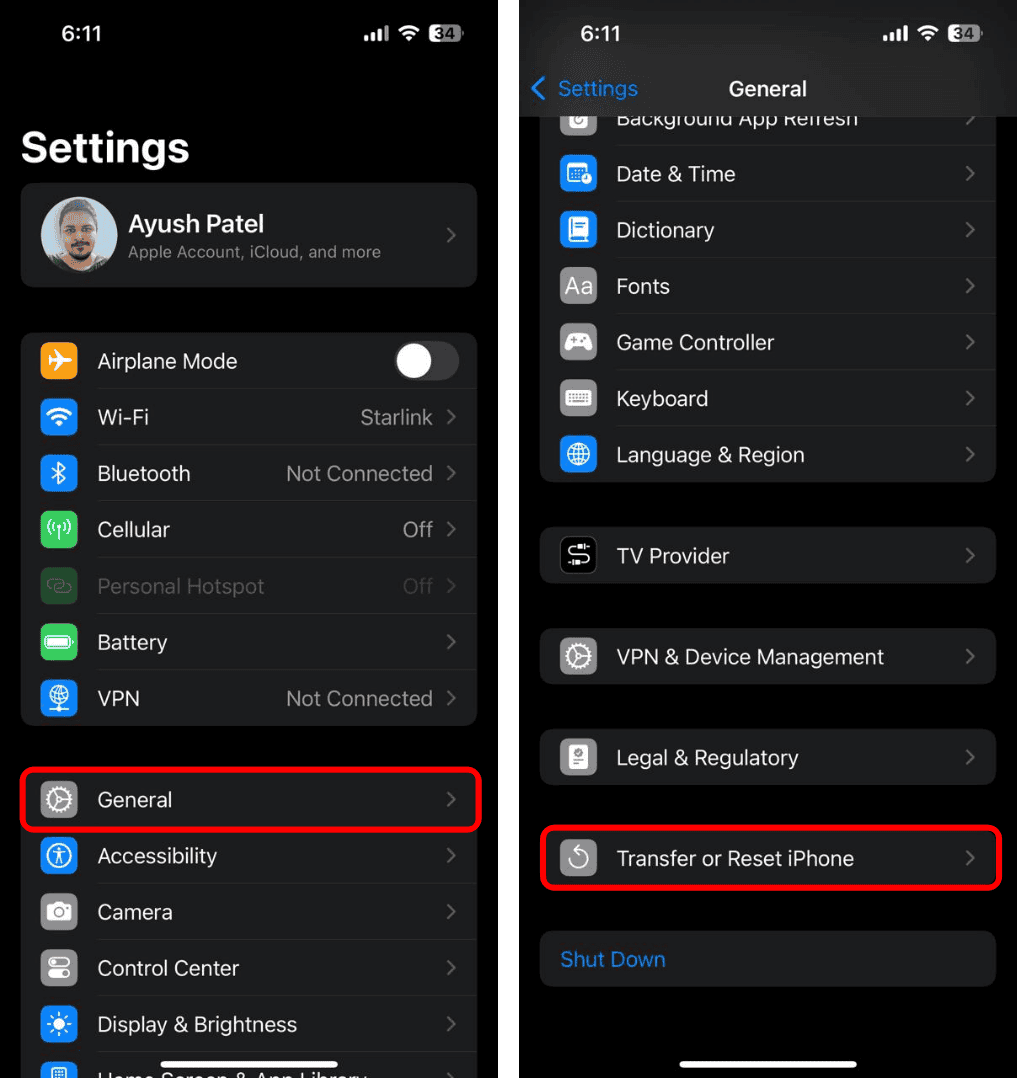
- Launch the Settings app on your iPhone and navigate to General.
- Scroll down to the end of the page and tap Transfer or Reset iPhone.
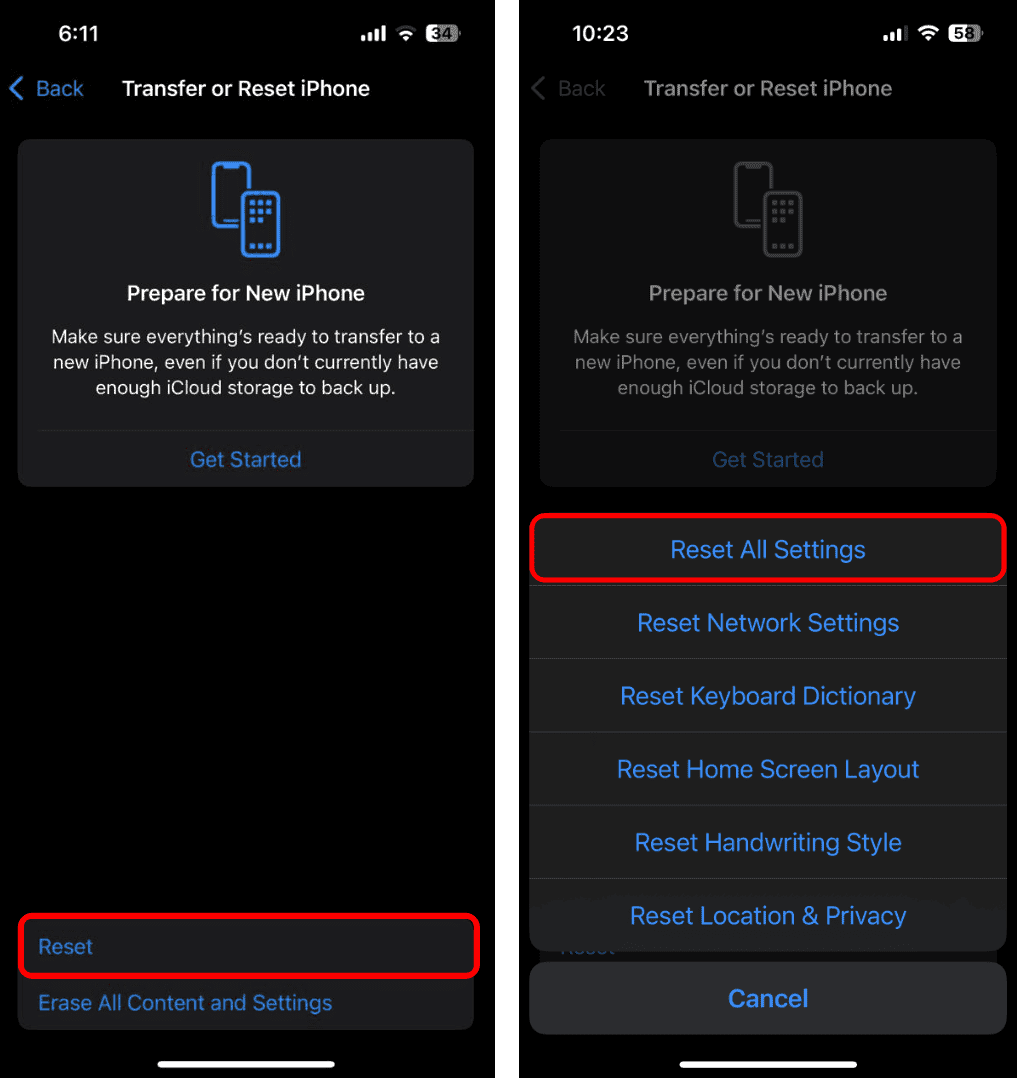
- From the resulting page, tap Reset and select Reset All Settings.
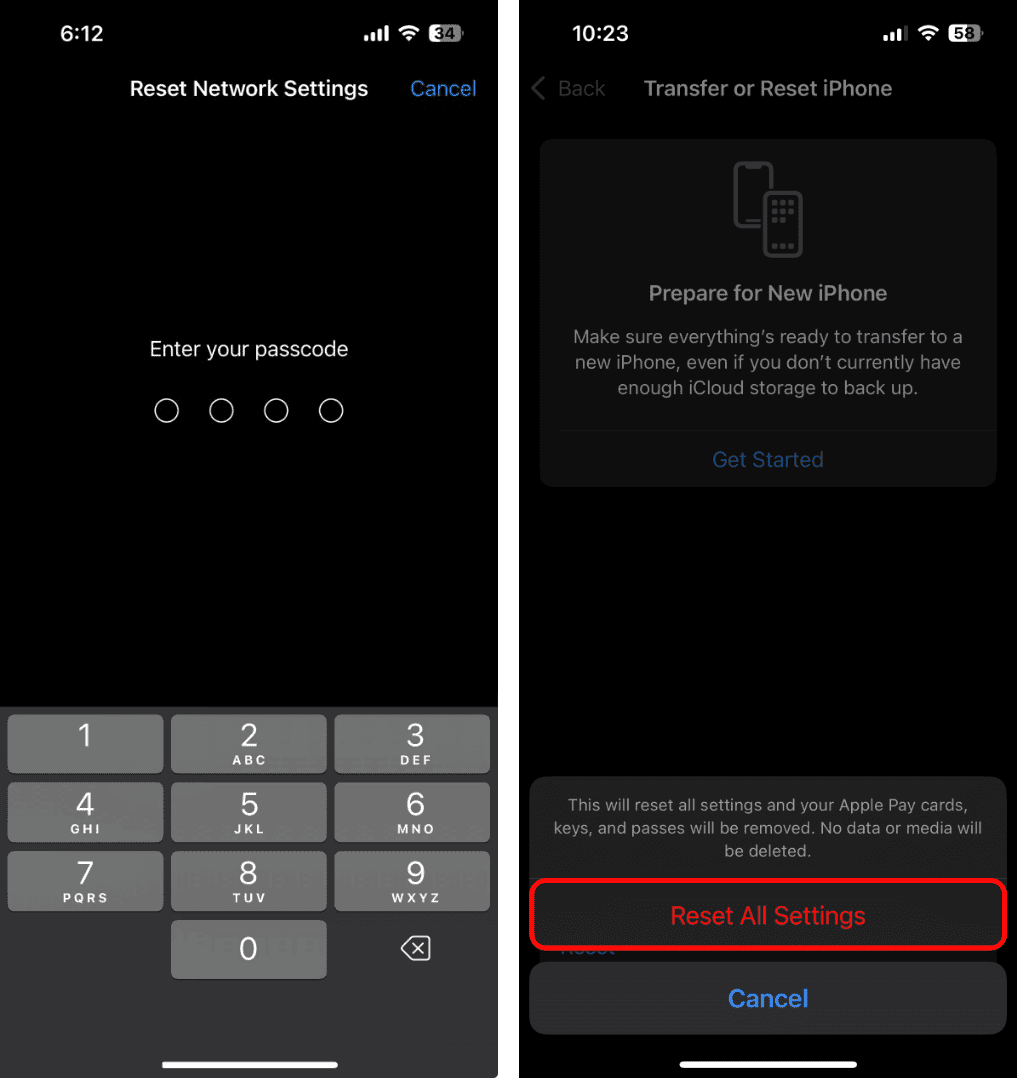
- Now, enter your lock screen password and tap Reset All Settings.
6. Factory Reset Your iPhone
If resetting all settings doesn’t work, you can try to factory reset your iPhone as a last-ditch solution to resolve the issue. Factory resetting will erase all saved settings and data on your iPhone and potentially eliminate any bugs that might be at the system level. Here’s how you can do this:
- Open the Settings app and tap General.
- Scroll down to the end of the page and tap Transfer or Reset iPhone.
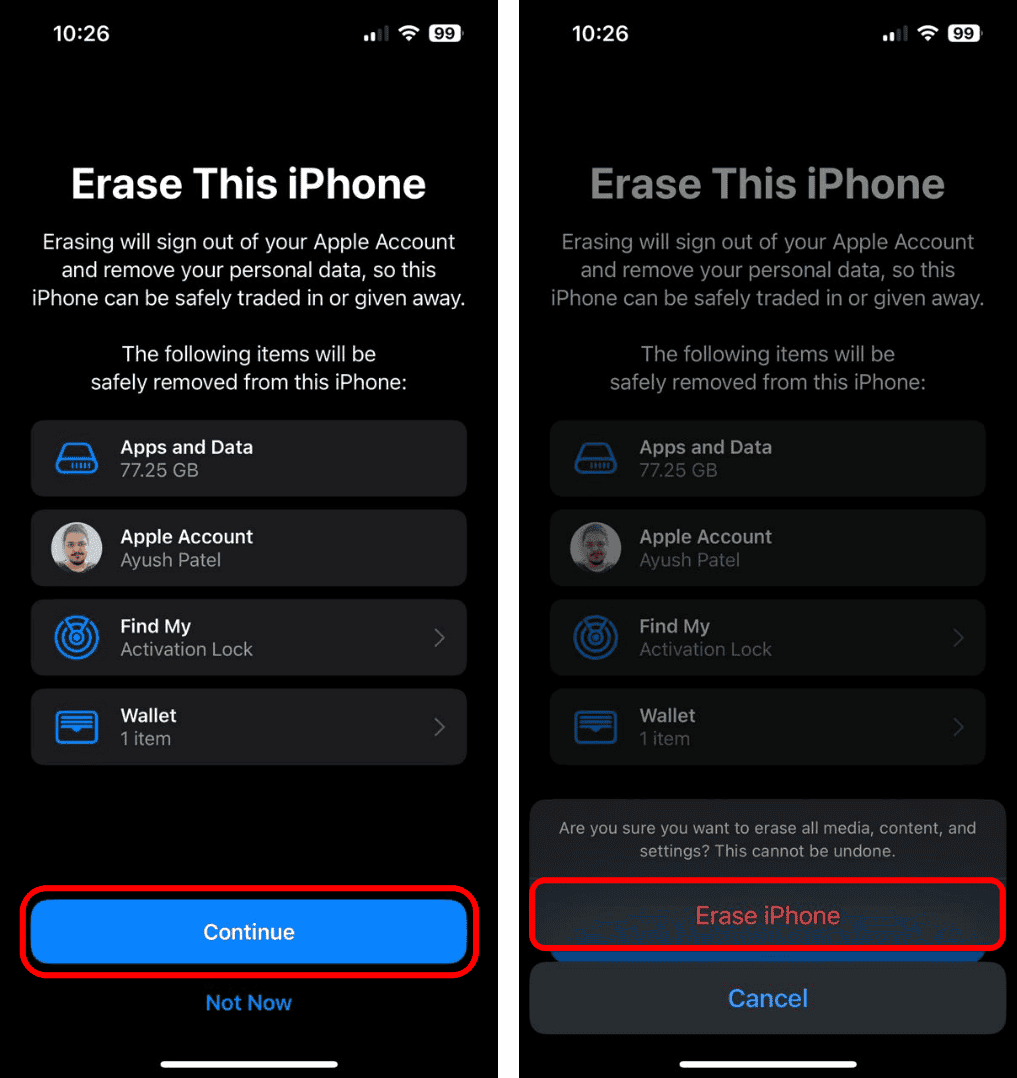
- Then, from the resulting page, tap Erase all Content and Settings.
- Tap Continue, then tap Erase iPhone to start the factory reset process.

If none of the solutions have helped and you still need a way to schedule text messages on an iPhone, you should try using the Schedule a Text shortcut. This handy iOS shortcut lets you schedule messages for all contacts, even if they don’t use an iPhone. Additionally, it works with other messaging apps like WhatsApp.