
Dictation on iPhone is an underrated feature that lets you convert speech into text for hands-free typing. It can be beneficial if you’re a professional who needs to respond quickly to emails and messages, a student taking notes on the go, or someone who finds typing on a touchscreen inefficient. However, if you’re facing issues using dictation on your iPhone running iOS 18/18.3, try these solutions to get it working again.
8 Ways to Fix Dictation Not Working on iOS 18/18.3?
Common reasons behind dictation not working include bugs and glitches in iOS, incompatible keyboard language, incorrect settings, and microphone issues. Regardless of what caused it, these fixes can help.
1. Force Restart iPhone to Fix Glitches
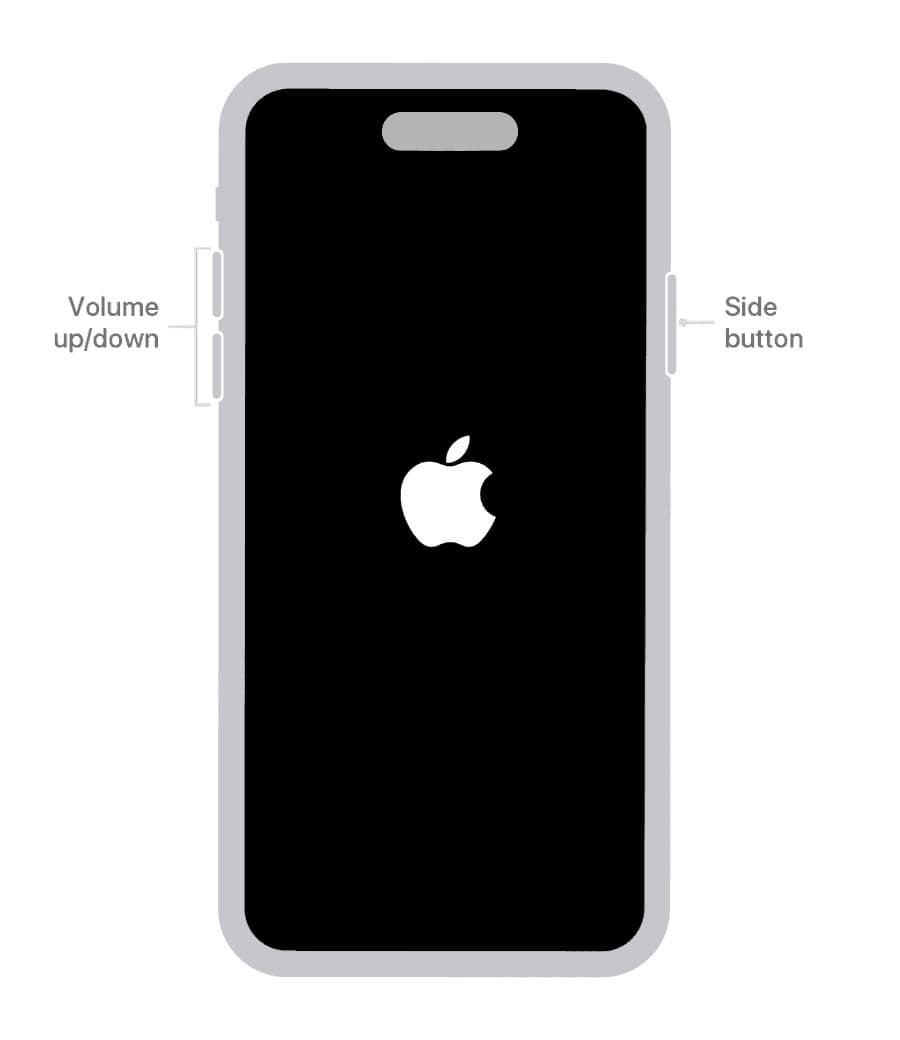
Problems related to dictation can often stem from temporary software glitches in iOS, and force restarting or hard rebooting your iPhone can be a very effective method to resolve them. This process will basically force your iPhone to kill all background services and restart the operating system to give it a fresh start.
- Press and release the Volume Up button.
- Press and release the Volume Down Button.
- Then, press and keep holding the Side Button.
- Release the Side button once your iPhone boots.

2. Check if Your Language is Supported
Apple explicitly states that dictation may not be available in all languages. If dictation is not working on your iPhone, it may be because your current keyboard language is not supported. I would recommend checking out Apple’s Feature Availability website to check if dictation is supported in your language.
If your keyboard language isn’t supported, you might want to add another keyboard language, such as English (US) or English (UK), to your device. If you need help to do this, follow the steps detailed below:
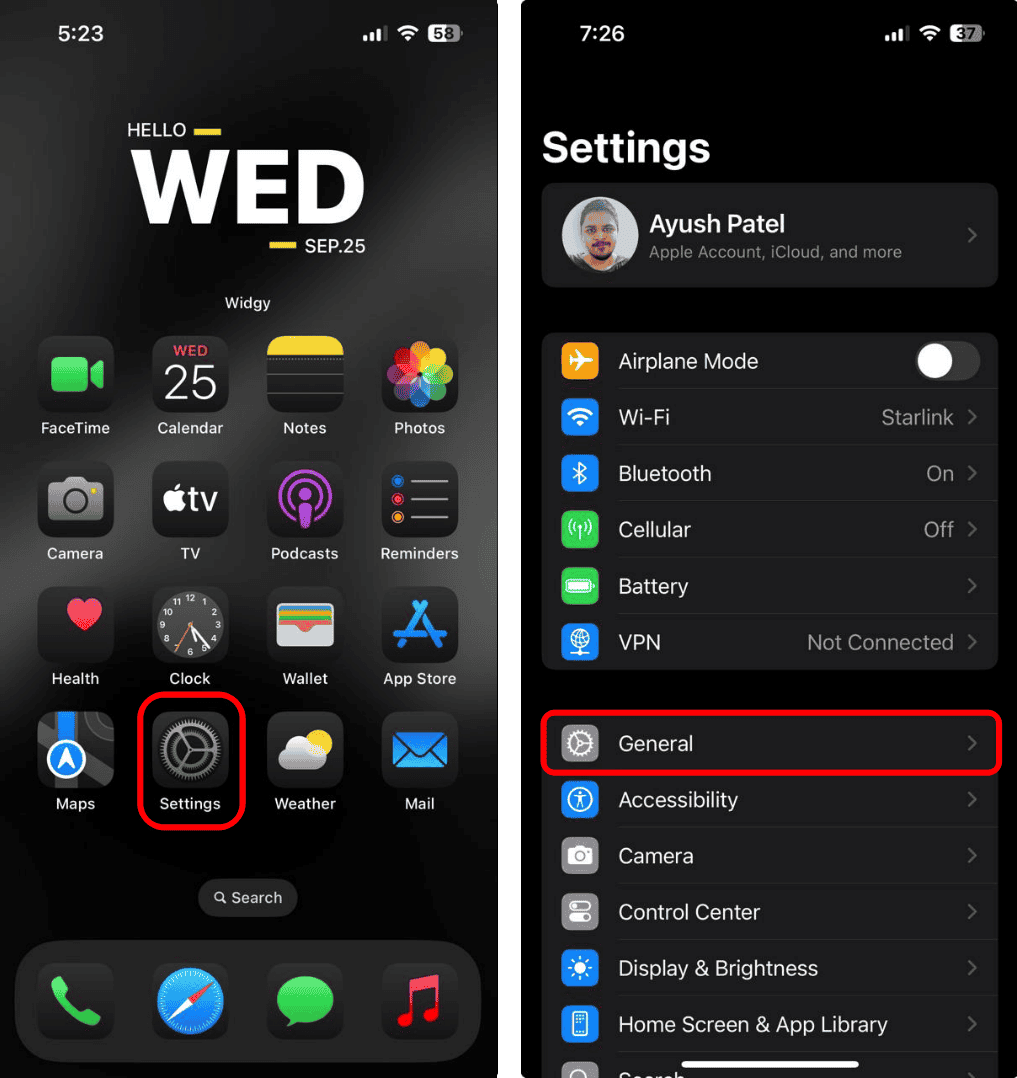
- Open the Settings app on your iPhone and tap General.

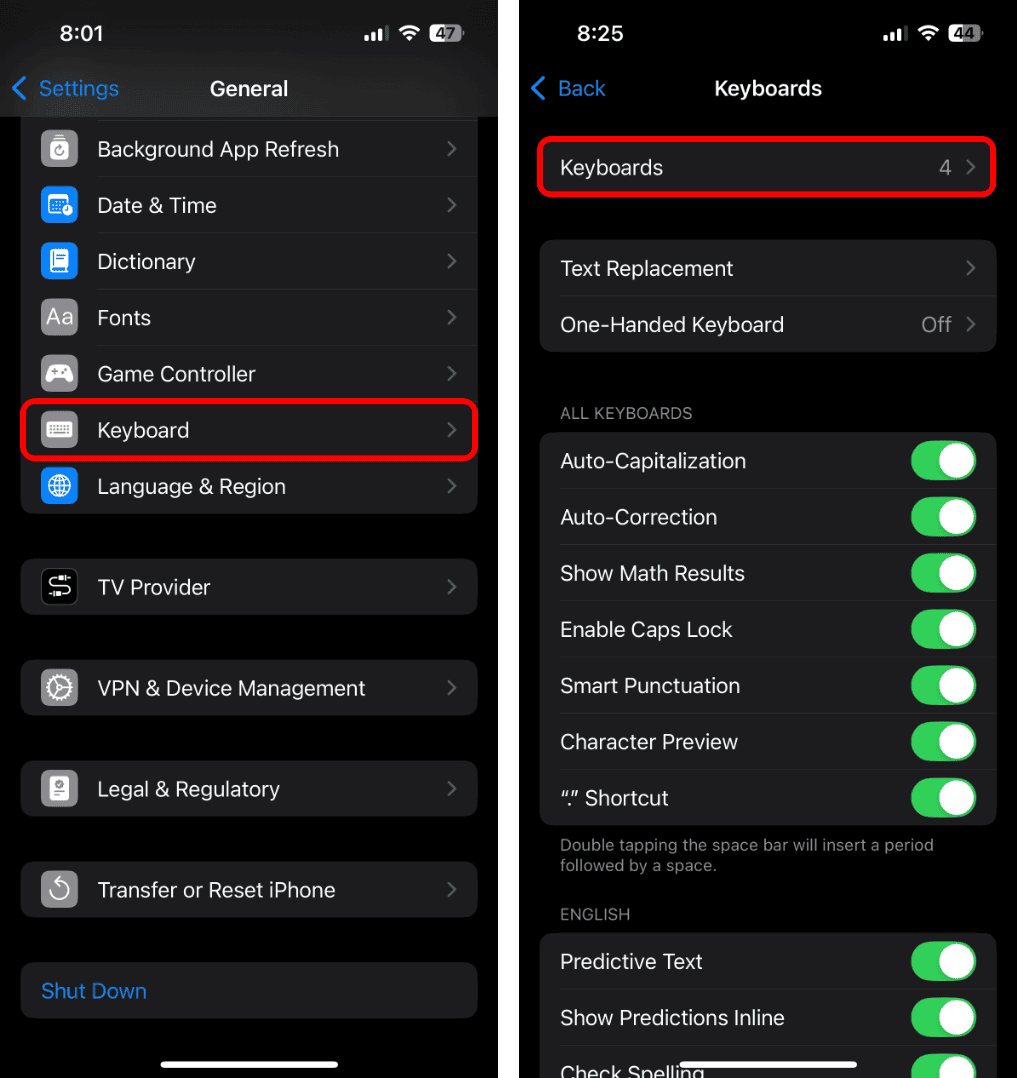
- Then, navigate to Keyboard and tap on Keyboards.
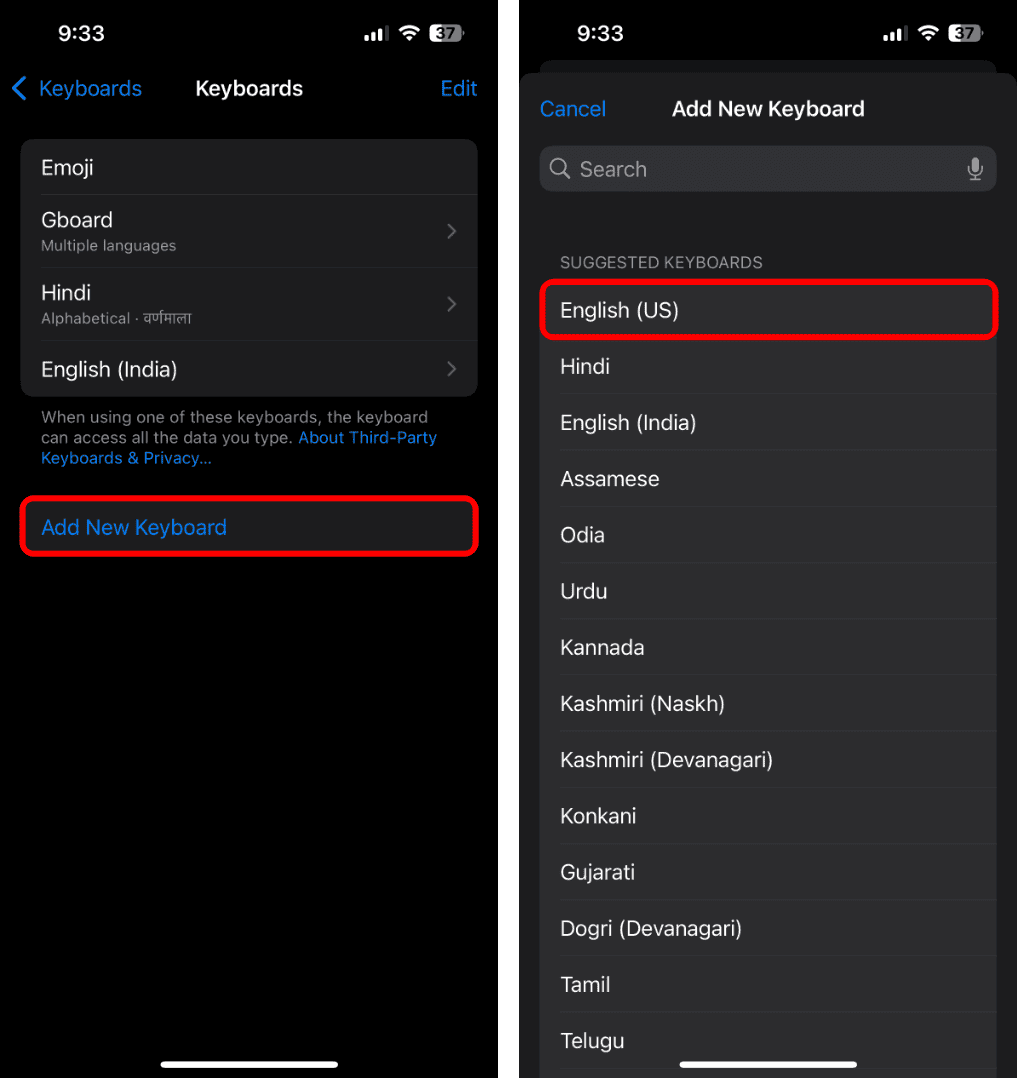
- Now, tap the option that says Add New Keyboard.
- Select a supported keyboard such as English (US).
3. Enable Dictation in Keyboard Settings
Even if your keyboard language supports dictation, the feature won’t work if you’ve mistakenly turned it off in the keyboard settings on your iPhone. To make sure this isn’t the case, follow these steps:
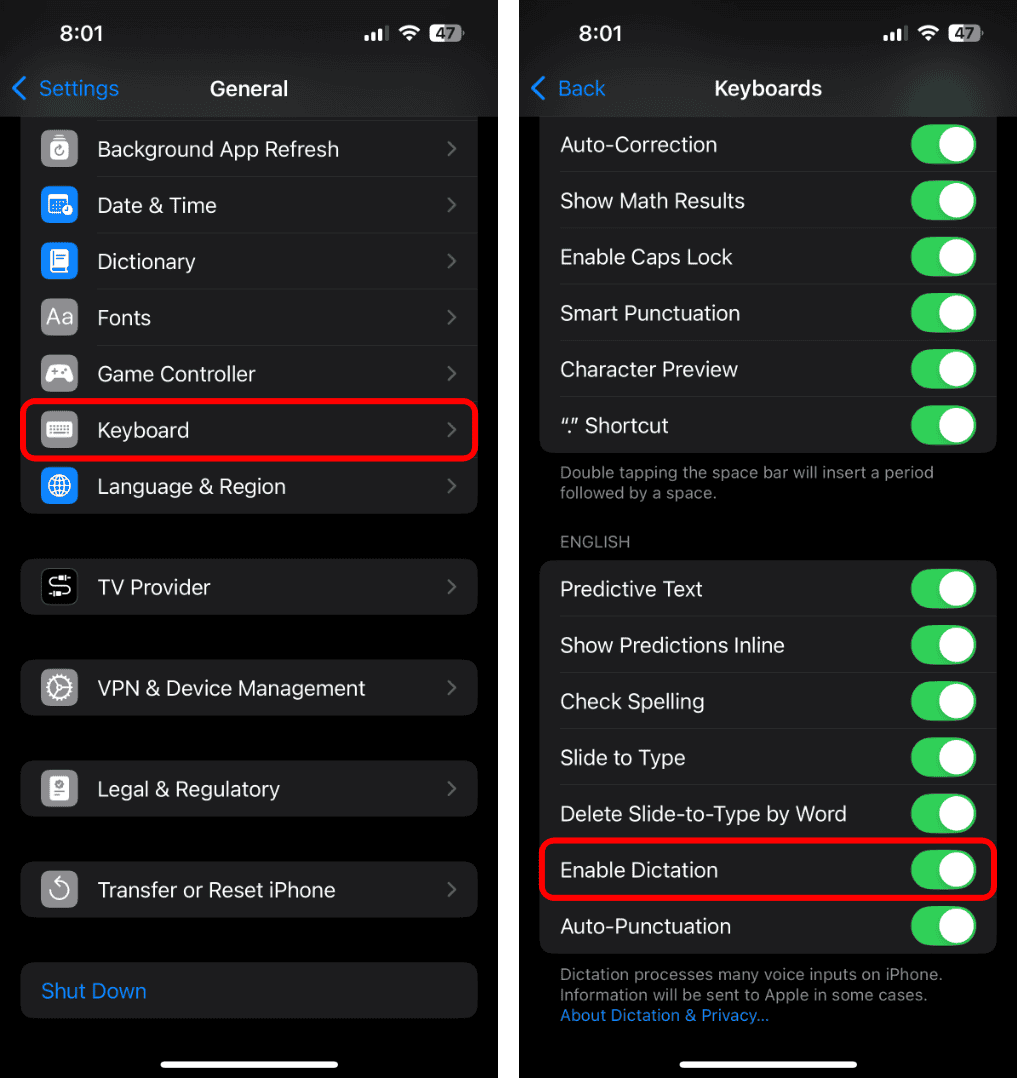
- Open the Settings app and navigate to General.
- Scroll down and tap the option for Keyboard.
- Turn on the toggle next to Enable Dictation.
4. Check for Microphone-related Issues
If you still can’t use Dictation on your iPhone, there could be a problem with your device’s microphone preventing the feature from picking up your voice. To make sure this isn’t the case on your iPhone, you should try recording a voice note and listening to it to check if you can hear your voice.
If you can’t hear anything, your iPhone’s microphone is probably blocked. You need to clean it using a Q-tip and a few drops of diluted isopropyl (rubbing) alcohol. But if cleaning the microphone also doesn’t work, you should take a look at our troubleshooting guide to fix the iPhone microphone not working.
5. Delete Your Siri & Dictation History
Your iPhone creates a cache file that contains audio recordings and transcripts that help improve Siri and Dictation accuracy over time. However, if this cache file gets corrupted, dictation could malfunction. You may delete your Siri & Dictation History to create a new cache file and fix such issues.
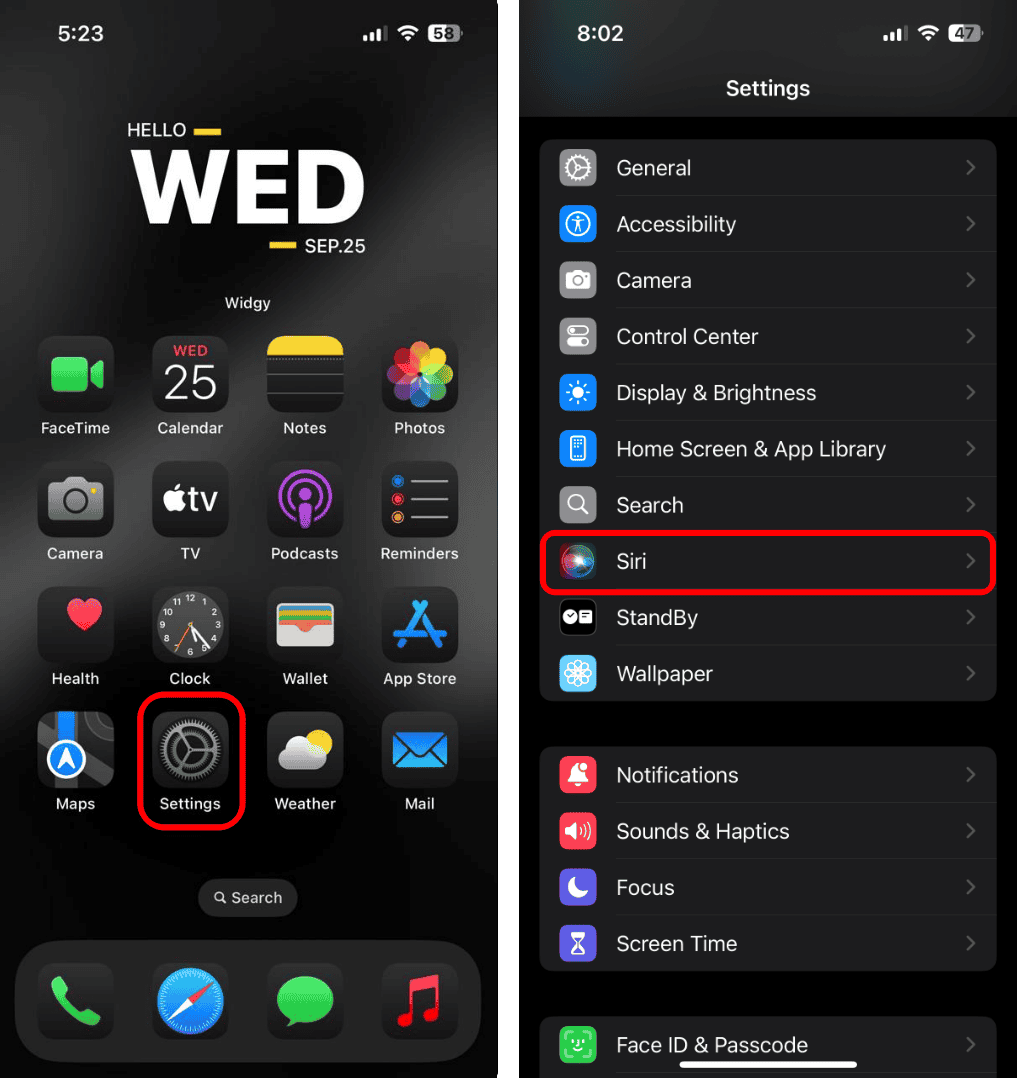
- Open the Settings app and tap Siri (Apple Intelligence & Siri).
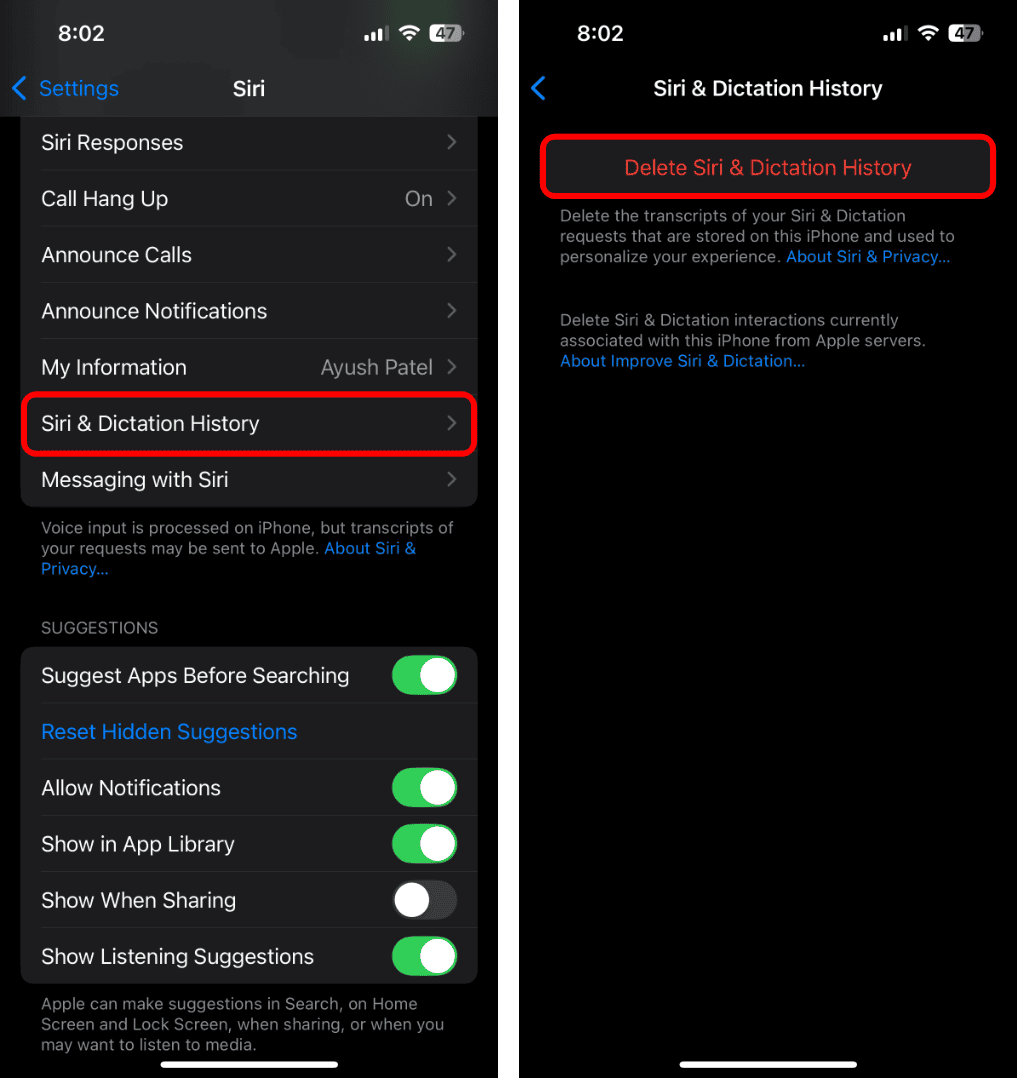
- Then, tap the option that says Siri & Dictation History.
- Hit Delete Siri & Dictation History to clear the cache.
6. Check Your Screen Time Settings
In some cases, dictation may stop functioning on your iPhone if you’ve mistakenly disabled the feature with Screen Time restrictions. To ensure that this isn’t the case with you, follow the steps given below:
- Launch the Settings app on your iPhone and navigate to Screen Time.
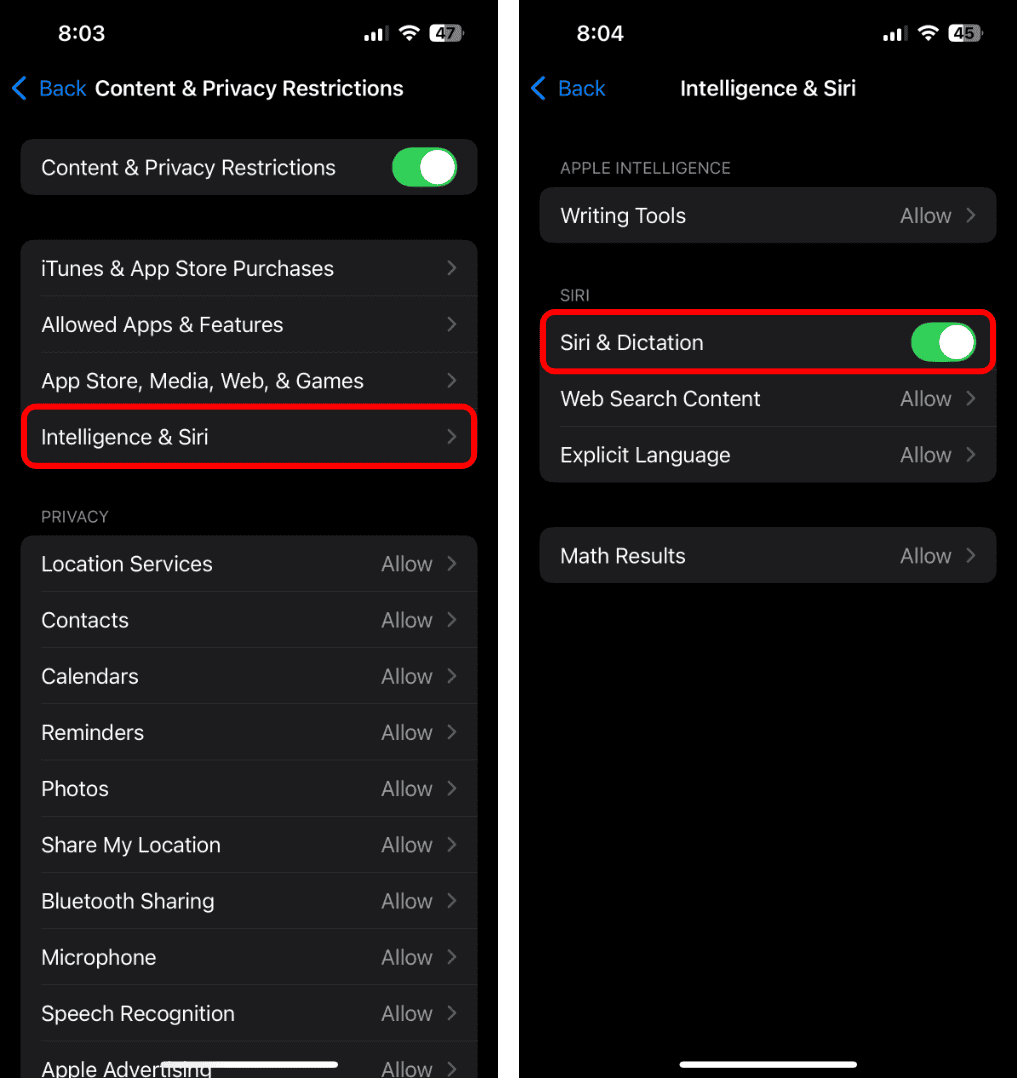
- Scroll down and tap the option for Content & Privacy Restrictions.
- Enter the six-digit Screen Time Passcode if you’ve created one.
- Now, tap Intelligence & Siri. Then, toggle on Siri & Dictation.

7. Install the Latest Version of iOS
Underlying bugs in iOS can sometimes lead to unexpected software issues that can affect your iPhone’s capabilities. Fortunately, installing the latest version of iOS can help you in such situations. Keeping your iPhone up to date ensures you have the relevant bug fixes to eliminate potential software issues.
- Locate and open the Settings app. Then, navigate to General.
- Tap Software Update and wait for the iPhone to check for updates.
- If a new iOS update is available, hit Update Now (or Install Now).
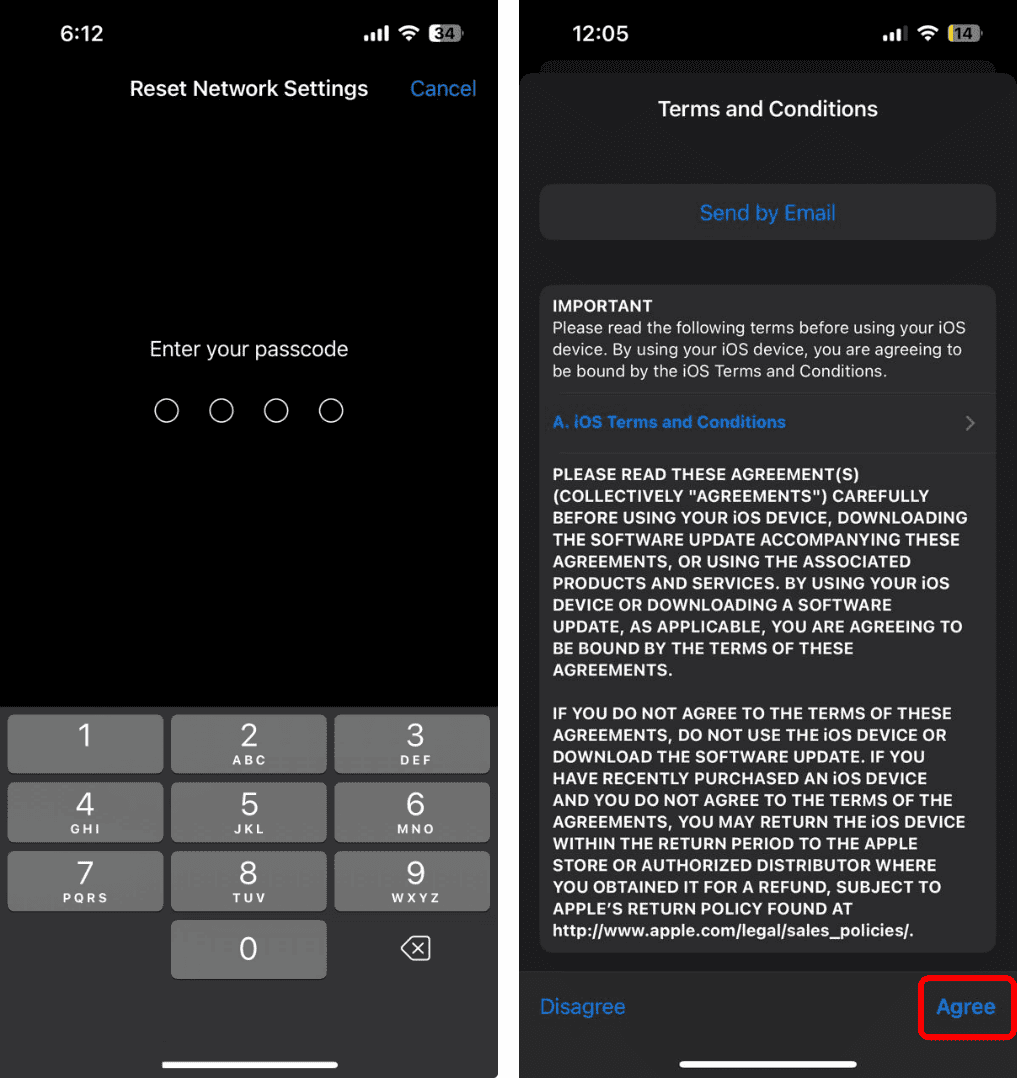
- Enter your iPhone’s passcode and Agree to the terms and conditions.

8. Reset All Settings on iPhone
If most solutions fail, you should try resetting all settings on your iPhone. This can help you fix the issue by reverting incorrect dictation settings to their default state without erasing your personal files and apps.
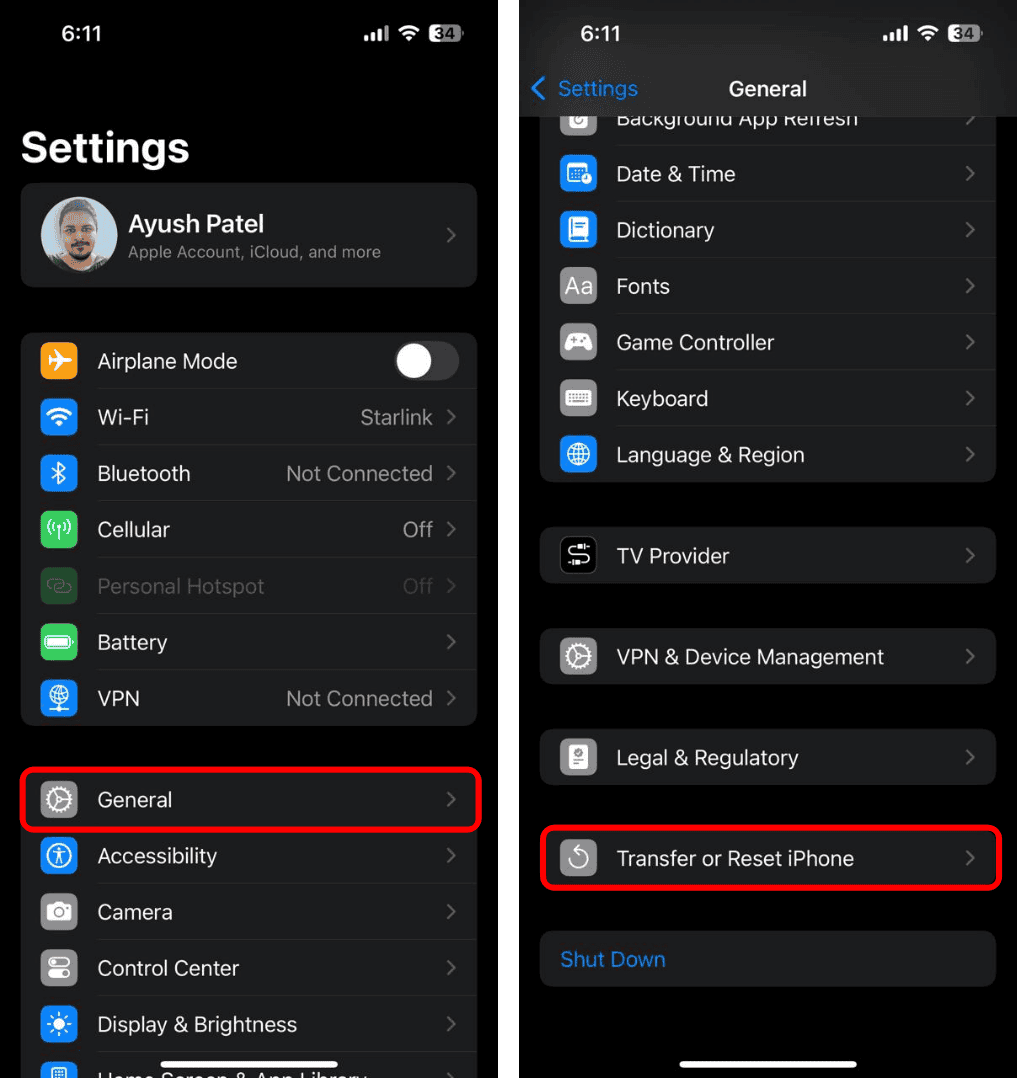
- Locate and open the Settings app on your iPhone. Then, go to General.
- Now, scroll down to the bottom and select Transfer or Reset iPhone.
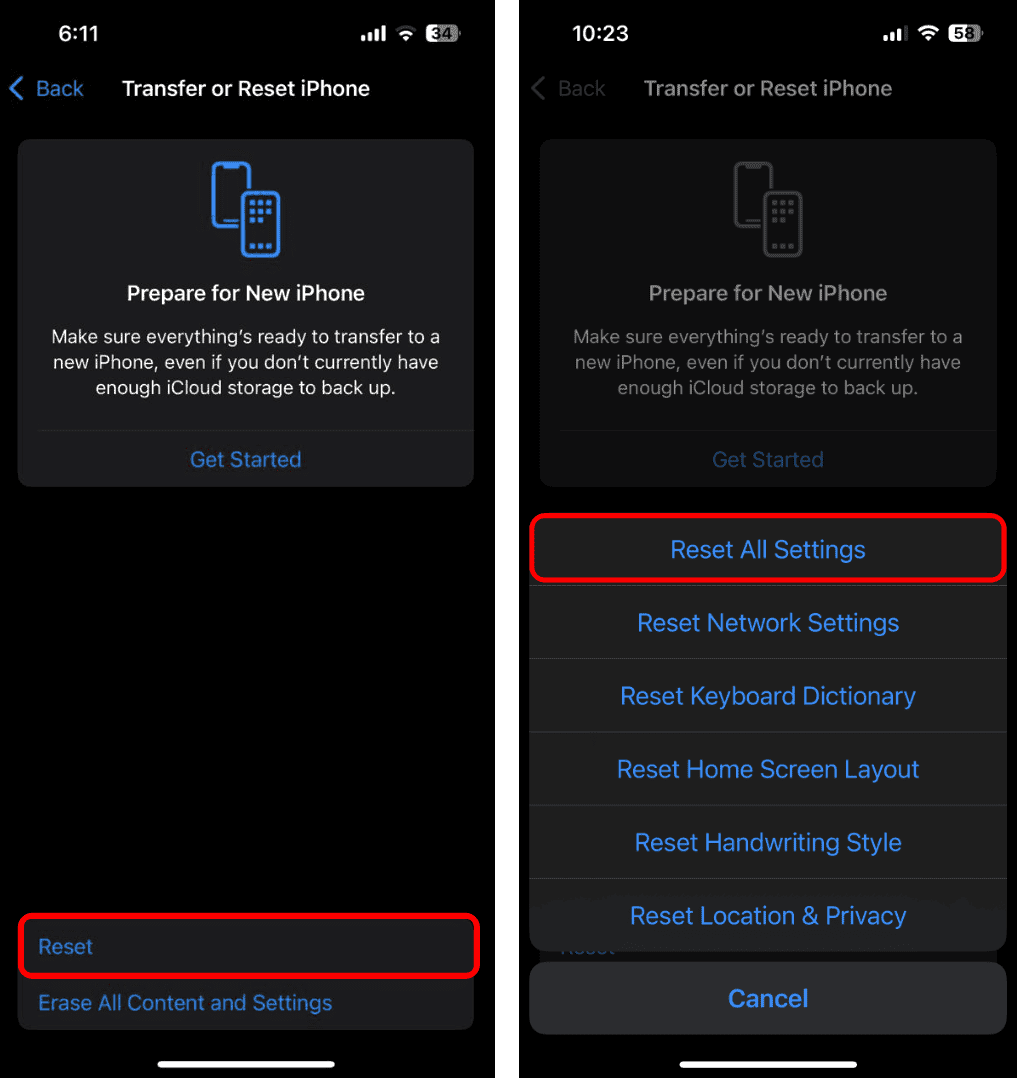
- From the resulting page, tap Reset and select Reset All Settings.
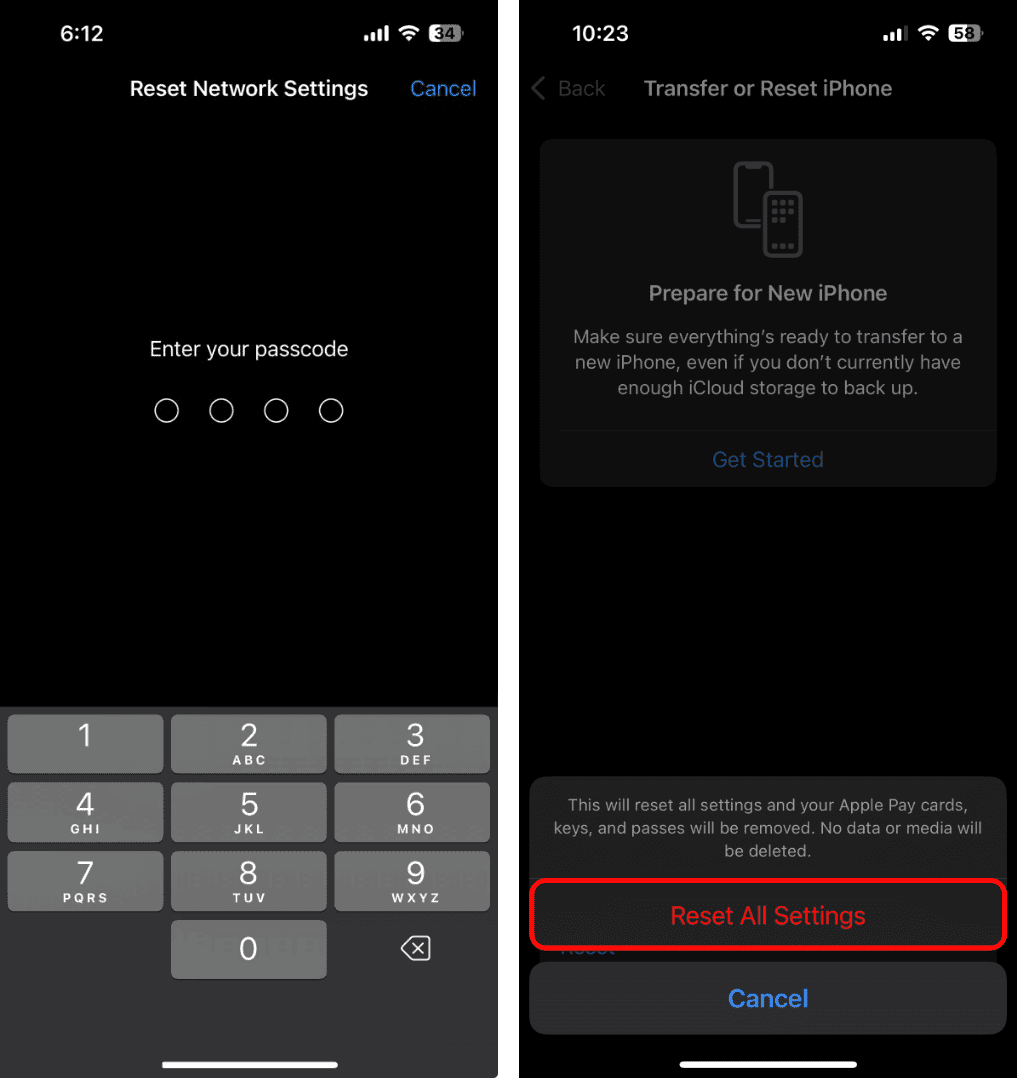
- Now, enter your lock screen password and hit Reset All Settings.
With the steps explained in this guide, you should be able to get dictation on your iPhone up and running in no time. However, if nothing helps, you can contact Apple Support over chat for additional assistance.