Time Machine, Apple’s built-in tool for backing up files on macOS, is quite reliable compared to most third-party solutions. However, it can sometimes encounter errors that make it seem otherwise. For instance, you might encounter an error where Time Machine backups on macOS Sequoia cannot be completed. This troubleshooting guide will take you through effective methods to resolve the issue.
Why Do Time Machine Backups Fail on macOS Sequoia?
Time Machine backups on macOS Sequoia fail and stop progressing when your Mac goes to sleep. Several users on Apple Discussions have also reported that this issue can occur due to corrupted local snapshots, the Firewall blocking the connection to a network drive, or a lack of read and write access for files.
What to do if Time Machine Backups on macOS Sequoia Cannot be Completed?
1. Stop Spotlight from Indexing Time Machine Backups
Time needed: 2 minutes
If Time Machine backups on macOS Sequoia fail to complete, you must prevent Spotlight from indexing the backups. Spotlight indexing can interfere with the backup process by locking your files and folders.
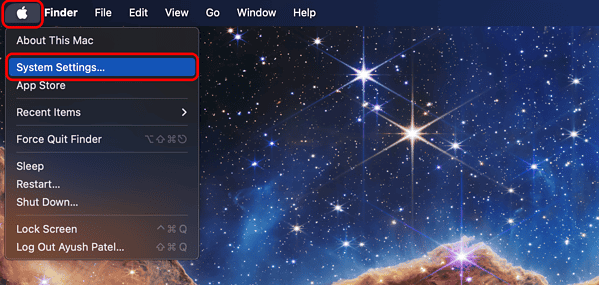
- Click the Apple menu in the menu bar and go to System Settings.
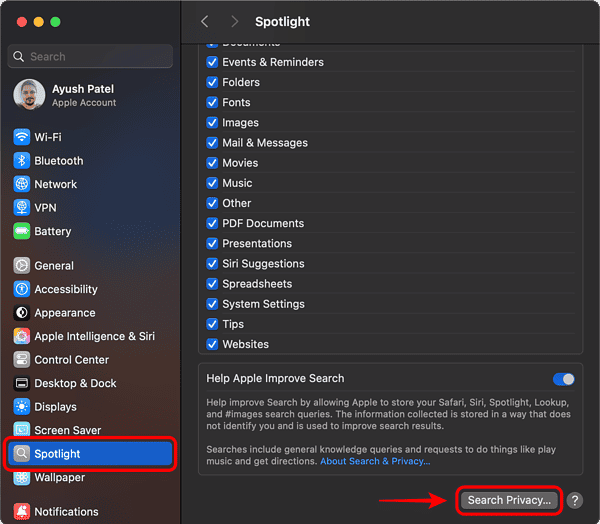
- Then, choose the option for Spotlight from the sidebar on your left.
- Scroll down and click Spotlight Privacy an the bottom-right corner.
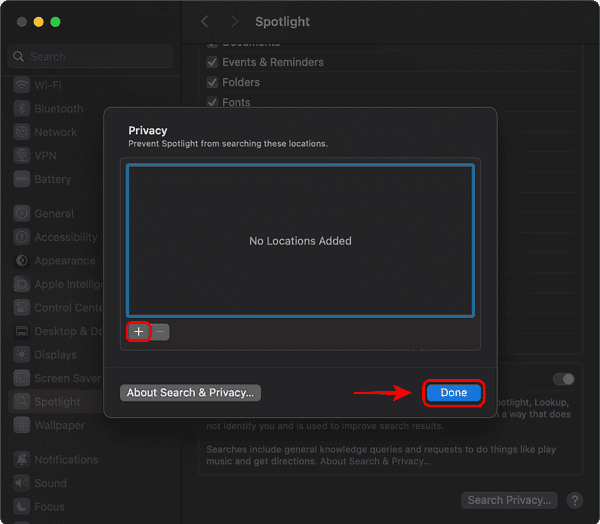
- Click the Plus icon and select the backup. Then, click Done.
2. Exclude Large Files from Time Machine Backups
Time Machine backups can stop midway if your drive is running out of storage. As a result, you should only back up the important files and try to exclude large files that can eat up space. Here’s how to do it:
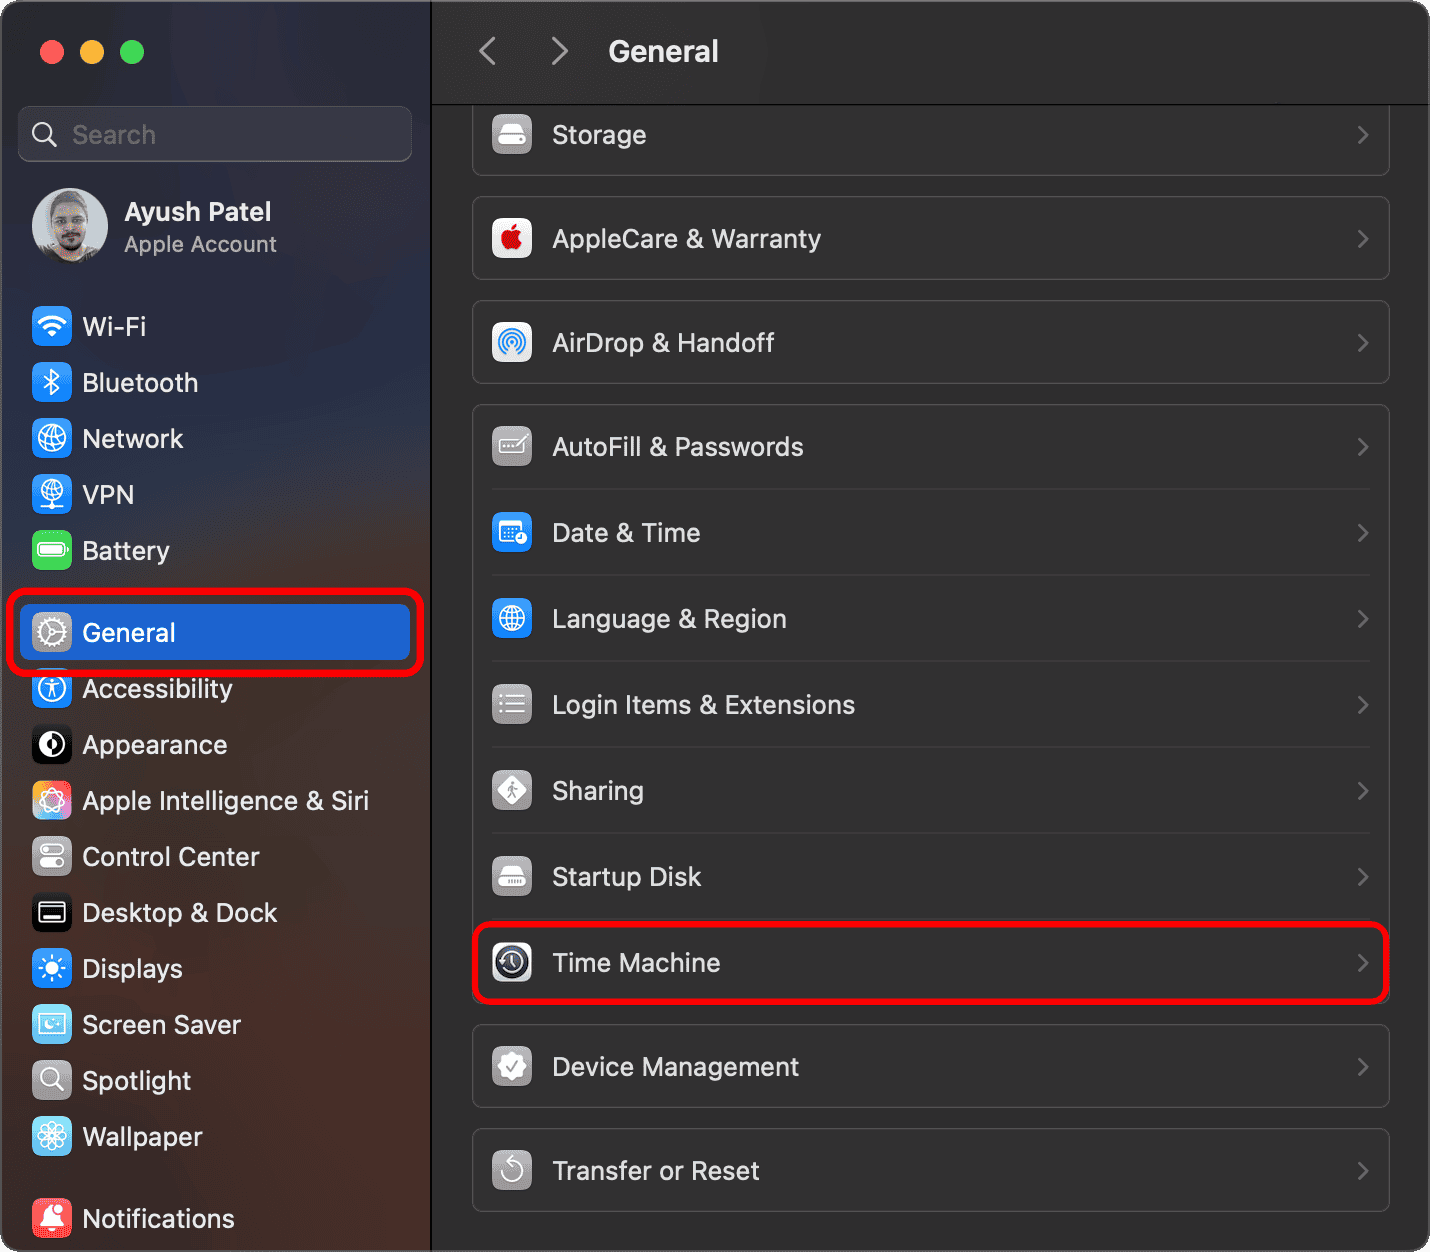
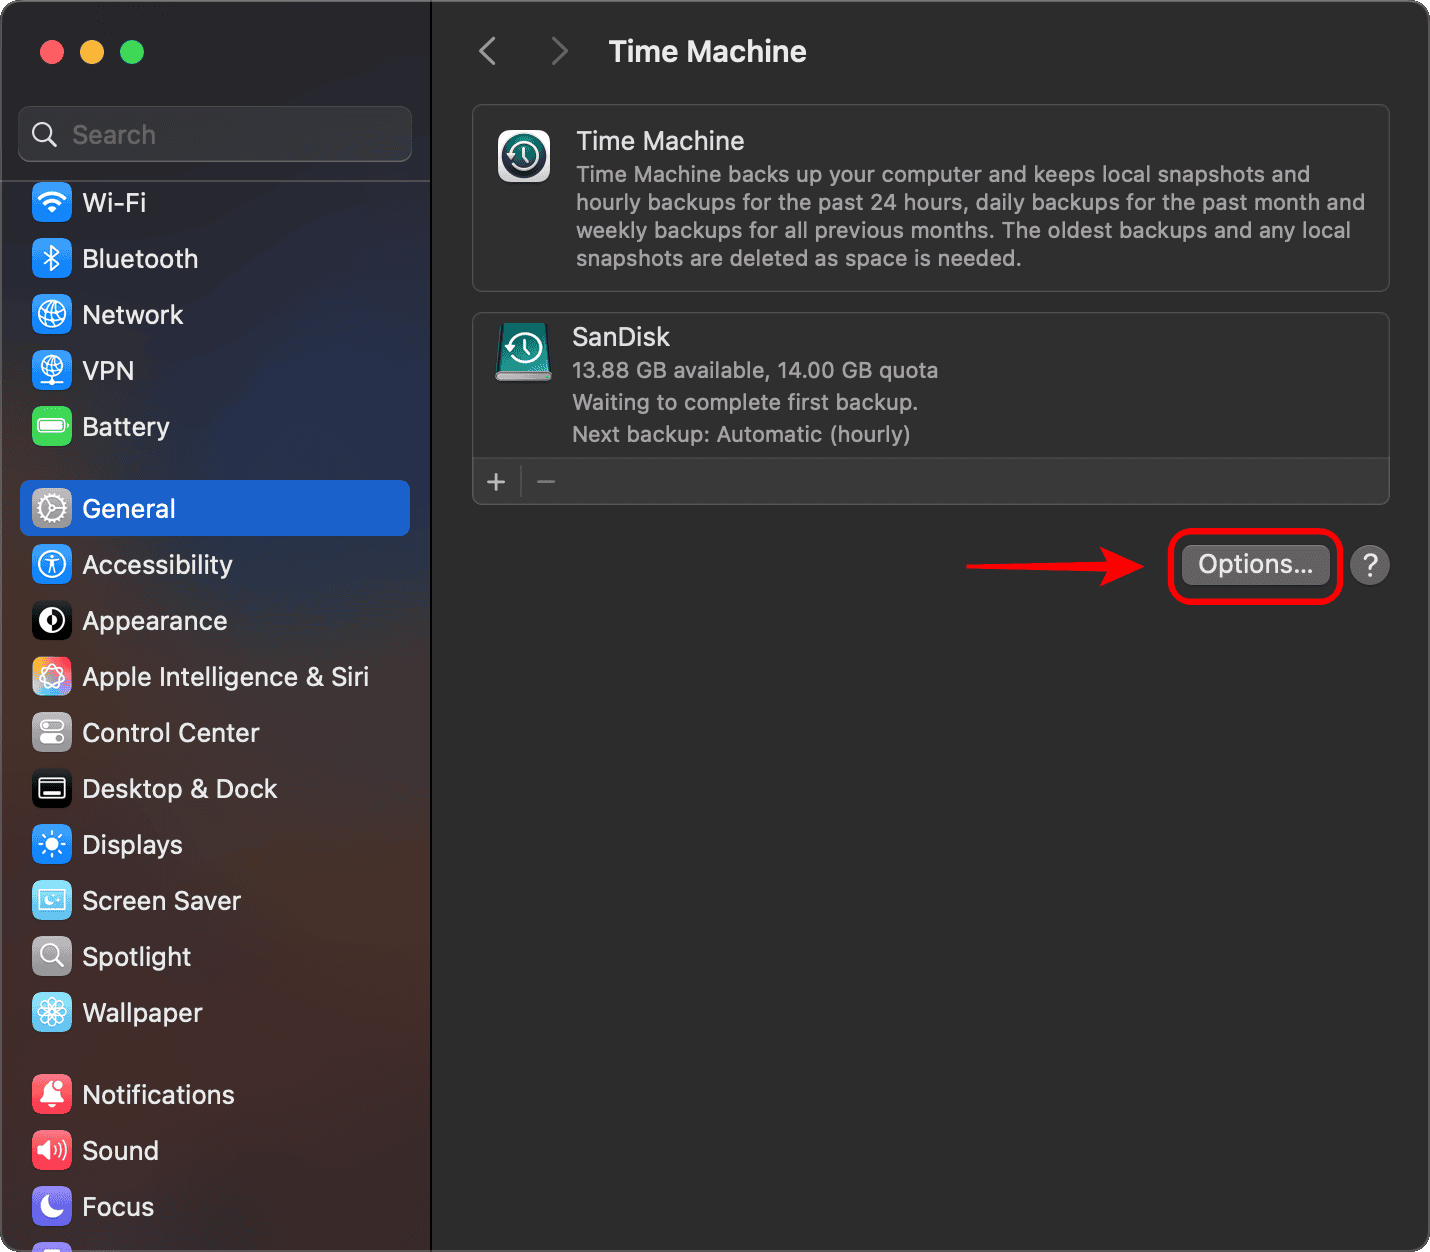
- Go to System Settings > General > Time Machine.
- Click the Options button located under the backup disk.
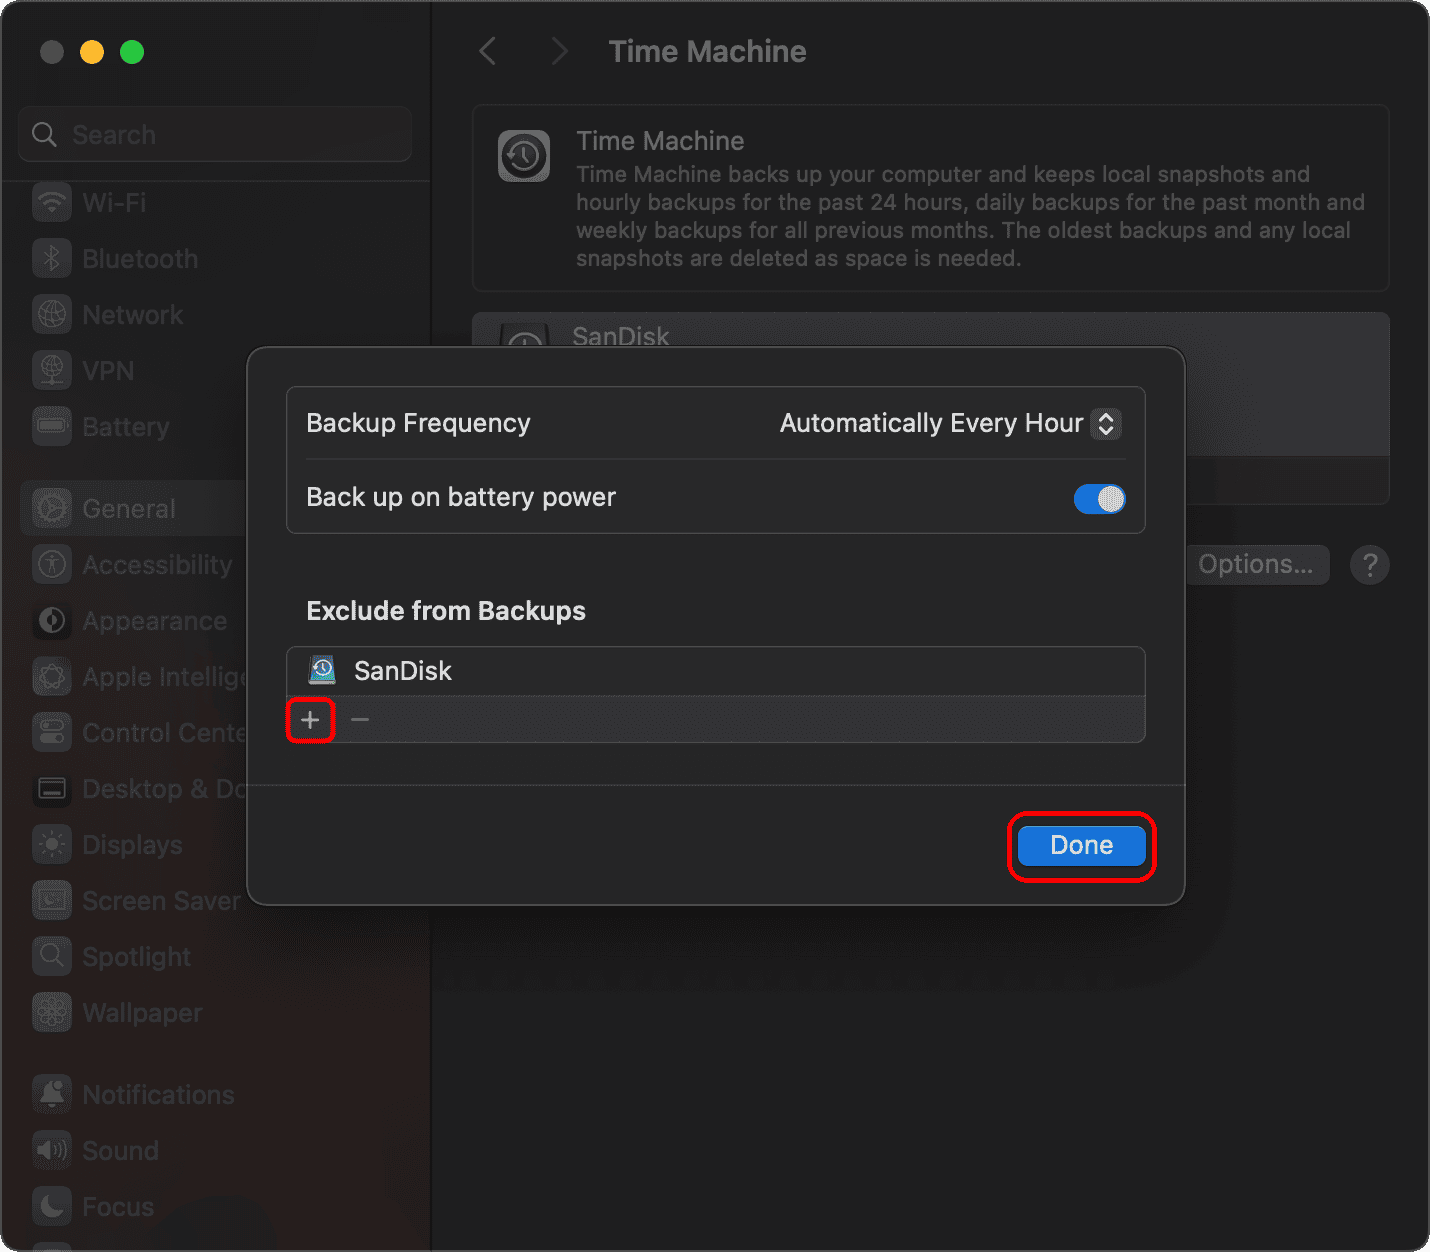
- Click the Plus (+) icon and pick the files to exclude, and then click Done.
3. Install the Most Recent macOS Update
The general consensus is that there’s a bug in macOS Sequoia that can cause Time Machine backups to fail. You may update your Mac to the latest macOS version to ensure you have the necessary bug fixes.
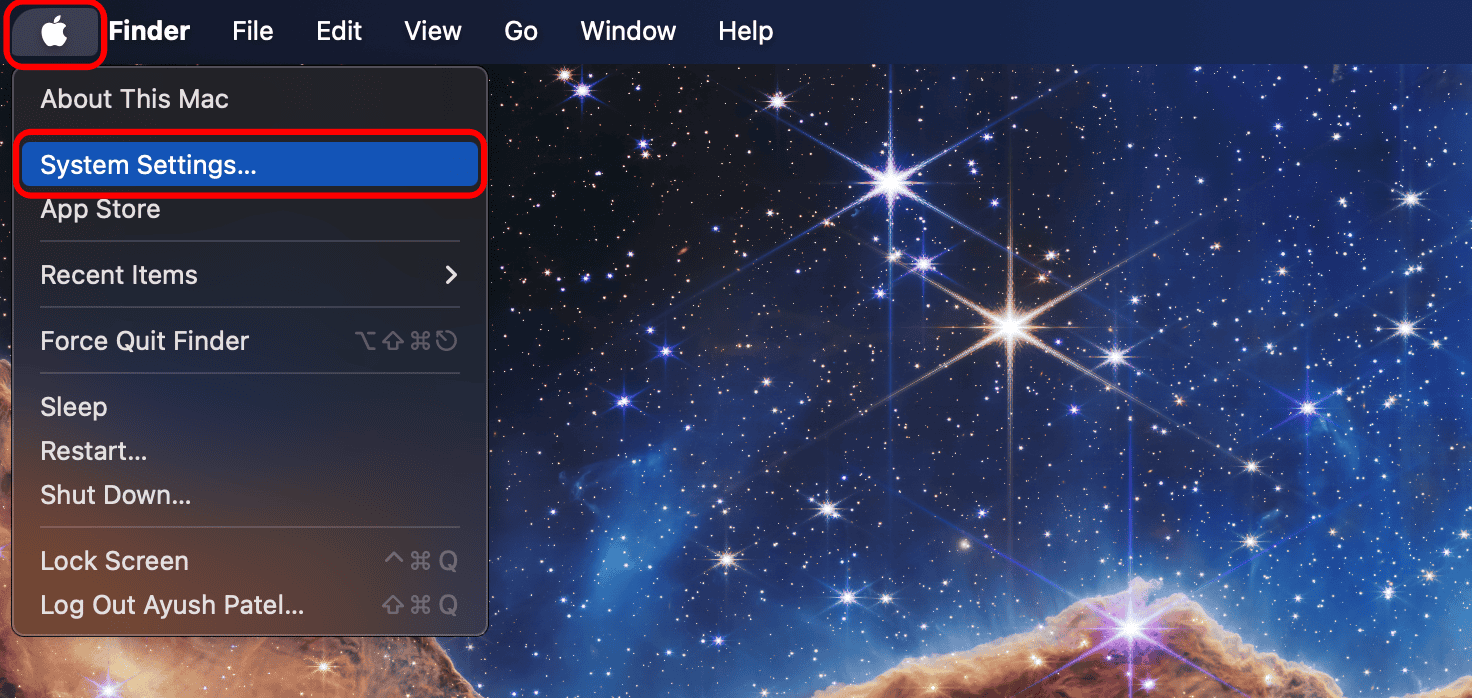
- Click the Apple menu in the menu bar and go to System Settings.
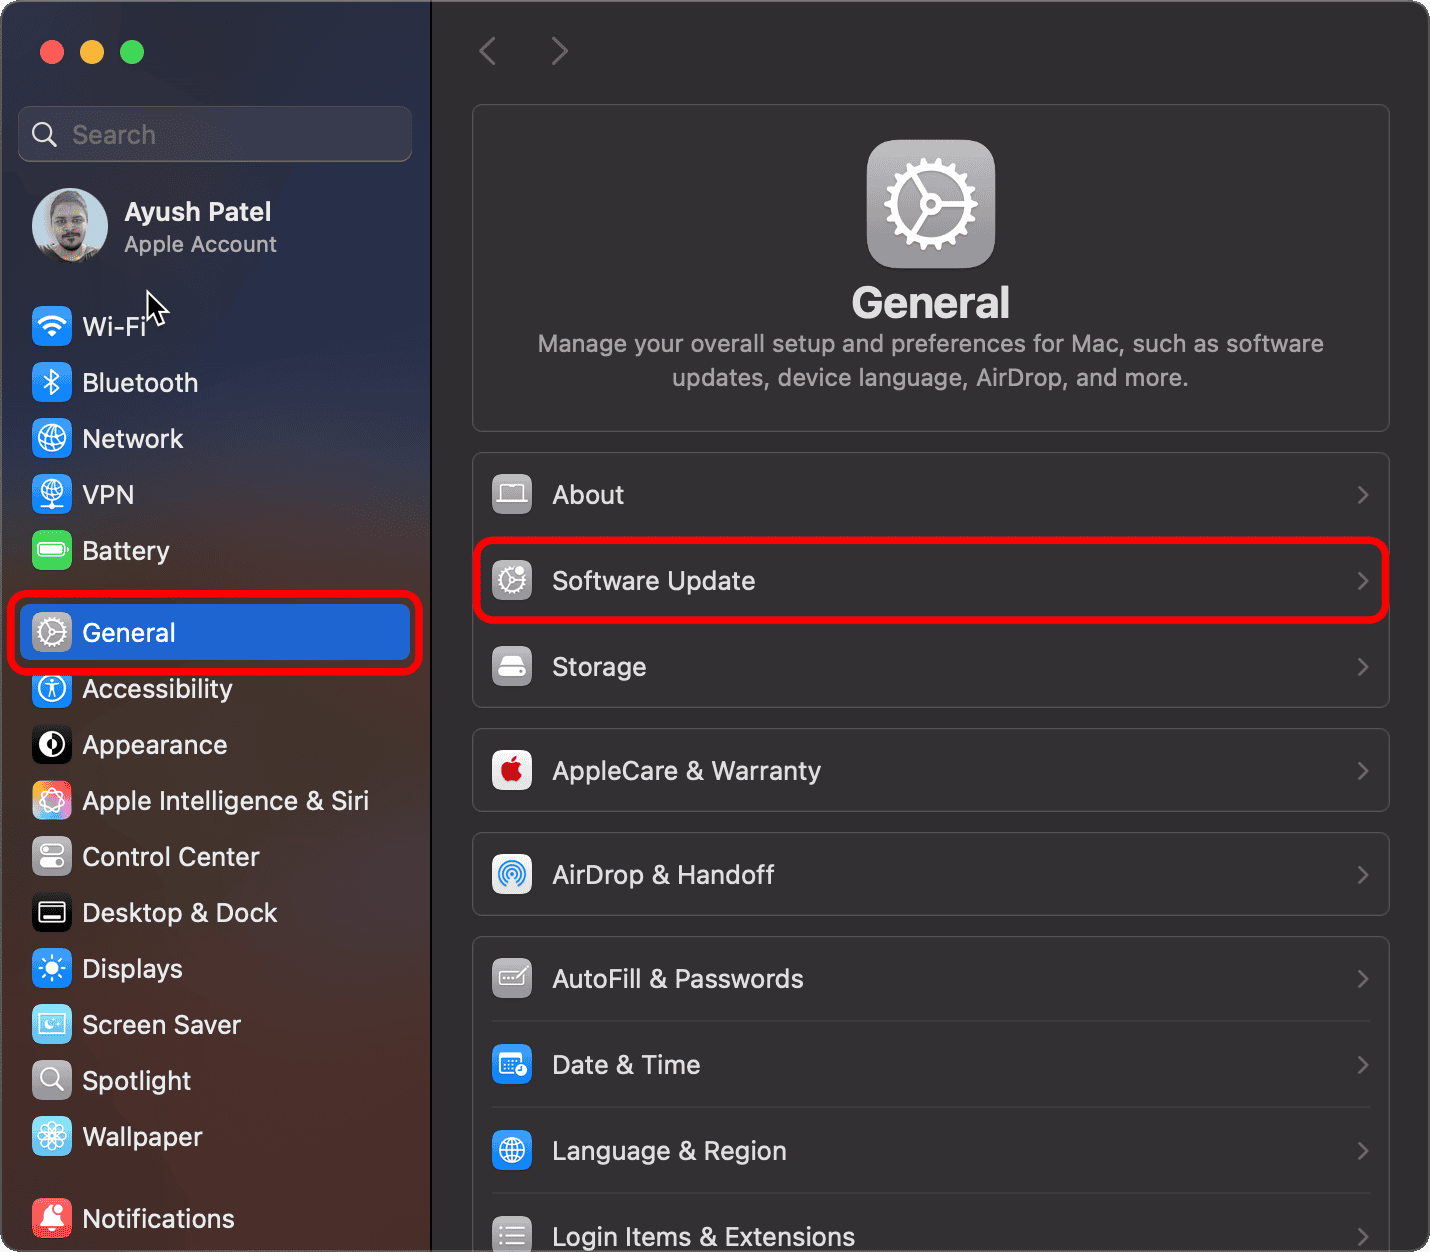
- Select General from the sidebar and click Software Update.
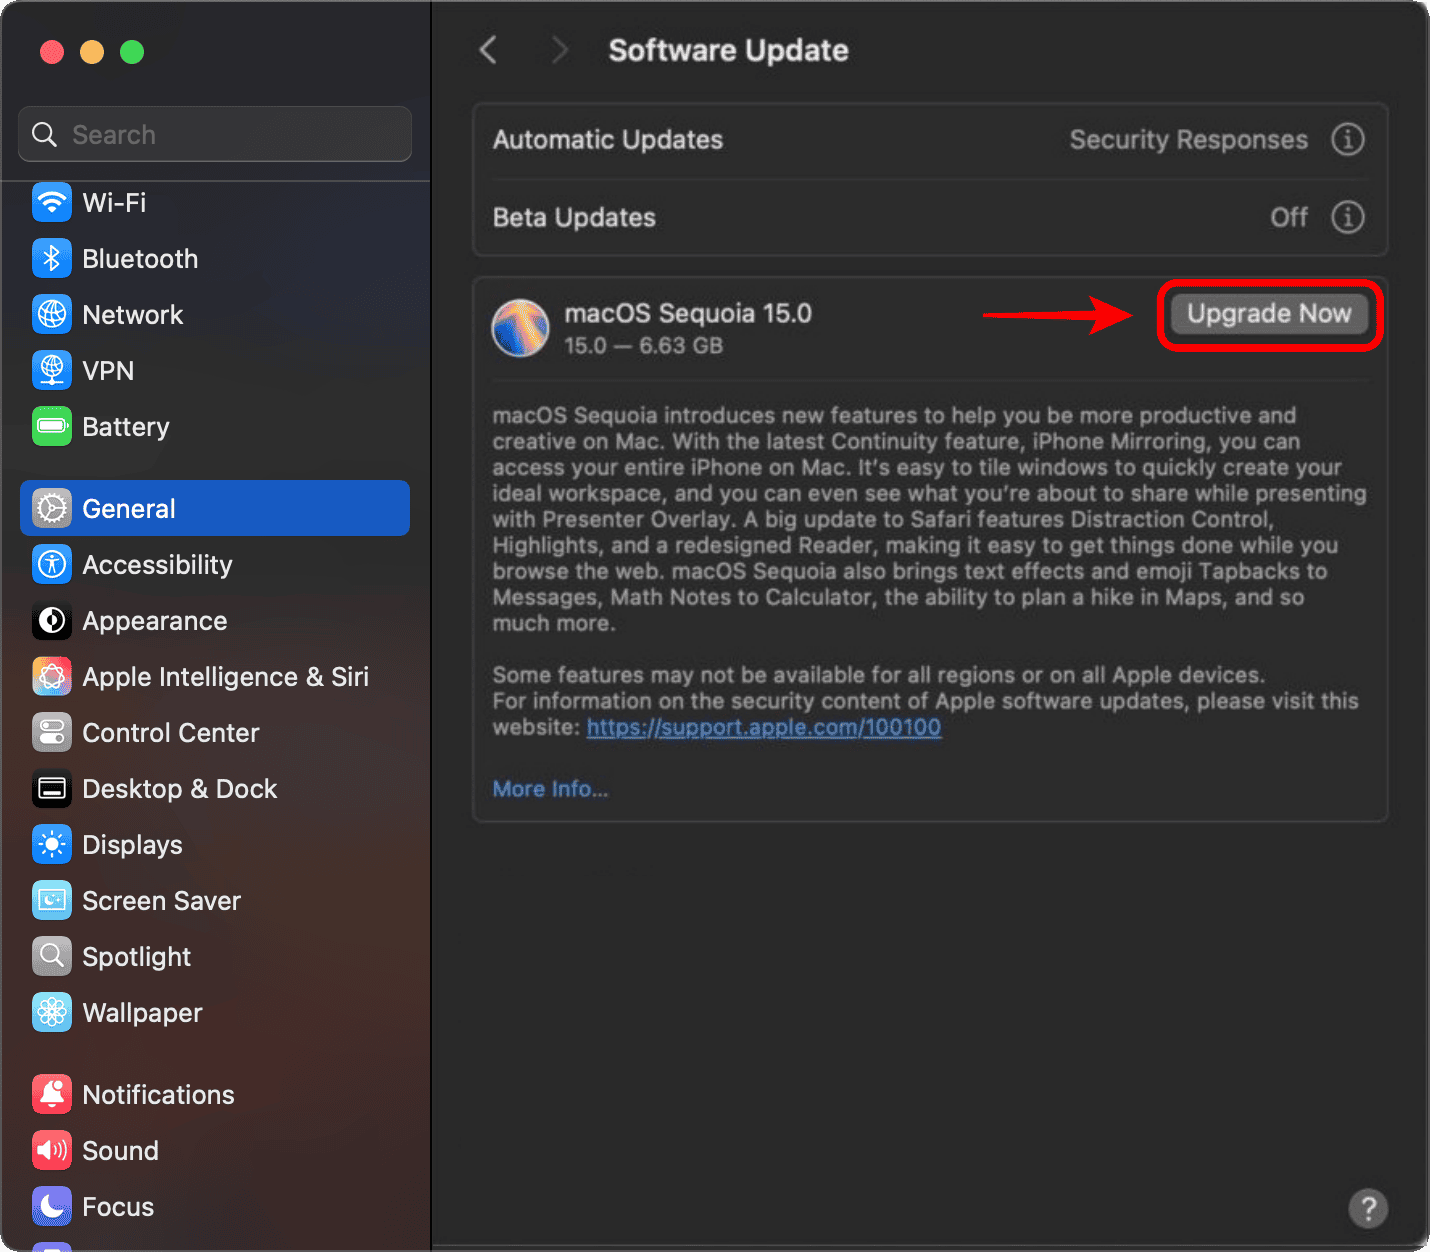
- If a new software update is available, hit Update Now.
4. Delete the Local Snapshots on Your Mac
In some cases, Time Machine Backups on macOS Sequoia cannot be completed if the local snapshots on your Mac are corrupted. You may delete the local snapshots stored on your Mac to resolve the problem.
- Press Shift + Command + U to access the Utilities folder. Then, open Terminal.
- Now, type
tmutil deletelocalsnapshotdates /and press Return. - Type your Mac’s password and press Return to delete all local snapshots.
5. Remove and Re-add the Time Machine Backup Destination
According to some users on Apple Discussions, re-adding the Time Machine backup destination can be a helpful solution. This process will clear any temporary glitches that could be interfering with the backups.
- Connect the Time Machine disk to your Mac and open System Settings.
- Then, navigate to General from the sidebar and select Time Machine.
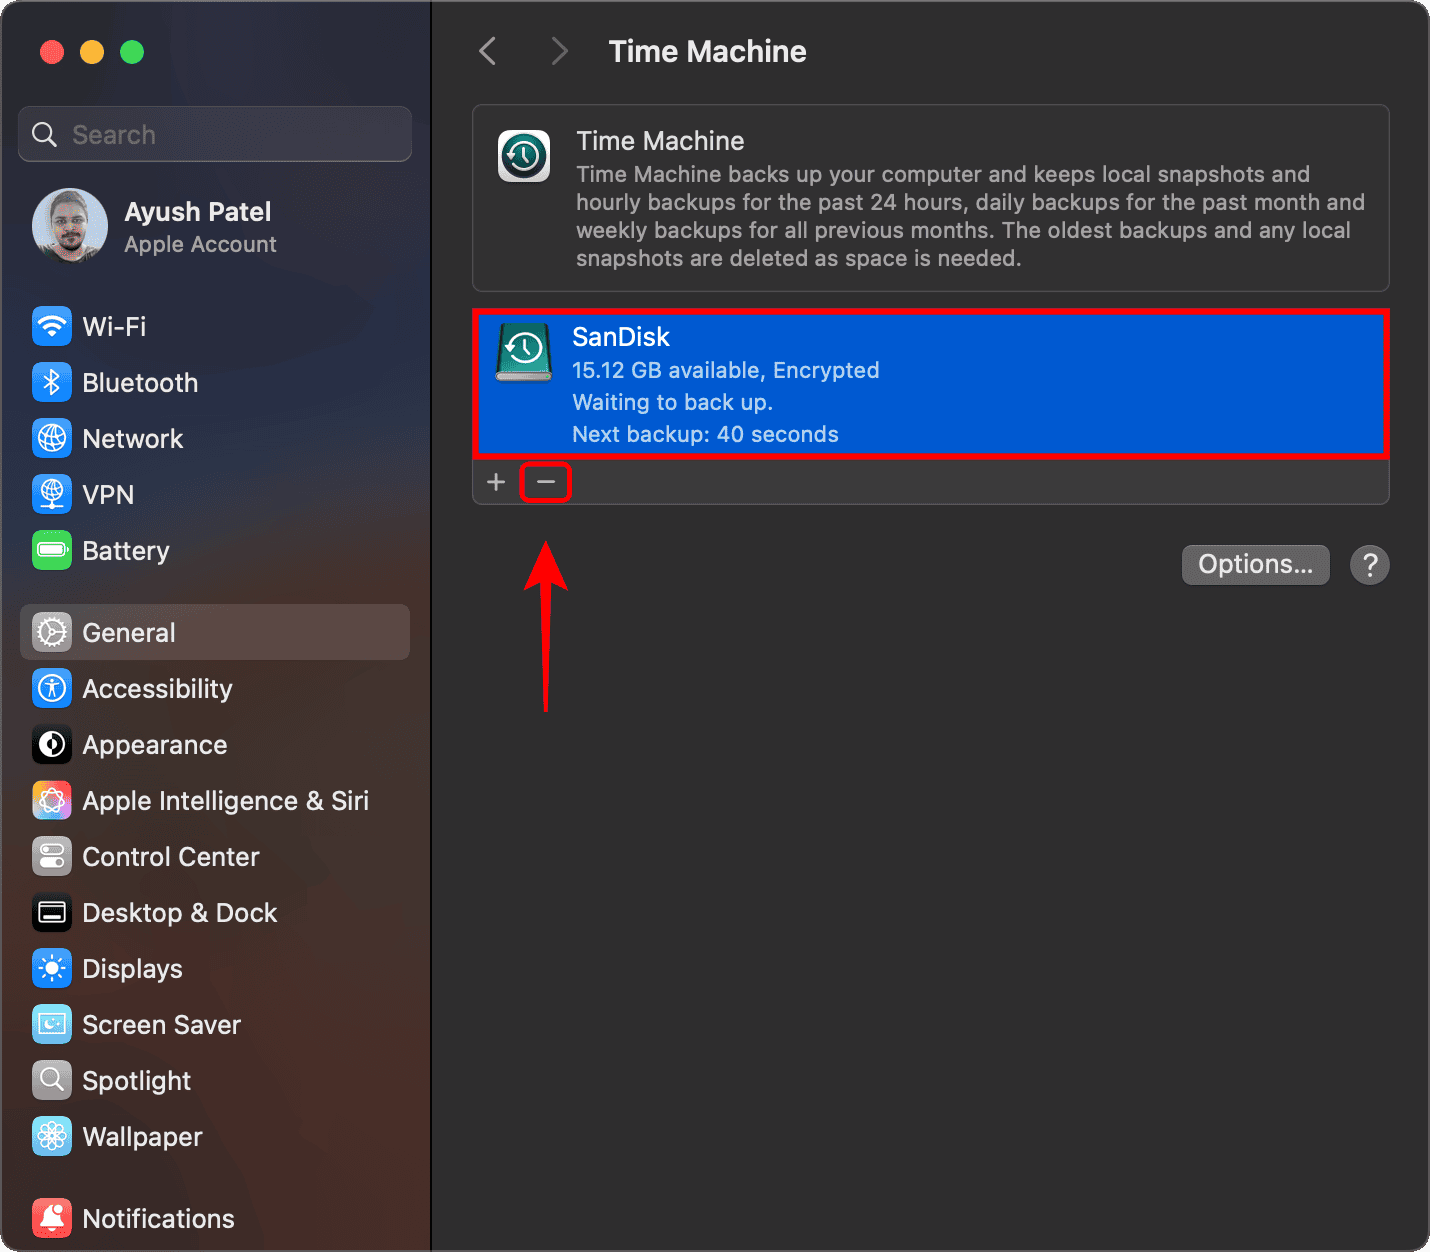
- Select the backup disk and click the minus (-) icon on the bottom left.
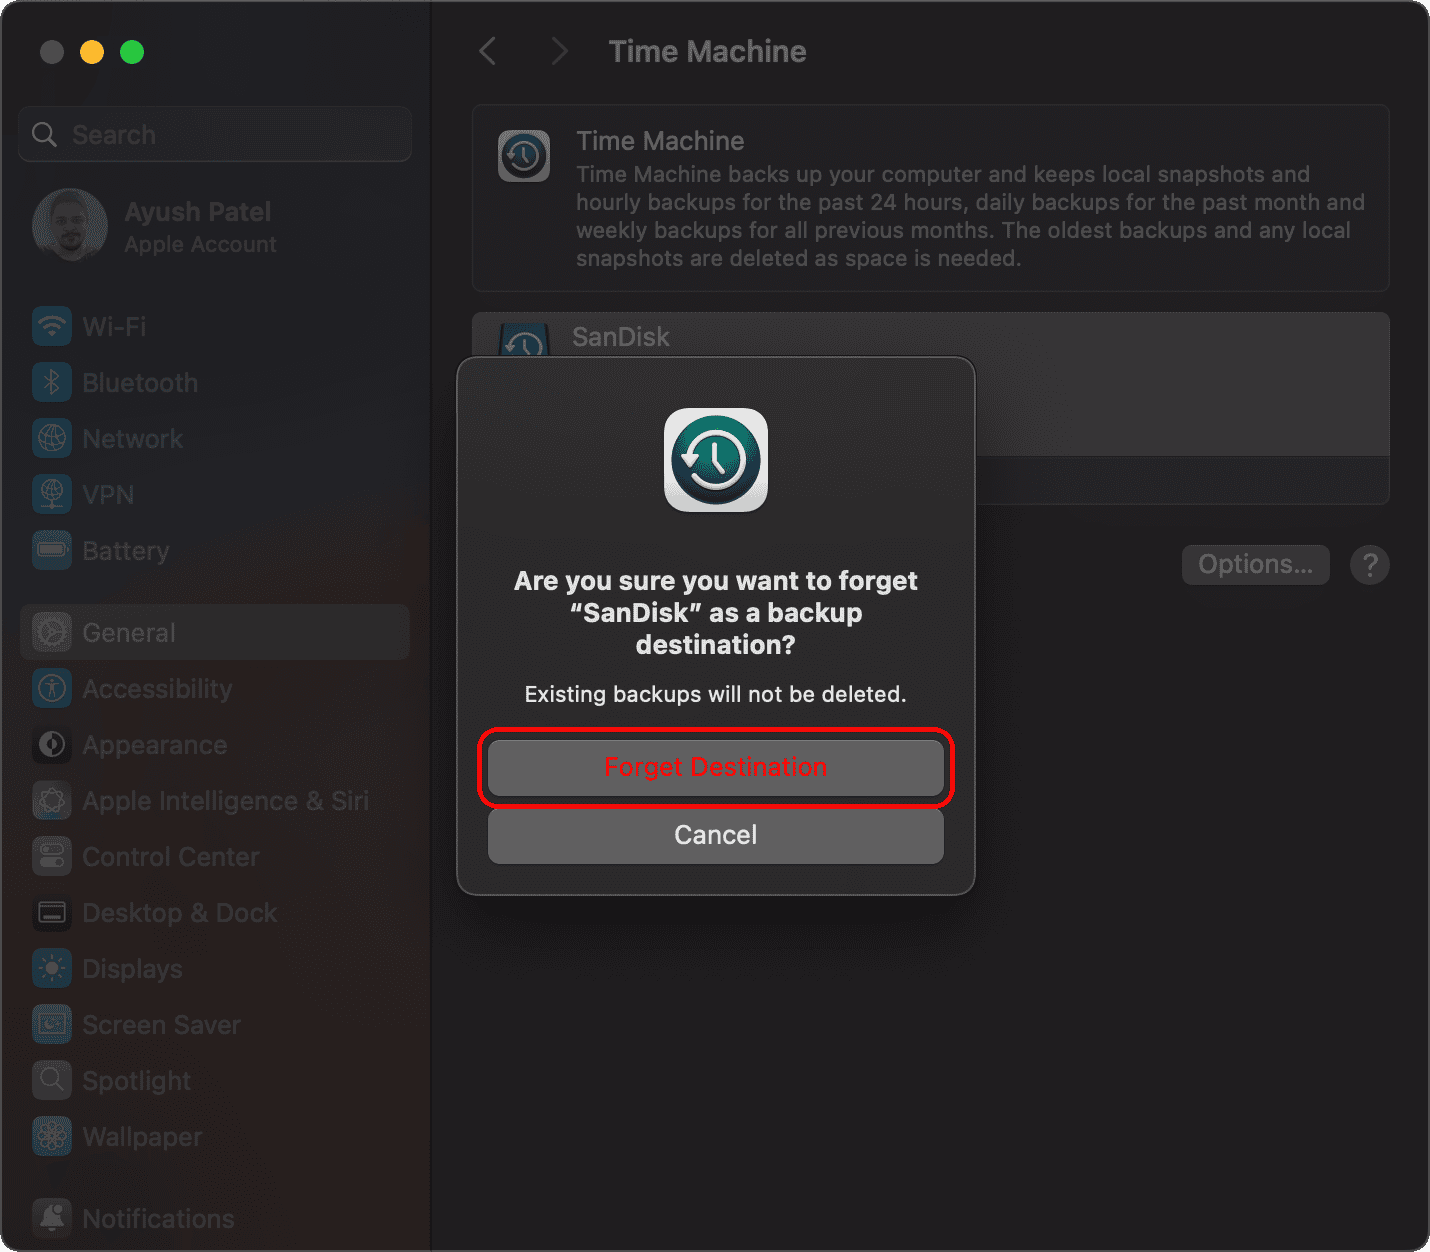
- When a confirmation dialog pops up, click Forget Destination.
- Hit Add Backup Disk and follow the on-screen prompts.
6. Change Your Mac’s Power Management Settings
Power management settings on macOS Sequoia can cause Time Machine backups to fail when your Mac goes to sleep. You can use a few handy Terminal commands to change this behavior and fix the problem.
- Press Shift + Command + U to access utilities. Then, launch Terminal.
- Type
sudo pmset -a hibernatemode 0and press Return. - Then, type
sudo pmset -a standby 0and hit Return. - Type
sudo pmset -a disksleep 1and hit Return.
 NOTE
NOTE
sudo pmset restoredefaults command. 7. Disable Firewall and Reset SMB Settings
If you’re facing issues when using Time Machine over a network disk, the Firewall may be blocking the connection between the disk and your Mac, or the SMB (Server Message Block) settings may be misconfigured. You can fix this by turning off the firewall and resetting the SMB settings on your Mac, as shown below:
- Go to Finder > Applications > Utilities and launch Terminal.
- Type the given command into the Terminal and hit Return to disable the Firewall.
sudo /usr/libexec/ApplicationFirewall/socketfilterfw --setglobalstate off - Now, type
sudo rm -f /etc/nsmb.confand hit Return to delete the SMB configuration file.
