NetBeans is a very useful Integrated Development Environment (IDE) that supports the development of many languages on the Mac. In the first article, I explained how to do the install. Here, in Part II, well show how to get started writing and learning HTML.

Summary of Part I
NetBeans is written in Java, and in the first article, I showed how to install Java 8 and then NetBeans 8.2.
[How to Install NetBeans to Write and Debug HTML on Your Mac for Free, Part I ]
There, I discussed the inconvenience of setting up a traditional web server, either on your Mac or with a service—likely at some cost for the latter with a reputable company. Then, I discussed how NetBeans has within it a local web server engine that can be accessed privately. Then you can use, say, Safari, to test your HTML and CSS.
There are some nuance when it comes to setting up your NetBeans environment, so let’s get started.
Using NetBeans
To get started, launch NetBeans. In the previous article, I showed how to place it in the Dock, like any other Mac app, You should see the splash screen, like this.
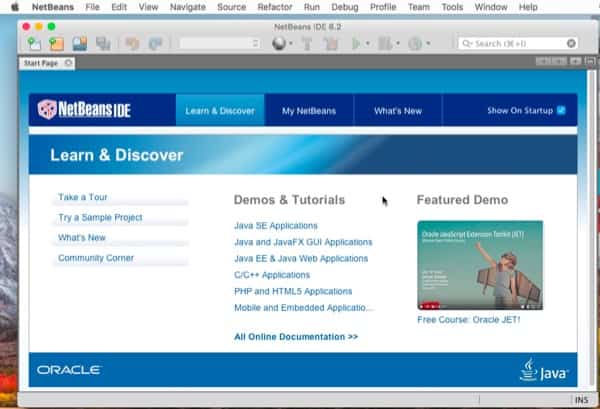
Some users become immediately overwhelmed right here. The trick is to instead focus on the NetBeans File menu on the upper left. Select File > New Project.
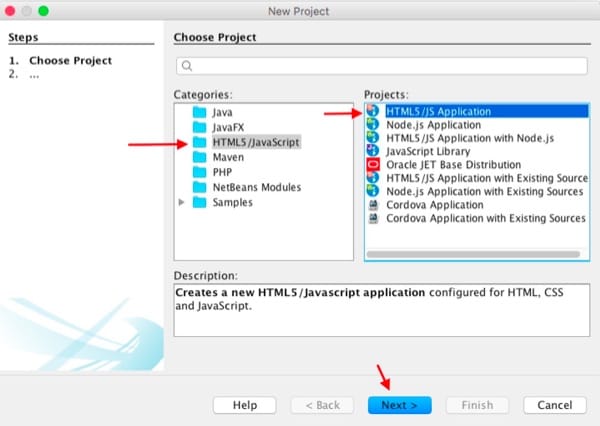
First, ignore the search field at the top. Instead:
- Under Categories, click on HTML5/JavaScript.
- Under Projects, click on HTML5/JS Application.
- Click Next >
On the next page, you’ll name your project and define where it will be placed. A convenient place to put your projects is in the root of your home folder, as I did.
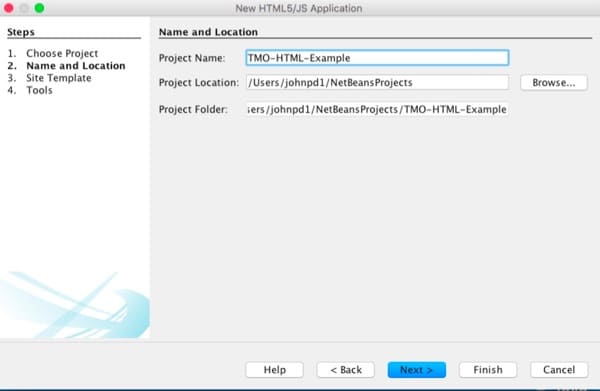
After you’ve defined the name and location, Click Next >. In this example, there is no site template, so opt for “No Site Template” and click Next >. Then we get to the Tools page.
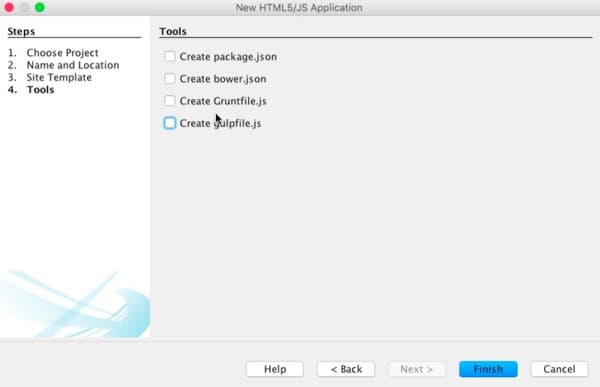
De-select all these tools. For this howto, they’ll just get in the way. Click Finish. When you do, you’ll finally be dropped into the glorious NetBeans IDE with some boilerplate HTML code already there as a trial template. Like this:
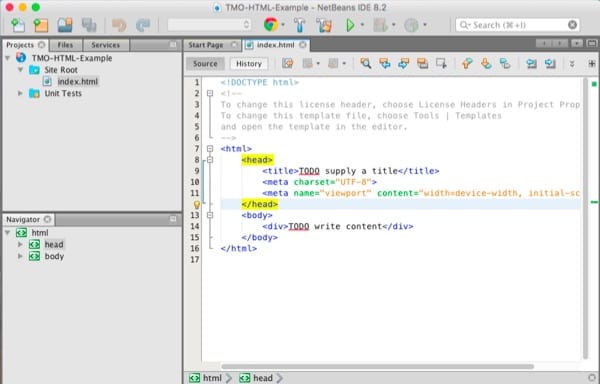
Some notes at this point are in order. First, the IDE may look a bit overwhelming. That’s okay. One learns an IDE piecemeal. First come the basics: trial editing, saving, and inspecting (with a browser.)
Right here, you’ll want to learn more from the NetBeans documentation. There’s plenty, including a Quick Start Guide. It’s very good.
Continuing, for the sake of a fast start, you’ll want to define your web browser. In this howto, we’ll use Safari. Notice at the top of the iDE is a (default) Chrome icon with a dropdown arrow. (If you want to fully use Chrome, it requires a special NetBean’s plug-in, so we won’t go there.)

Click the down arrow, and you’ll see options for your browser. Click on Safari. The browser selection window will close and icon in the menu bar will change to reflect Safari as your browser of choice.
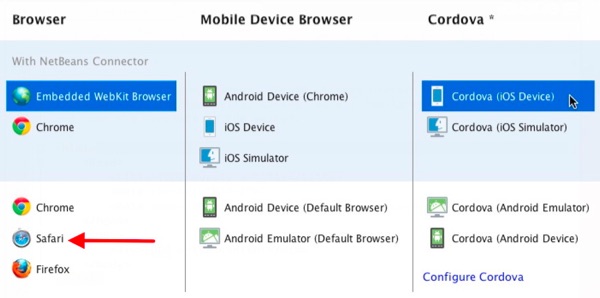
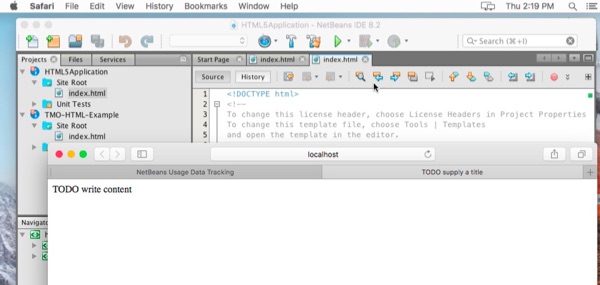
Now, you can test your boilerplate HTML code. Click on the right facing green arrow in the menu bar. (See menu bar screenshot above.) Safari will launch and show you the result.
Summary
So far, you’ve installed Java, installed NetBeans, created a NetBeans HTML/CSS project, selected a browser, and viewed the boilerplate HTML in Safari. Next is a taste of error handling. It’s pretty cool.
Debugging HTML
As a brief introduction to what NetBeans can do, try deleting the “div” code at the end of line 14. Right away, you’ll see a (light bulb) alert in the column of line numbers on the left. Click on it, and you’ll see a yellow box explaining what the IDE didn’t like about your HTML.
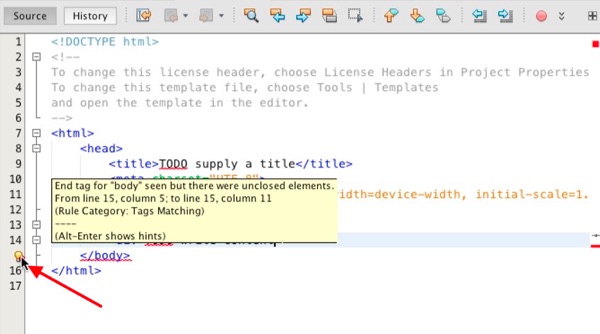
Undo your edit by replacing the “/div” and click the double floppy disk icon (anachronistic but traditional) in the menu bar to save your work. You’re back where you started. You can then go to the File menu and Quit or continue editing the HTML.
There is much more to learn, of course. But with this howto and the NetBeans docs, you’re poised to begin the process of learning HTML with a great IDE and free, local, private web server engine.
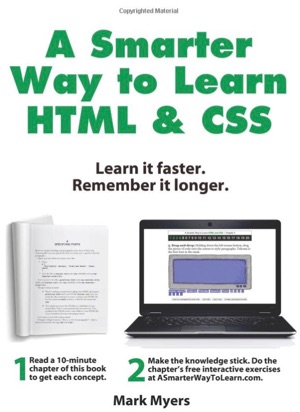
Finally, here’s a good book we’ve found, at Amazon, as a learning aid. “A Smarter Way to Learn HTML & CSS.”
Now go have some fun.

May not run in 10.13.4 keeps complaining Java is not installed even though I have the latest Java 8. The netbeans installer points me to this website to install java. http://www.oracle.com/technetwork/java/javase/downloads/index.html But Oracle’s website says I already have the latest java installed.
So I’m stuck.