No matter what your background is with using computers, chances are you’ll eventually need a word processor. You may wonder whether you should use Microsoft Word or Pages. If you ask on forums, a figurative holy war will likely break out. If you’ve ever opened Pages just to check it out, maybe you thought it a stripped-down toy since it looks little like the Microsoft software most of us are accustomed to. I’m going to give you a walk-through of the major features in Apple’s Pages, so you can see just how powerful the software truly is. By the end of this article, you’ll have a good handle on how to use Pages on iCloud, on your Mac, or on your iPhone or iPad.
Getting Started With Pages on iCloud
When you first use Pages on iCloud, or on any other device, you’ll be given a selection of templates to choose from. You will see that Pages offers a number of templates, even more types of documents than you will likely see in Word.
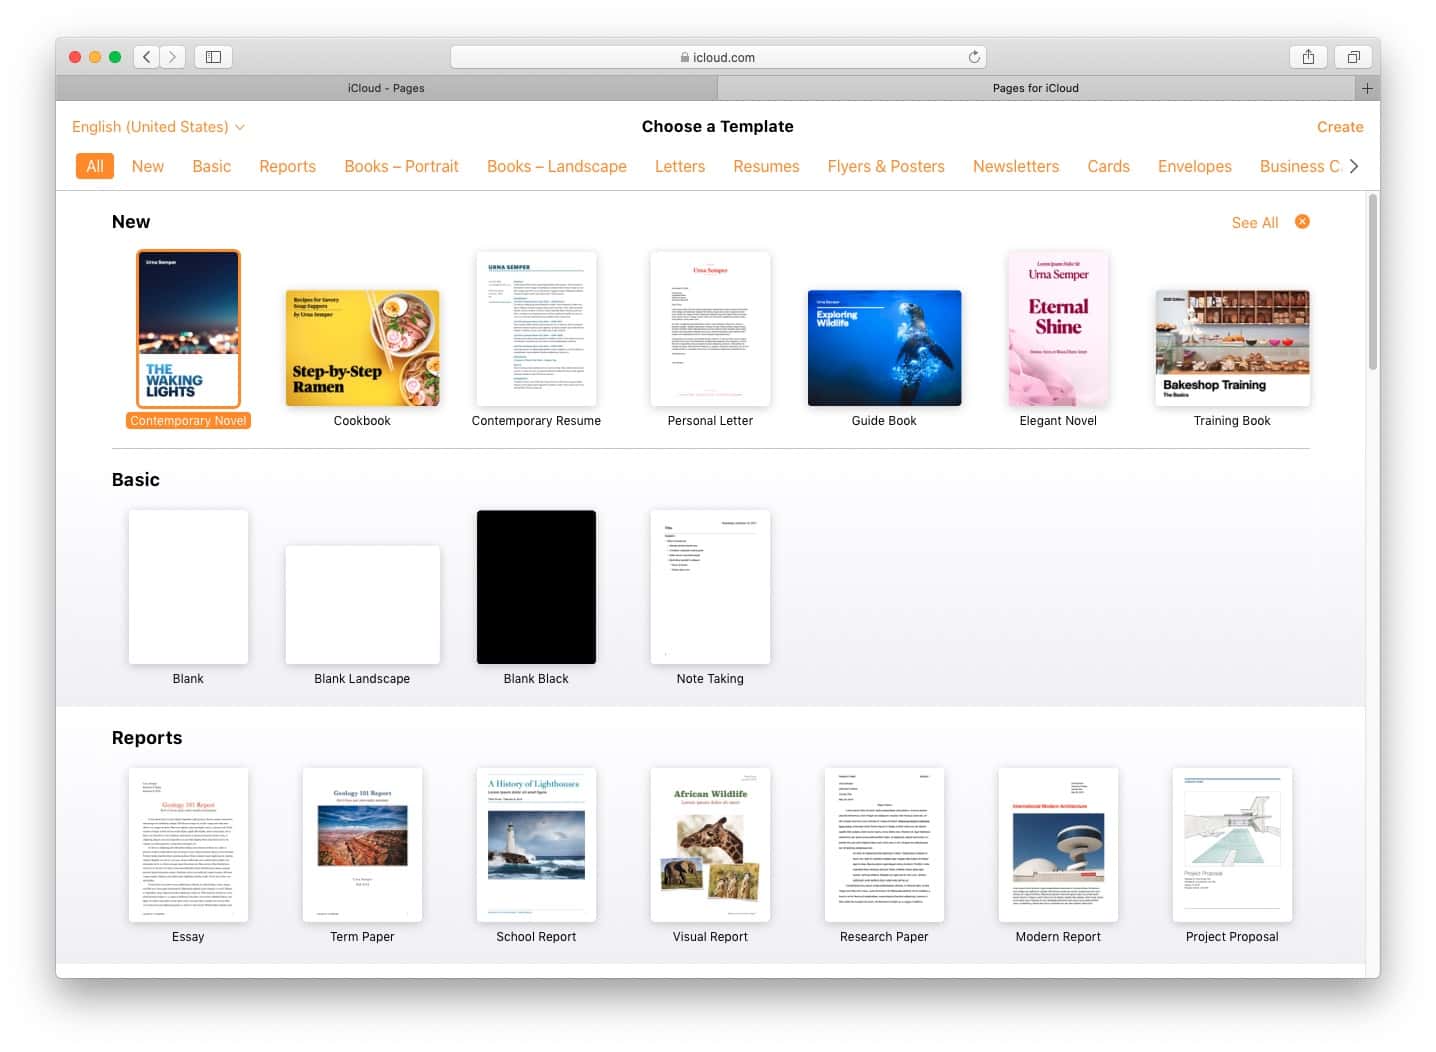
Apple provides you with gorgeous, functional templates in these categories:
- Reports
- Books, in both portrait and landscape orientation
- Letters, including both personal and business letters
- Resumes
- Flyers and posters
- Newsletters
- Greeting cards
- Envelopes
- Business cards
- Certificates
- Invoices
- Brochures
Choose a template you like, or select a blank document to get started.
Setting up Your Pages Document
I’ve chosen to create a business letter, and you can see that Pages has automatically done some formatting and preparation for me. I edited the top heading, the address block at the bottom, as well as the recipient information and content of the letter. Everything is very easy to use, and the simplicity belies the power beneath the surface.
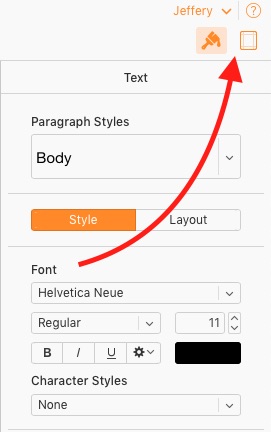
The first thing many people will wonder when they use Pages on iCloud is how to set the paper size and margins. Near the top right corner of your document, you’ll notice an icon that looks like a picture frame. If you hover your mouse over that icon, the tool tip “Show or hide document and section options” appears.
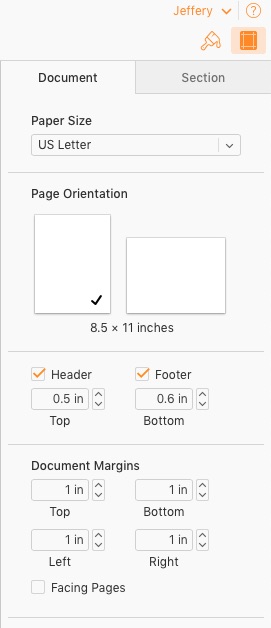
After clicking that icon, you’ll see the dialog that helps you format your document. You can change the paper size, page orientation, and document margins. Also, you can set your document to use facing pages, as in a book, and configure the header and footer for your letter.
Making a Pages Document Stylish with Paragraph Styles
To get out of the document options when you use Pages on iCloud, click the paintbrush icon right next to the document and section icon. This simple-looking tool sidebar will allow you to change all of the paragraph formatting options you might want to.
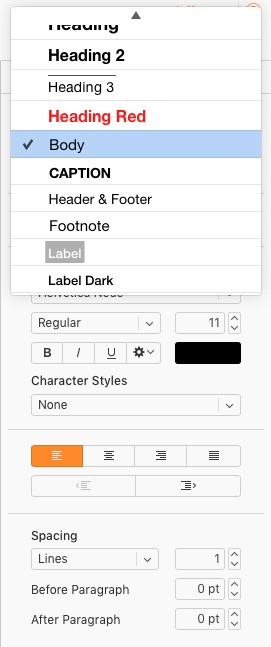
You’re able to choose your favorite font, characteristics of that font like size, color, bold, italicized, and so forth. You can also Set various text alignment and indentation options, modify your line spacing, and configure bullets and lists. If you’re working on a book or other document that might need a stylistic “oomph,” choose the Drop Cap option and really spice things up.
Writing and Editing Your Document in Pages on iCloud
Once you’re set up, just start typing away. Pages will spellcheck your document on-the-fly, underlining words in red when they’re misspelled. You can click on the underlined word and then either click the suggested spelling you want to use or type in a new word over the misspelled one. You can also add the spelling to your custom dictionary, if you know that Apple is wrong and you are right.
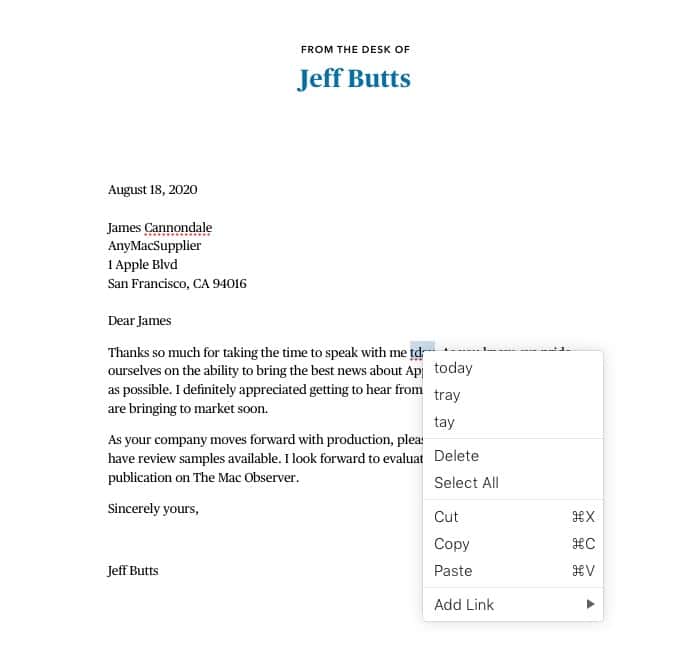
The only area where Pages lacks, compared to Microsoft Word, is in checking grammar. While Pages offers an excellent spell-checking tool, it does very little to help with grammatical errors.
Putting the Polishing Touches on Paged Documents
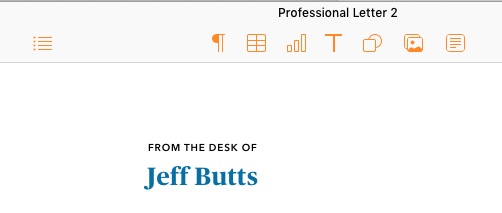
Once you’ve done drafting your magnum opus, it’s time to put on the finishing touches. You can add tables, charts, text boxes, shapes and lines, and images to your letter or report. You’ll find these options as fairly self-explanatory icons near the top middle of the window. Should you need to insert a bulleted or numbered list, that icon is also quite clearly visible, left of the main group of insert icons.
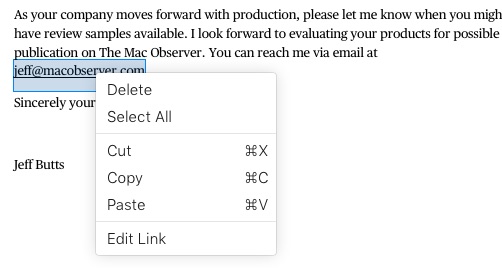
Creating links to email and web page addresses is equally simple. Just type the link, and Pages turns it into a hyperlink. Edit the link, as you need, by right-clicking and choosing Edit Link.
Working and Playing Well With Others in Pages
Pages doesn’t force you to work in standalone mode, either. It features excellent collaborative tools, including comments and the ability to review, accept, or decline changes to your document. If you use Pages on iCloud, you can easily invite others to help with your document.
You’re even able to see your team’s edits as they make them, if two or more of you are working on the document at the same time. Select a name on the collaborator list, and you’ll even jump straight to where they have their cursor placed, anywhere in the document.
You’ll find that Pages works basically the same, whether you’re on iCloud or using the app on your Mac, iPhone, or iPad.
How to Use Pages on iCloud to Print or Publish Your Document
Once you’ve finished, you’ll need to know how to use Pages on iCloud for printing and publishing. Just like everything else in this software, it’s both simple and powerful. Just click the wrench icon beside the collaboration button, and you’ll see your options.
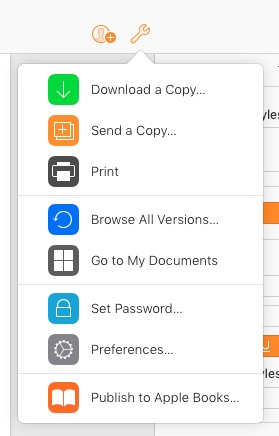
You can print your letter, resume, report, book, or anything else, save it as a Microsoft Word document or PDF, and even publish it to Apple Books. If you need one, it’s easy to create a table of contents page in your document. You can also save your document, download it (if you’re using Pages in iCloud), print, or set a password. Try doing that in Microsoft Word or Microsoft 365!
