Dr. Mac’s Rants & Raves
Episode #330
Last week I explained that your Mac creates invisible swap files to support its virtual memory scheme. When your available (free) space drops below around 10%, your Mac’s performance will suffer. And the closer it gets to 100% full, the slower your Mac will run.
I like to have a relatively large margin of error, so I try to keep at least 20% of its capacity free for swap files. So, as the files on my disk approach 800GB (80% of its 1TB capacity), I start looking for large files I can delete or relocate to an external drive.
If your startup drive is filled to 90% or more, you will begin to experience virtual memory related slowdowns.
The Cure for Disk Fullness
The cure is deleting or moving files to free up disk space—at least 10% of the disk’s capacity—so there’s plenty of free space for your virtual memory swap files.
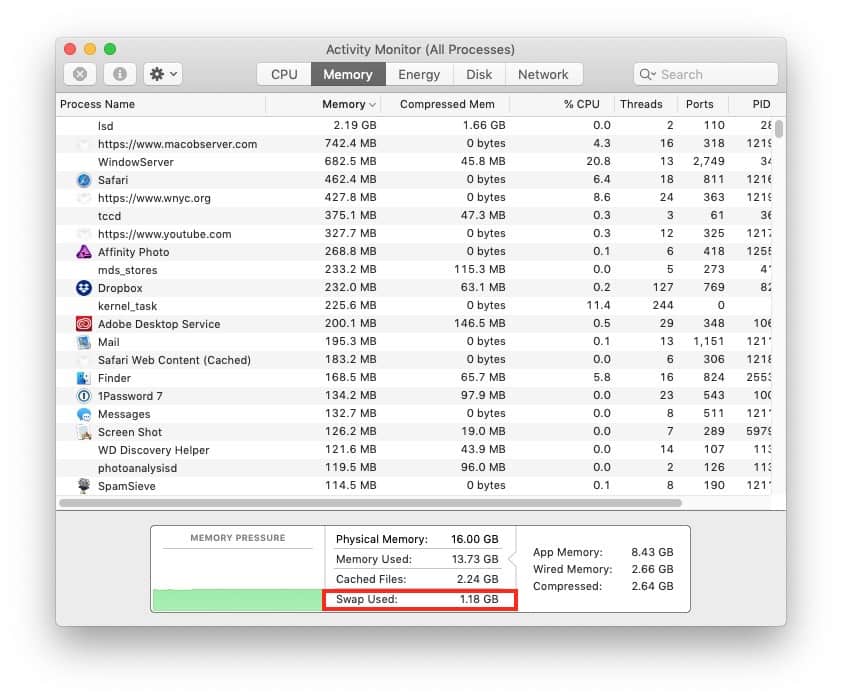
By the way, if you want to know how big your VM swap file is, launch Activity Monitor and click its Memory tab. “Swap Used,” at the bottom of the window, is the current size of your swap file.
Now, here are two ways to find large files you can delete or move to another disk to free up space for your virtual memory swap file.
The Easy (and Free) Way
The easiest (free) way to find large files is by choosing About This Mac from your Apple menu and clicking the Storage tab at the top of the window. This will display a list of your connected storage devices along with their capacity and how much space is currently available.
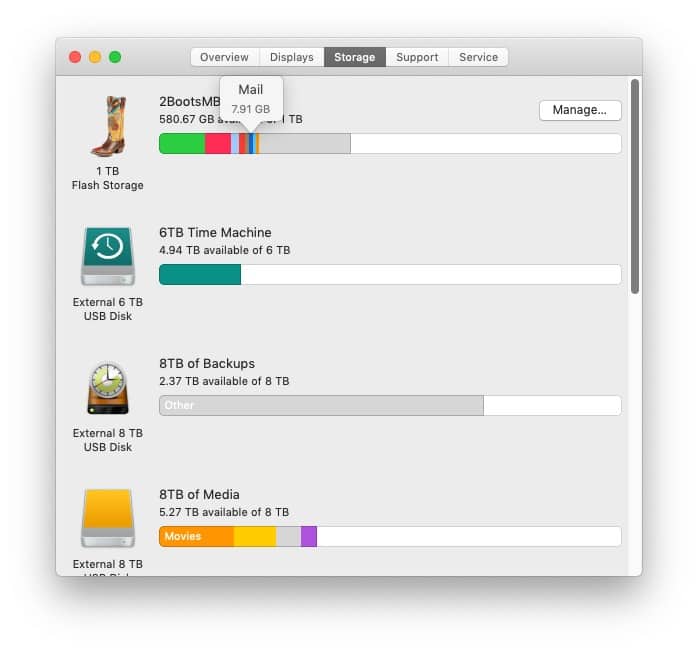
Point at one of the colored stripes and you’ll see what it represents (Mail in the figure above) and how much space it uses (7.91GB in the figure above).
Click the “Manage…” button on the Storage tab and a new window appears with recommendations for freeing up disk space.
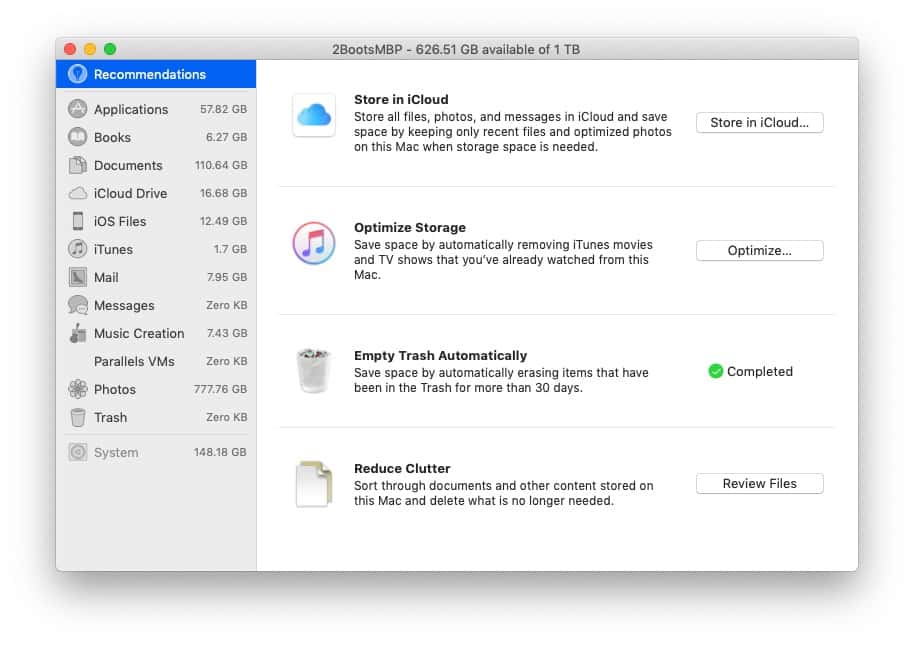
You can choose to move all of your files to iCloud, and only store recent files and optimized photos locally. Or, you can choose to optimize storage by removing TV shows and movies you’ve already watched from your disk. If you someday decide you want to watch them again, you can download or stream them at that time. You can also choose to Empty Trash Automatically, which erases all files in the Trash after 30 days. And finally, you can choose Reduce Clutter, which opens another window with a list of files you can sort by size and delete or archive large files you no longer need on your startup drive.
The Easier (but Not Free) Way
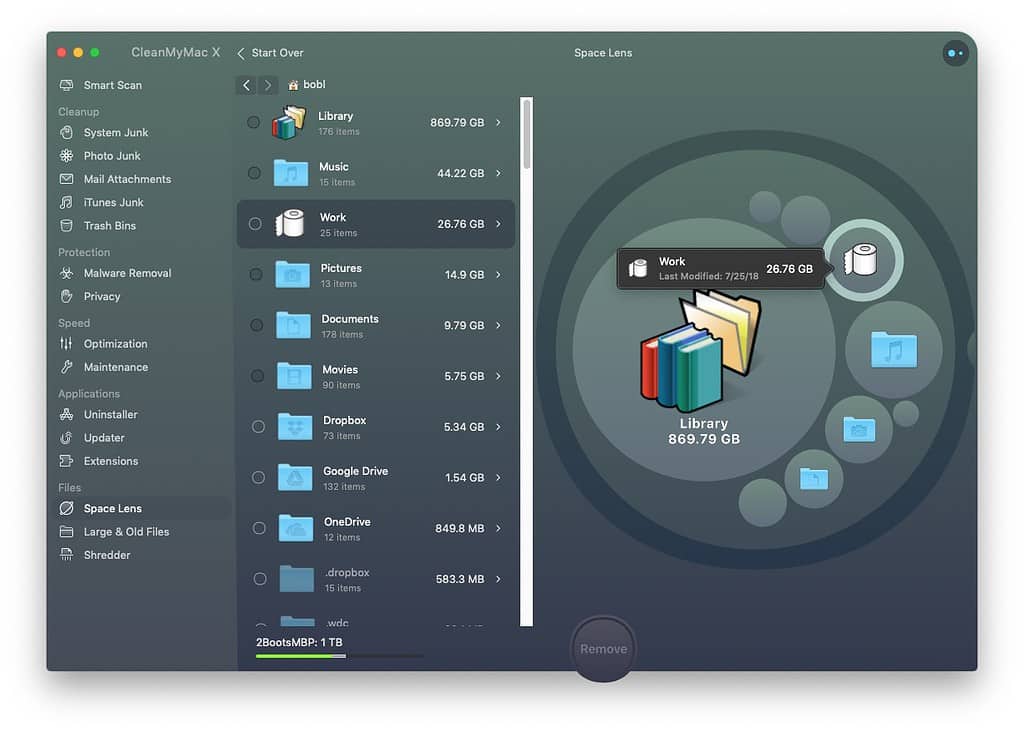
This method is fine, but I prefer MacPaw’s Clean My Mac 3, which recently added a cool new feature called Space Lens. It’s designed specifically for hunting down and killing (or moving) large files, and does it faster, easier, and more elegantly than macOS’s Storage tools.
The bottom line is that it doesn’t much matter what you do to free up space on your startup disk… what matters is that you do something to free up space when your startup disk is almost full.
