Need to fix SOS Mode after upgrading to iOS 18/18.3? I’ve got you covered. If you’re seeing a
small SOS icon in the top-right corner of the screen, the reason for this is likely unrelated to updating your iPhone. While there may be some rare instances of an update causing this problem, there’s probably a better explanation. With that in mind, let’s see what you can do about it.
How To Fix SOS Mode on iOS 18/18.3
1. Wait It Out/Contact Your Provider
While you may not like this answer, one of the first things you should do is check to see if your wireless provider is experiencing any issues. Or, check if you have any issues with your provider, such as an overdue bill. For example, many within the Apple Support community were annoyed that their iPhone was stuck in SOS Mode. However, the reason turned out to be a massive Verizon outage. You should make sure the area you’re in has coverage.
Considering SOS Mode engages when you don’t have a connection to your cellular provider, this means it’s unusual that it’s something wrong with your iPhone. While I’d recommend contacting your carrier first, there are still solutions you can try.
And yes, if you’re in Canada, Australia or the U.S., you can still use Emergency SOS.
2. Force Restart iPhone
A good force restart can be just the thing if you’re experiencing connectivity issues. This solution is usually easy to perform and doesn’t hurt your device. While it isn’t a guaranteed fix, it’s one of the first things you should try.
Time needed: 2 minutes
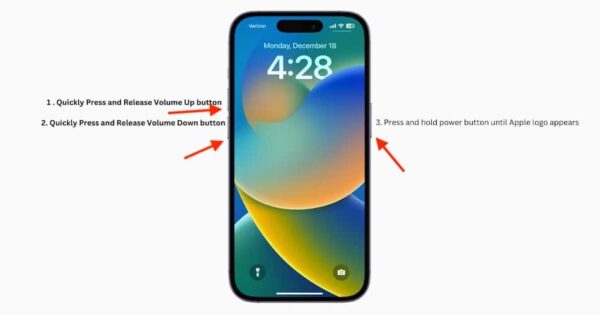
To force restart your iPhone, follow these steps:
- First, press and quickly release the Volume Up button on your iPhone.
- Press and quickly release the Volume Down button.
- Finally, press and release the Side Button until you see the Apple logo.
- Older model iPhone users can look here for instructions on a force restart.
3. Check Your Connection
3a. Reconnect with Airplane Mode
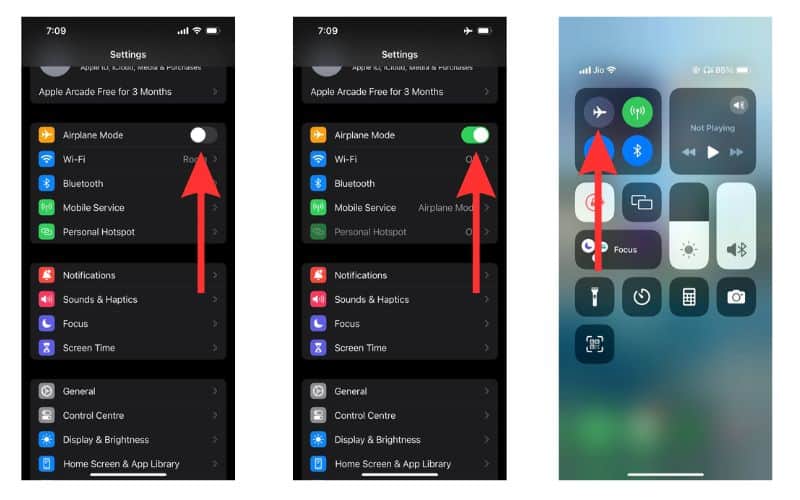
If you’re sure you have a connection to your cellular provider, Apple recommends disconnecting from it and reconnecting. This may jump-start your service. You can do this via Airplane Mode.
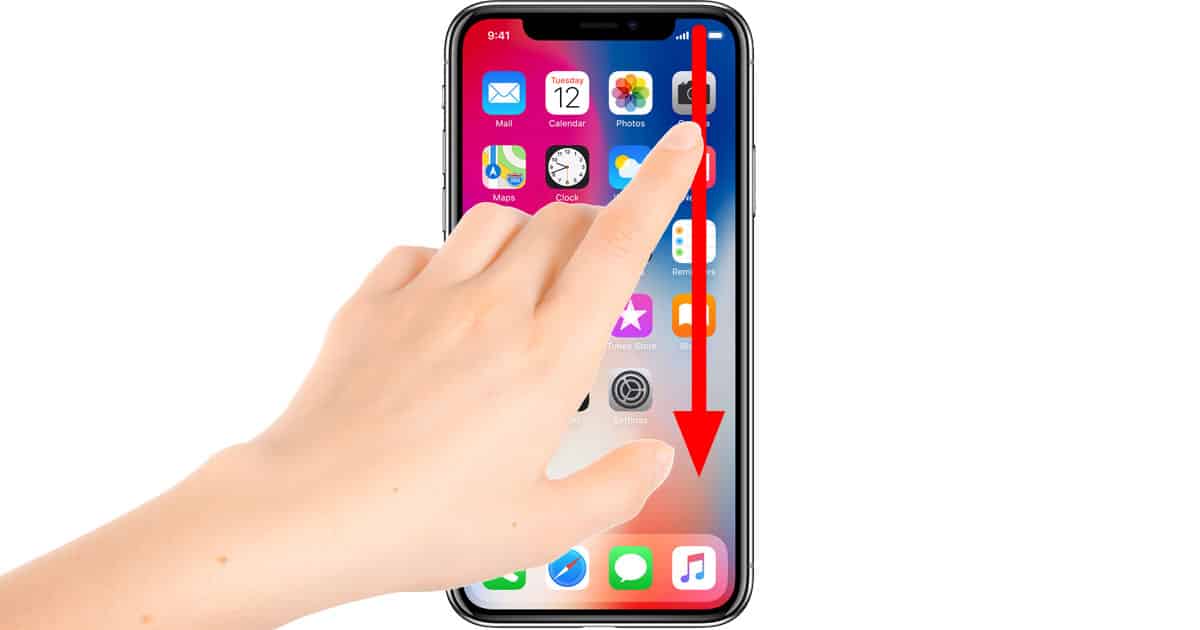
- First, open Control Center by dragging down from the top-right corner of your screen.
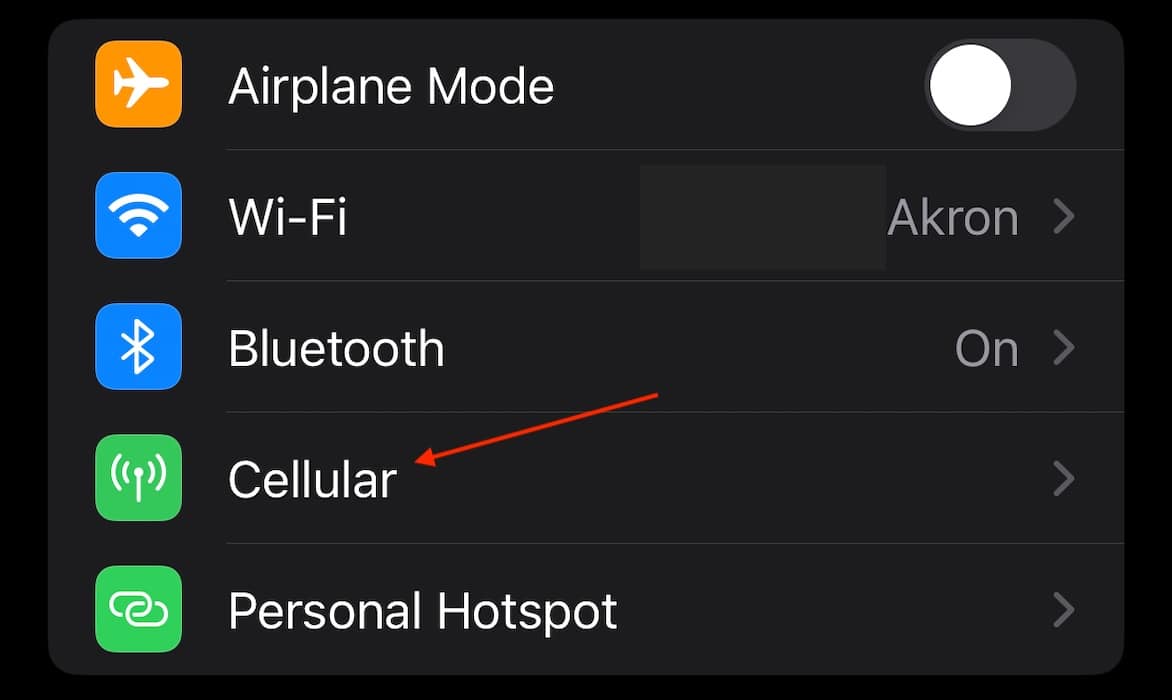
- Next, tap the Airplane Mode icon, enabling the setting. You can also find the setting directly in your Settings menu.
- Wait fifteen seconds and then disable Airplane Mode.
3b. Check Data Roaming
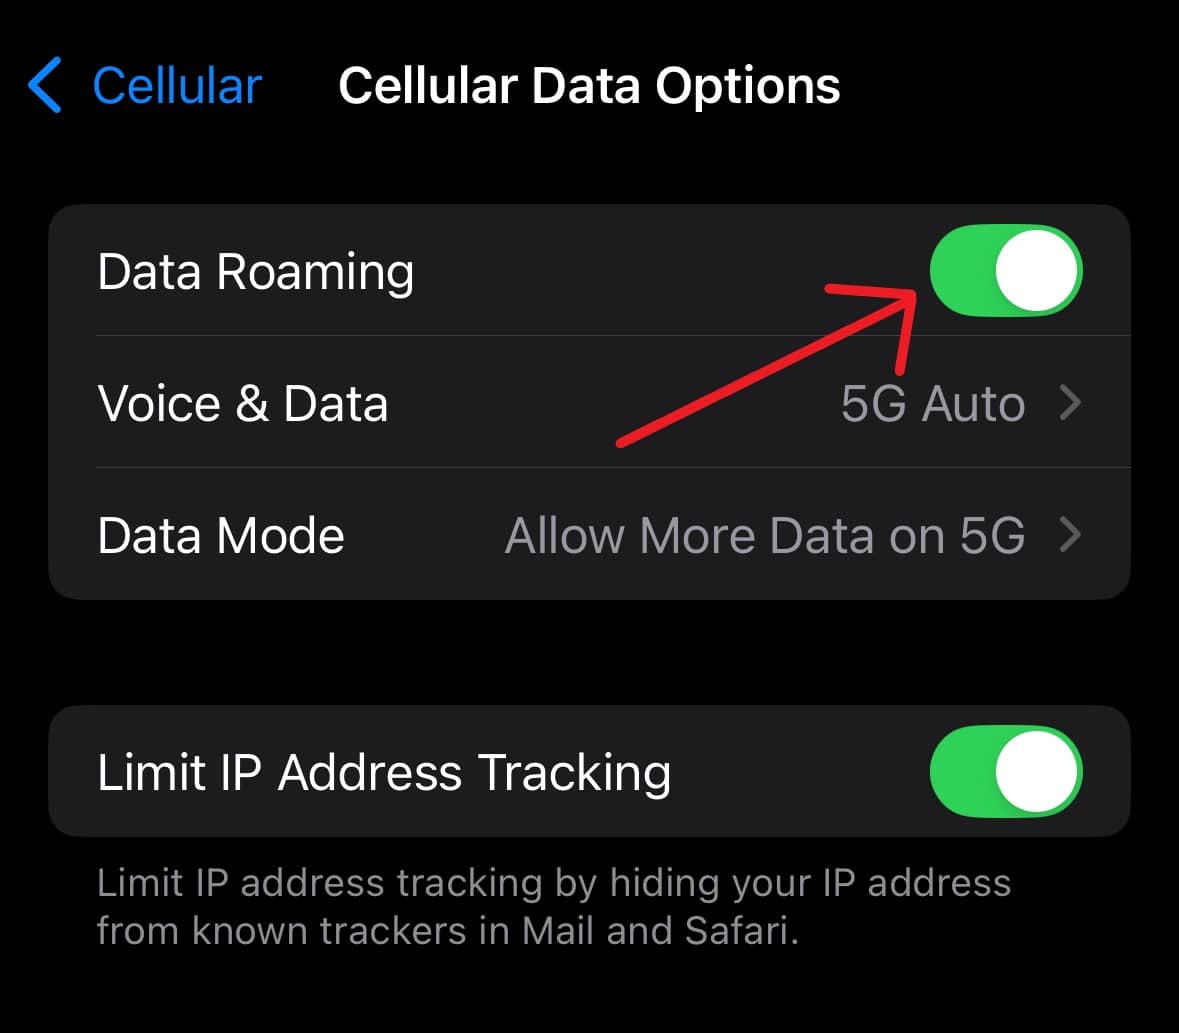
If you are traveling internationally, you should ensure Data Roaming is enabled.
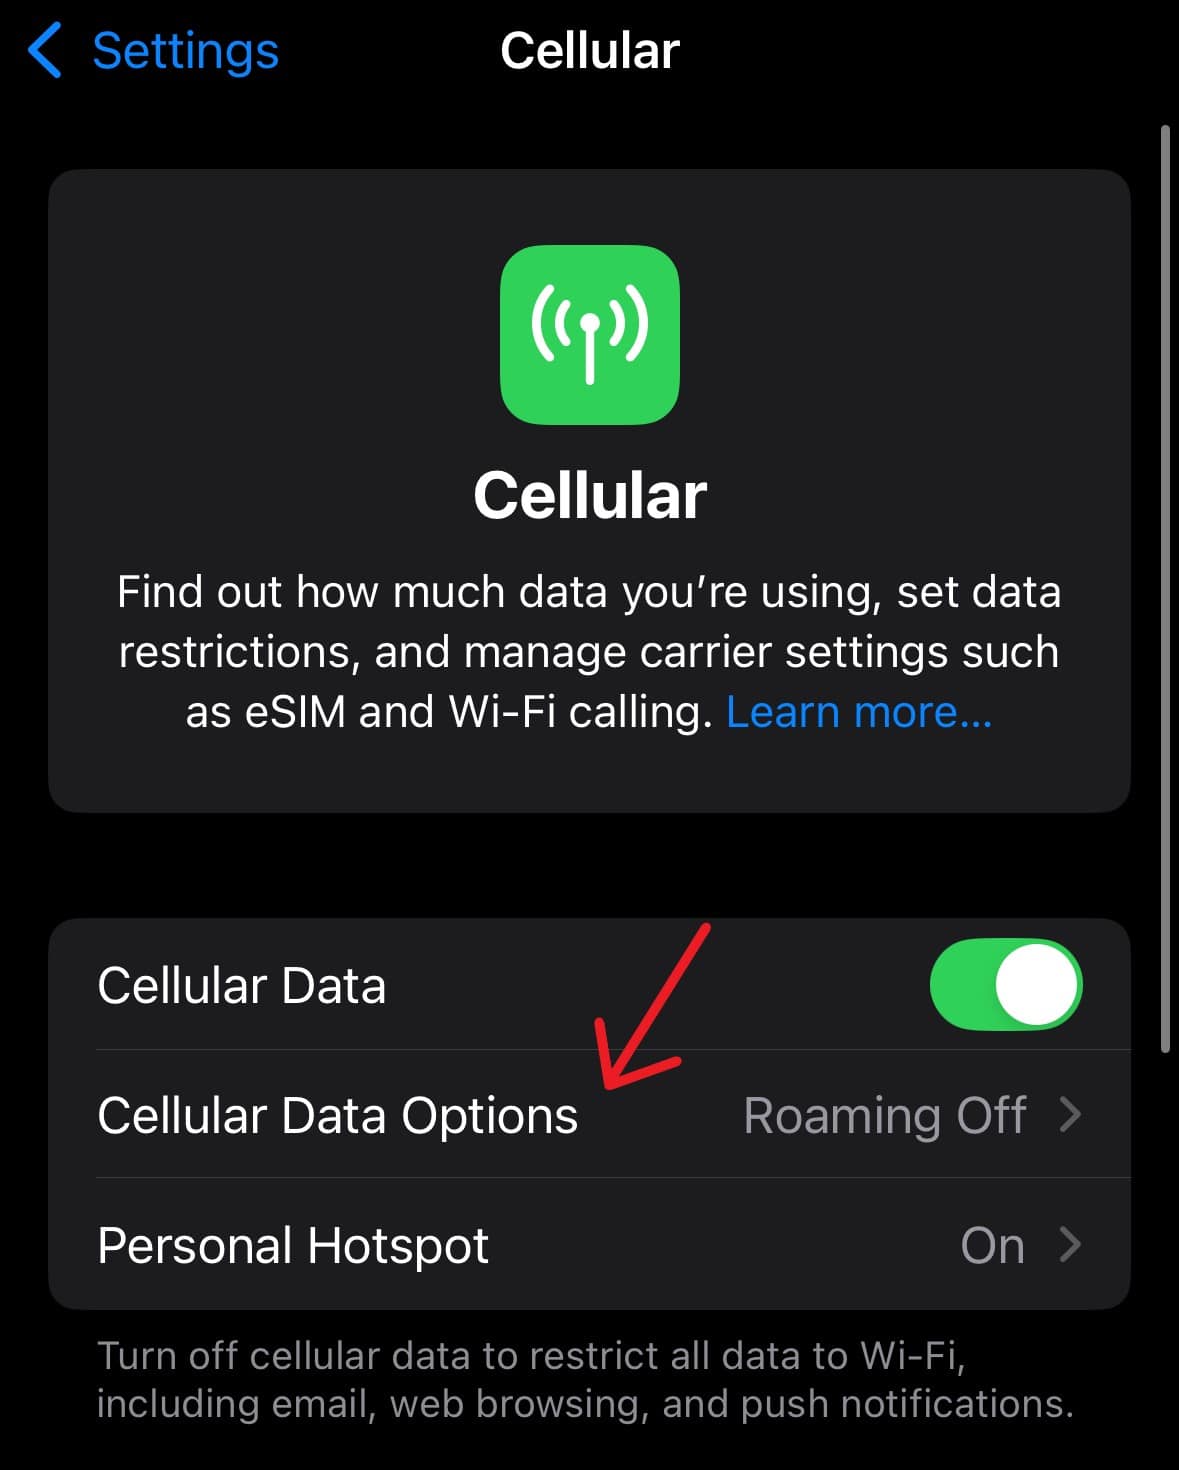
- Navigate to Settings, then tap Cellular Data or Cellular.
- Tap Cellular Data Options. Ensure Cellular Data is on. If you use a dual SIM, select the number you are going to modify at this time.
- Turn on Data Roaming.
4. Check for a Carrier Settings Update
While a bit more rare than your usual iOS update, it may be that your device needs a carrier update. Your cellular service typically provides these updates and can help with your connection to towers and the like. Checking for an update is easy.
Note that if you insert a new SIM card into your iPhone, you should check for this update. This is especially true if you switched carriers.
- Ensure your device has Wi-Fi. You can check via Control Center as shown above or through Settings > Wi-Fi.
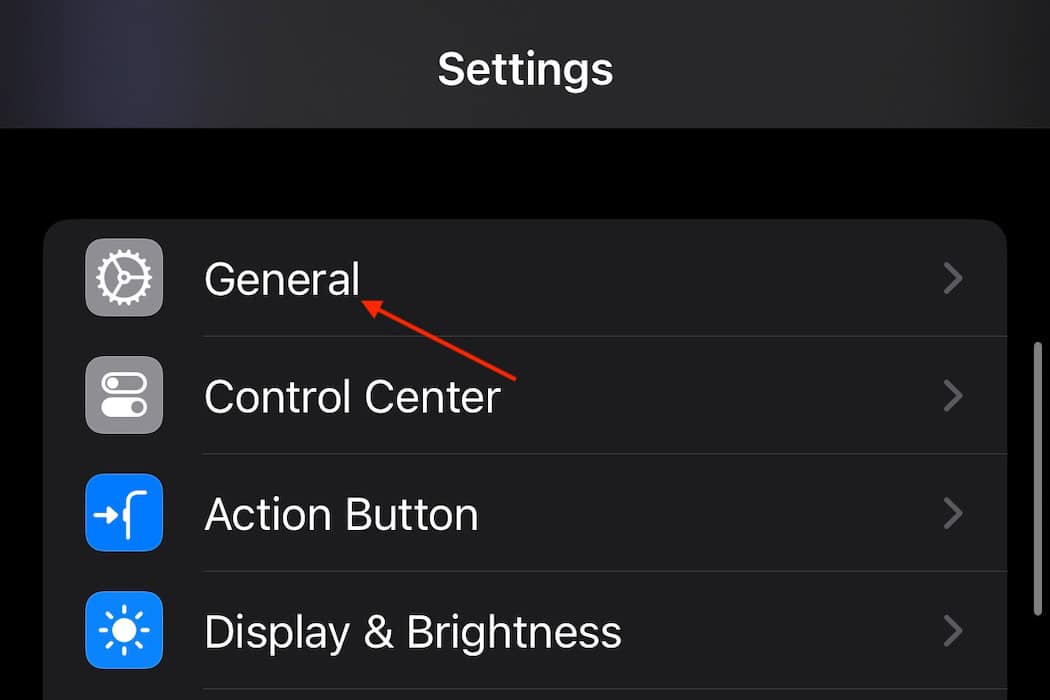
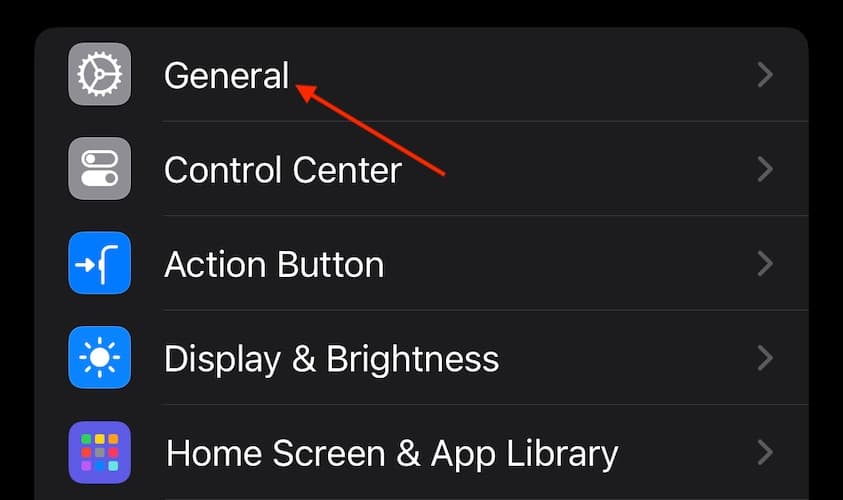
- Next, navigate to Settings > General.
- Tap About. If a carrier update is available, you will see the available option.
5. Reset Network Settings
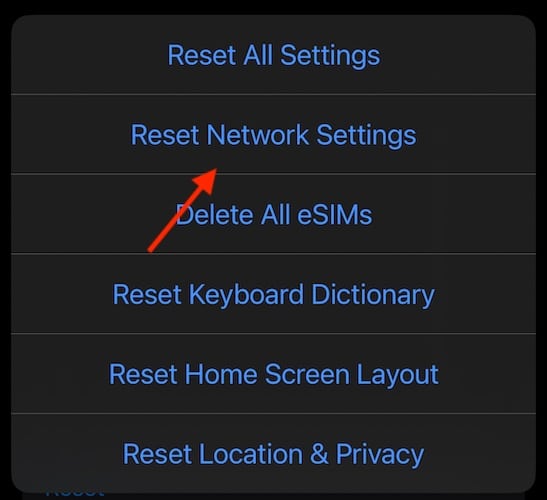
One of the last things you can try is resetting your network settings. Considering this erases items such as Wi-Fi passwords and VPN connections, I would save this for last. Again, I would actually encourage talking to your cellular provider before performing this solution.
- Navigate to Settings > General.
- Scroll all the way down and select Transfer or Reset iPhone.
- Tap Reset.
- Select Reset Network Settings and follow the instructions on-screen.
Hopefully one of these solutions is able to work for you. If not, you can also view this guide on what to do if your iPhone is stuck in SOS Mode for even more tips and solutions.
You may also want to know what to do if Siri is not working with iOS 18/18.3.
