AirPods and iPhones usually work together seamlessly to offer a premium audio experience with features like spatial audio, adaptive noise cancellation, and more. However, if your AirPods are not connecting to your iPhone or keep dropping the connection after installing iOS 18.1, here’s what to do.
Why Won’t My AirPods Connect to iPhone?
Connectivity issues between AirPods and iPhone can stem from several factors. These include software glitches, outdated firmware, intermittent Bluetooth connection, incorrect settings, or low battery levels. Depending on the root cause behind the issue, there are several effective methods to troubleshoot it.
How to Fix AirPods Not Connecting to iPhone on iOS 18/18.1
1. Restart Your iPhone and AirPods
Software glitches in iOS or issues related to AirPods can often prevent them from connecting with your iPhone. You can easily fix this by restarting your iPhone and AirPods, as explained below.
- To Restart Your iPhone: Press and hold the Side button and the volume down button at the same time until the screen turns off. Once the screen turns off, press the Side button to turn your iPhone on.
- To Restart Your AirPods or AirPods Pro, Put them in their case and close the lid for 10 seconds.
- To Restart Your AirPods Max, Press and hold the Digital Crown and the noise control button on the right headphone simultaneously for 10 seconds. The LED indicator next to the charging port should flash amber.
2. Check the Bluetooth Connection
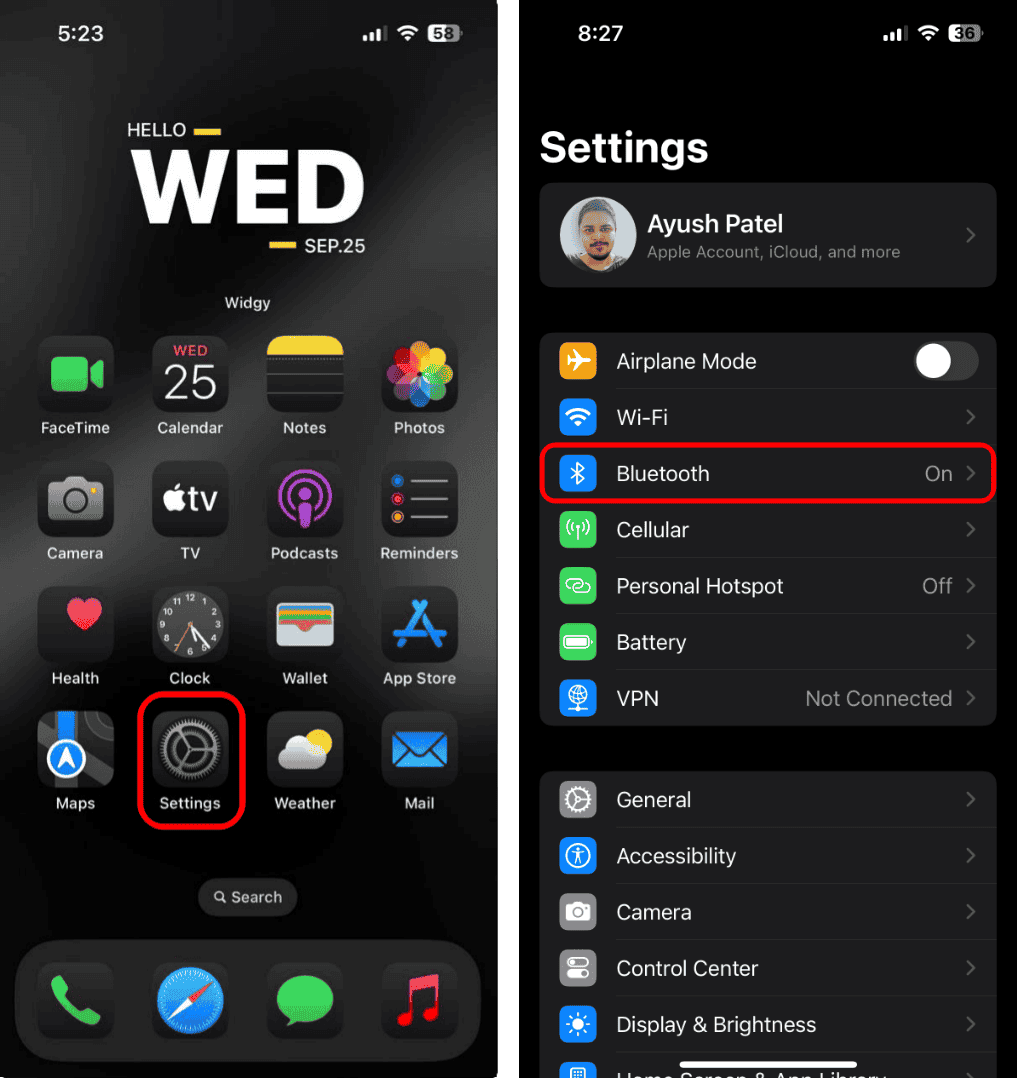
You may face issues connecting your AirPods if you’ve accidentally turned off Bluetooth on your iPhone. To make sure this isn’t the case, check if Bluetooth is on and select your AirPods from the list of devices.
- From the Settings app: Locate and open the Settings app on your iPhone and navigate to Bluetooth. Then, ensure the Bluetooth toggle is turned on, then select your AirPods from the list of devices.
- From the Control Center: Open the Control Center, tap and hold the network widget, and make sure Bluetooth is on. Then, tap and hold the Bluetooth toggle to select your AirPods from the list of devices.
3. Ensure Your AirPods are Charged
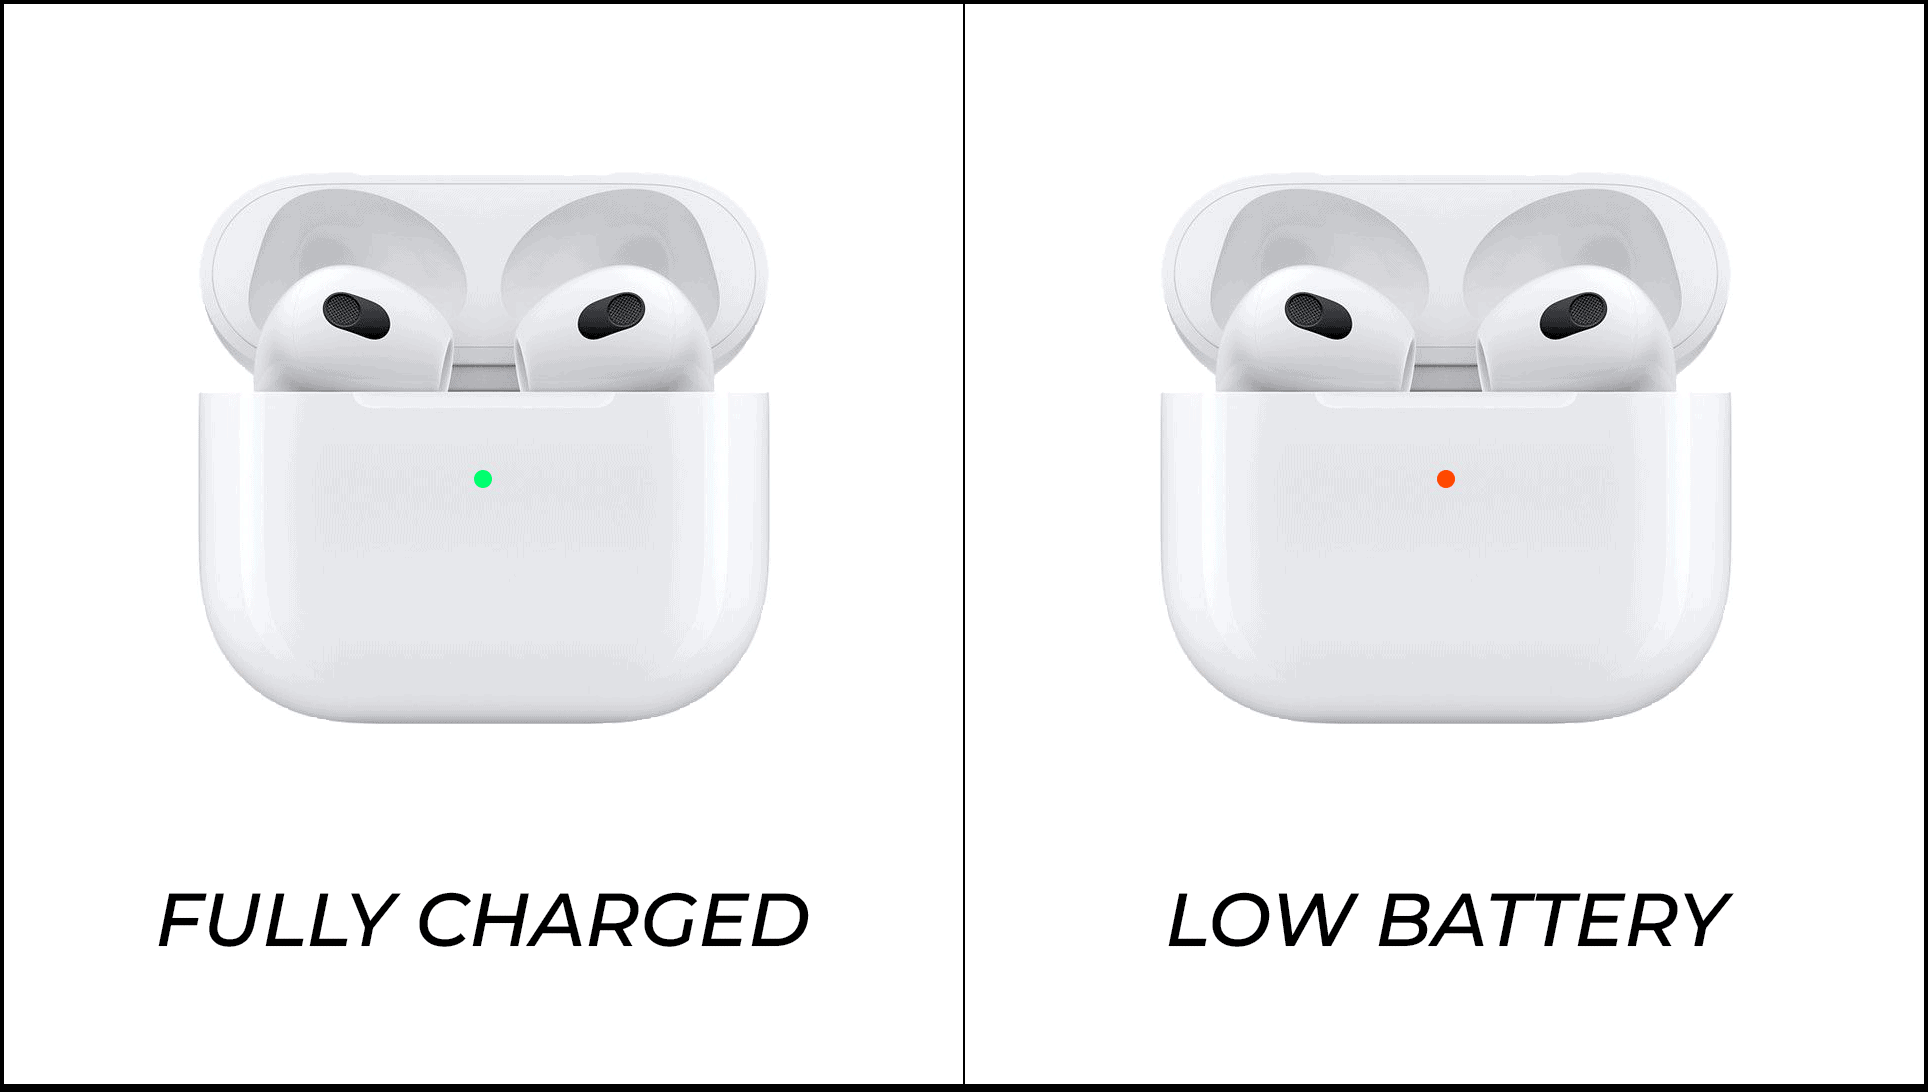
Your AirPods may refuse to connect with your iPhone if they are running low on battery. To check if your AirPods have enough battery available, place them in the charging case and check the color of the LED.
If you see a green light, it means that your AirPods are fully charged and ready to use. If you see an amber-colored light, it means your AirPods need to be charged before use.
4. Change Your Audio Output Device
In some cases, your AirPods may be connected to your iPhone, but you’re unable to hear anything simply because you have selected another device, such as a speaker or car stereo, as your audio output. Therefore, check your audio output device and change it to your AirPods if necessary. Here’s how you can do it:
- Swipe down from the top left corner of the screen to open the Control Center.
- Locate the Music widget in the Control Center. (If you can’t find it, add it in Settings)
- Now, tap the circular AirPlay icon and select AirPods from the list.
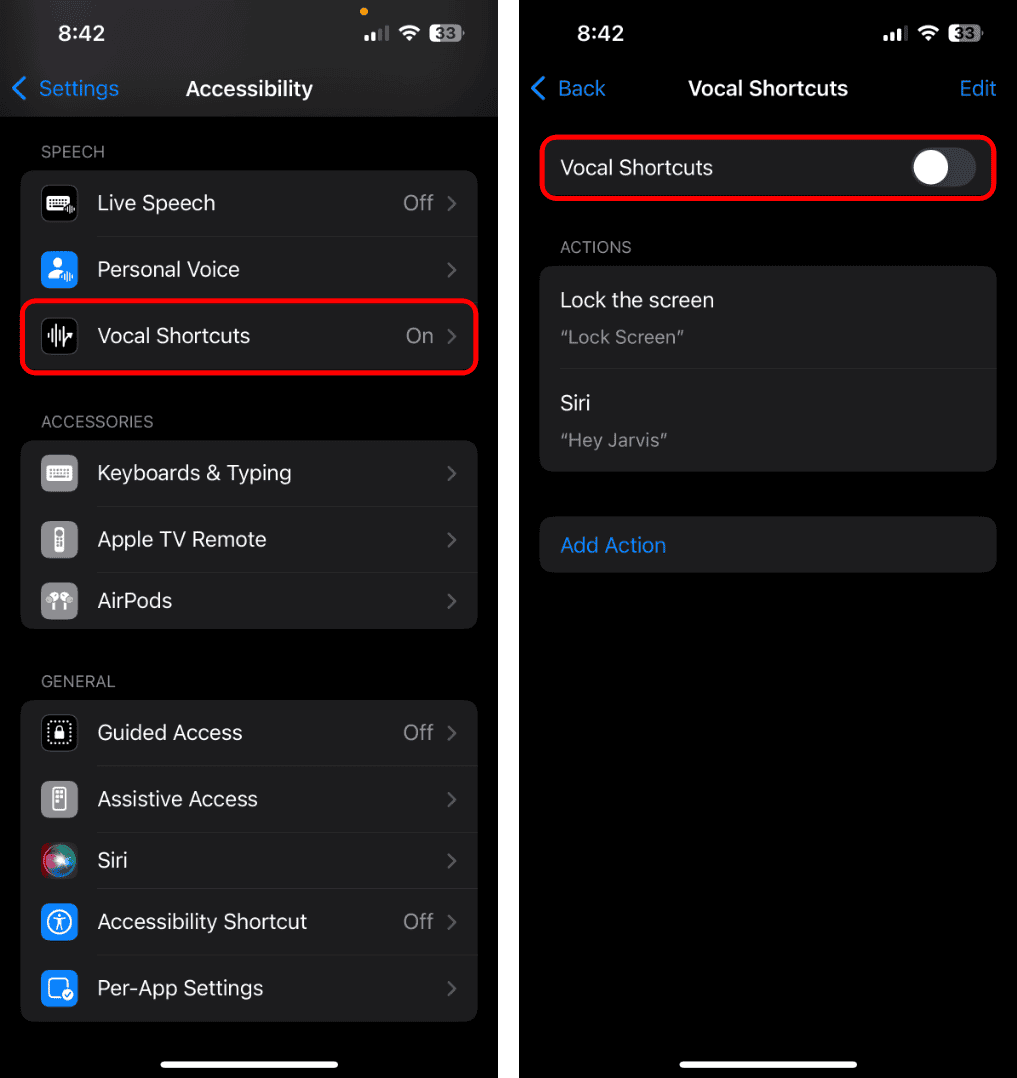
5. Turn Off Vocal Shortcuts on iPhone
Although Vocal Shortcuts can be helpful if you want to create custom voice commands to trigger specific actions, this accessibility feature can interfere with your AirPods’ connectivity. As several users on Reddit and Apple Communities have observed, turning the feature off on your iPhone should resolve the issue.
- Open the Settings app on your iPhone and go to Accessibility.
- Tap Vocal Shortcuts then turn off the toggle for Vocal Shortcuts.
6. Reconnect AirPods to Your iPhone
If you’re able to connect your AirPods to your iPhone, but it randomly keeps dropping the connection after some time, you should reconnect them with your iPhone, as explained below. Reconnecting the AirPods will help you re-establish the Bluetooth connection while fixing any problems along the way.
- Open the lid of the AirPods case, but don’t remove the AirPods from it.
- Navigate to Settings and tap the AirPods option under your name.
- Scroll all the way down to the end of the page. Then, tap Disconnect.
- Tap Disconnect again to confirm.
- Open the AirPods case and place it near your iPhone to reconnect them.
7. Get the Latest Software Update
Software glitches and bugs in iOS 18/18.1 can often lead to unexpected issues on iPhone. Generally, you should be able to resolve such issues by updating your iPhone to iOS 18.1 or a newer version. Software updates often include bug fixes and other improvements that ensure everything keeps running smoothly.
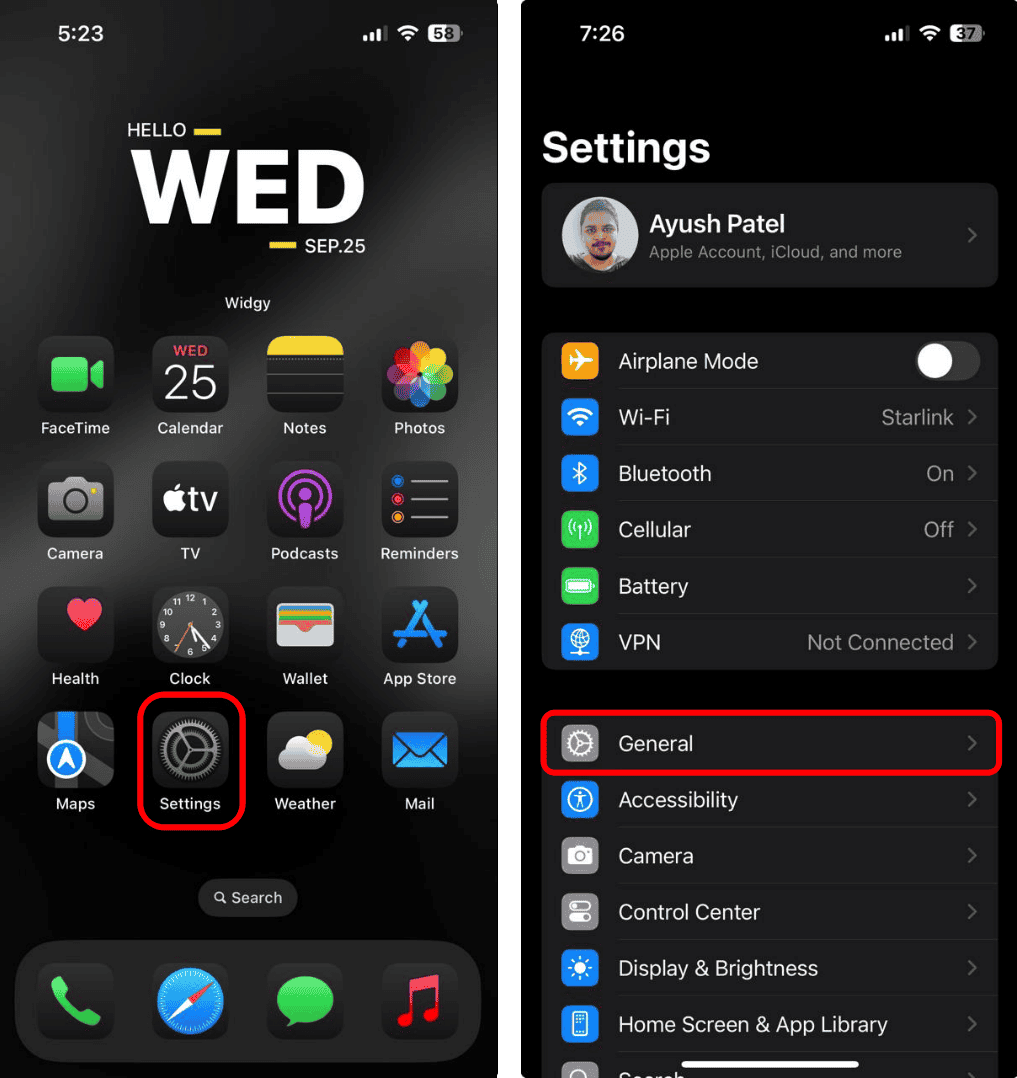
- Open the Settings app, then go to General.
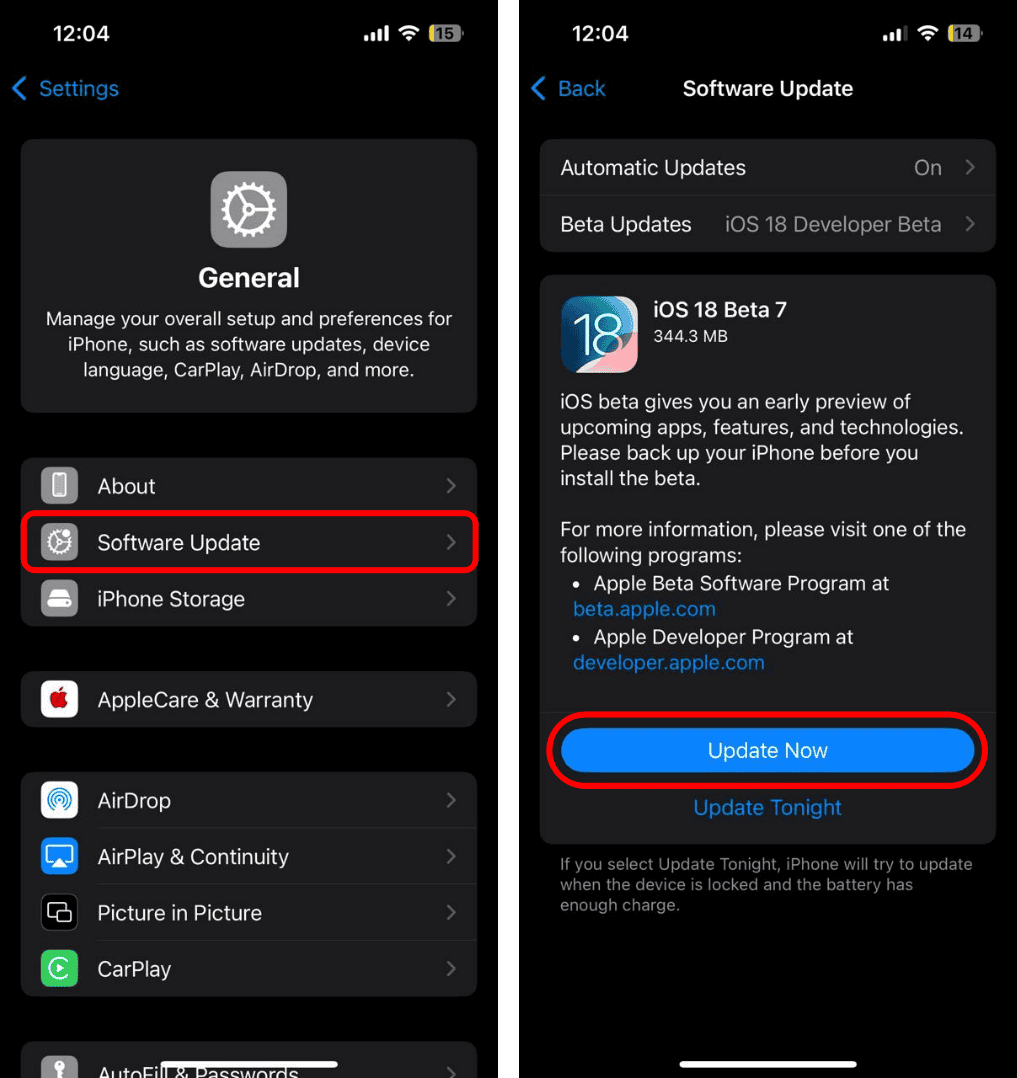
- Tap Software Update and wait for the iPhone to check for updates.
- If a new iOS update is available, tap Update Now (or Install Now)
Once you have finished updating your iPhone, you should also check the current firmware version of your AirPods and update it to the most recent version if it’s outdated. While there isn’t any sure-shot method to update the firmware on your AirPods, you can still try to place them inside their charging case, connect the charging cable, and place it near your iPhone so they get updated automatically.
8. Unpair and Reset Your AirPods
If you cannot connect your AirPods to your iPhone after trying out everything, you can try to unpair your AirPods, and factory reset them as a last-ditch attempt to fix the issue. Here’s the step-by-step process:
- Put your AirPods in the case, close the lid, and wait for 30 seconds.
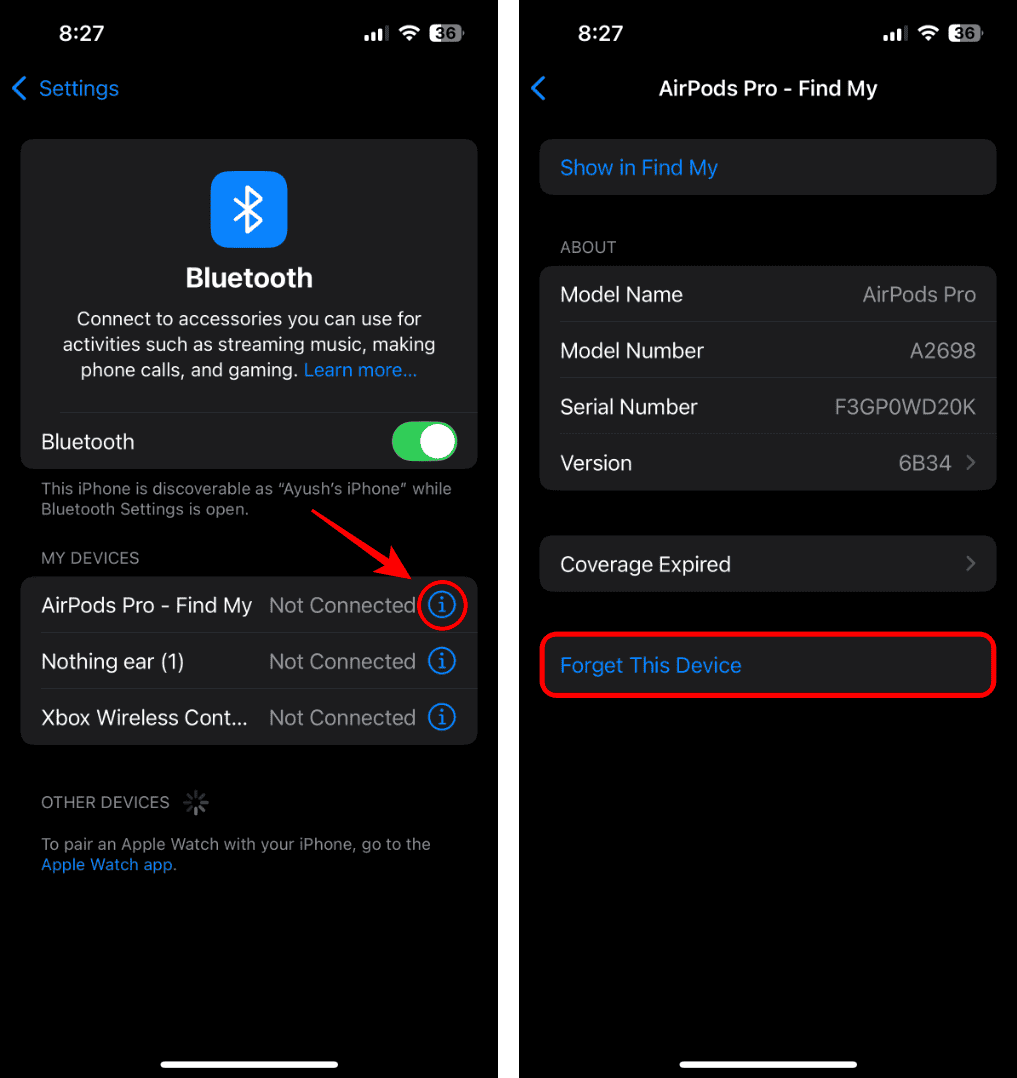
- Open the Settings app on your iPhone and navigate to Bluetooth.
- Now, tap the blue More Info button located next to your AirPods.
- Tap Forget this Device to unpair your AirPods from your iPhone.
- Open the lid of the AirPods case, but don’t remove the earbuds.
- Depending on your model, follow these steps to reset AirPods.
- AirPods Pro: Press and hold the setup button located at the back of the case for at least 15 seconds.
- AirPods 4 or AirPods Pro with Noise Cancellation: Double-tap on the front of the AirPods case. After the status light starts to flash white, double-tap on the case again, then do the same thing for the third and the last time. Once you do this, the status light should flash amber before turning white.
- AirPods Max: Press and hold the Noise Control button and the Digital Crown for 15 seconds.
9. Other Potential Workarounds
Apart from the solutions mentioned above, there are a couple of other workarounds that might help you:
- Toggle Off Automatic Ear Detection: Issues with the proximity sensor on your AirPods can cause them to stop playing audio repeatedly. To prevent such issues, open the Settings app on your iPhone and tap the AirPods option under your name. Then, turn off the toggle next to Automatic Ear Detection.
- Turn Off Automatic Device Switching: If you have several Apple devices, automatic device switching can sometimes cause your AirPods to disconnect without warning. To prevent this from happening, open the Settings app on your iPhone and tap the AirPods option under your name. Then, tap Connect to This iPhone and select When Last Connected to This iPhone to turn off automatic device switching.
