Having the App Store icon mysteriously disappear, even when allowed access via Screen Time, is a frustrating glitch that limits access to Apple’s app marketplace. You won’t be able to install or update native and third-party programs alike. Although confusing, it usually stems from relatively easy-to-fix glitches or misconfigured settings. You just have to know where to start troubleshooting. Let’s delve into the potential causes and explore effective solutions to restore App Store access.
Why Am I Experiencing This Problem?
Issues with the App Store disappearing are normally because of cross-device content restrictions. In some cases, you may also face issues with incompatible settings or temporary glitches on your device. These apply to both iOS and iPadOS devices.
How to Stop App Store From Disappearing When Allowed Via Screen Time
1. Completely Disable Content and Privacy Restrictions
Start by completely disabling content and privacy restrictions—see if that makes a difference. Just note that you’re only doing this to see whether the problem lies here or elsewhere. I don’t recommend it as a permanent solution if you like using content and privacy restrictions.
Time needed: 2 minutes
Follow these instructions to disable content and privacy restrictions on your iPhone or iPad.
- Open Settings and select Screen Time.
- Navigate to Content & Privacy Restrictions.
- Toggle Content & Privacy Restrictions off at the top of your screen.
2. Check Your Other Privacy Settings
In addition to disabling your content and privacy restrictions, it’s also a good idea to check your other privacy settings. In some instances, you may need to turn these off before you can use the App Store again.
The main one to look at is your Location settings. I suggest turning these off at least until you’ve solved the problem.
- Open the Settings app and go to App Store.
- Under Allow App Store to Access, select the Location tab.
- In the next window, you’ll see a section called Allow Location Access. Tap Never.
 NOTE
NOTE
3. Change Screen Time Management Settings
It’s worth double-checking to ensure you have allowed the App Store in your Screen Time settings. You can do that via Always Allowed. Here’s how:
- Go to Settings > Screen Time.
- If the App Store is allowed, you’ll see it under Allowed Apps. Tap the + icon next to App Store if you don’t see it there.
4. Toggle “Installing Apps” and “Deleting Apps” Off and On Again
You should also look at the iTunes & App Store Purchases section and ensure that each of the following settings are toggled on:
- Installing Apps
- Deleting Apps
- In-app Purchases
The above toggles are all located in the same place. Below are the steps you should follow to access them.
- Go to Settings > Screen Time.
- Select iTunes & App Store Purchases.
- Under Store Purchases & Re-Downloads, check each section to ensure they say Allow.
- If any options say Don’t Allow, tap them and select Allow. You should now have full control over the App Store.
5. Turn Off “Share Across Devices”
One of the most common reasons why you can’t use the App Store, even when you’ve allowed it via Screen Time, is because you’re sharing your content and privacy restrictions across multiple devices. This problem occurs especially when you’ve shared your Screen Time settings with a child’s iPhone or iPad.
You can change your settings by turning off Share Across Devices.
- Open the Settings app and go to Screen Time.
- Scroll to the bottom and look for the Share Across Devices tab. Switch this off.
 NOTE
NOTE
6. Perform a Hard Restart
If you’ve tried everything so far and nothing has worked, you may be experiencing some kind of software glitch. In these instances, performing a hard restart is the best thing you can do.
How you perform a hard restart depends on whether your iPhone or iPad has a Home Button. If your device uses Face ID, you’ll need to follow these instructions.
- Tap one of the Volume Buttons.
- Tap the second Volume Button.
- Press and hold the Standby Button until your device switches off and on again.
For iPhones and iPads without a Home Button:
- Hold on to the Home Button and Power Button simultaneously.
- Wait for your device to turn off and on again. You can let go of the buttons when you see the Apple logo.
7. Update iOS or iPadOS
Another way you can solve challenges that arise when using Apple’s apps or problems within the Settings app is by updating your iOS/iPadOS software. I also recommend switching on Automatic Updates, as you’ll then ensure that your device is constantly up to date.
First, let’s look at how to update iOS or iPadOS:
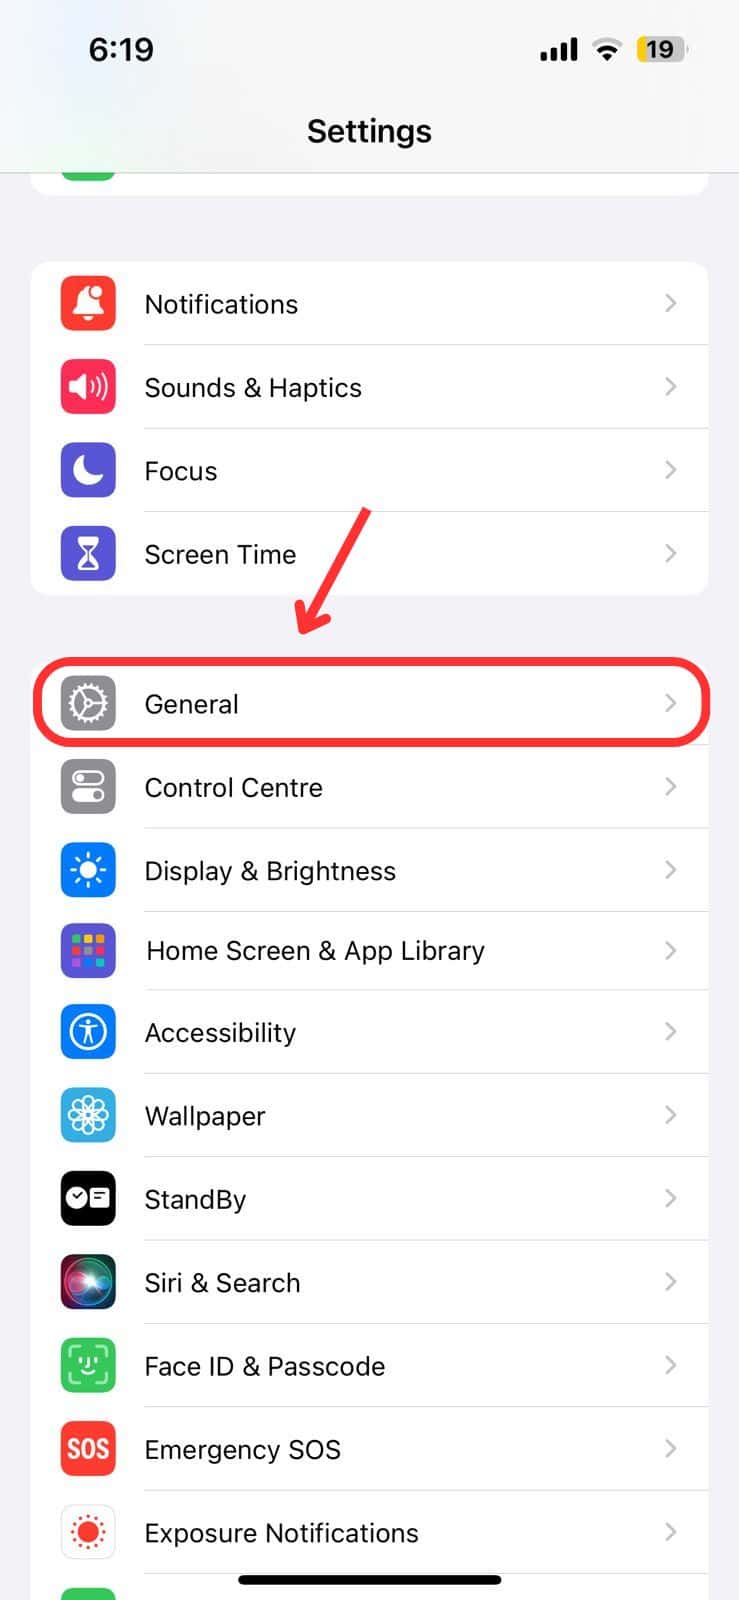
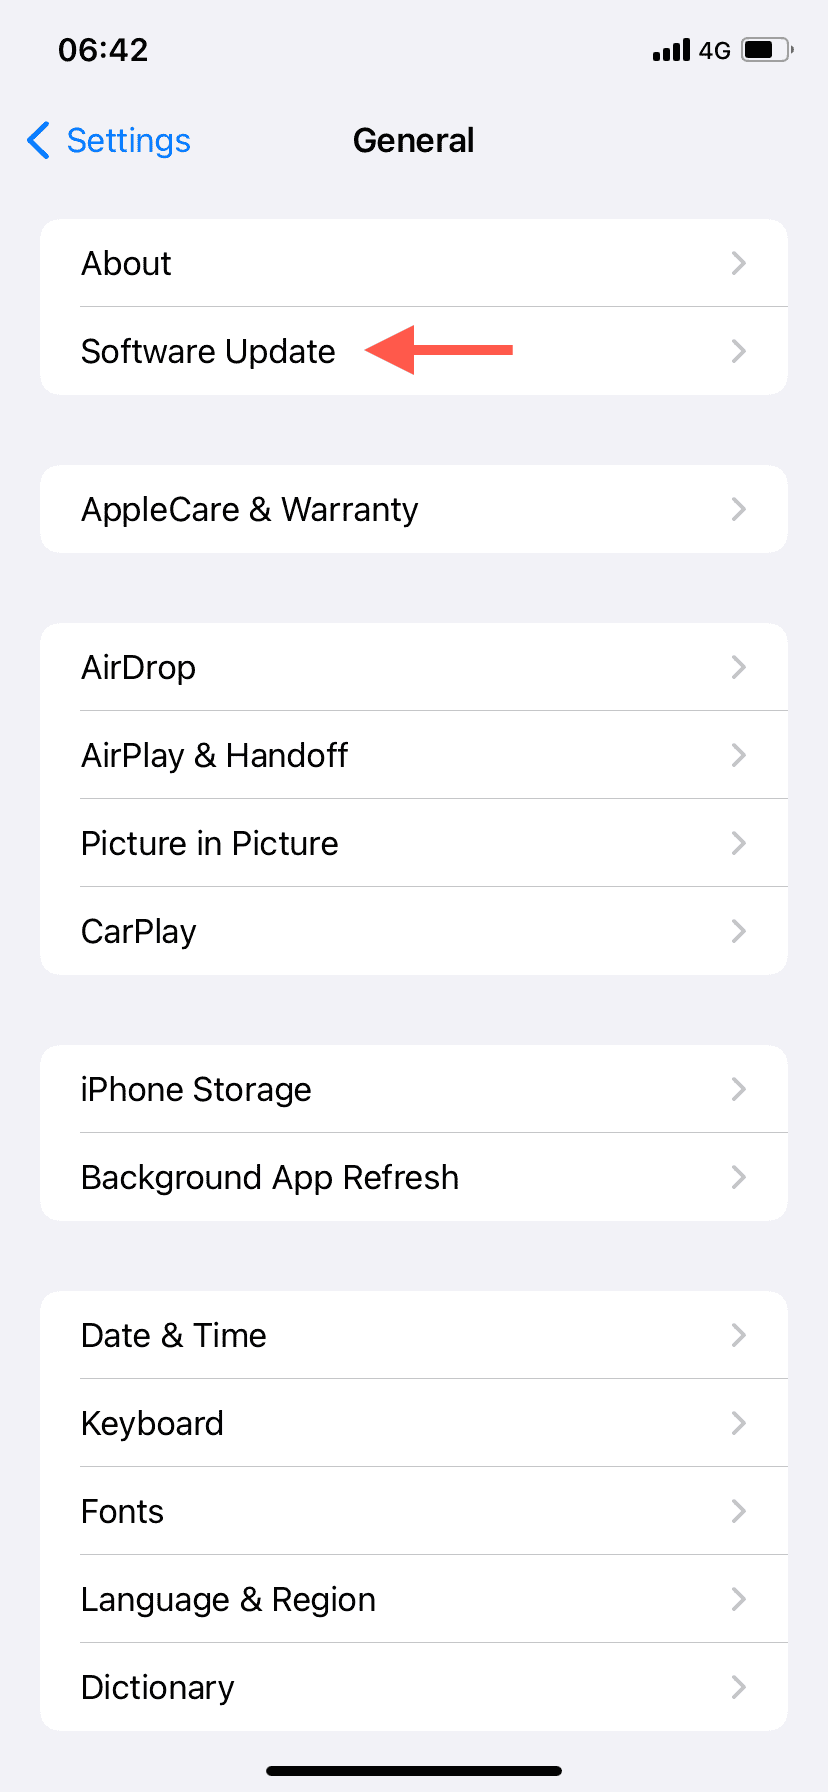
- Go to Settings > General on your iPhone or iPad.
- Select Software Update.
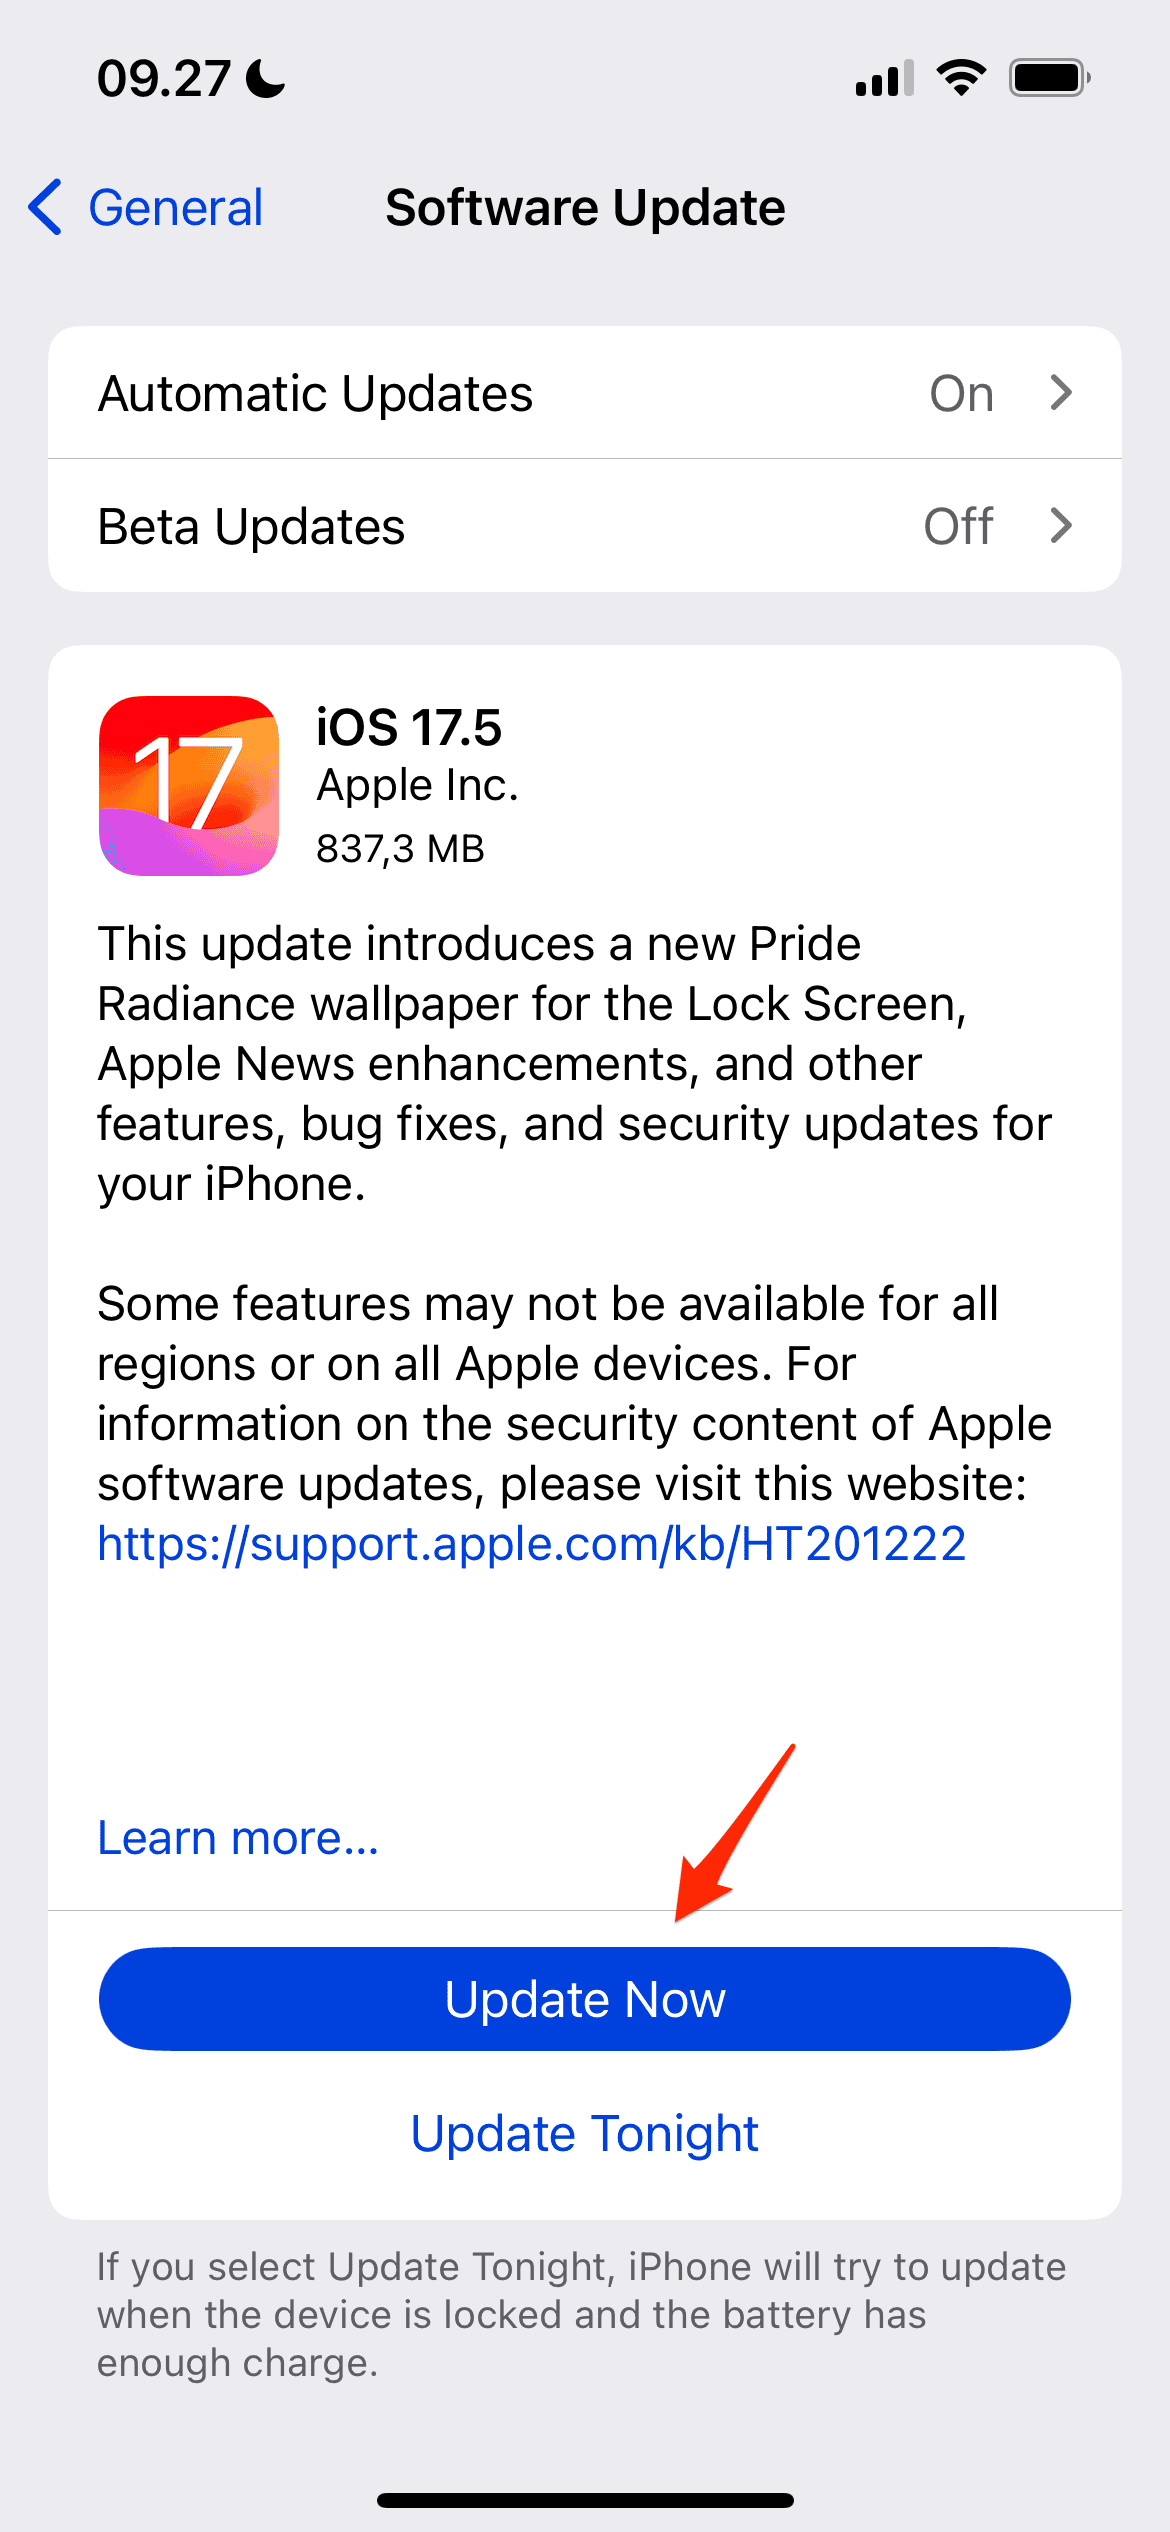
- If your software is up to date, you’ll see a message confirming this. If it isn’t, select Update Now when the necessary prompt appears.
To ensure that your device is always updated:
- Tap Automatic Updates at the top of Settings > General > Software Update.
- Under Automatically Install, toggle iPadOS Updates on. Do the same under Automatically Download.
8. Factory Reset Your iPhone or iPad
I wanted to do everything to stop you from needing to factory reset your smartphone or tablet. Doing this will remove everything from your device, and for this reason, you need to first back up your iPhone or iPad. Let’s first look at how to do that:
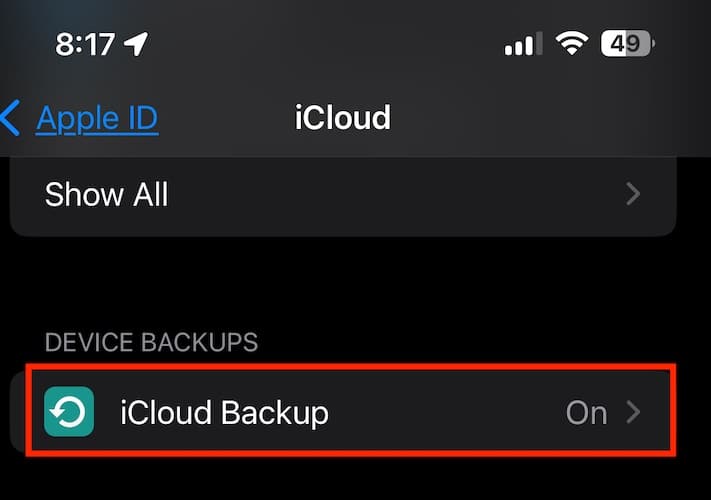
- Open the Settings app and select your Apple ID at the top, before then tapping iCloud.
- Go to iCloud Backup.
- Select Back Up Now and wait for your iPhone or iPad to complete the process.
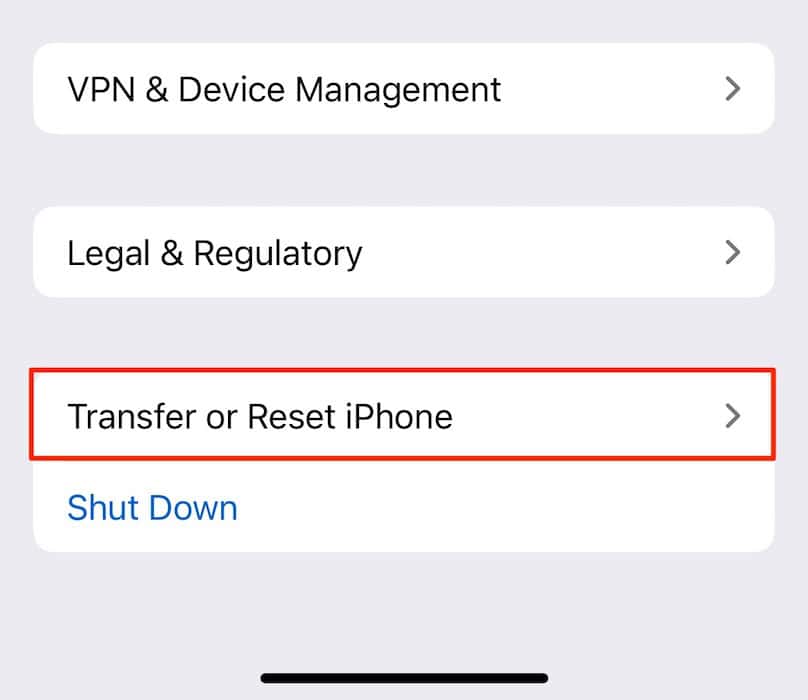
Then, factory reset your iPhone or iPad by following the instructions below.
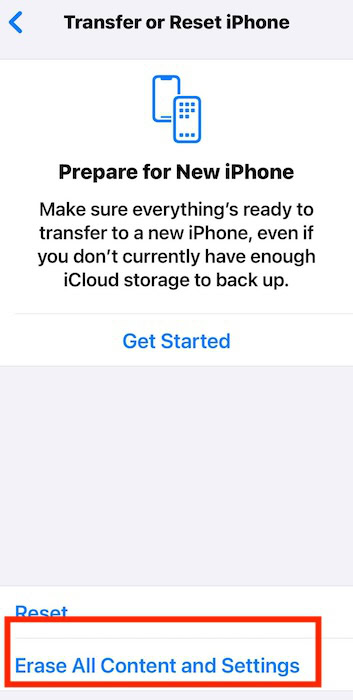
- Go to Settings > General > Transfer or Reset iPhone (or, if you’re using an iPad, Transfer or Reset iPad).
- Select Erase All Content and Settings.
- Enter your passcode and follow any remaining instructions on the screen.
- Restore your iPhone or iPad when the reset has been completed.
Hopefully, you don’t need to as far as wiping your iPhone or iPad. Several solutions exist before you get to that point, such as tweaking your Screen Time settings. Hopefully, now that you’ve reached the end of this guide, you have managed to access the App Store again. Otherwise, it’s best to reach out to Apple Support.


