
The iPhone excels at capturing stunning videos, but the trade-off for that high quality is often a large file size. Instead of deleting these videos to free up storage space, you can compress them right on your device. This allows you to significantly reduce their size while still maintaining good quality. They’ll take less space, plus they’re also easier to share on platforms with file size limits, such as email or social media.
I’ve explored various methods to simplify this process, and I’ll guide you through four of the best options below.
4 Ways to Compress a Video on iPhone
1. Compress Video Online
Time needed: 2 minutes
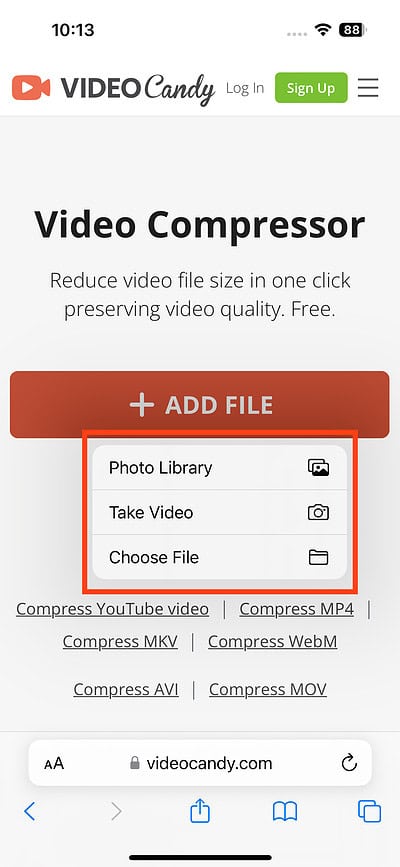
I recently found a free online platform called Video Candy, and it’s been a game-changer for me when I need to quickly compress an iPhone video. This option is the easiest and best if you’re low on storage space and cannot download any new apps on your iPhone. Follow these steps:
- Go to Video Candy on Safari or any other browser on your iPhone.
- Tap the + Add File button to select the video from your library or camera roll to compress.
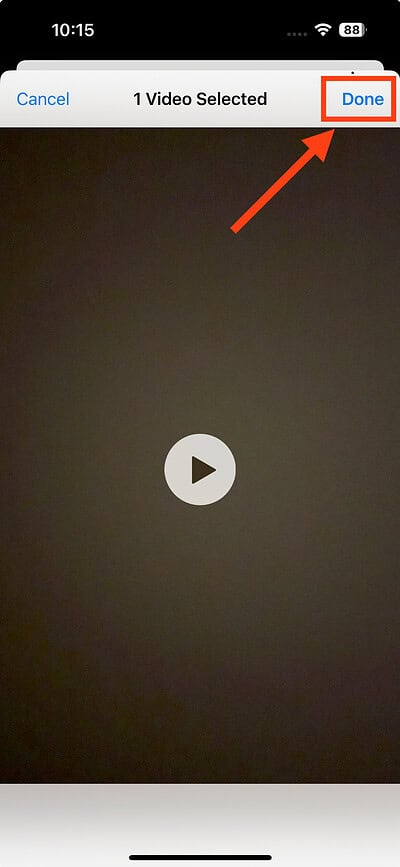
- Tap Done in the top right corner.


Once compression is complete, check the resulting file size. If satisfied with the result, tap Download file.
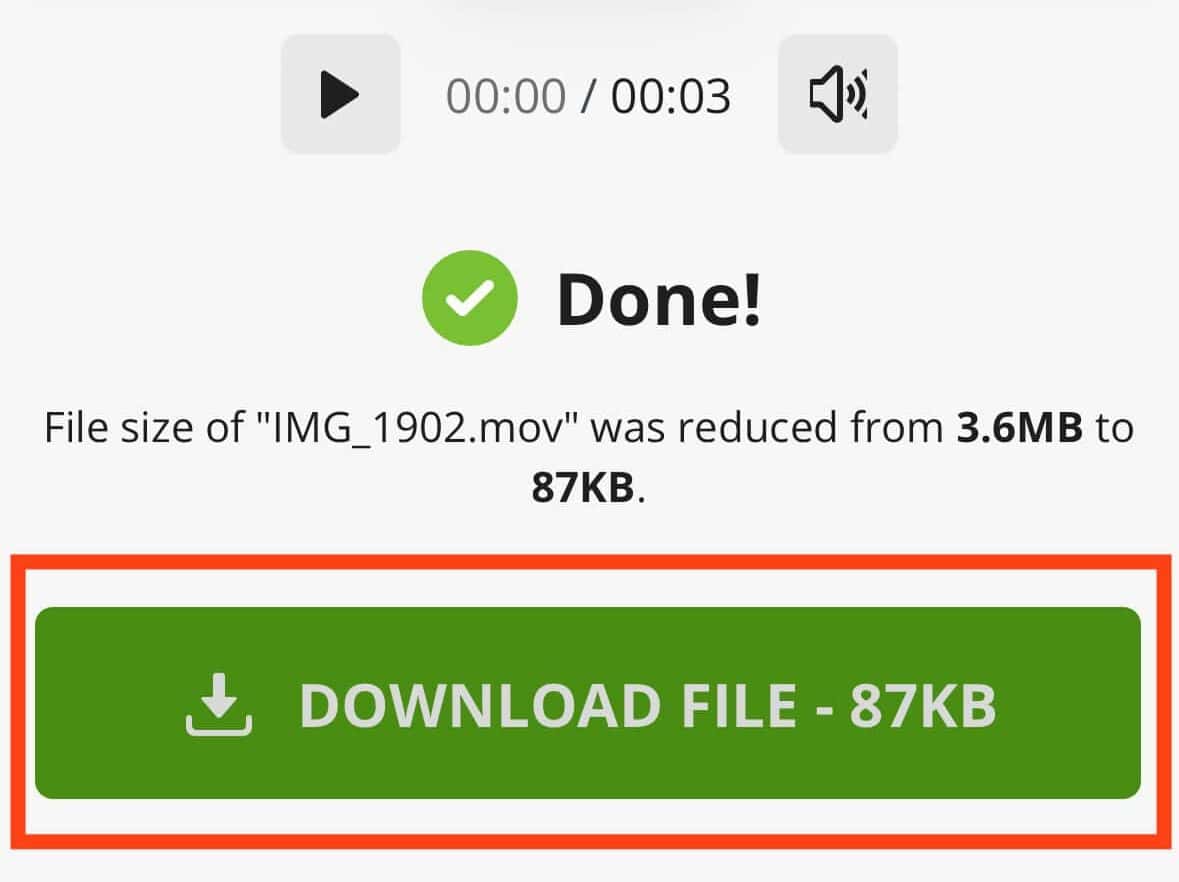
You can find the downloaded video in the Downloads folder of the Files app.
2. Use a Third-Party App
If you do not want to reduce video quality drastically, use third-party apps that edit videos with minor quality reductions. You can search for one on the App Store, although I suggest trying the following:
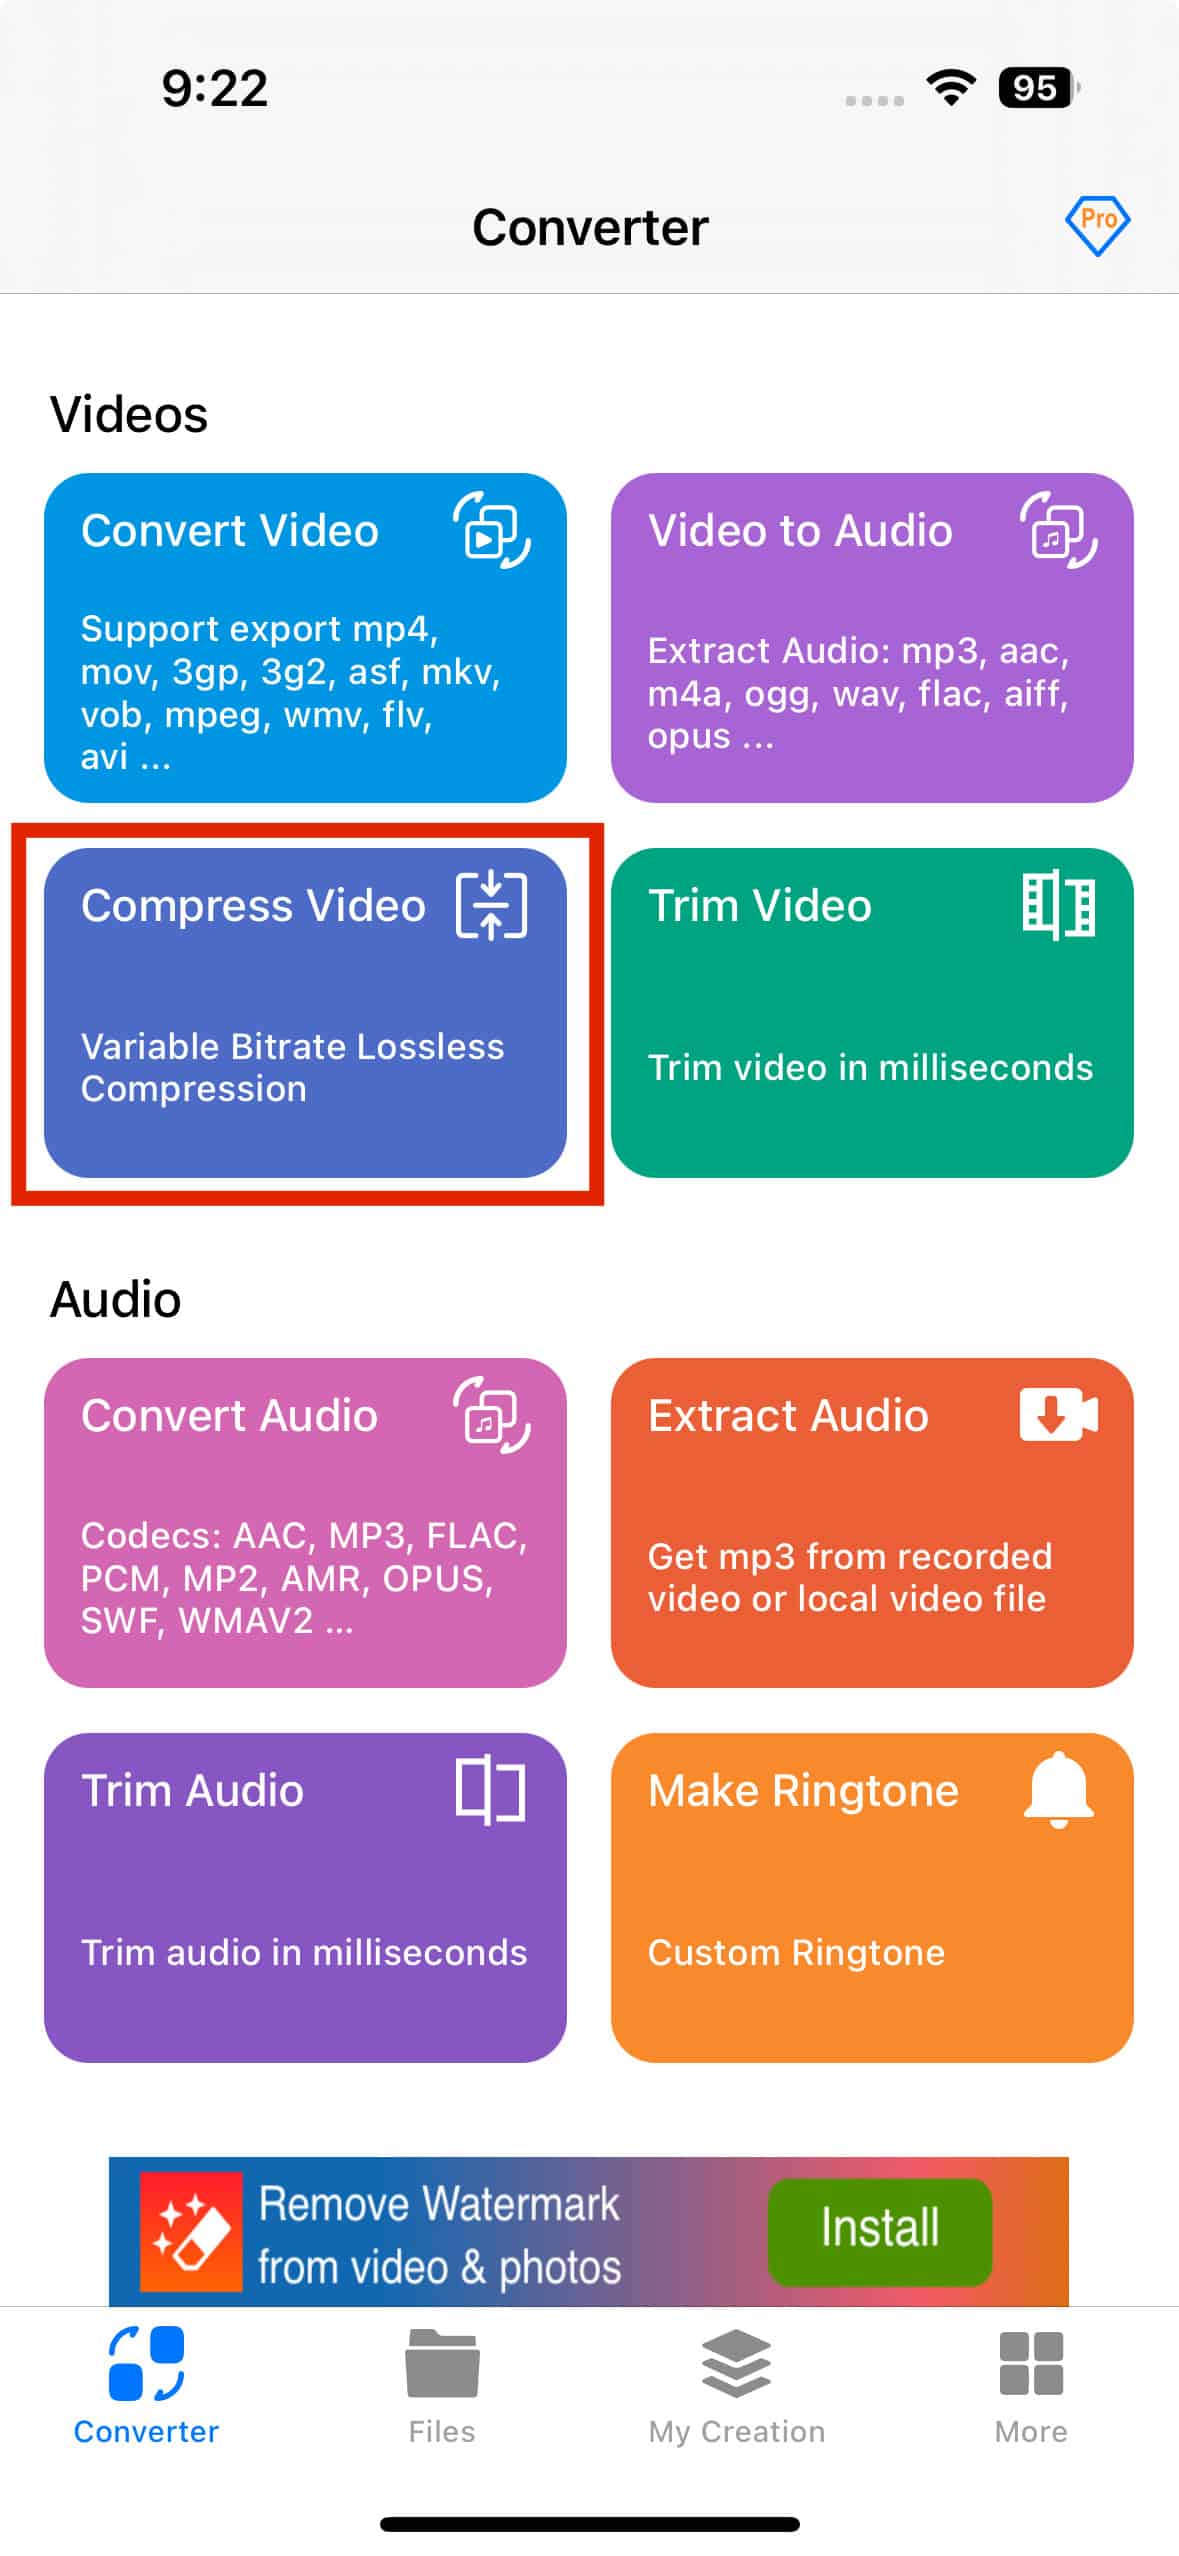
Media Converter
Media Converter is a freemium app that gives you a lot of freedom to fine-tune the compression settings for the best results.
- Open Media Converter on your iPhone.
- Select Compress Video under the Videos section.

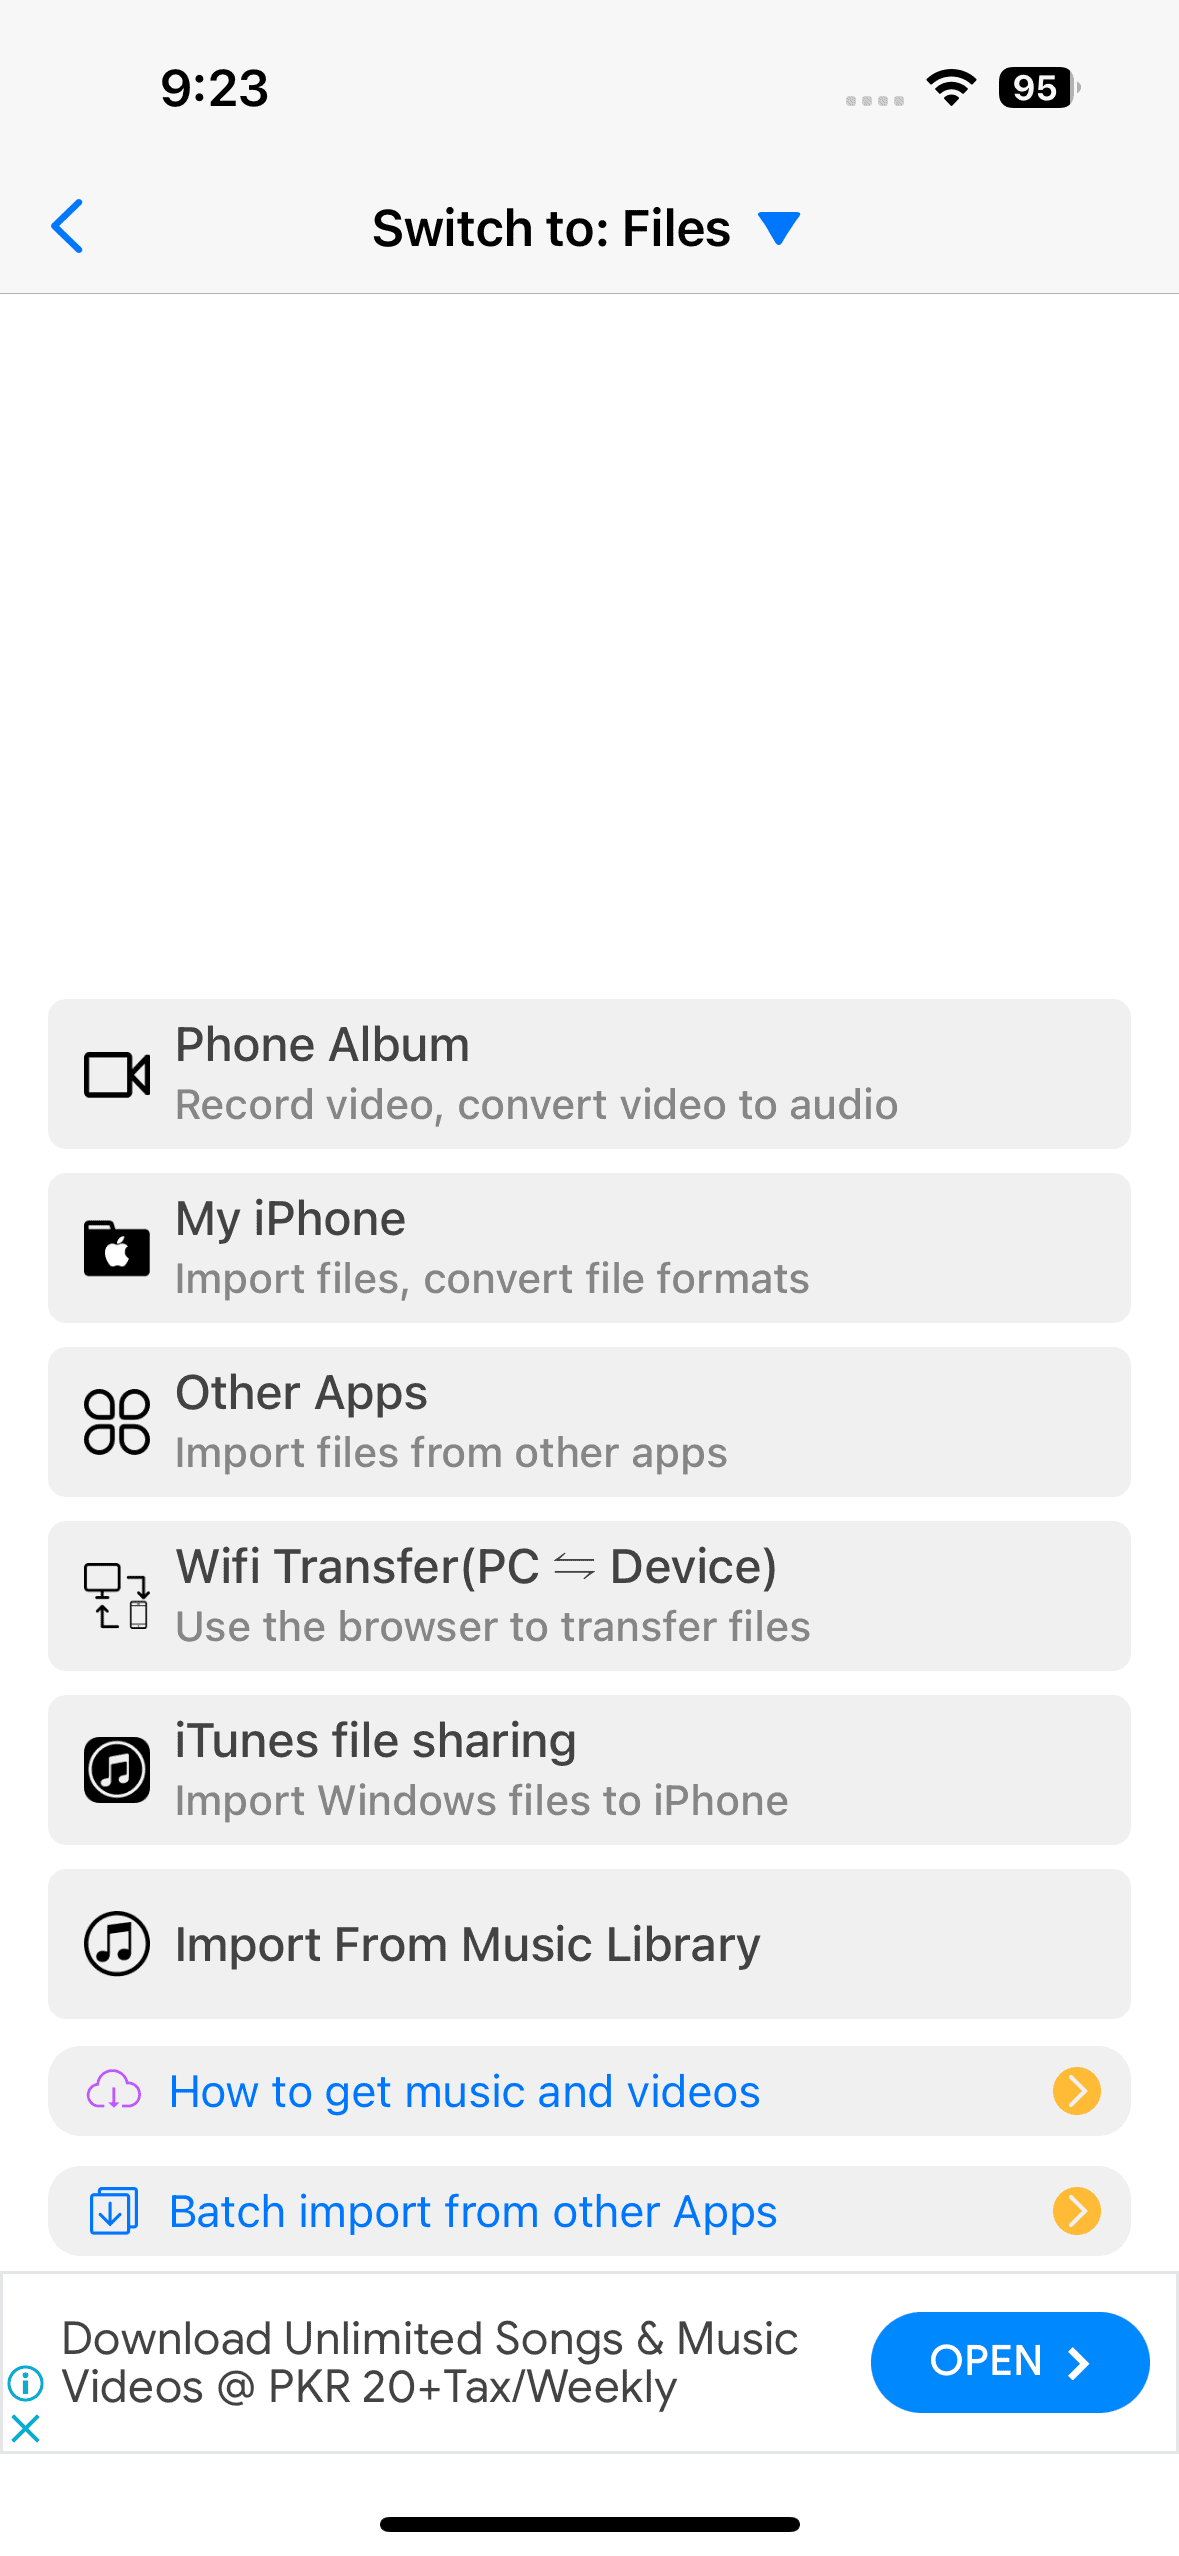
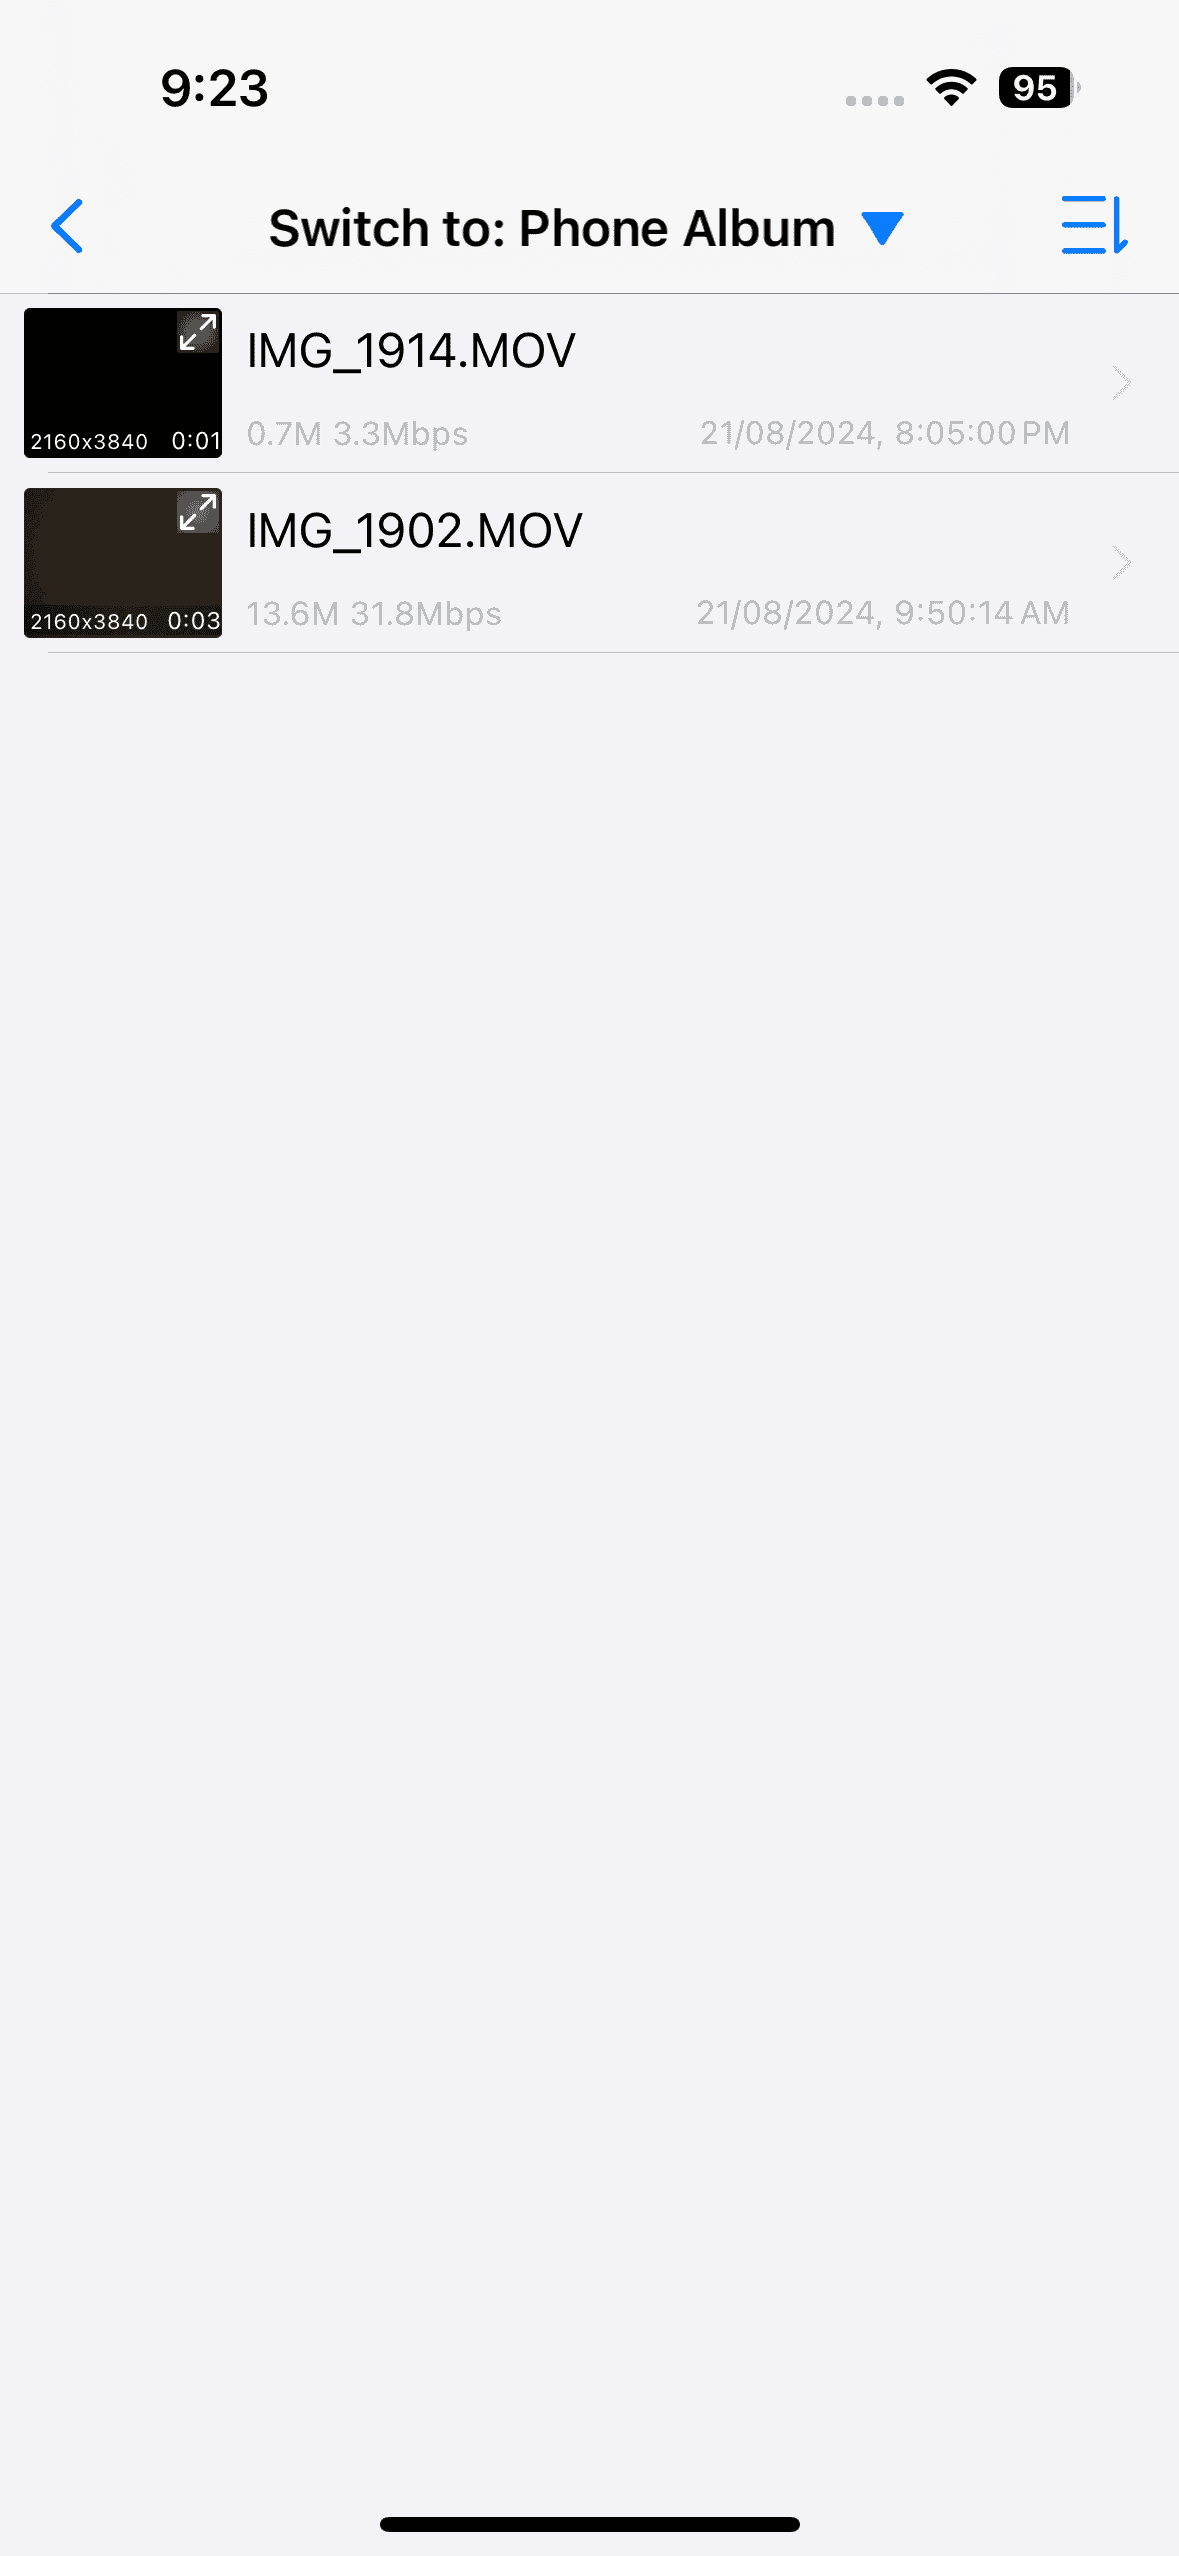
- On the next page, choose the video source (e.g., Phone Album) and grant the app access to your files.
- Choose the video you’d like to edit.
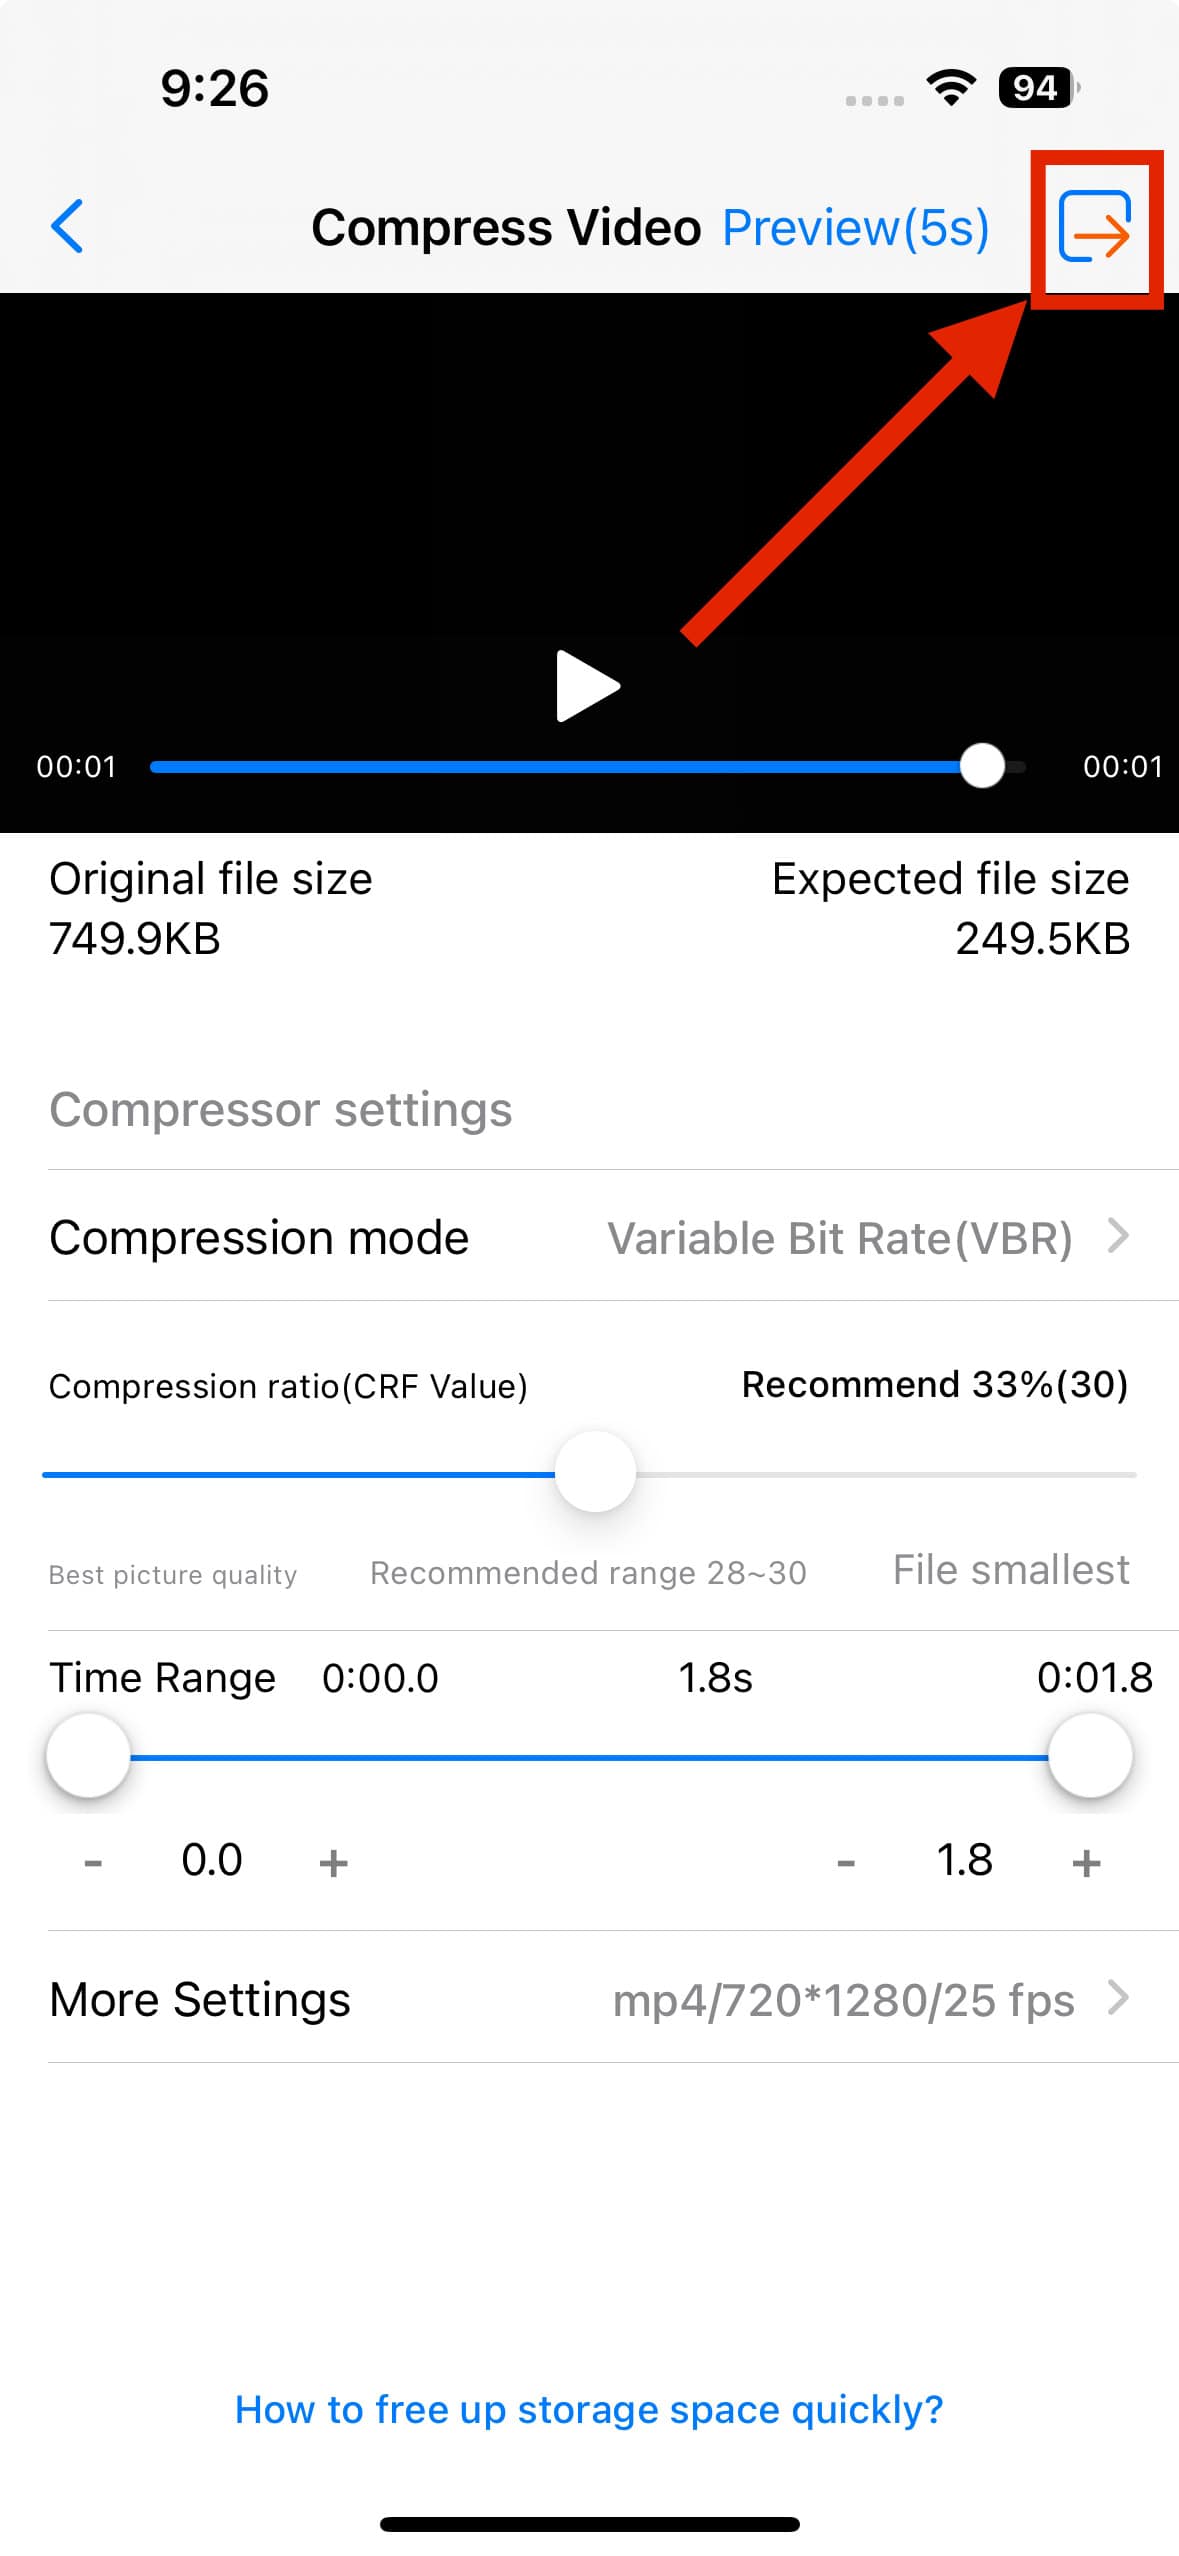
- On the Video Compression page, choose a Compression Mode and Ratio.
- Tap the Next button in the top-right corner and select Start to begin editing.

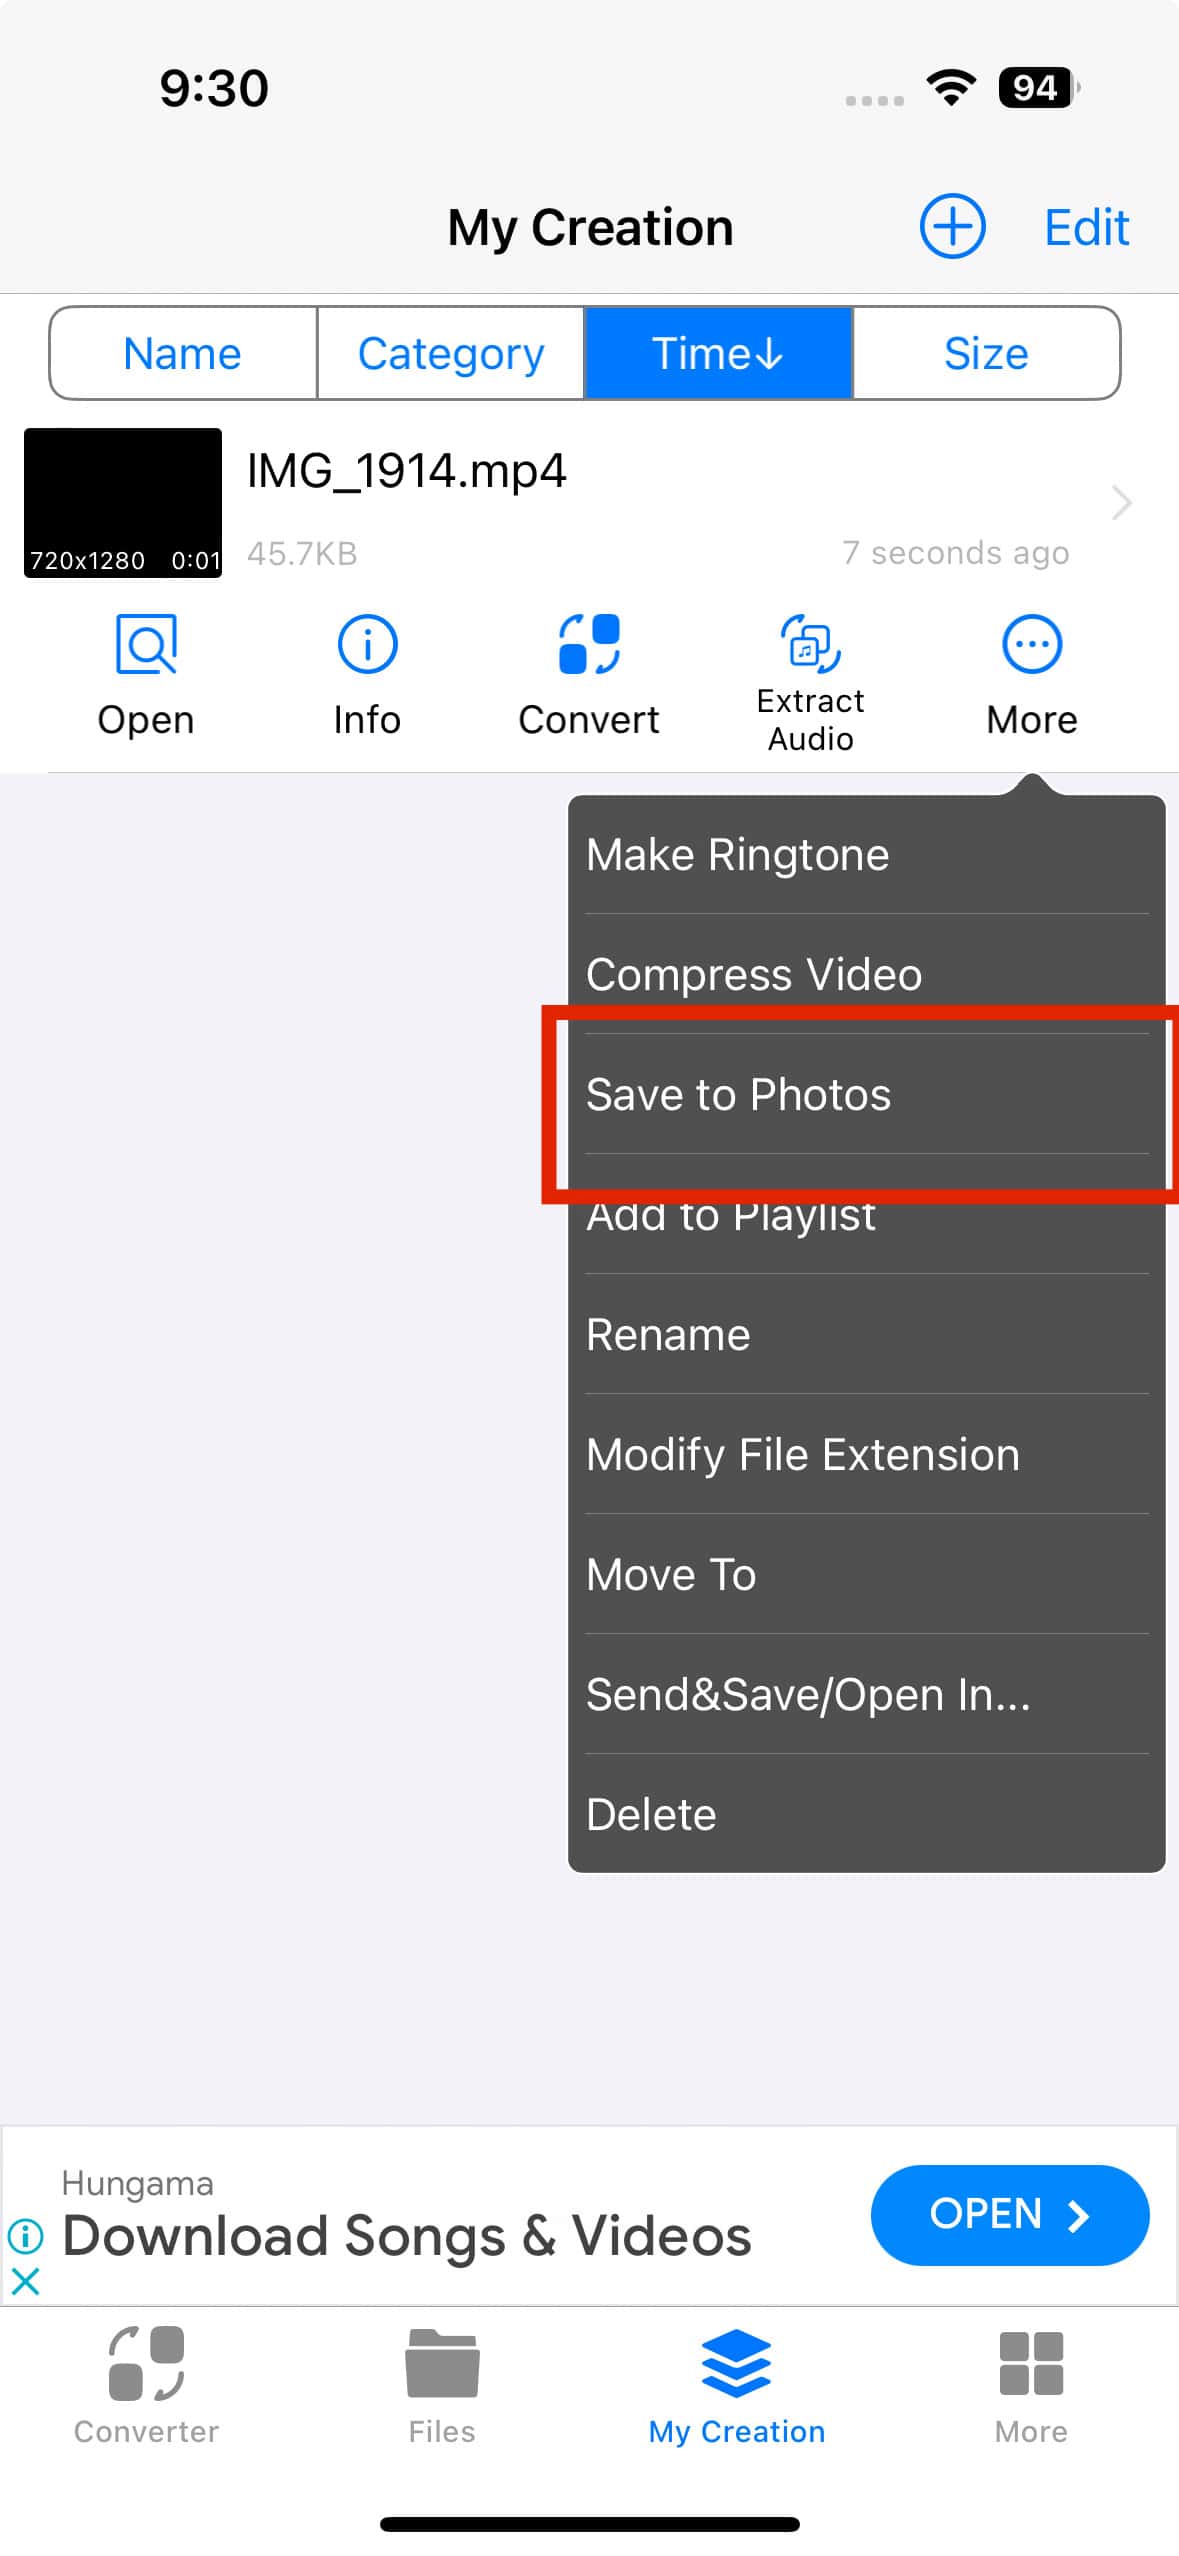
After rendering is complete, you can find the converted file in the My Creation tab. The video will remain in Media Converter until you save it to the Photos app.
- Tap the forward-facing arrow next to the file name.
- Select More > Save to Photos to move the video to your Photos app.
Video Compress
This free app is super simple and easy to use, mainly because its only function is to downsize your large video files.
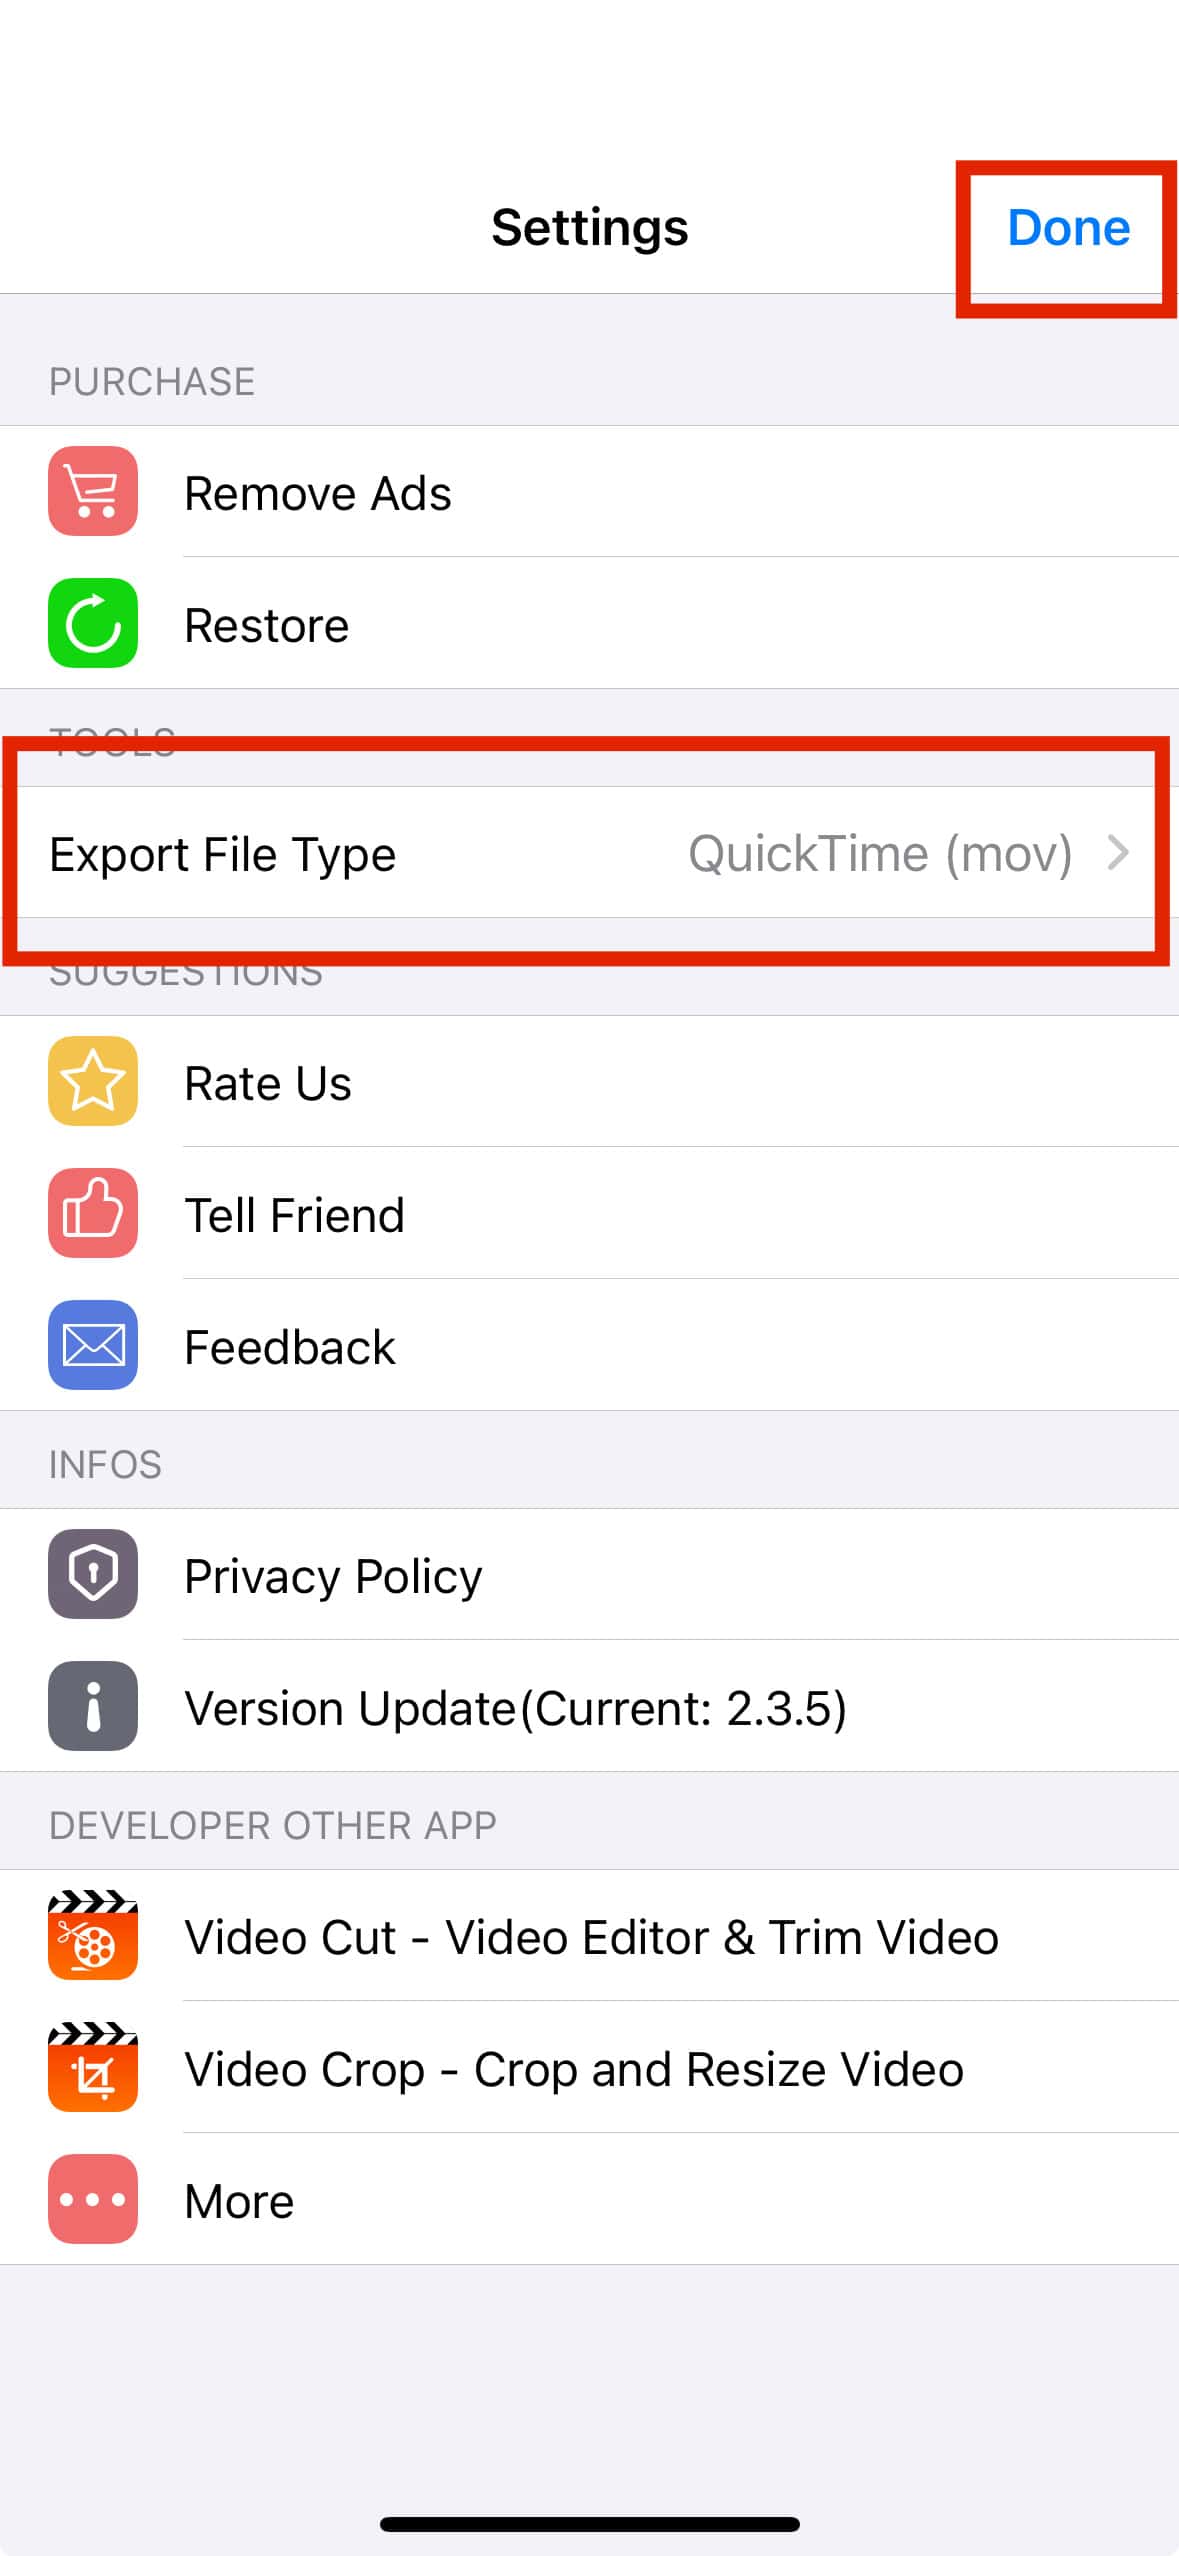
- Open Video Compress and tap the gear icon in the top right corner.
- Specify the format you want your video to be in.
- Select Export File Type to choose your preferred file type.
- Tap Done to return to the home page.
- Tap the orange circular icon with two diagonal arrows pointing at each other.
- Grant the app permission to access your library. You can either limit access to select files or give full access.
- Choose the video you want to compress and tap the checkmark in the top right corner.
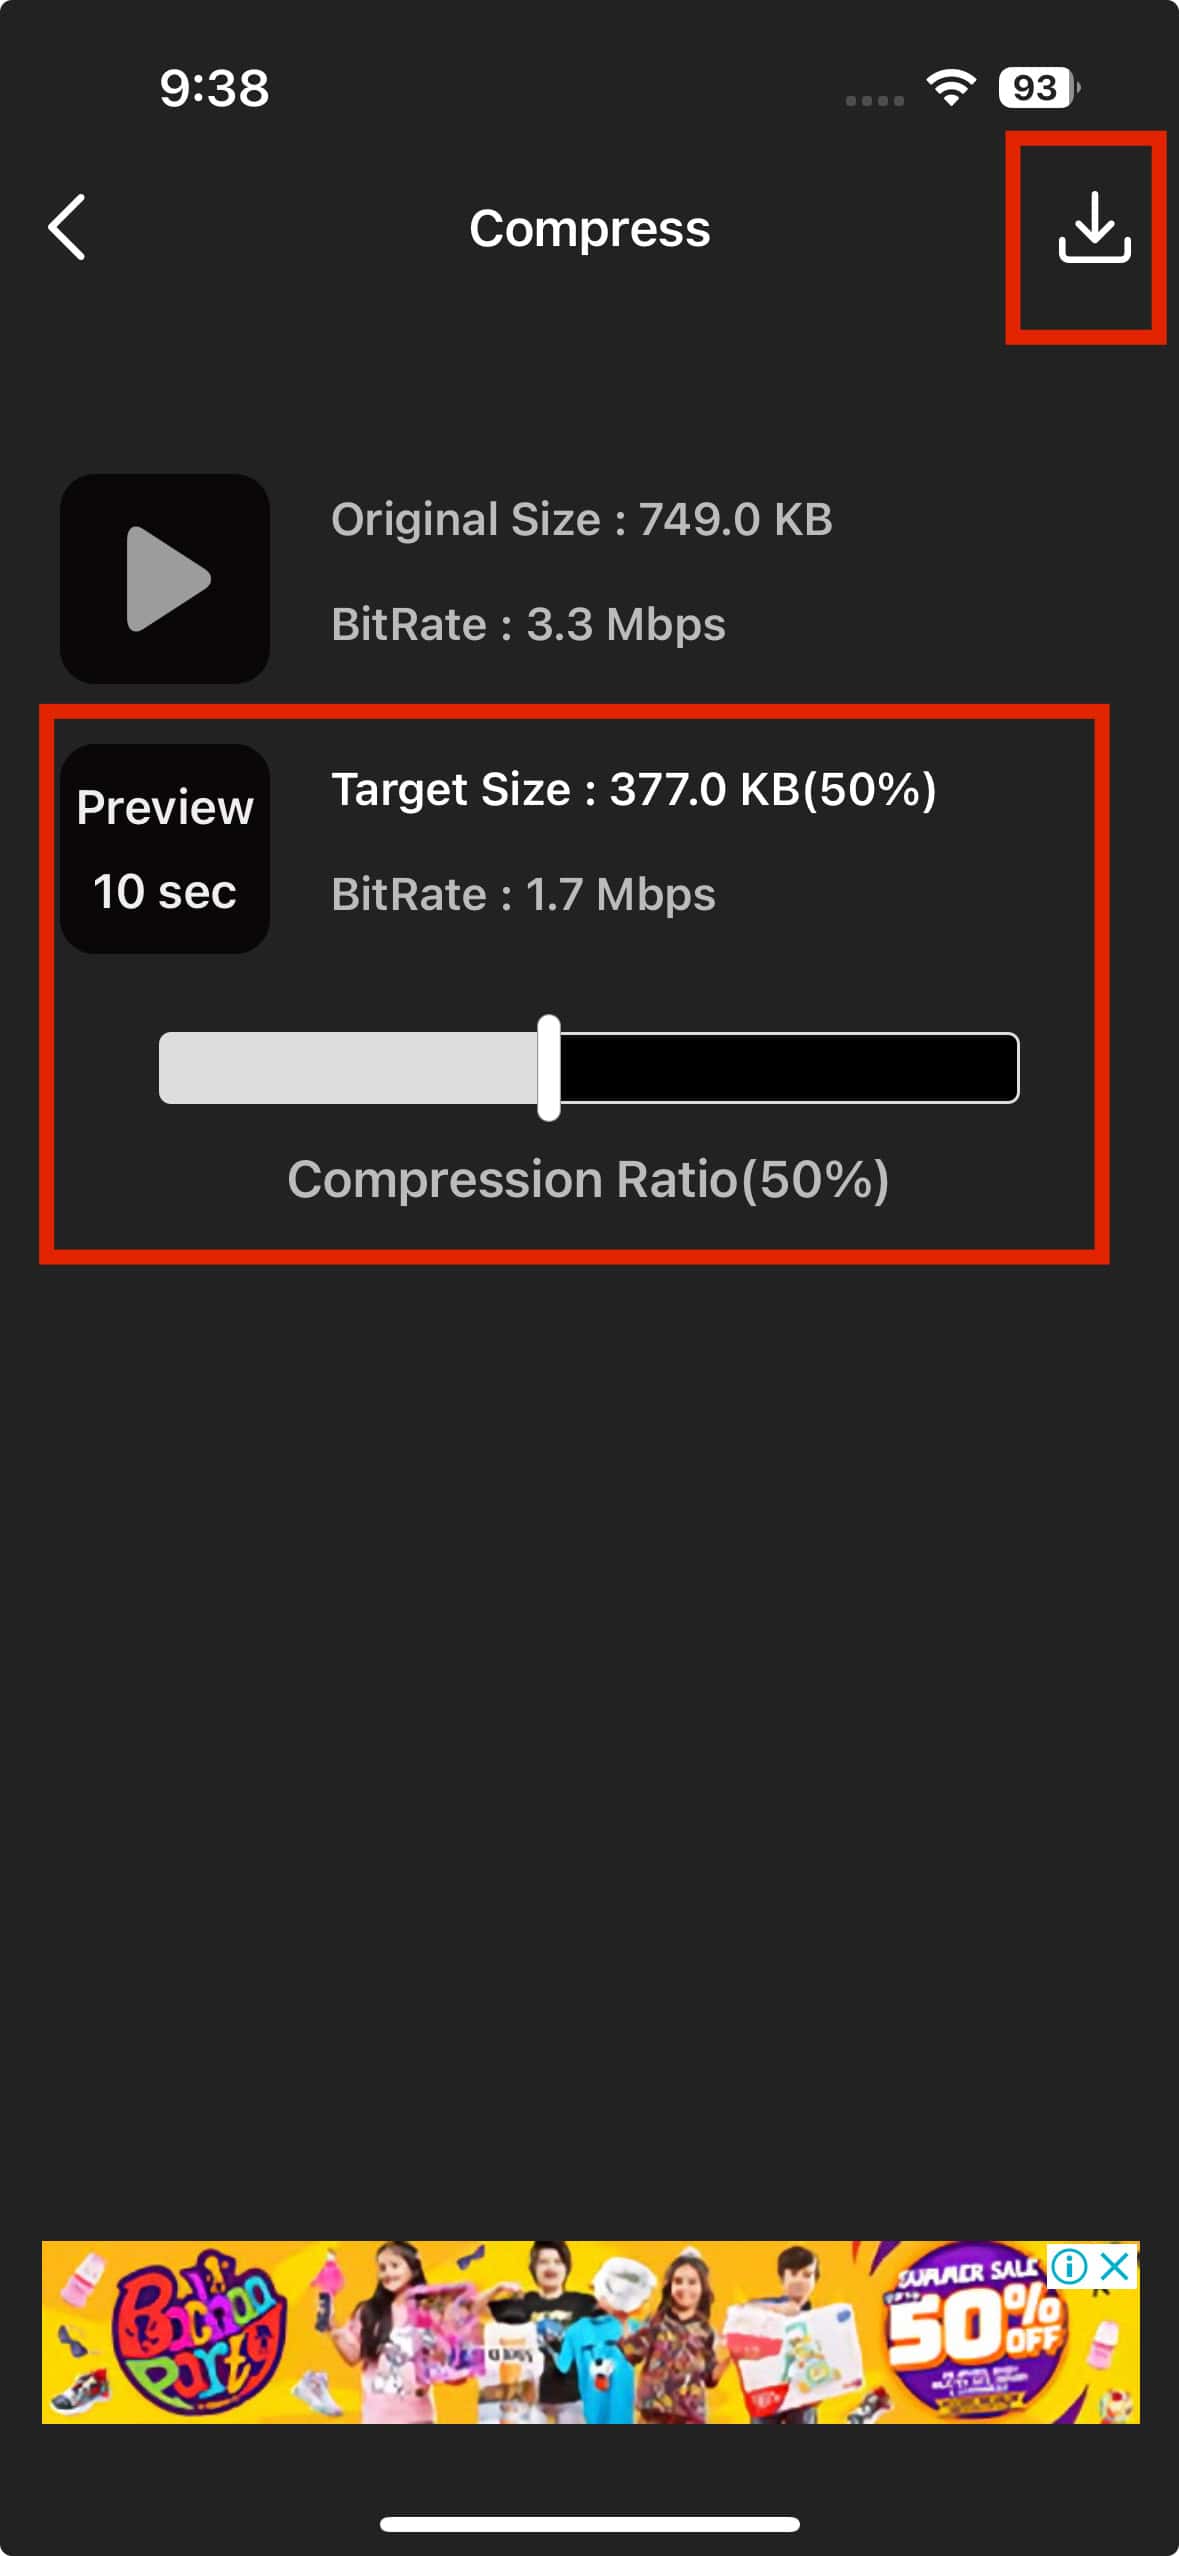
- Adjust the compression ratio using the slider at the center of the screen. I recommend setting it somewhere around 50% for the best compression-to-quality trade-off.
- Tap the preview icon to view your video.
- When satisfied, tap the download icon to save the video.
Compress Videos & Resize Video
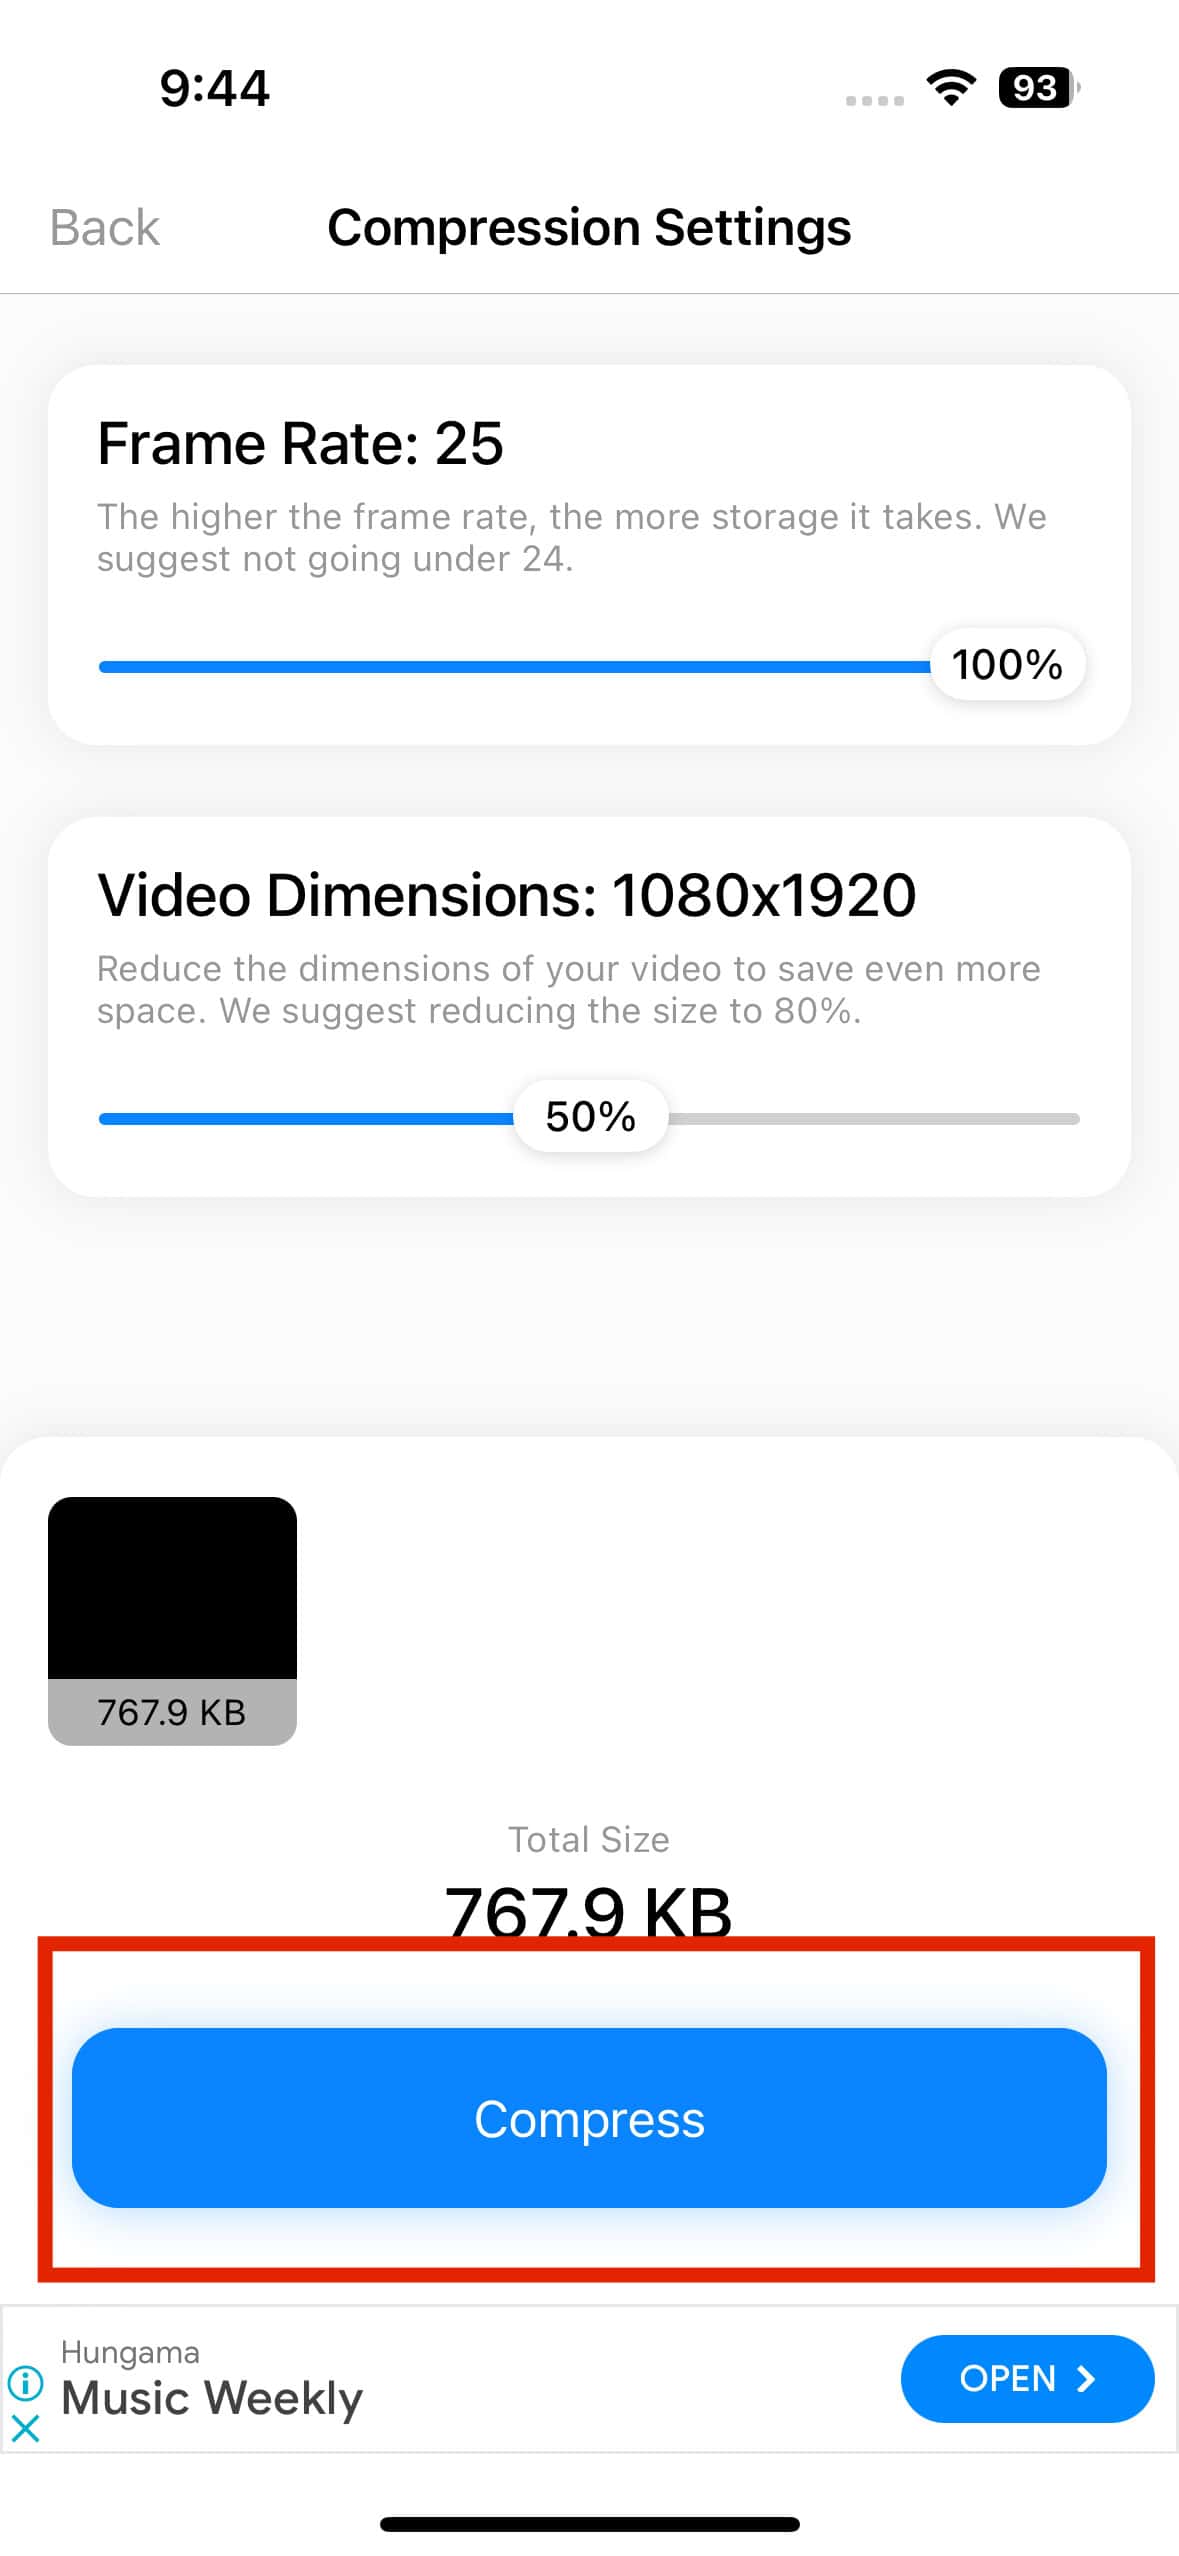
This highly-rated app makes it easy to edit multiple videos simultaneously and gives you additional options like adjusting the video frame rate.
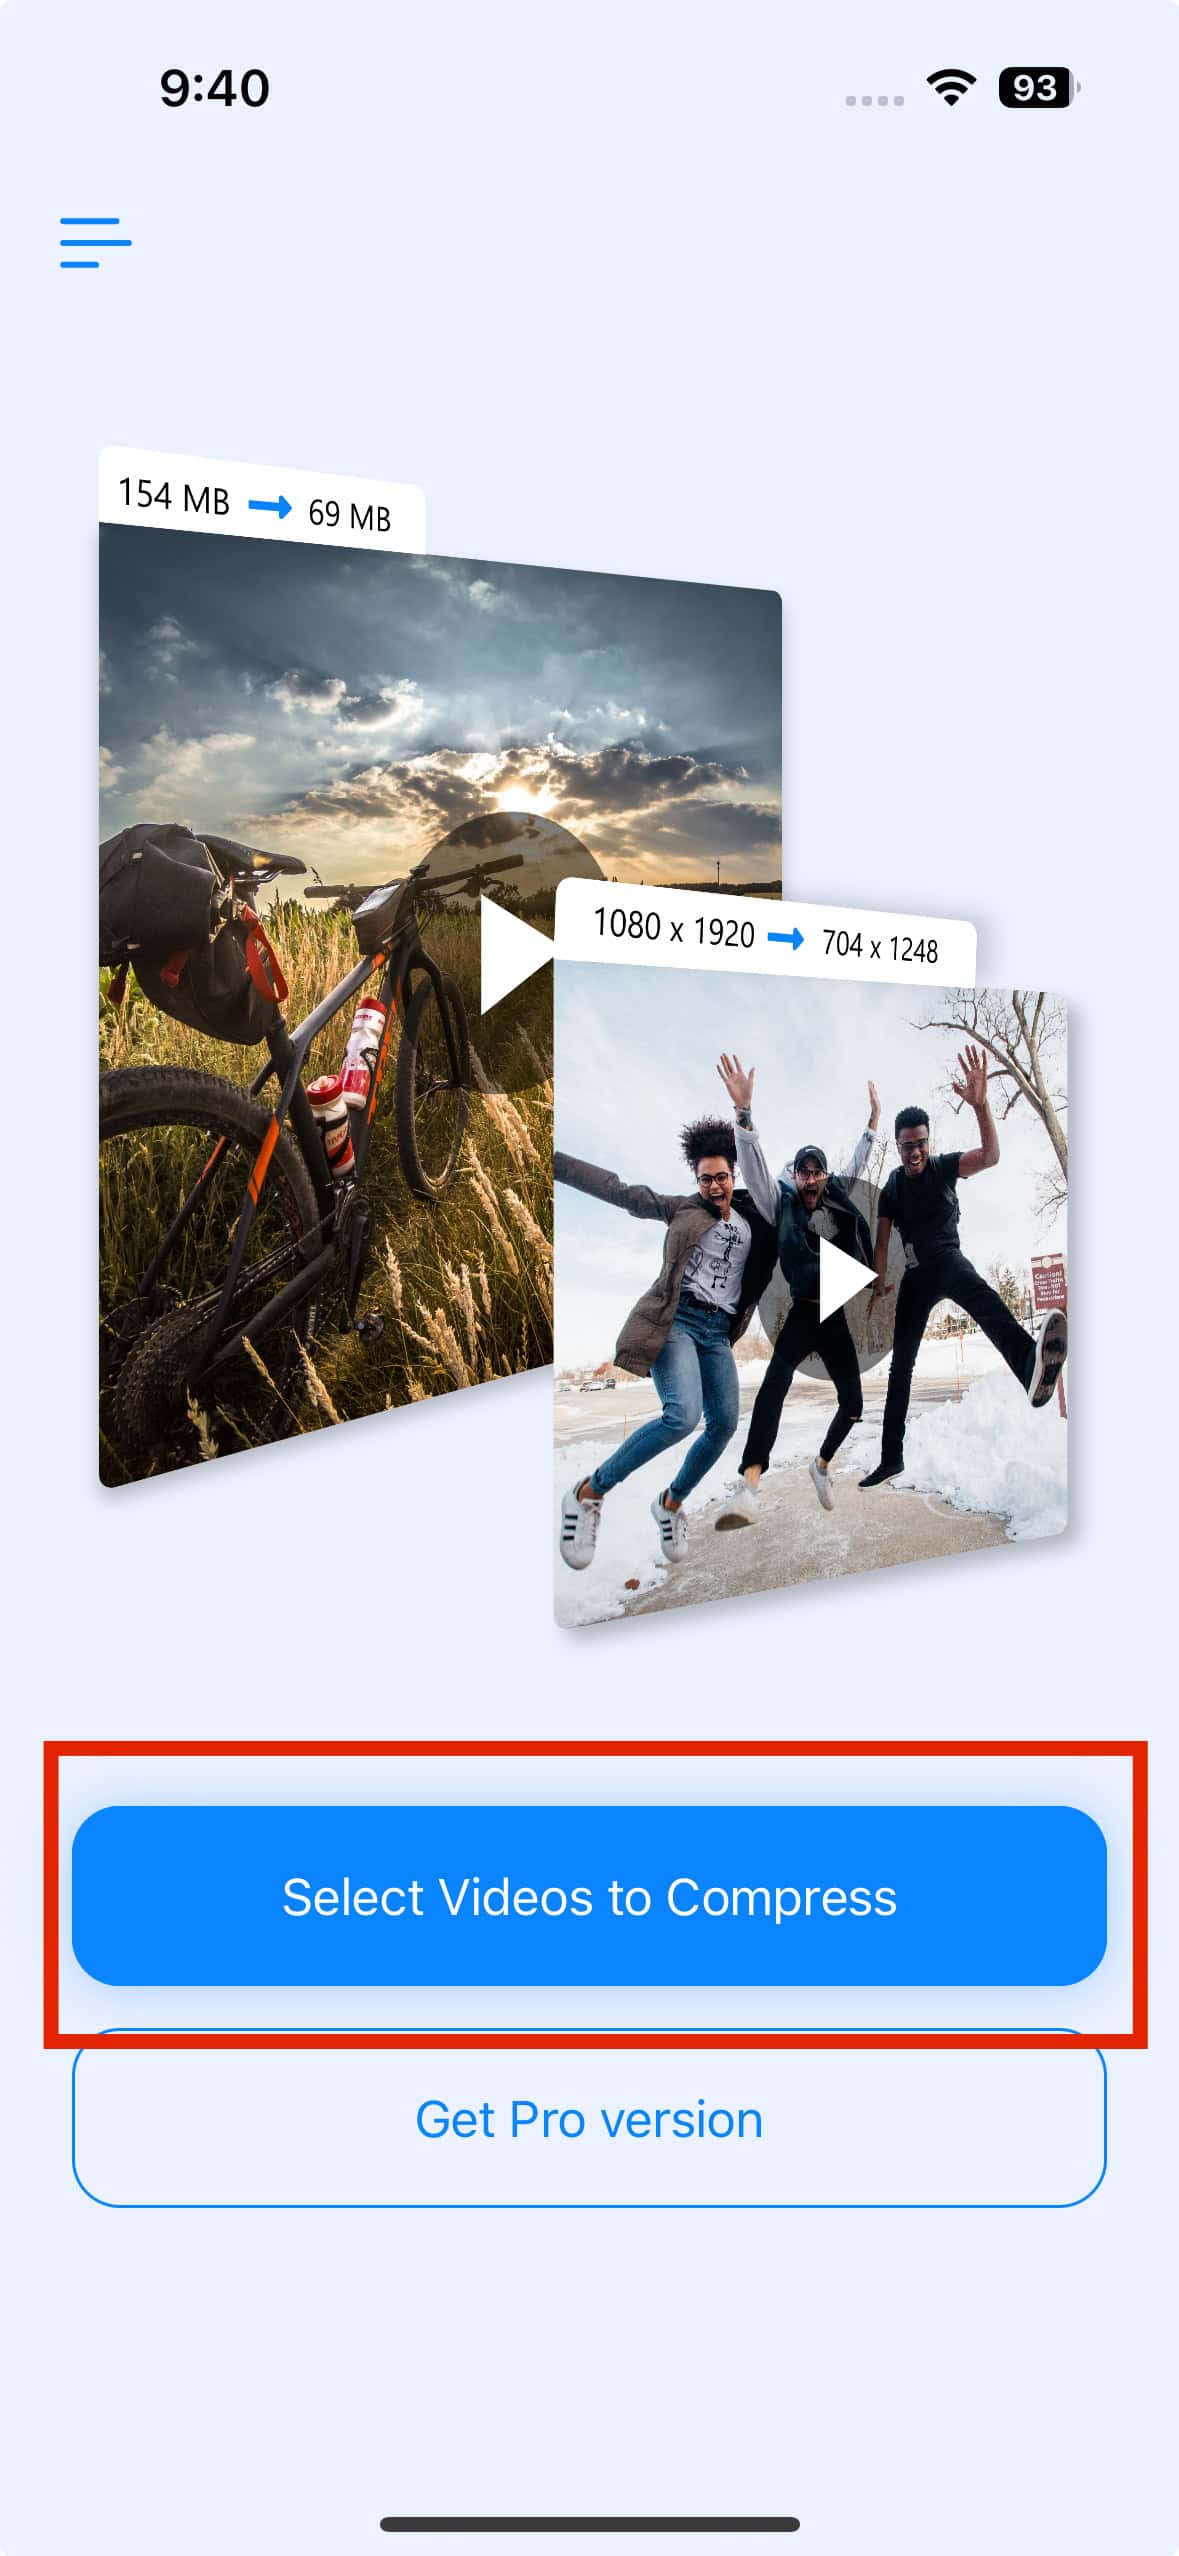
- Open Compress Videos & Resize Video and allow access to your photos and videos.
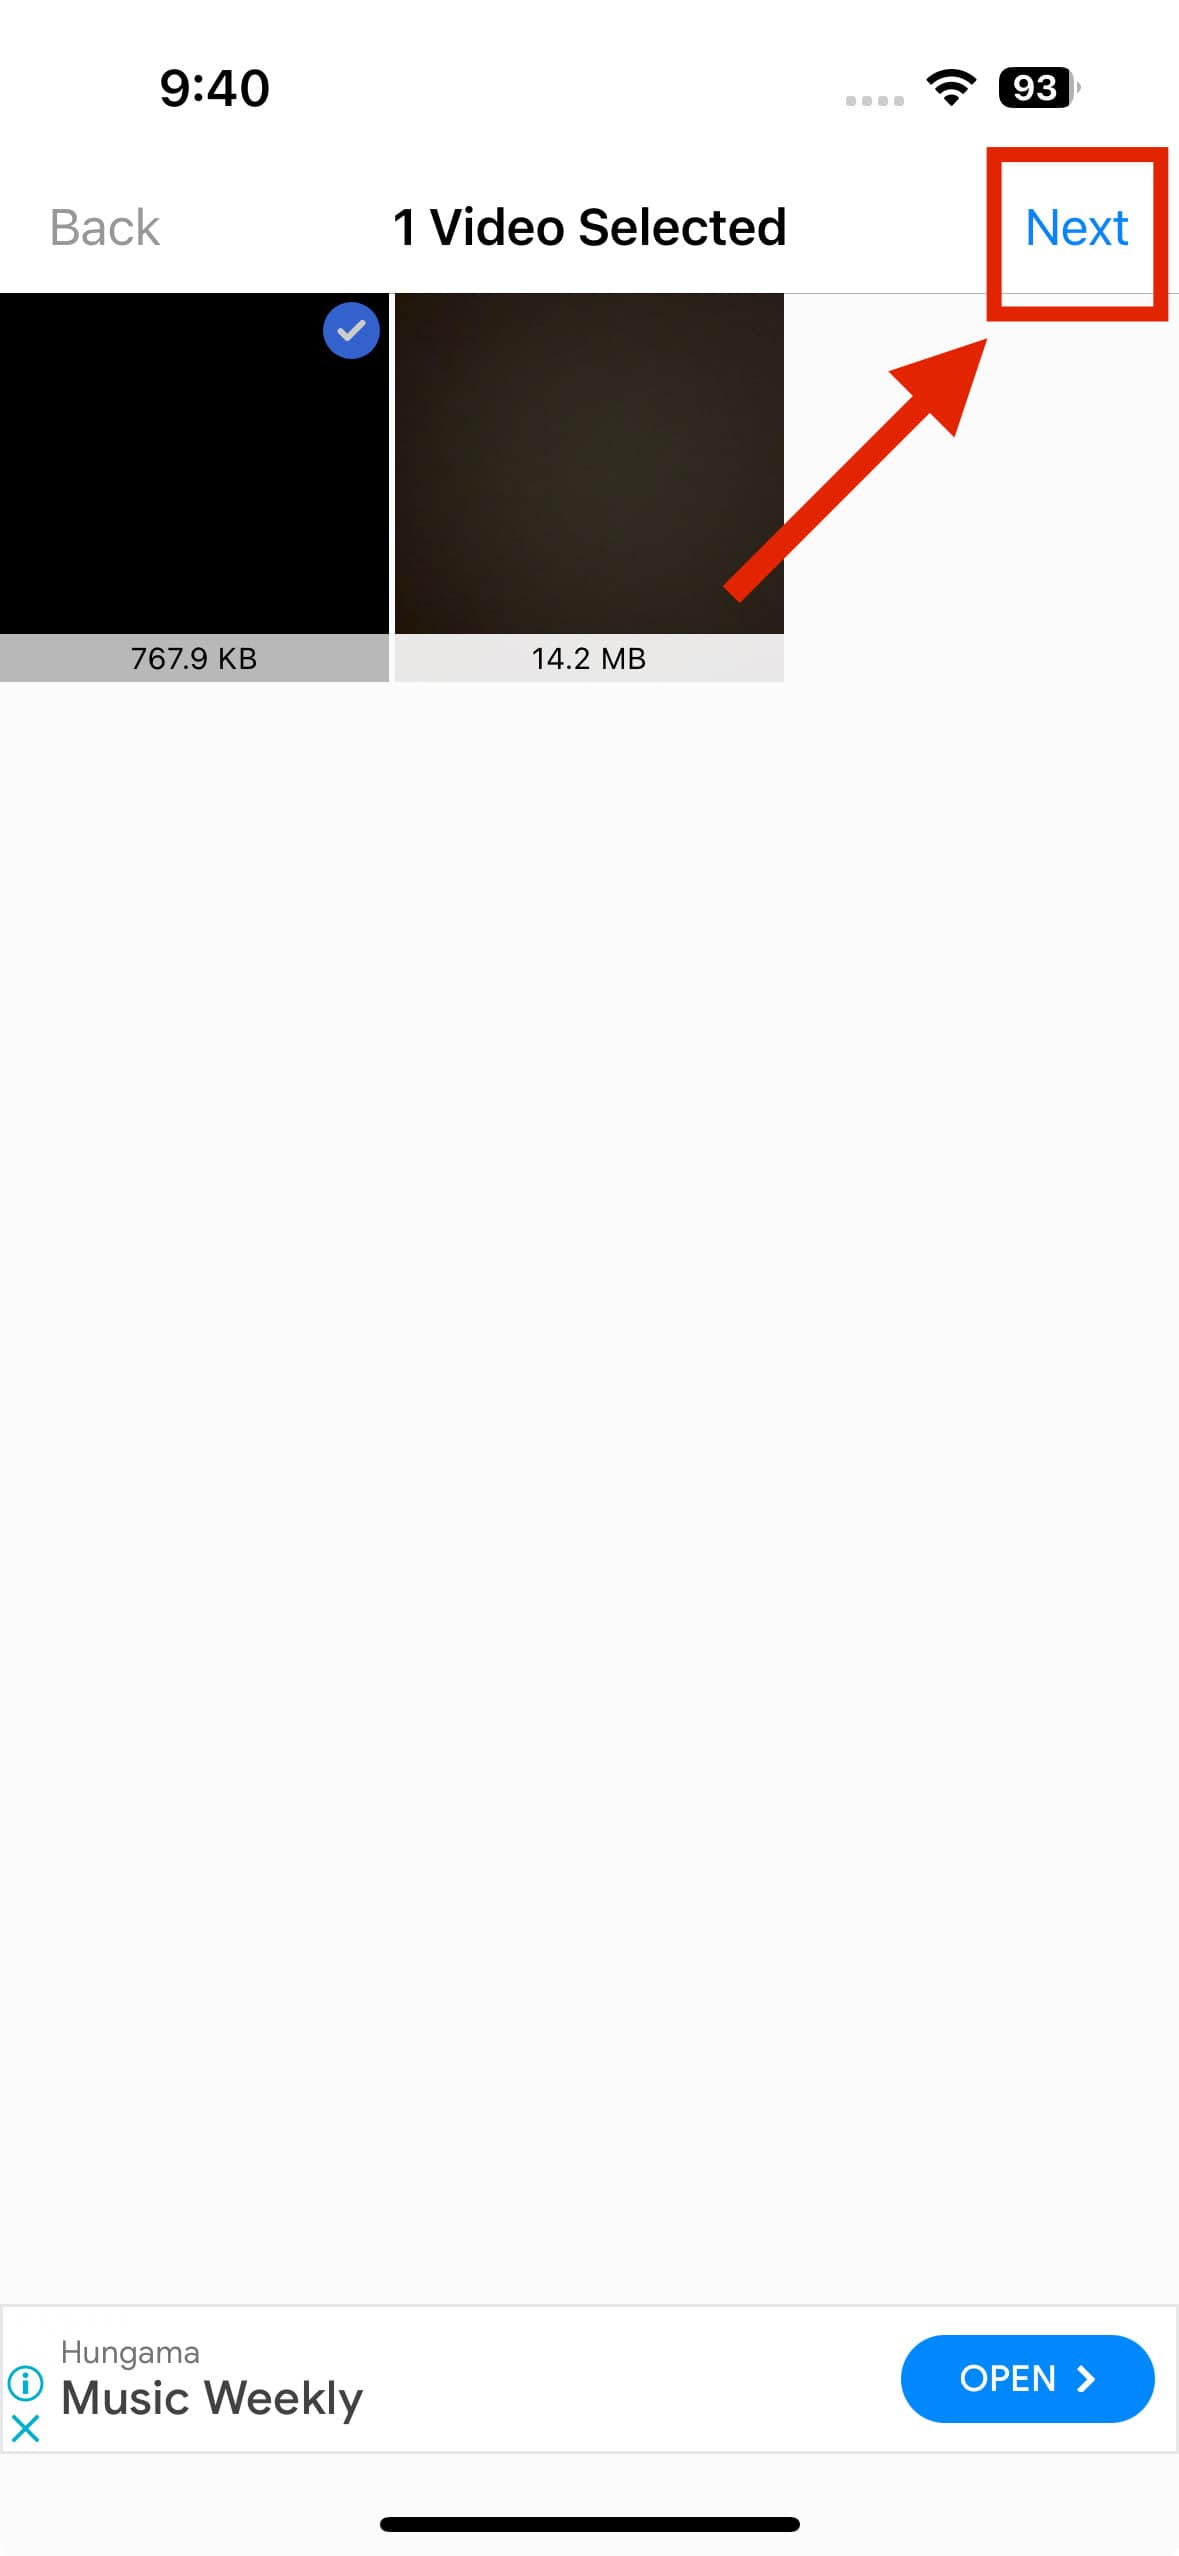
- Tap Select Videos to Compress, choose a video, and tap Next.
- Specify the Frame Rate and Video Dimensions for the resulting video file. You can choose a frame rate between 5 and 25, and the video dimensions can go up to 4K. The choice depends on several factors, but I normally go for a frame rate of 25 and a resolution of 1080p for the best results.
- Tap the Compress button and wait for the app to edit your video.
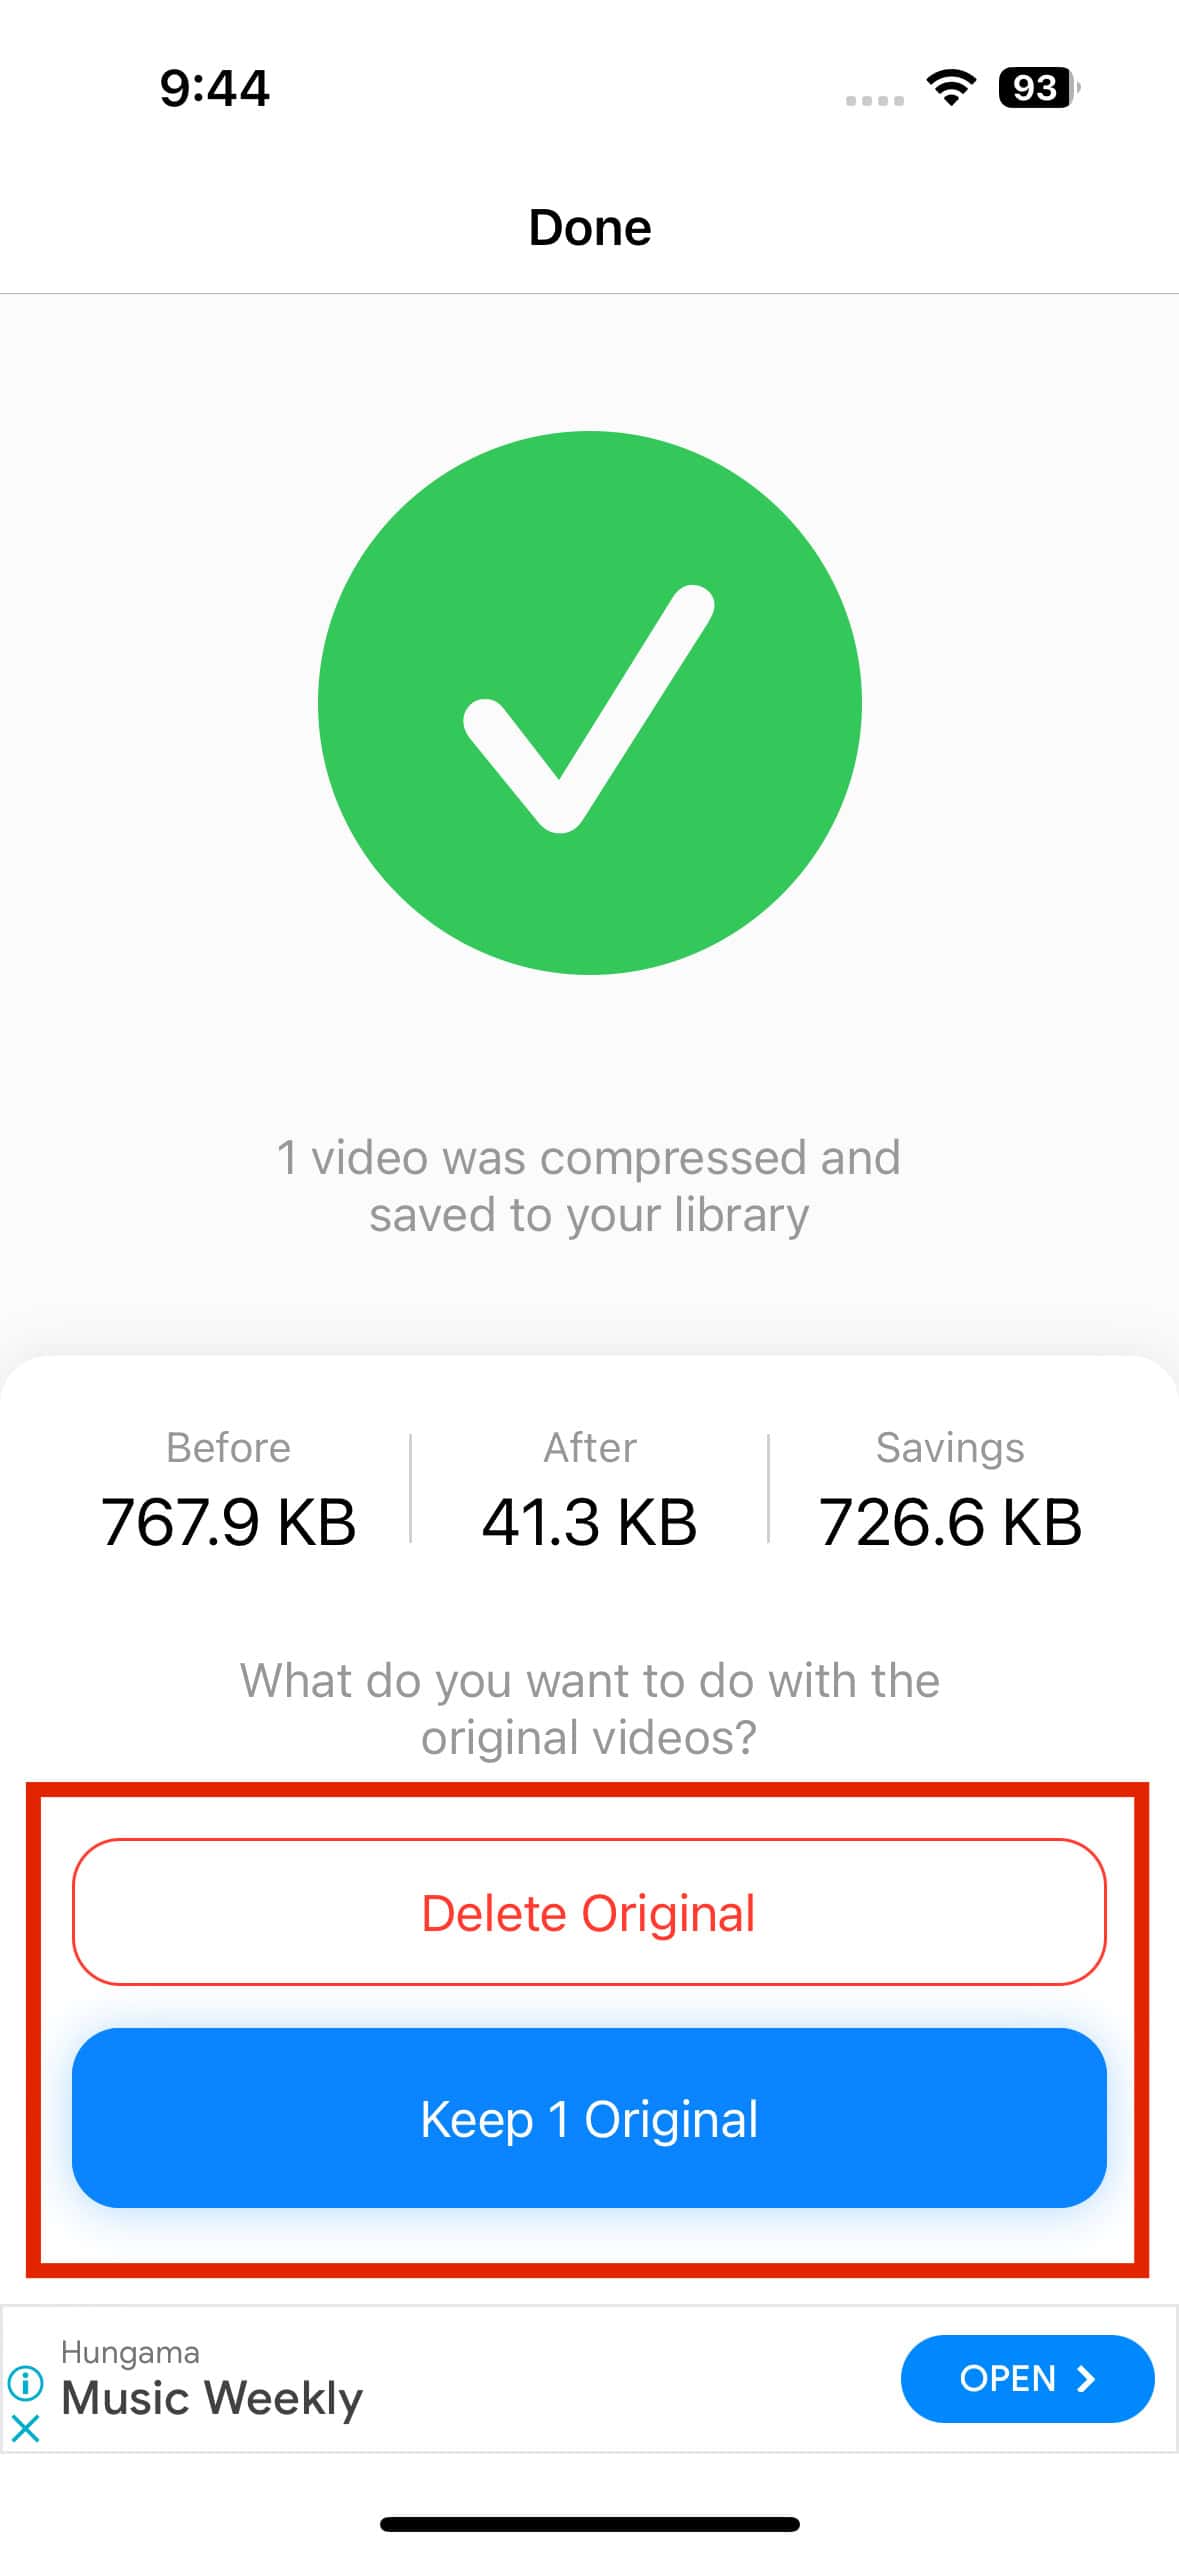
- Tap Delete Original or select Keep 1 Original to retain both the original and edited versions.
- Your video will be in the Recents album in the Photos app.
3. Use iMovie to Export Video in Lower Resolution
While iMovie might not stack up against high-end video editors, it gets the job done. It lets you reduce file size by exporting them in lower resolution.
- Install the iMovie app from the App Store if it’s not installed.
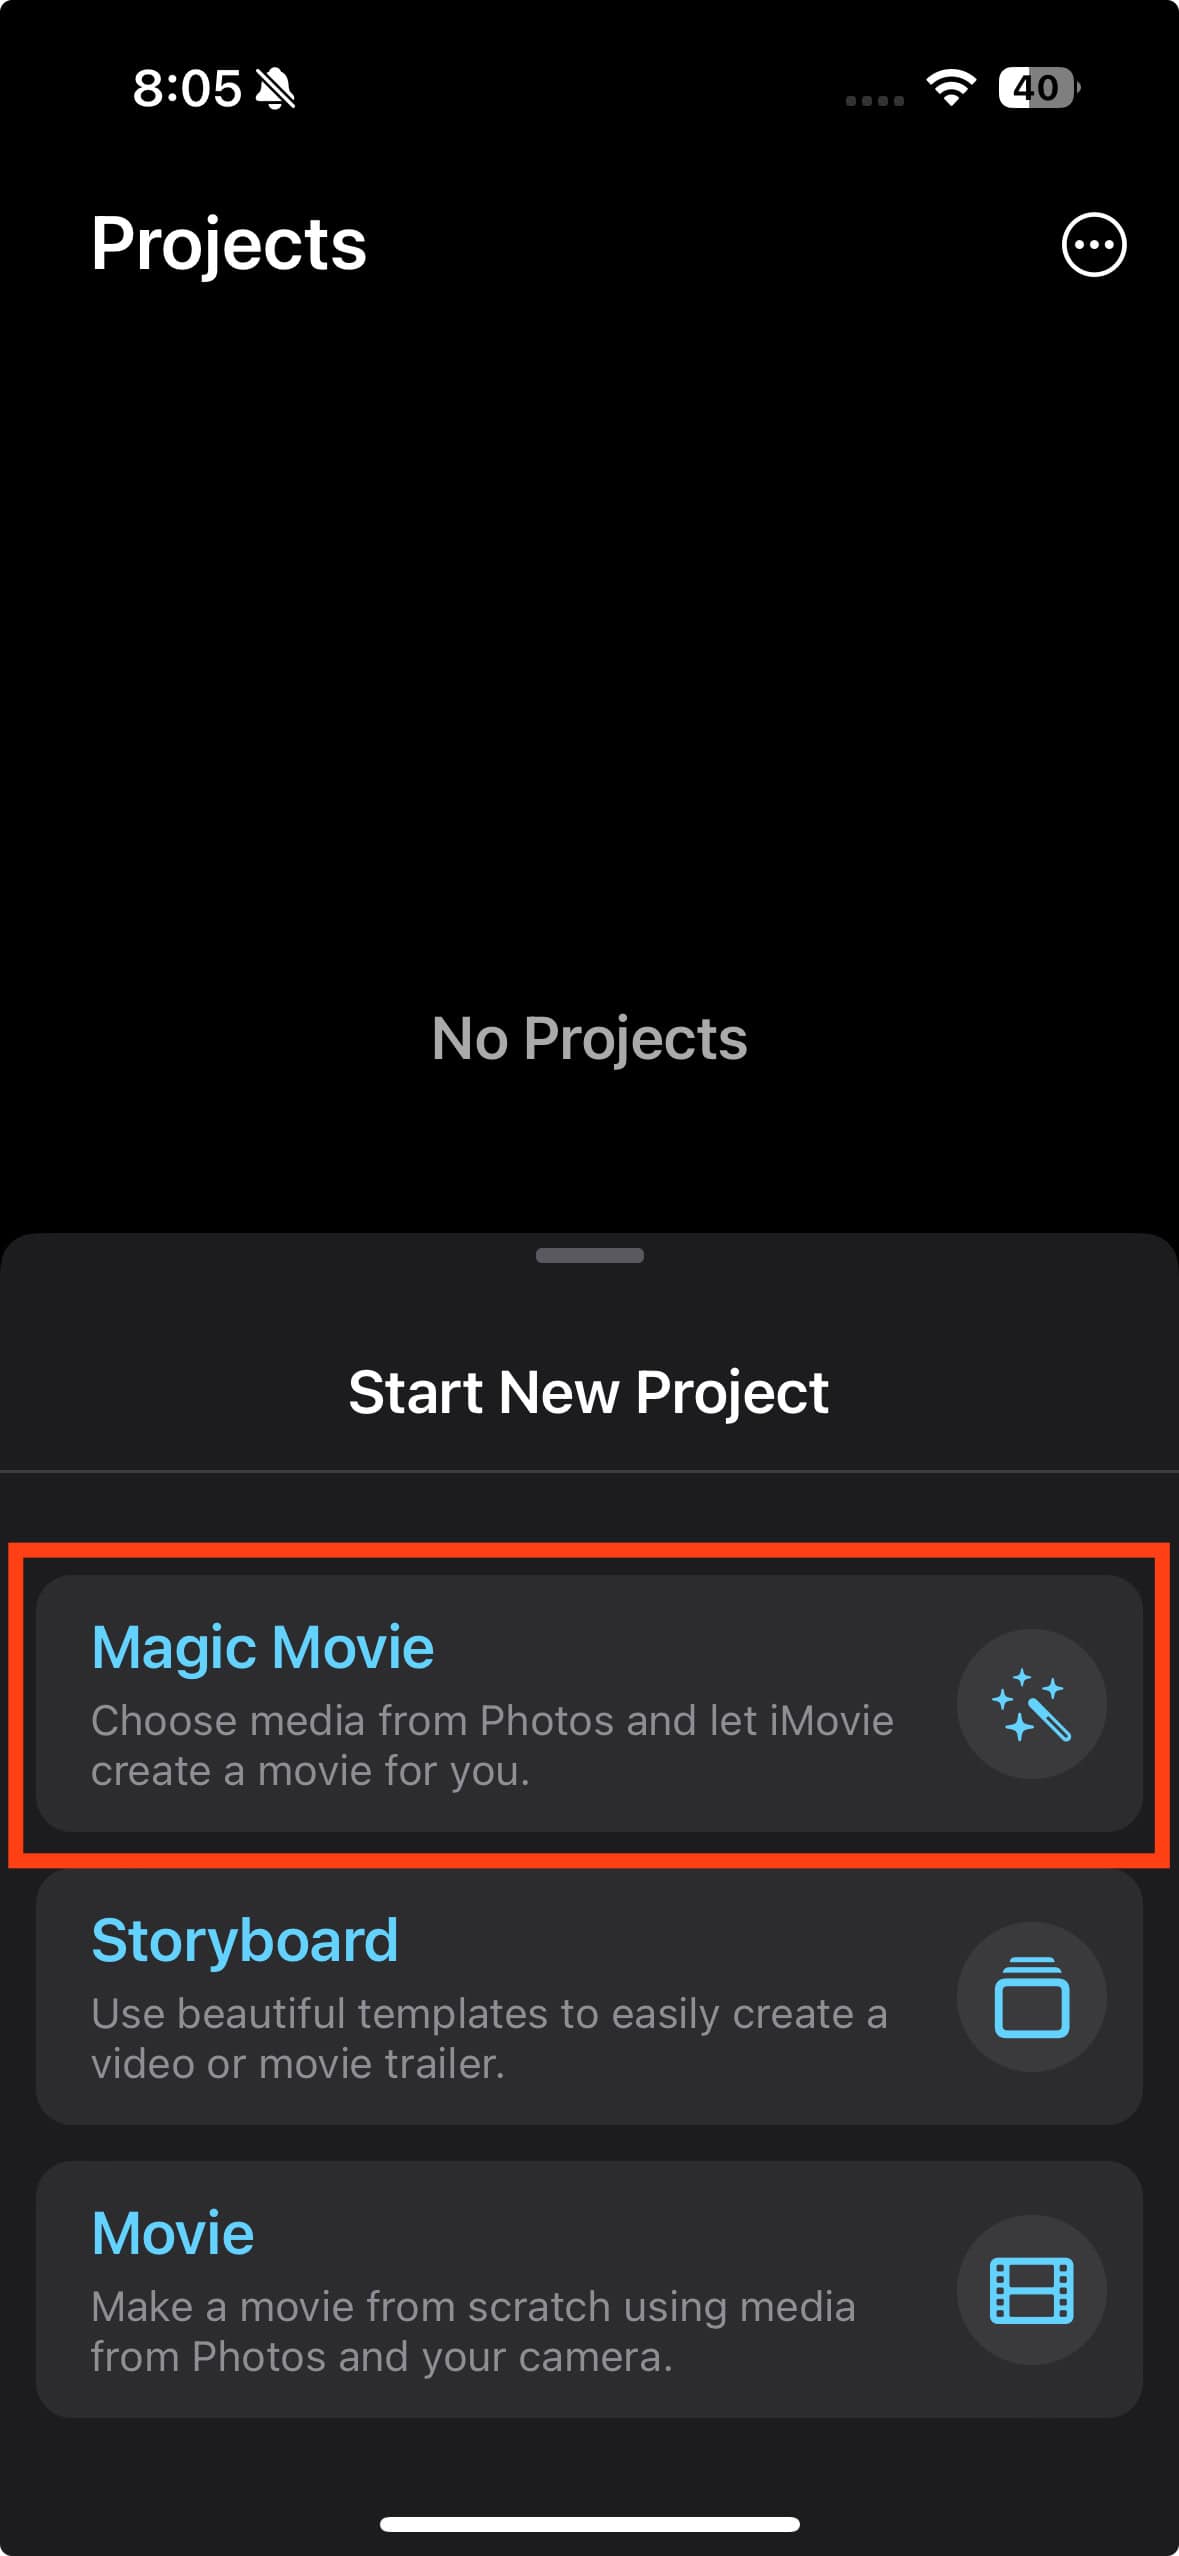
- Launch the app and tap Start New Project at the bottom of the screen.
- Select Magic Movie from the pop-up menu.
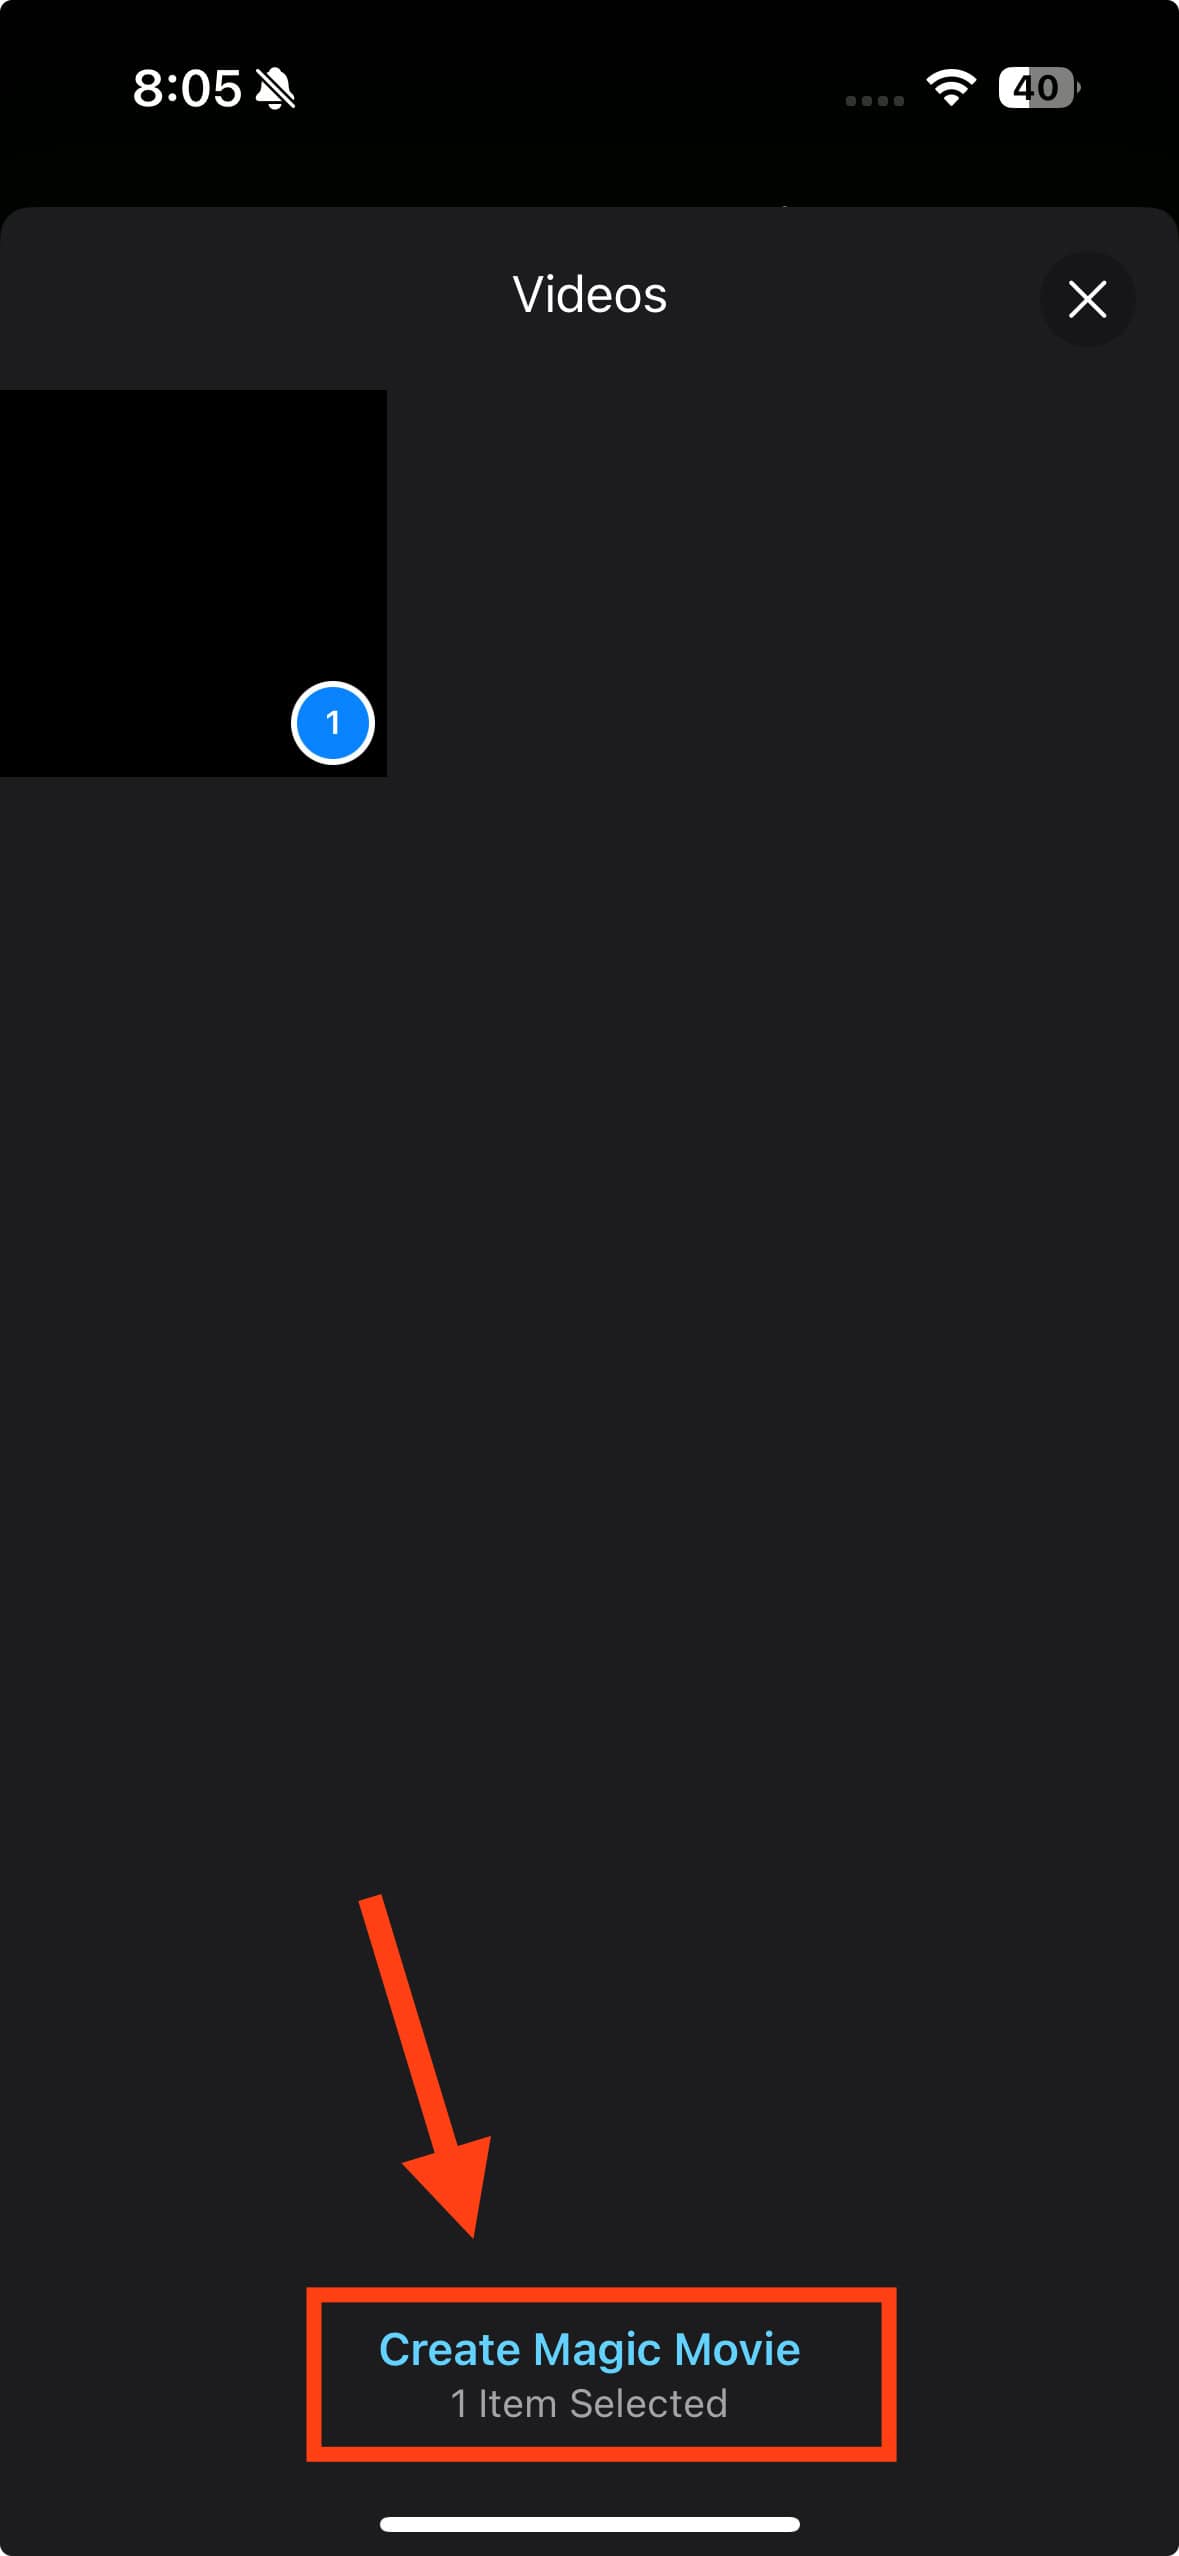
- Choose the video you want to edit.
- Tap Create Magic Movie at the bottom of the screen.
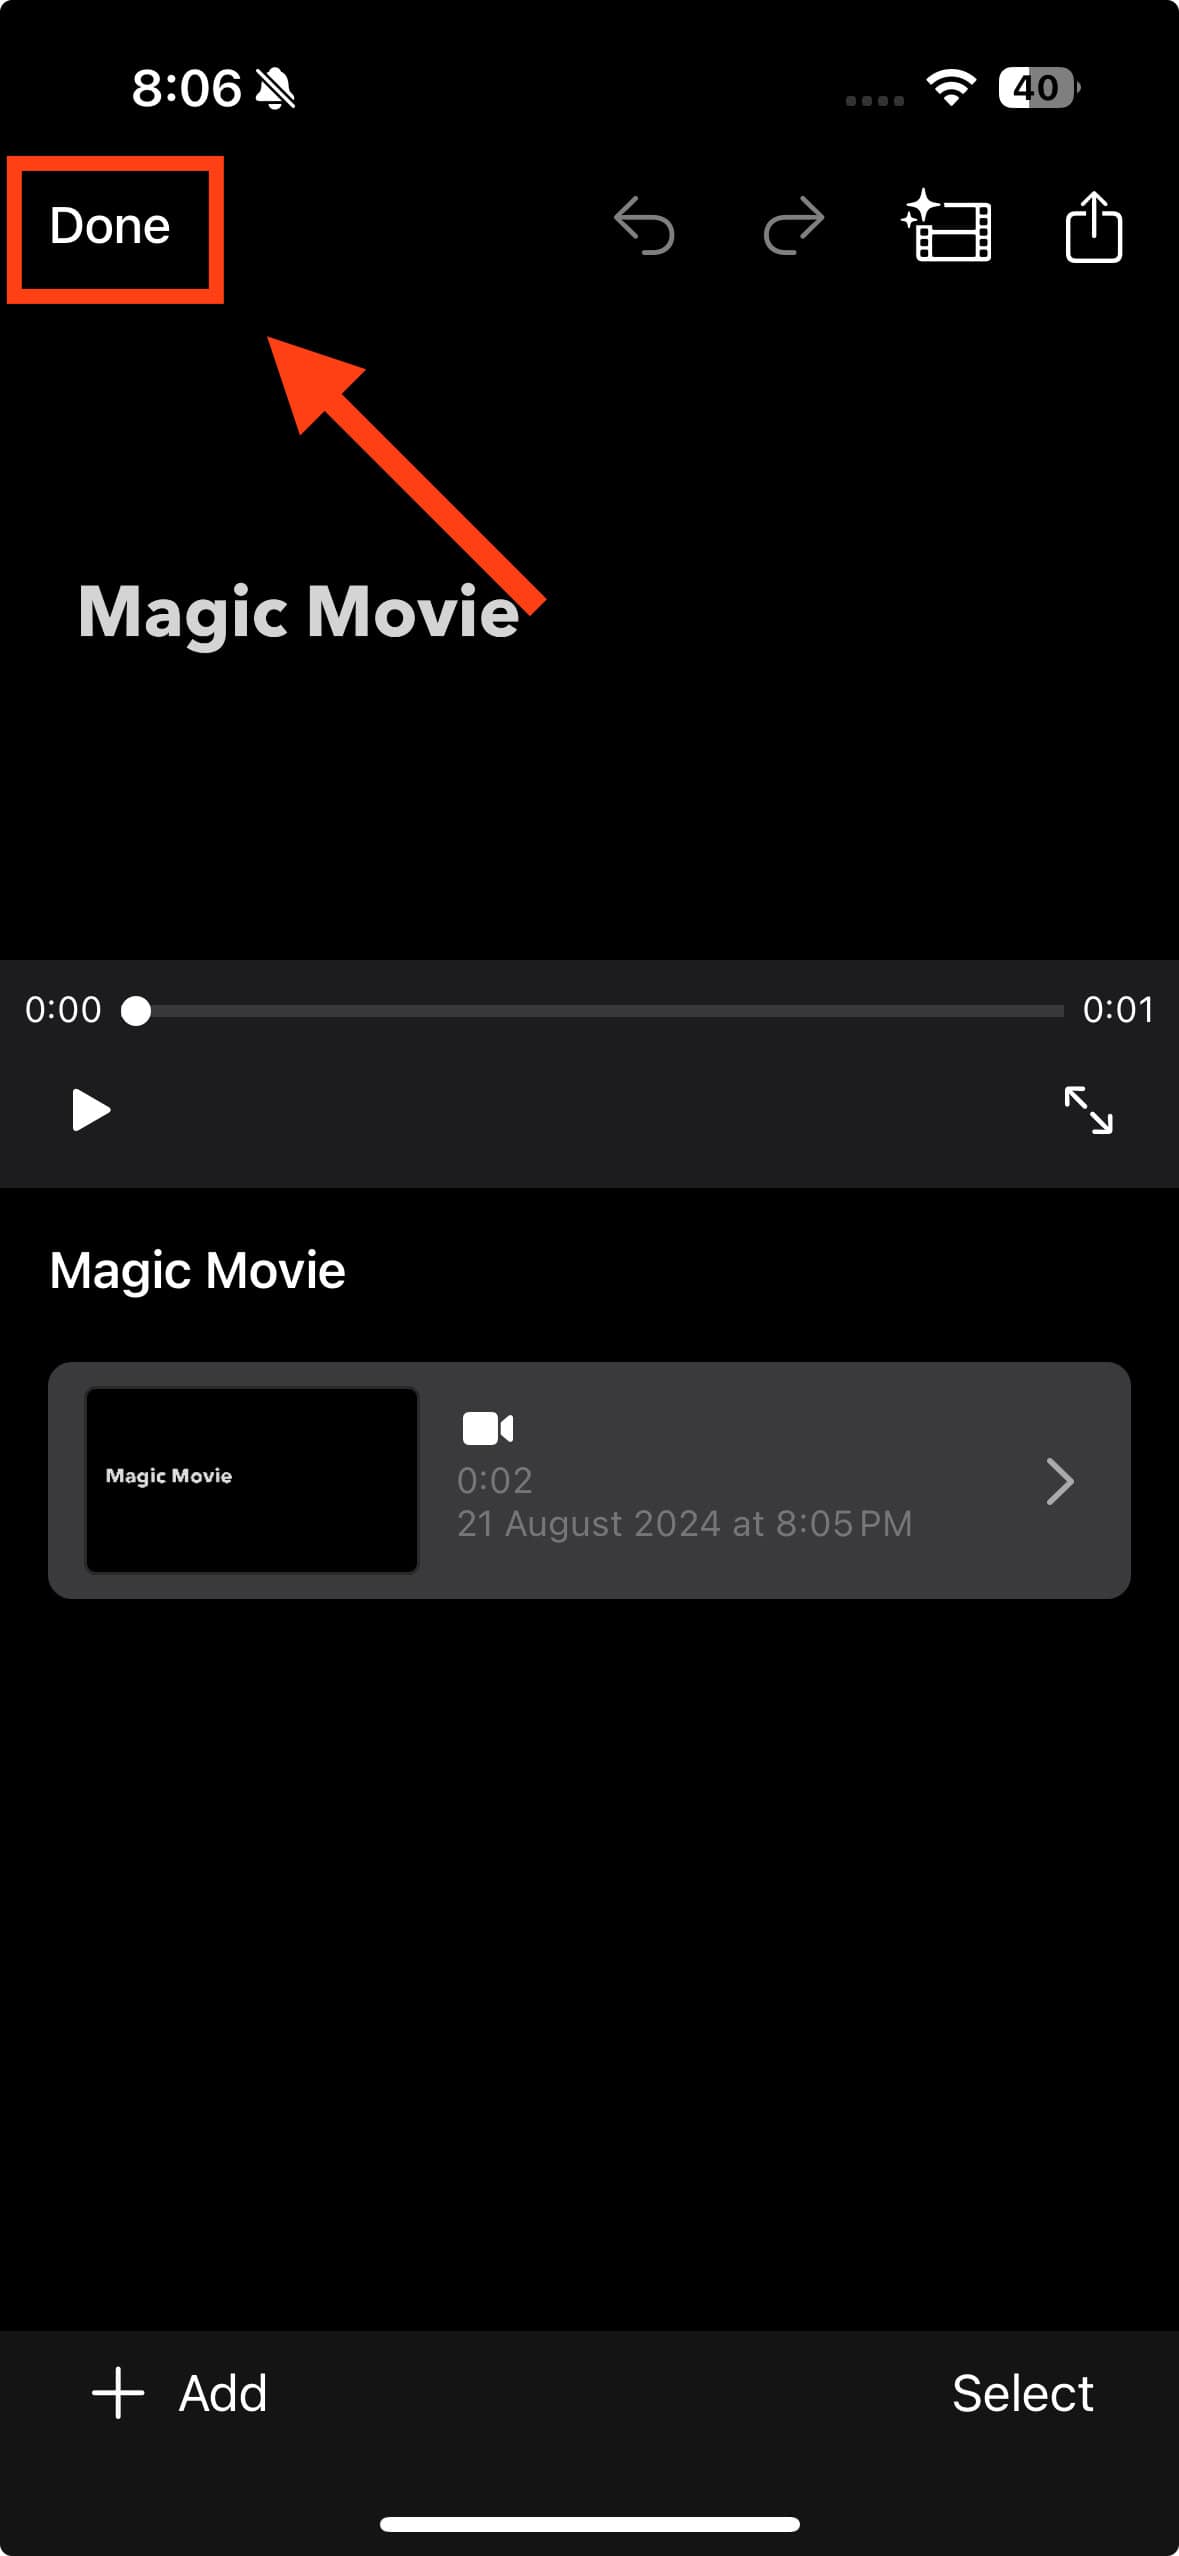
- Tap Done in the top left corner of the screen.
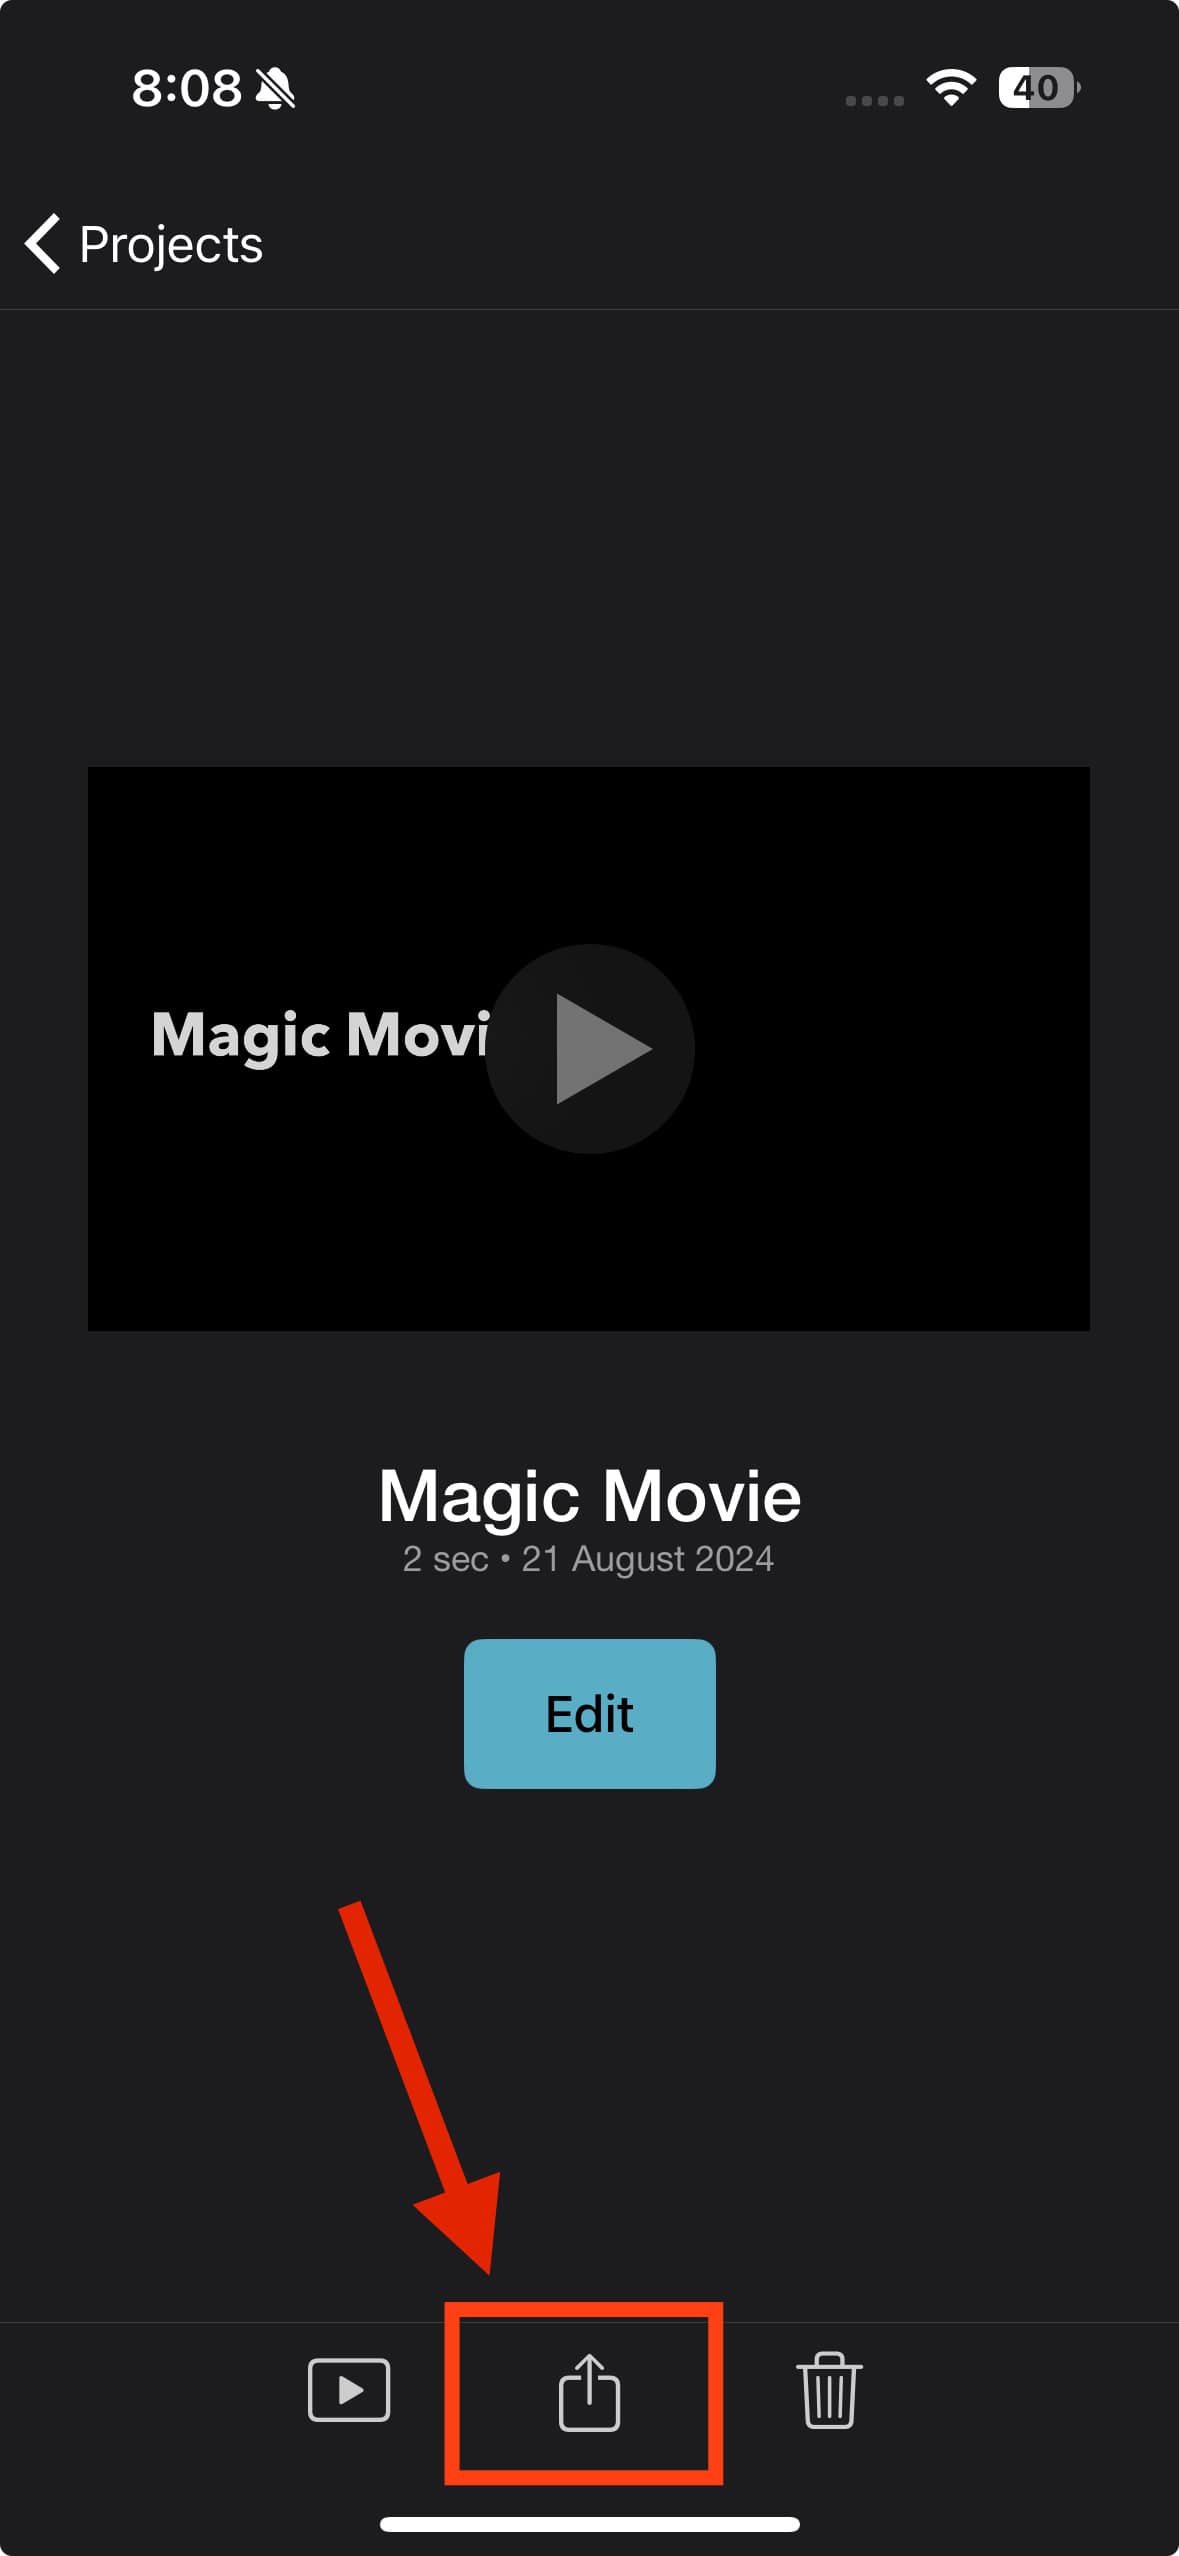
- Tap the Export and Share button at the bottom bar.
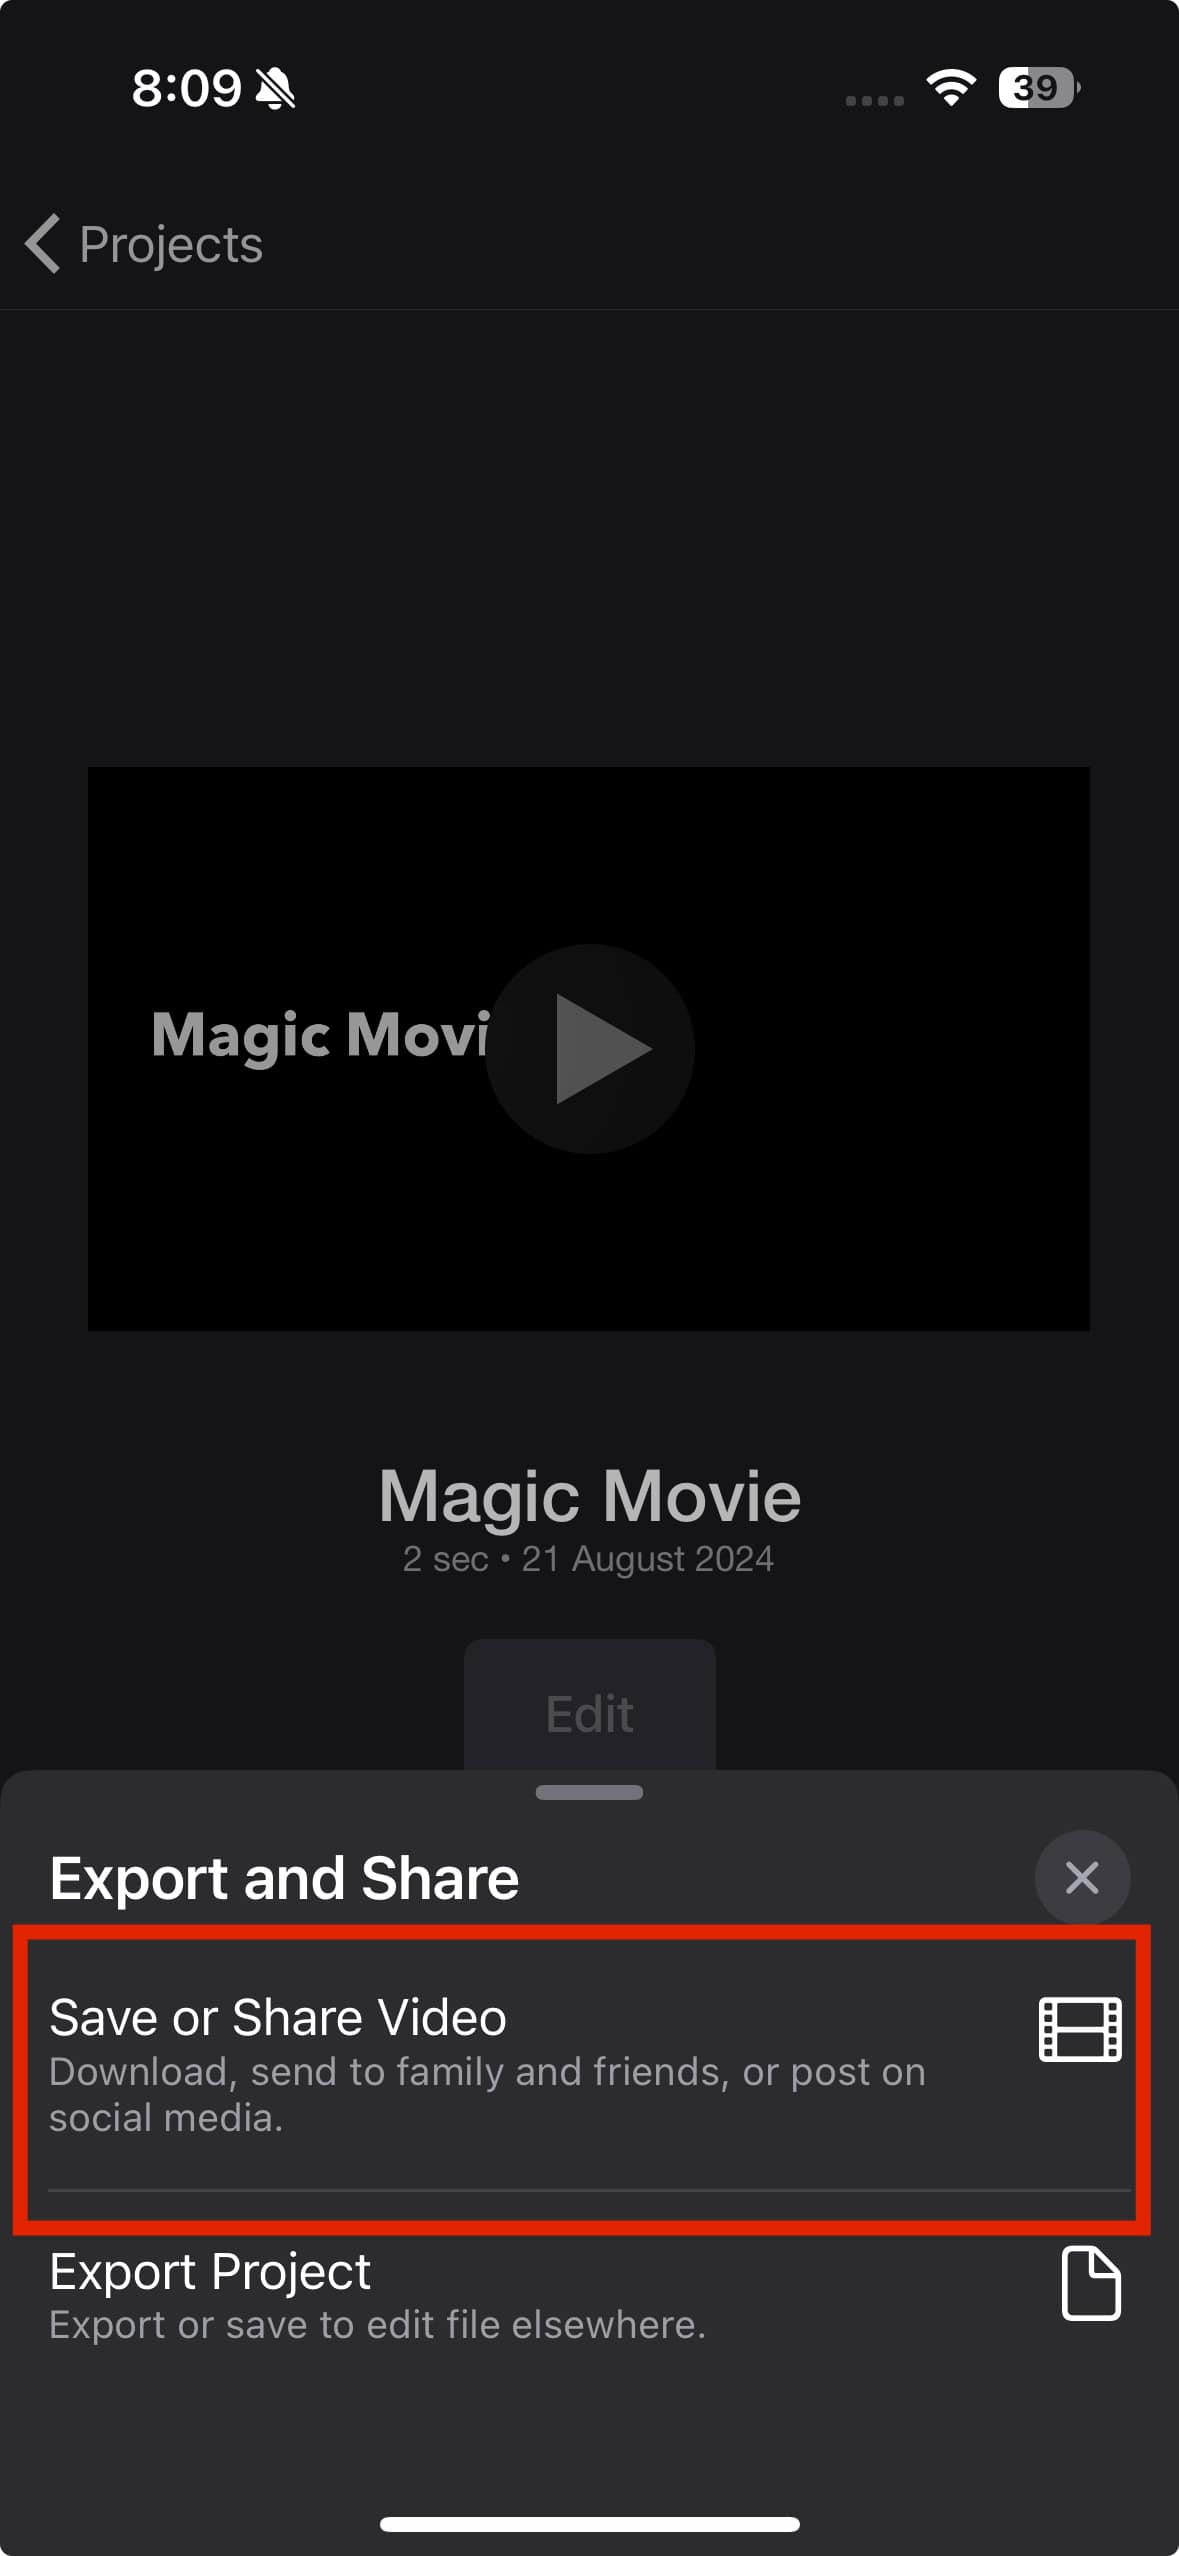
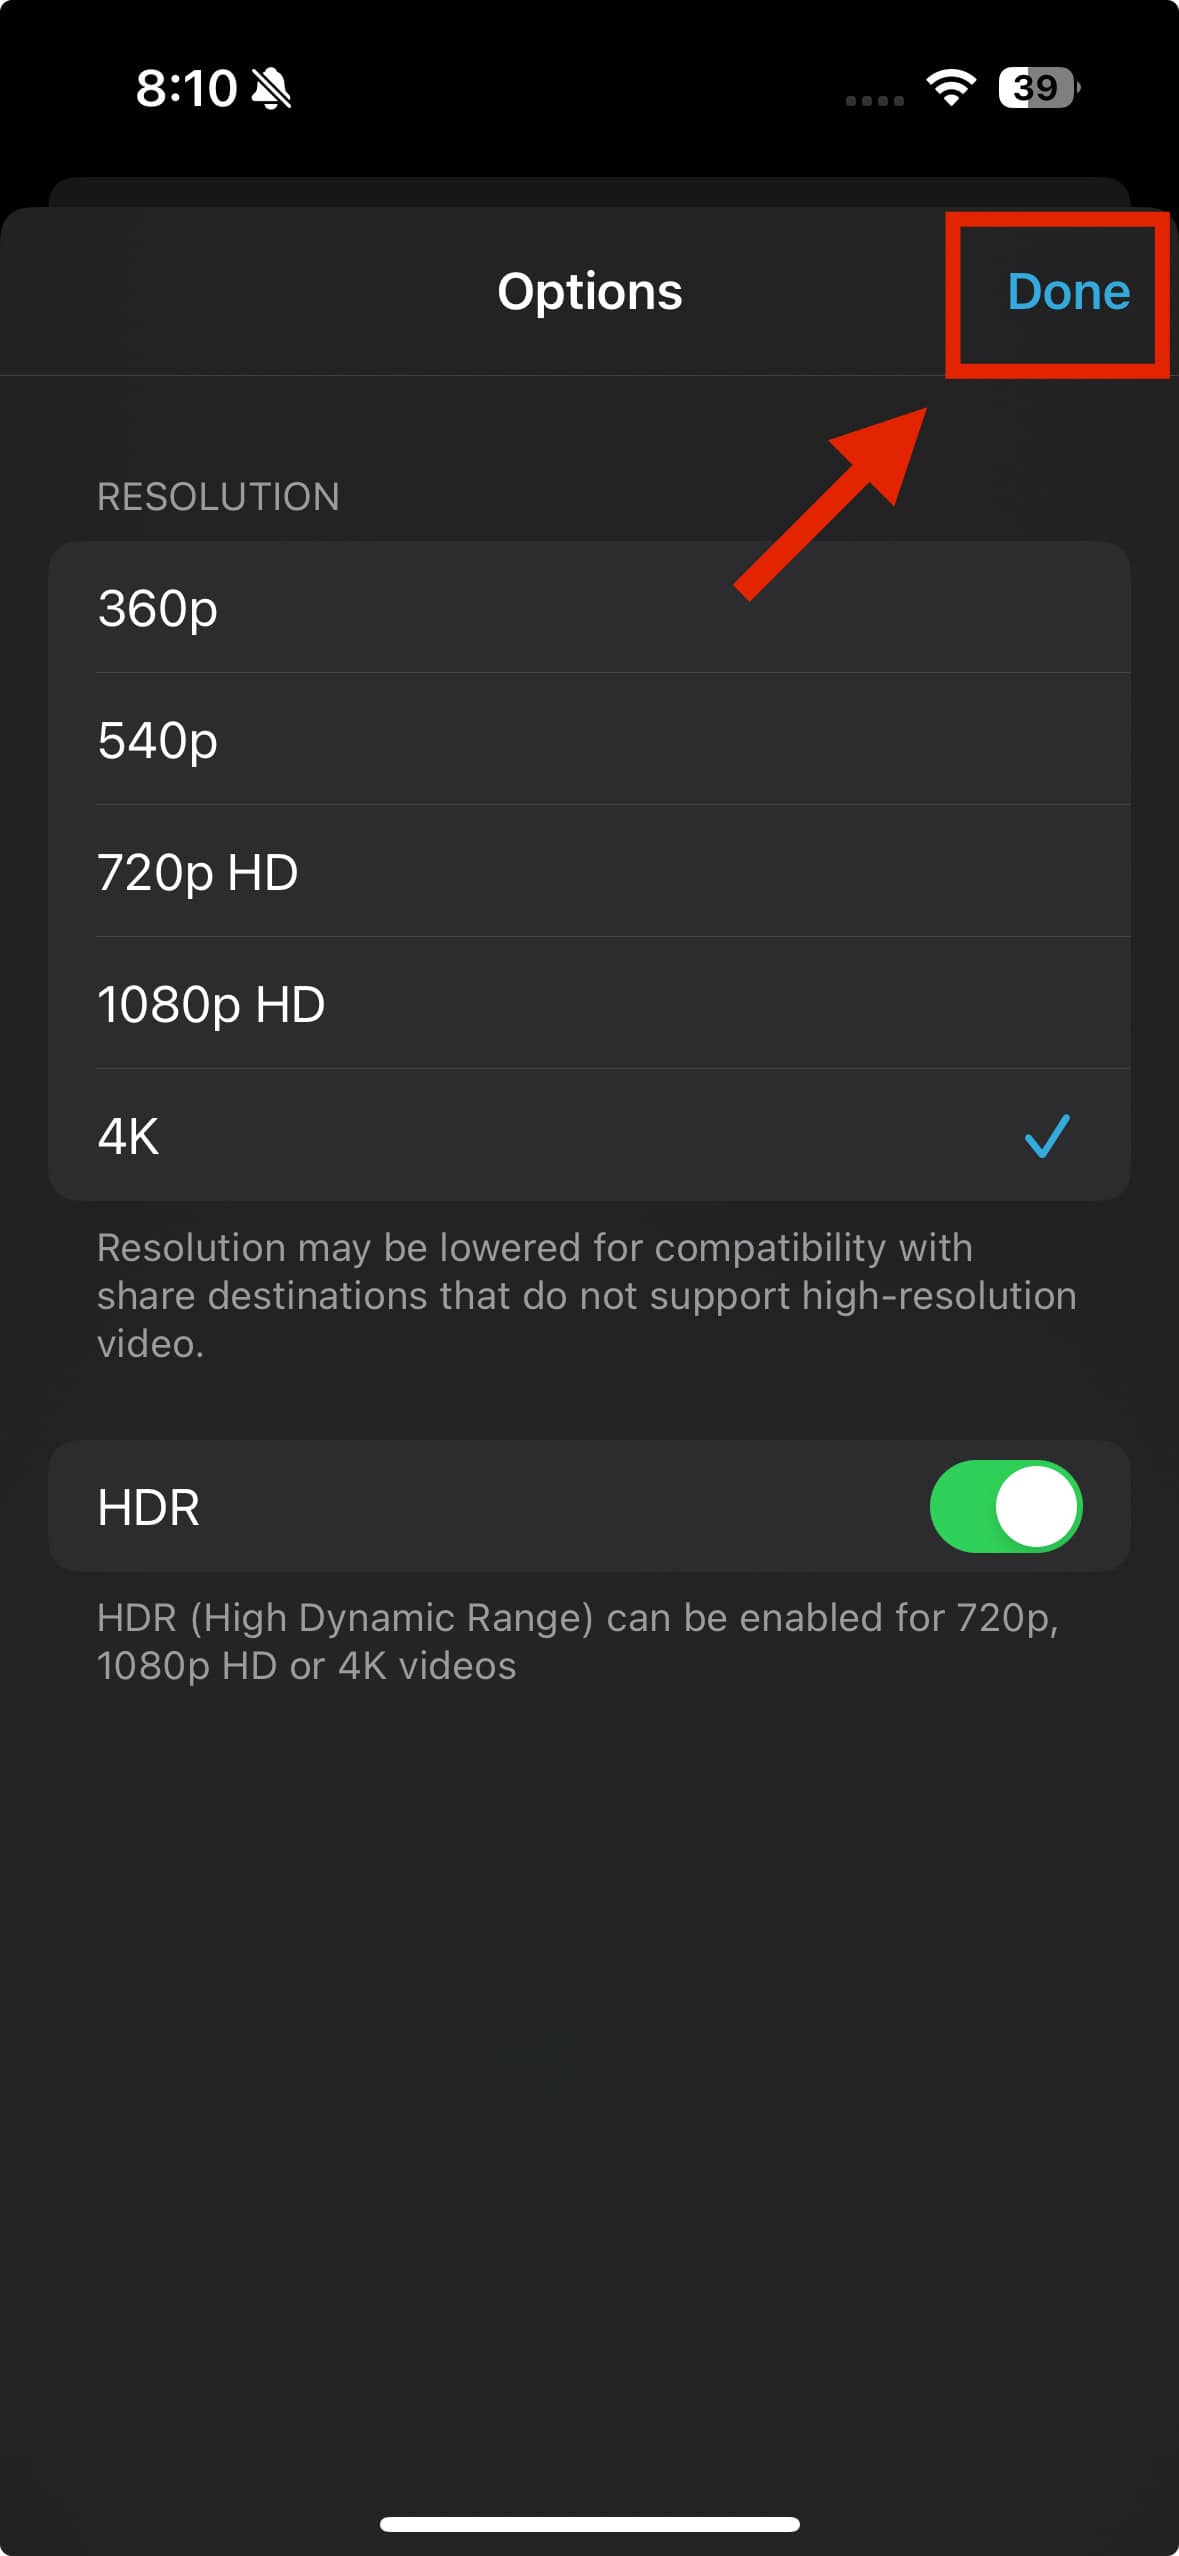
- Select Save or Share Video > Options to choose your preferred resolution. The lower the resolution, the smaller the file size will be.
- Tap Done. Save the new video to your iPhone, or send it directly to the recipient.
4. Trim the Video to Reduce File Size
You can edit videos on your iPhone just as easily as pictures. However, the iPhone’s built-in video editing tools are limited. You can’t cut out specific parts from the middle of a video; you can only trim the beginning or the end.
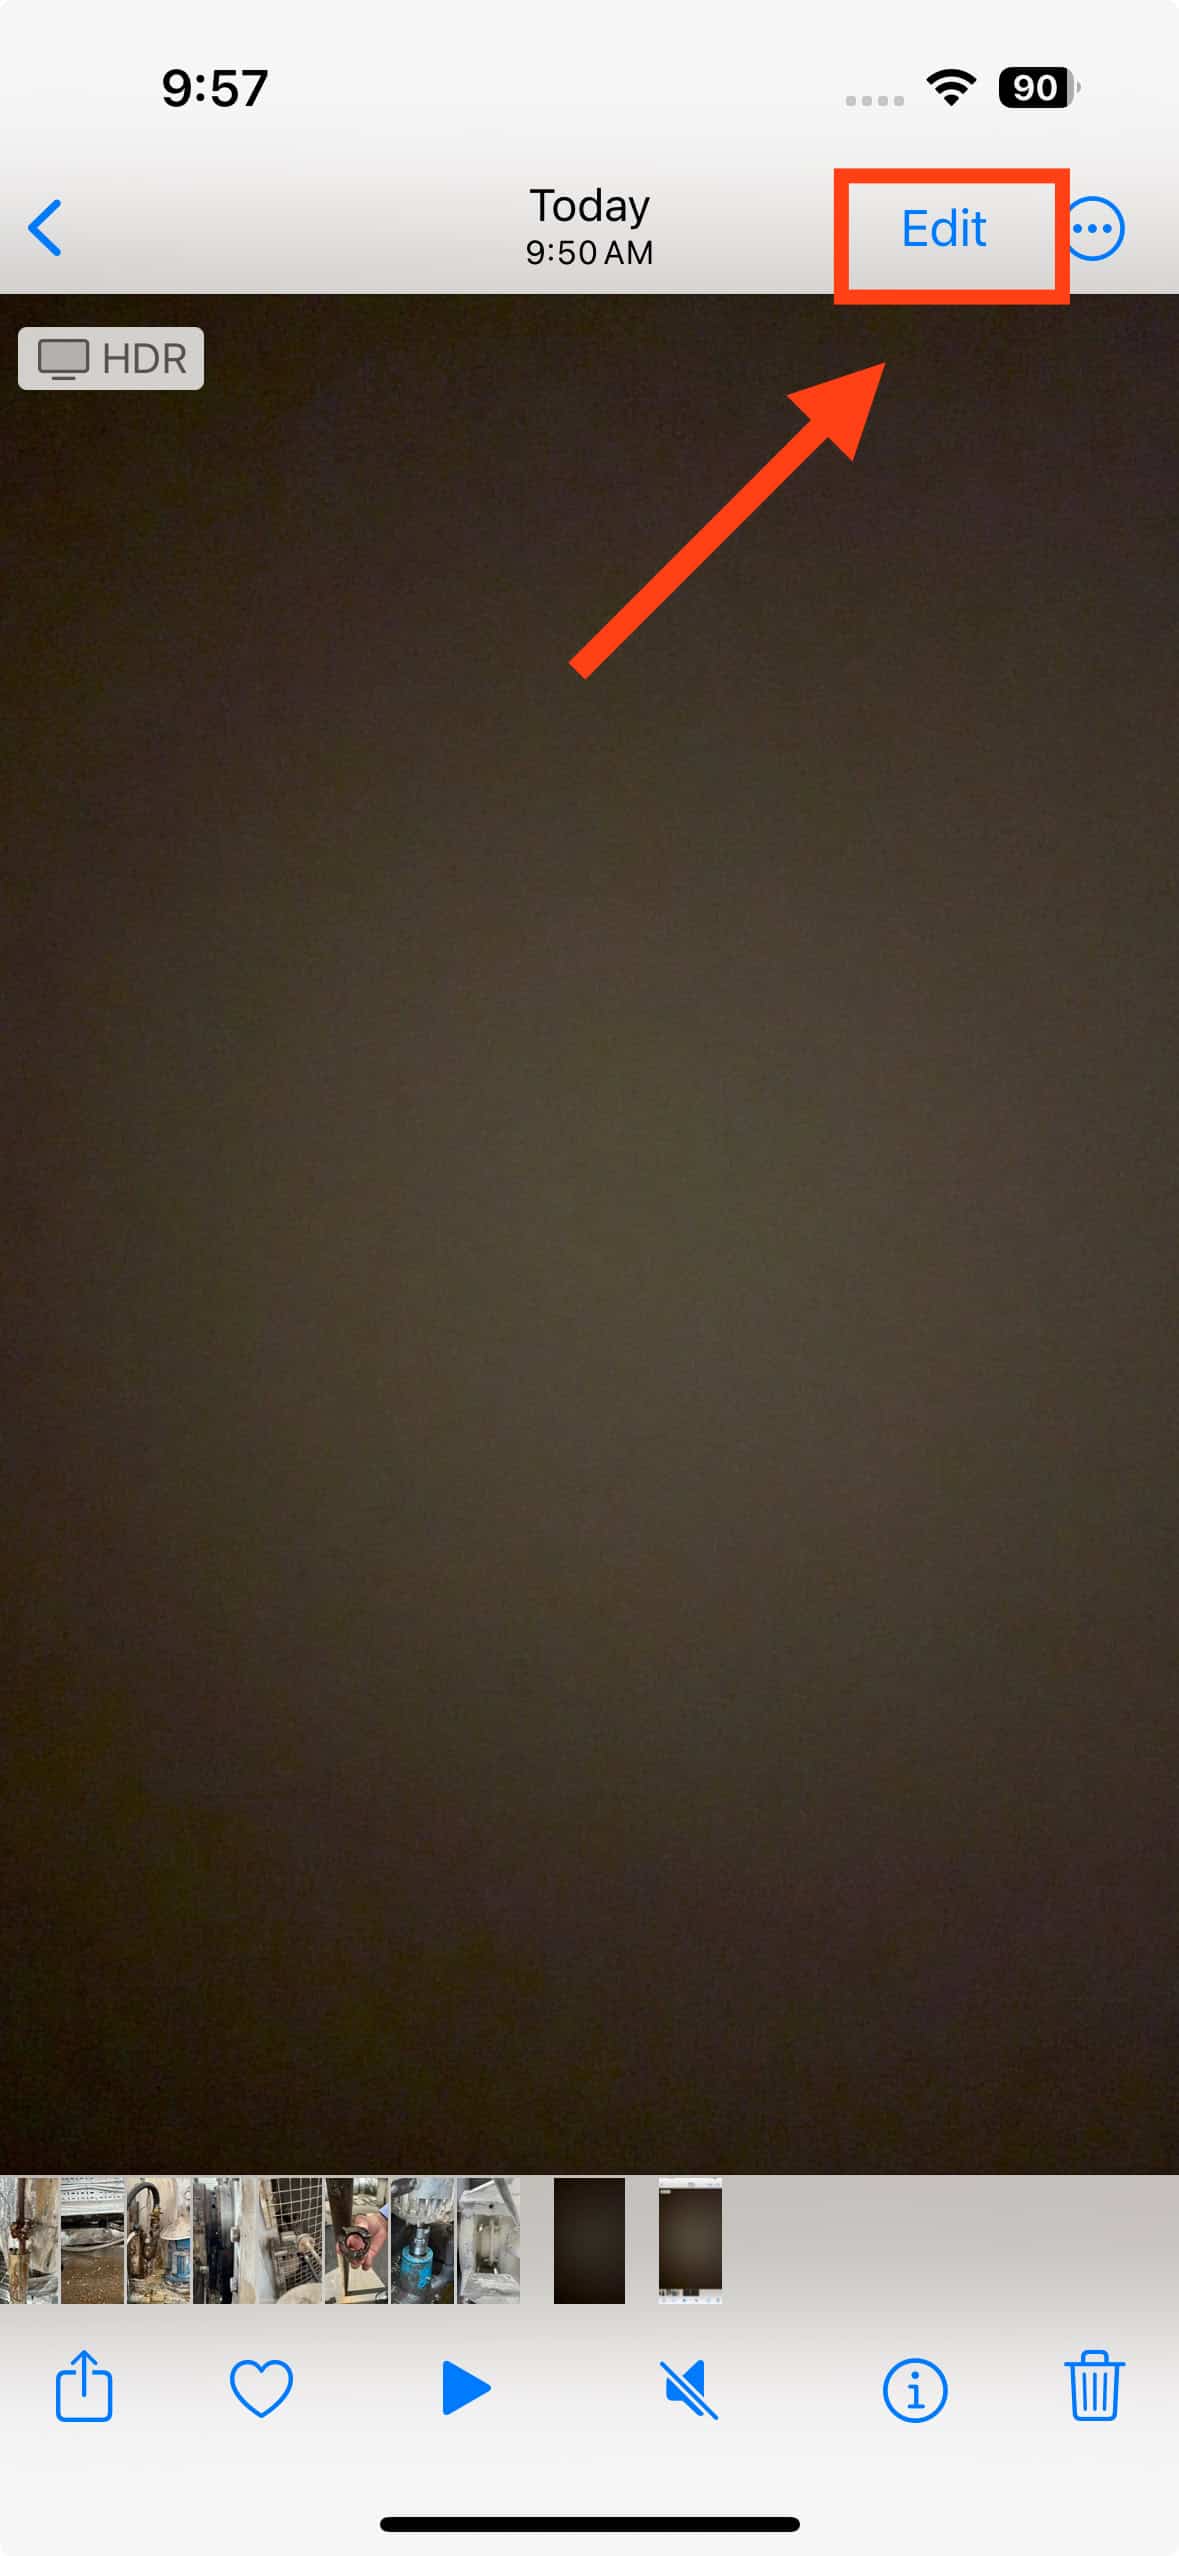
- Open the Photos app and tap the video you want to edit.
- Tap Edit in the top-right corner.
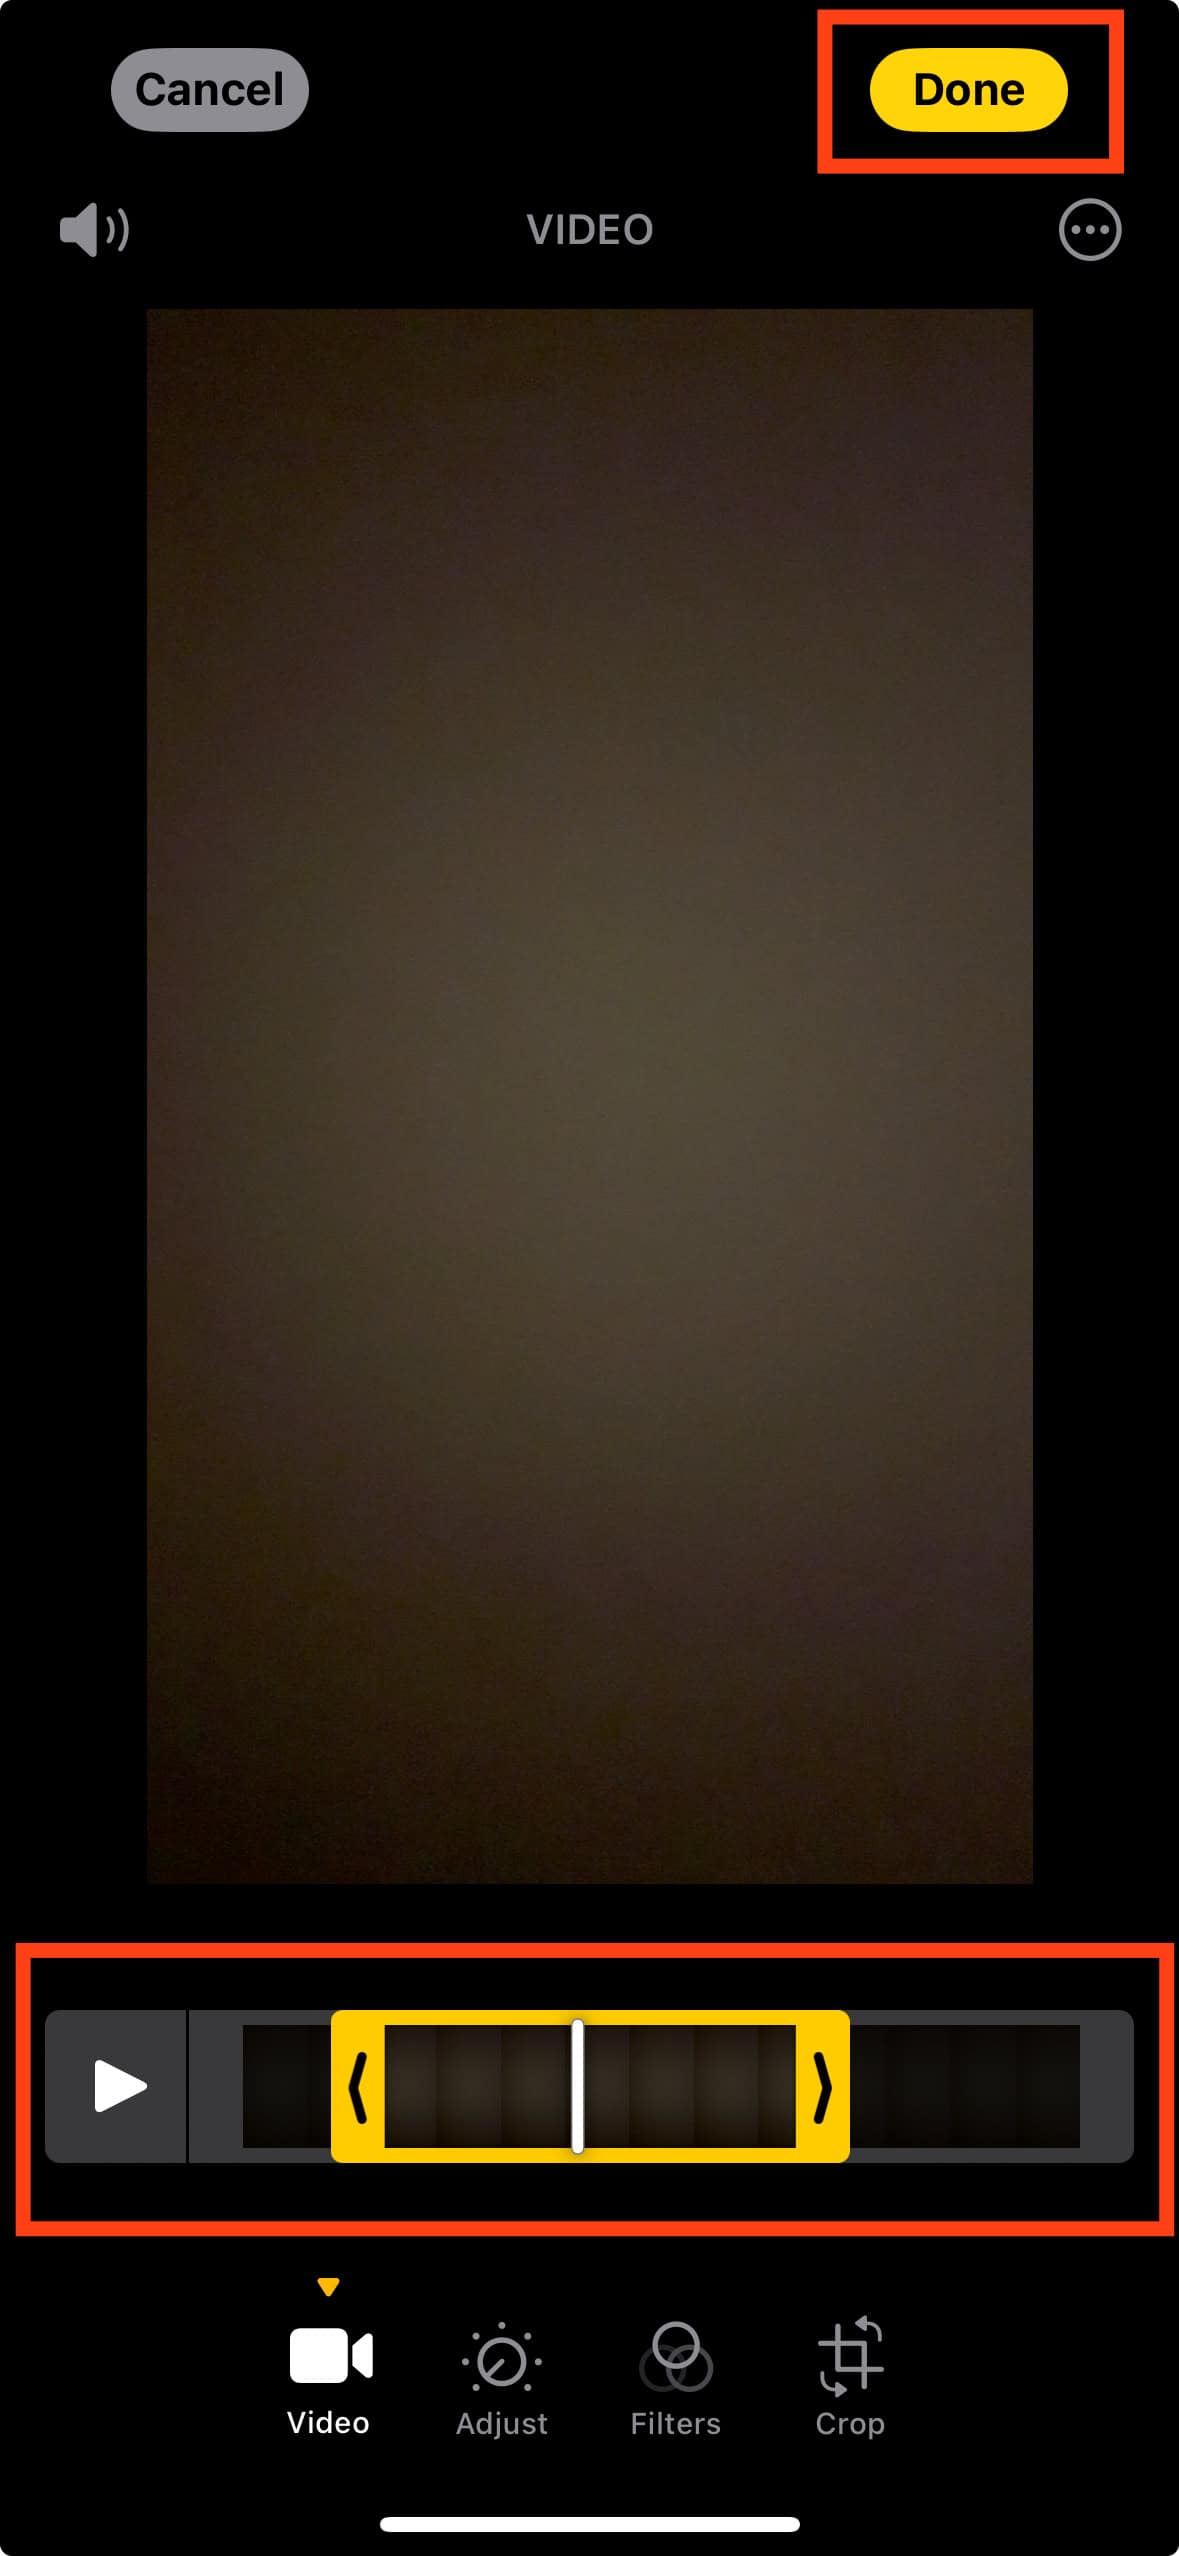
- By default, the trim function appears first, with arrows at both ends and a vertical seek bar. Drag the bar to set the point where you want to trim the video.
- Depending on whether you’re trimming the start or end of the video, drag the arrow from the left or right to where you’ve positioned the vertical bar.
- Tap Done in the top right corner.
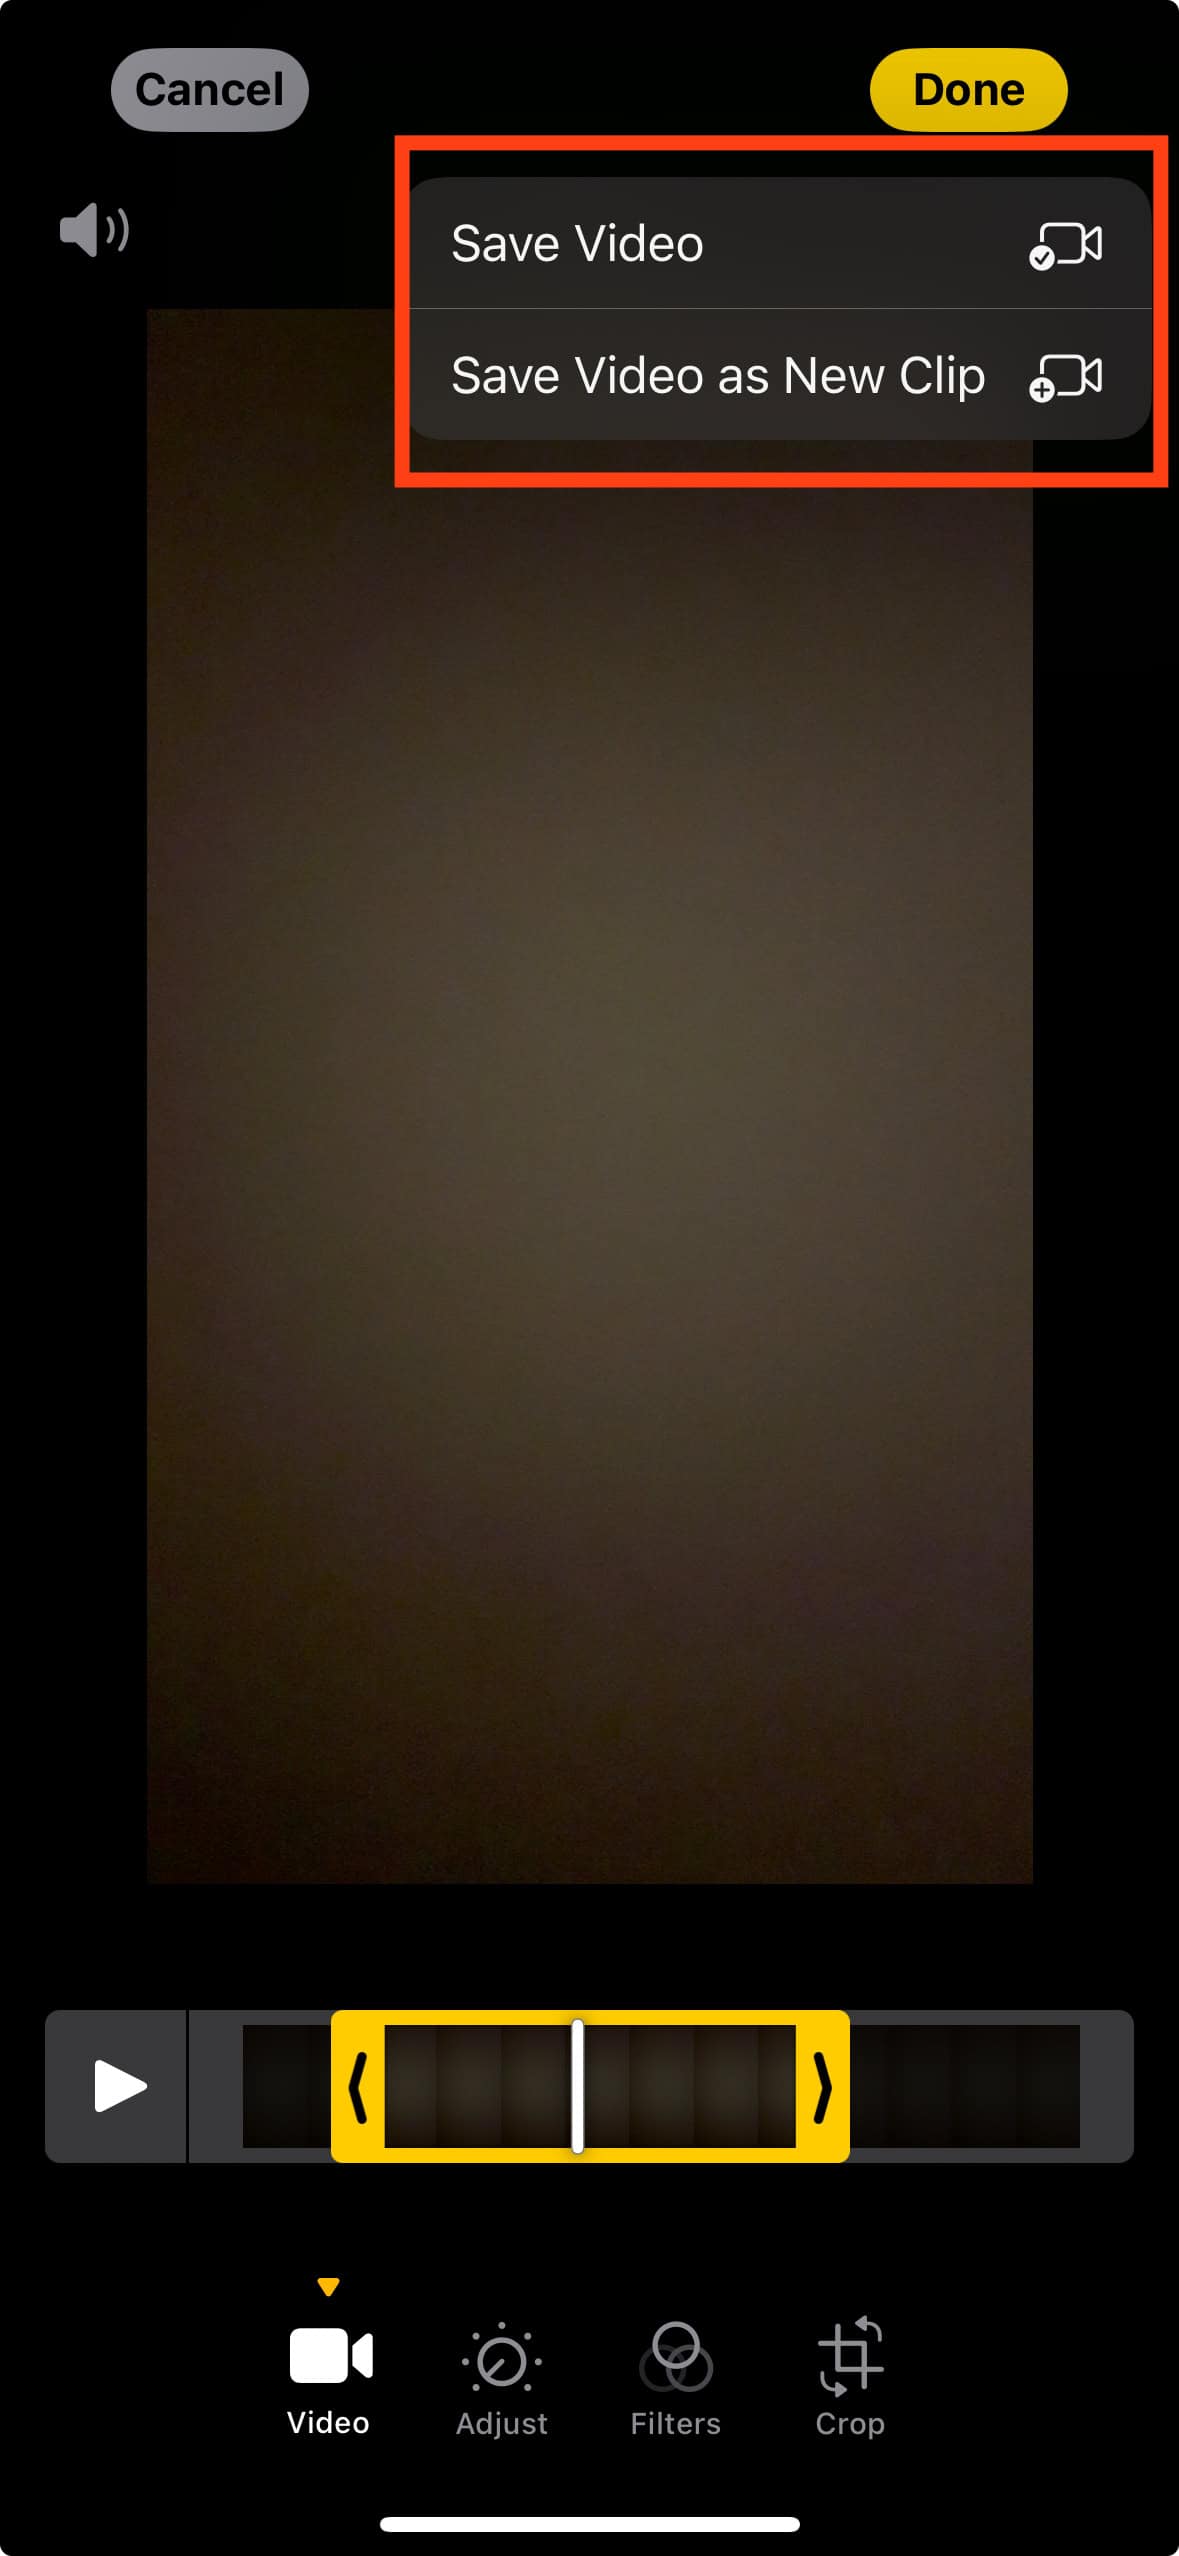
- Choose Save Video to overwrite the original video or Save Video as New Clip to keep the original and save the edited version as a new file. If saving space is a priority, select the latter option and then delete the original video. Otherwise, your iPhone will keep the original video in the background if you want to undo your edit.
While trimming doesn’t technically compress the video, it reduces the file size, which makes it easier to store and share. Just note that you’ll lose some parts of your video.