
Stolen Device Protection is an iOS security feature that delays tasks like changing account passwords and requires FaceID or TouchID authentication for others.
However, some users have reported that it enters a kind of “lockdown” mode after being enabled. This makes the feature impossible to disable, and adds inconvenient extra steps to tasks that, otherwise, would be simple.
What to Do if You Can’t Disable Stolen Device Protection: 6 Fixes
Stolen Device Protection is enabled only when you’re away from the designated “familiar locations,” like your home, school, or office. Thus, you have additional security when needed without needing to take extra steps when your device is somewhere safe.
However, the feature sometimes gets “overprotective” and behaves like you’re away from a “familiar location” even though you’re not. Here are some possible fixes for the issue.
1. Reboot
It may seem silly, but some users reported that simply restarting their iPhones solved the issue. Hold the power button, turn your device off, wait for a minute or so, then turn it on again.
2. Connect to a Wi-Fi Network Set as a “Familiar Location”
The two main ways the iPhone detects whether you’re in a “familiar location” are GPS positioning and the connected Wi-Fi network. However, if the device has issues locking the GPS coordinates, it may think you’re not in one of these places.
To solve that, turn your Wi-Fi connection on and join a network recognized as belonging to a “familiar location”.
3. Confirm You Have a Valid Card as Payment Method on Your Apple ID
For some reason, you may have issues disabling Stolen Device Protection if the payment method assigned to your Apple ID has expired. Switching to a valid method, like a new credit card, may fix this.
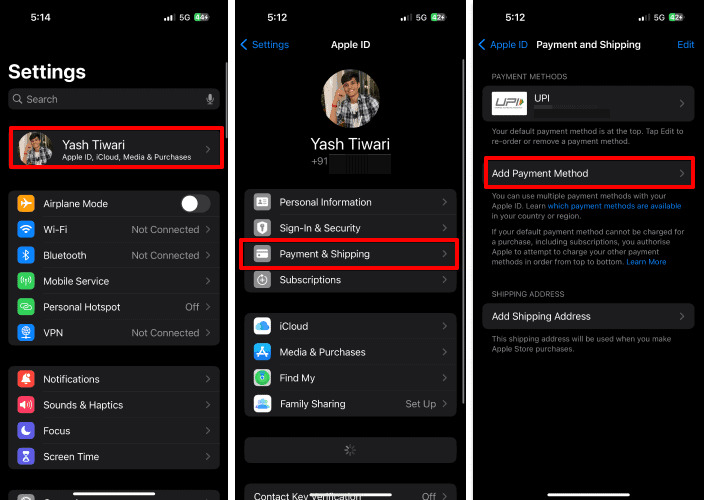
To do that, go to Settings > Apple ID > Payment and Shipping and add a new payment method. If this is the reason you can’t disable Stolen Device Protection, the issue should be gone.
4. Set a Timer for the Security Delay
Changing your Apple ID password outside a “familiar location” with Stolen Device Protection enabled triggers a security delay. This waiting period involves a TouchID or FaceID before and after the procedure. This ensures it’s really you trying to change the password.
Disabling Stolen Device Protection outside a “familiar location” also triggers the security delay. After the waiting period — usually an hour — passes, you’ll get a notification to perform the biometric scan again. With this out of the way, you should be allowed to disable Stolen Device Protection.
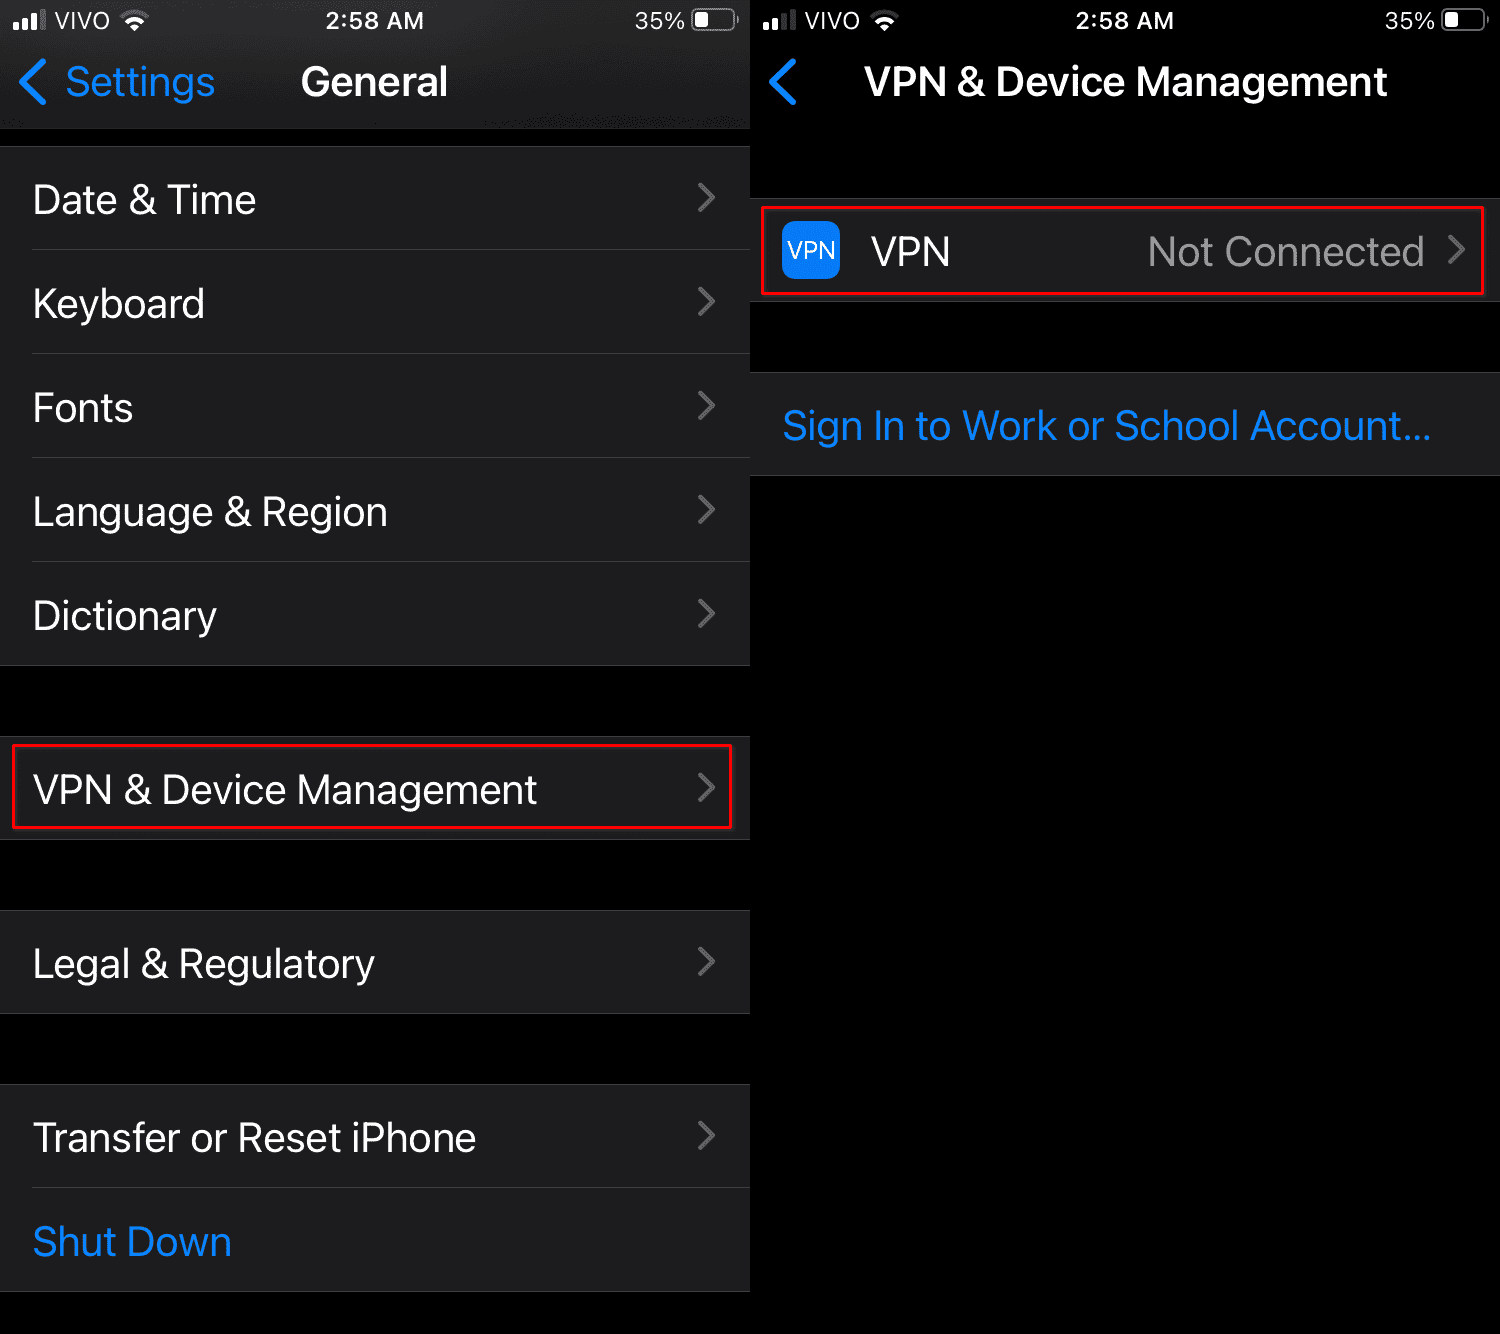
5. Change Your VPN and Location Settings
Using a VPN may interfere with the Stolen Device Protection. It also may, for some reason, mess with your Location Service settings, which prevents you from disabling Stolen Device Protection.
To fix that, do the following:
- Go to Settings > General > VPN & Device Management.

- Disable your VPN.

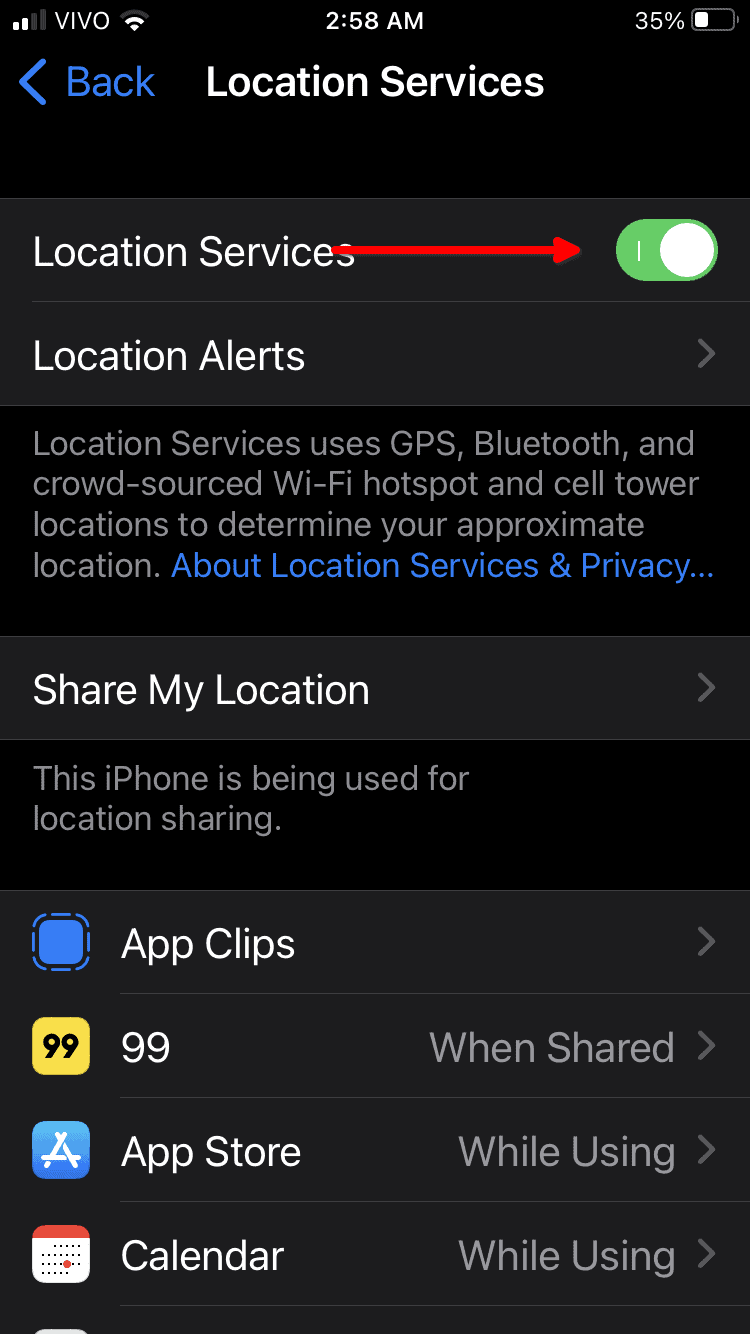
- Enable Location Services in Settings > Privacy & Security > Location Services.
- Also, scroll down to System Services on this page. Open it and enable the Significant Locations toggle.
- Try to disable Stolen Device Protection.
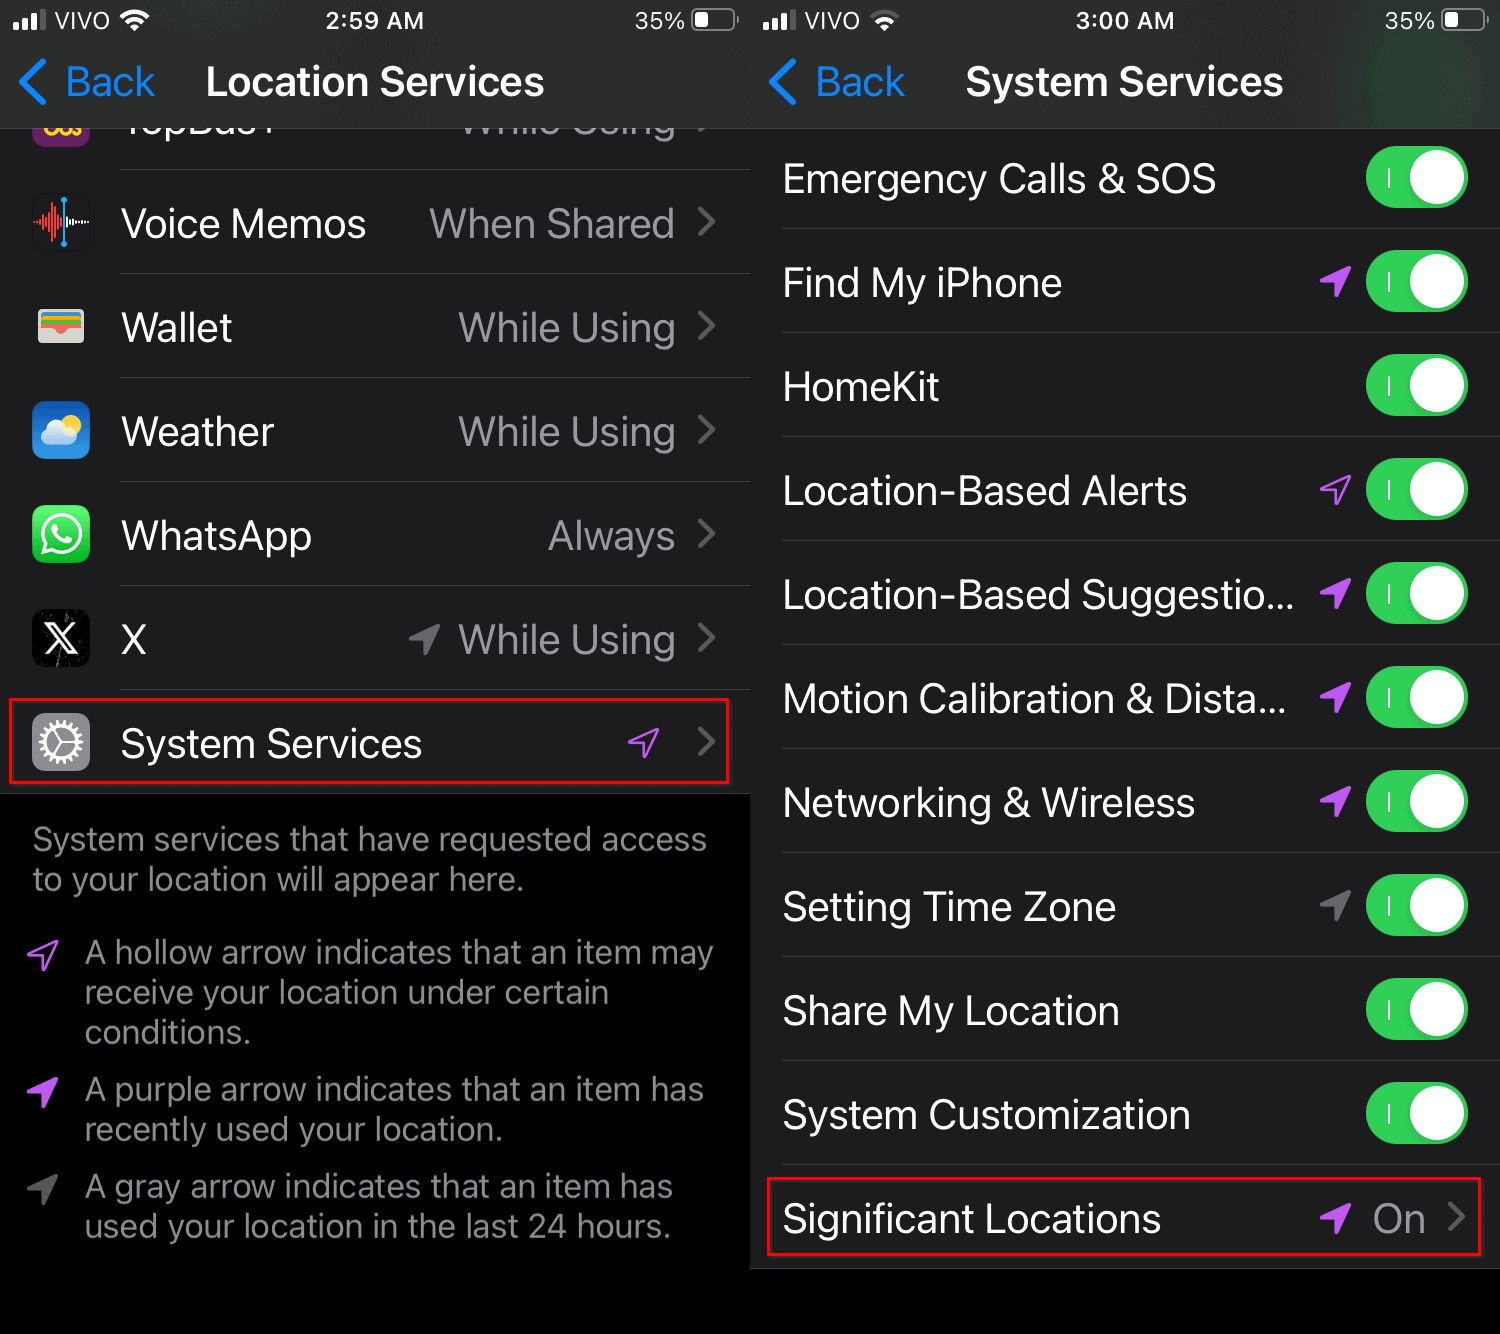
This triggers a security delay, but you’ll receive a notification that your phone has been registered to a Significant Location. After that, you should be able to turn Stolen Device Protection off.
6. Remove Screen Time and Family Restrictions
Additionally, some people can’t disable Stolen Device Protection because their FaceID or TouchID and Passcode settings have disappeared. This is related to Screen Time and Family Restrictions, which aren’t anti-theft measures but deal with similar security features.
To remove the Screen Time Restrictions, go to Settings > Screen Time > Content & Privacy Restrictions. Toggle the feature off. You should now be able to change your FaceID or TouchID settings.
To remove the Family Restrictions, you’ll need to use a device belonging to one of the Family Group administrators. On the Family menu, select the user whose settings will be changed, then follow the same steps described above.
Safety often comes at the price of some convenience. Stolen Device Protection balances both, providing an additional layer of security while getting out of your way when it’s safe. However, it may also unnecessarily get in your way if you try to disable it. Go figure.