
Few things are more nerve-racking than seeing your (expensive) smartphone’s screen act up. Whether it happens after a minor drop, a new iOS update, or seemingly out of nowhere, the dreaded Purple Screen of Death can leave you scrambling for solutions. What’s worse is that it could stem from several hardware and software issues. You might have to go through a few steps before isolating the cause.
To speed up troubleshooting, I compiled all the effective fixes for software-related glitches. You won’t have to buy a new screen if you’re lucky!
What Causes the Purple Screen of Death on iPhone
The most common cause of screen defects is hardware damage. You might notice display distortions if you recently dropped your iPhone on a hard surface or installed non-genuine parts replacements. Water damage can also corrode internal circuits. Less common, yet still worth checking, are software-related errors from iOS glitches and Settings misconfigurations.
How To Fix the Purple Screen of Death on iPhone
1. Check Battery Health
Time needed: 2 minutes
A bloated battery can physically push against the display (OLED screen in newer iPhone models) and result in screen discoloration. Your screen can’t render colors correctly if it’s physically warped. Failing battery packs can also cause flickering due to voltage irregularities. Here’s what to do:
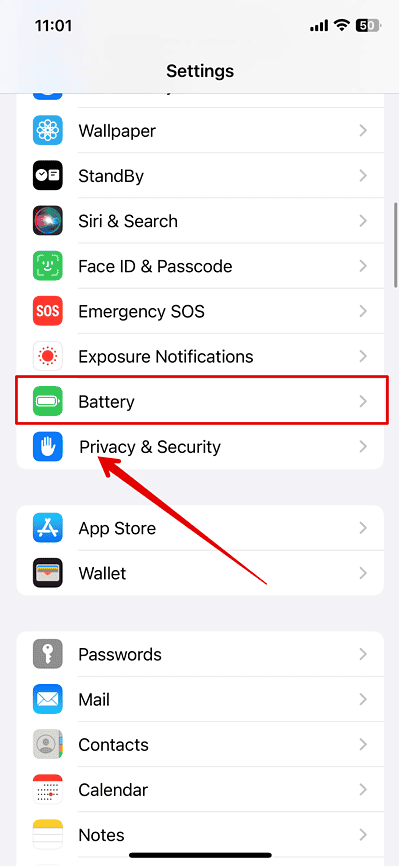
- Go to Settings > Battery.

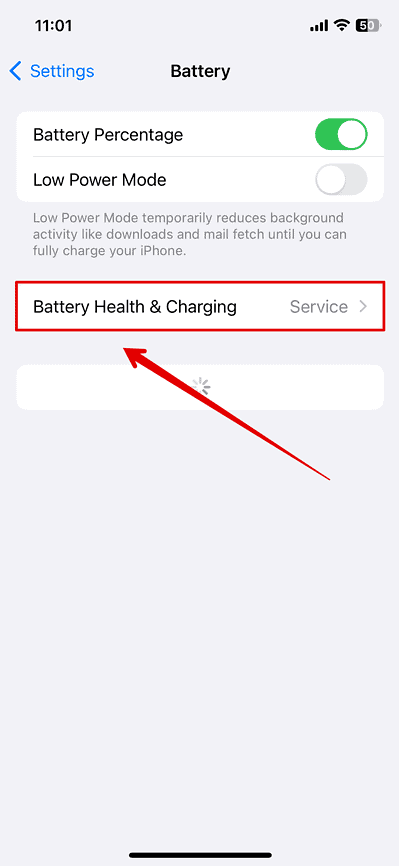
- Select Battery Health & Charging.
- Check the Maximum Capacity and Peak Performance Capability. Consider getting a battery replacement if it’s under 80 percent.
2. Customize Home Screen Layout (iOS 18)
One of the biggest changes on iOS 18 is that it now allows users to customize the Home Screen. You can create widgets, resize app icons, and adjust the overall color shade of your display. It’s possible to envelop your screen in a different tint.
That said, there’s barely any use for this feature beyond aesthetic appeal. It might also come across as screen distortion if you accidentally chose a weird shade—turn it off while troubleshooting.
- Press and hold any blank space in the Home Screen.
- Tap Edit > Customize.
- De-select Tinted and choose either Light or Dark.


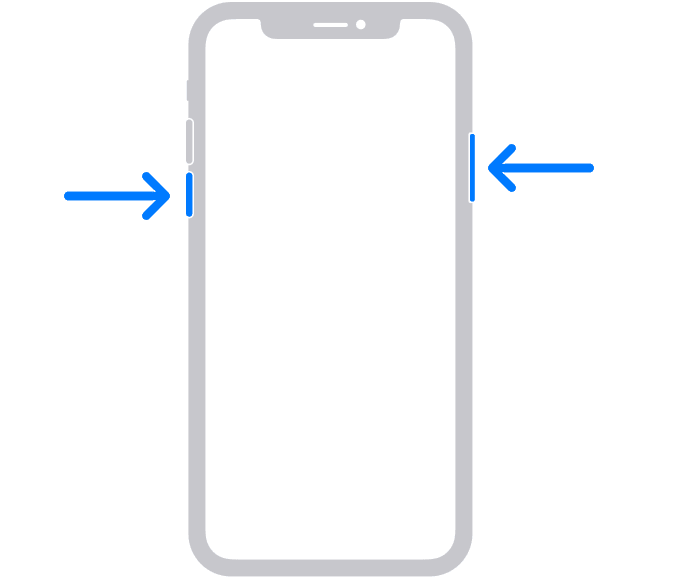
3. Force Restart the iPhone
Force restart clears out any temporary memory issues, such as software bugs or glitches, that could be causing the display malfunction. Do one after every troubleshooting step.
For iPhone 8 and newer:
- Press and quickly release the Volume Up button.
- Press and quickly release the Volume Down button.

- Hold the Side button until the Apple logo appears.
For iPhone 7 and older:
- Hold the Volume Down button and the Side button together.

- Wait until the Apple Logo appears.

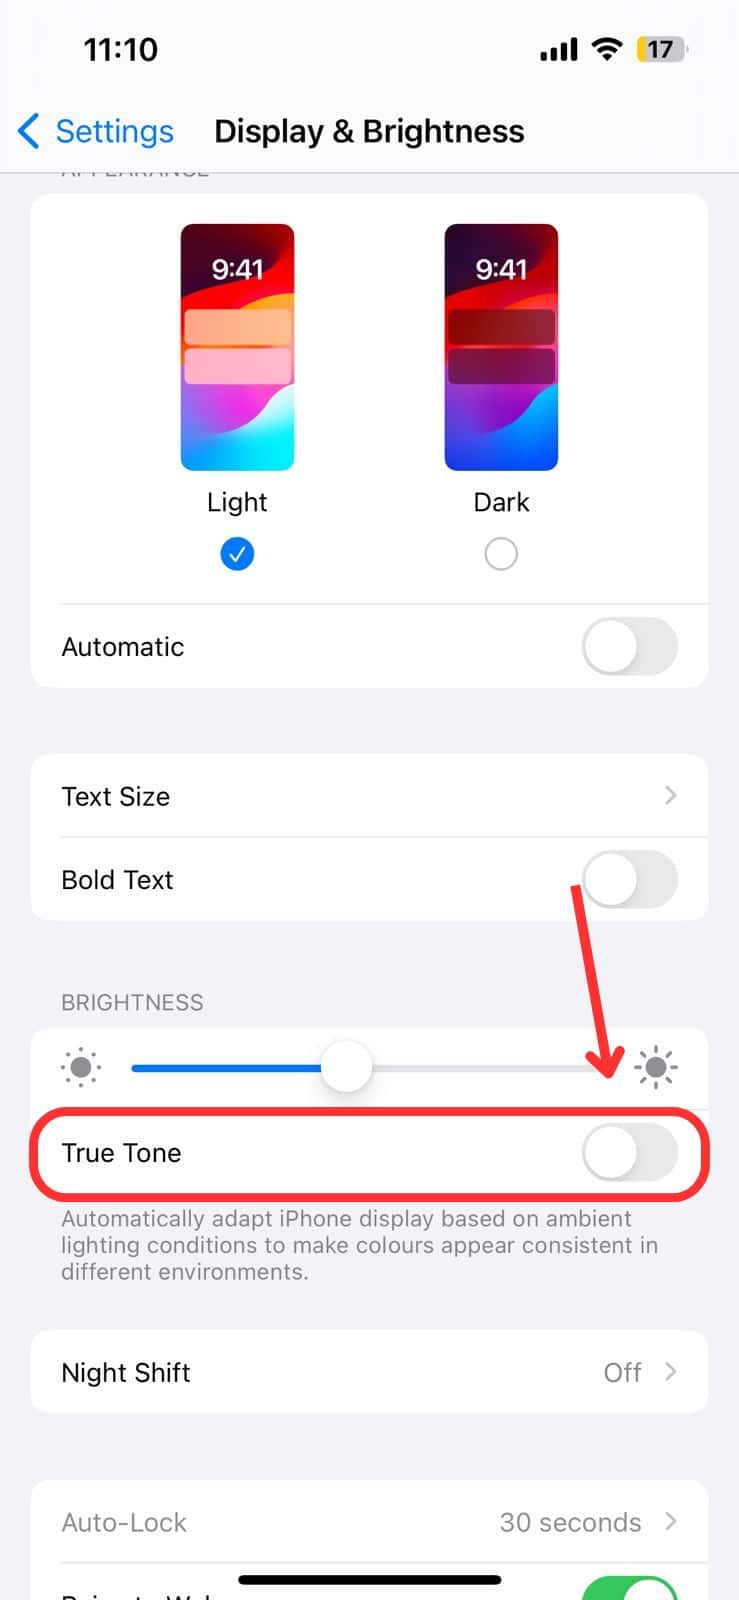
4. Adjust the Brightness or Screen Tint
The weird tint on your screen could also stem from misconfigured settings. The iPhone has several battery-saving and accessibility features that directly impact the way it renders colors.
- Open Settings > Display & Brightness.
- Toggle off True Tone.

- Open Night Shift.
- Under Color Temperature, drag the slider to the right for a warmer tone.
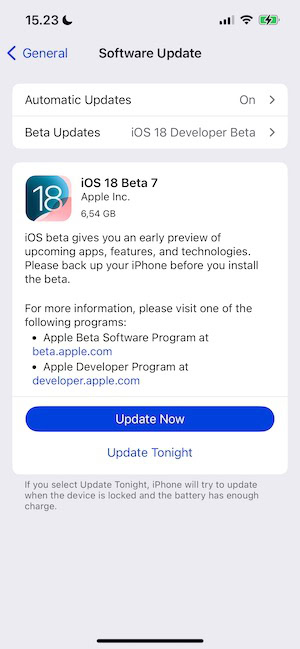
5. Update to the Latest iOS Version
The issue could also come from an iOS glitch. It’s best to install the latest stable version available in your region—Apple typically resolves known software and hardware bugs through updates.
- Go to Settings > General.
- Open Software Update.
- Tap Download and Install Now if an update is available.
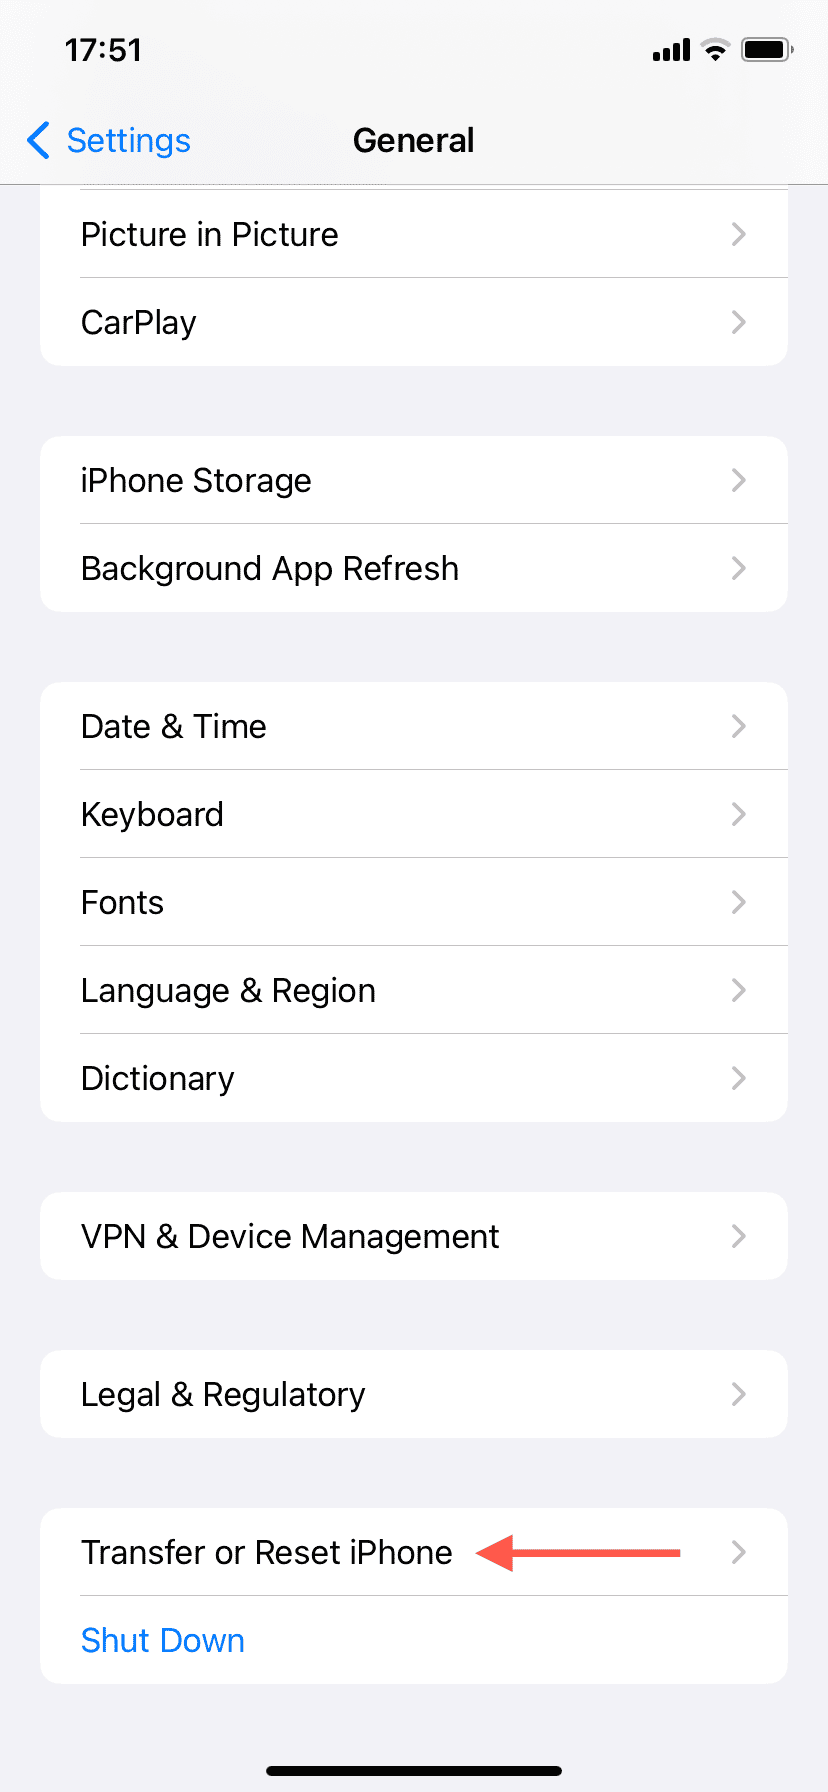
6. Reset All Settings
As a last-ditch resort, consider resetting your iPhone back to its factory settings. It’s a drastic yet effective way to revert any settings misconfigurations that you might have overlooked. Just note that you’ll have to set up your device again. As best practice, back up your data on iCloud beforehand.
- Go to Settings > General.
- Scroll down to Transfer or Reset iPhone.
- Select Erase All Content and Settings.
Should issues persist, reach out to Apple Support. You’ll likely have to send in your device hardware checkups. Apple’s One-Year Warranty doesn’t cover accidental damages, so expect to shell out up to $370+ unless you have AppleCare+ coverage.