
Looking to speed up a video on your iPhone? Whether you’re looking to create dynamic time-lapses or slow-motion effects, Apple has the tool you need right at your fingertips. You’ve probably seen content creators using video adjustments to craft eye-catching visuals, and while it might seem tricky, it’s easier than you think.
I can’t promise you can shoot footage like they can, but I can at least get you started using the same editing tricks they use. Let’s take a look.
How To Speed Up Video on iPhone Using iMovie
Time needed: 5 minutes
The easiest way to speed up a video on iPhone is through iMovie. This is Apple’s free video editor, and although imperfect, it’s rather powerful for something that comes free with the purchase of your device. Note that you can search the Apple App Store for other video editors, but I prefer this one because it is the most accessible. Follow these steps:
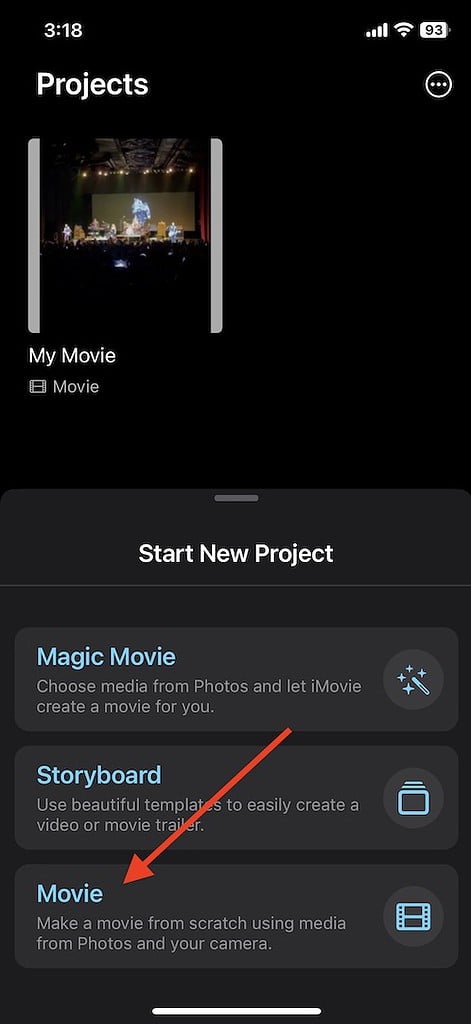
- First, open iMovie on your iPhone and start a new project. If you already have a project, open it and move to step three.
- Those starting a new project. Select Movie and the next screen will allow you to choose what media to add to the project. Select any clips to add to the project.
- Now, tap one of the clips within your timeline to reveal the inspector.
- You can then select the speed button at the bottom of the screen. Click the speed button and then adjust the slider to change the speed of your clip.

- Additionally, you can also create ranges within a clip. This allows you to make a specific part fast. There are two methods to create a range: either drag the yellow range handles to create a start and end to your clip, or you can select Add within the inspector to create another range.
- If you want to create more ranges, simply select an area of the clip that is outside of your current range. You can also tap Add from the inspector, allowing you to create a new range from the border of the playhead position. You can view what ranges you have via the vertical white lines at the bottom of a clip.
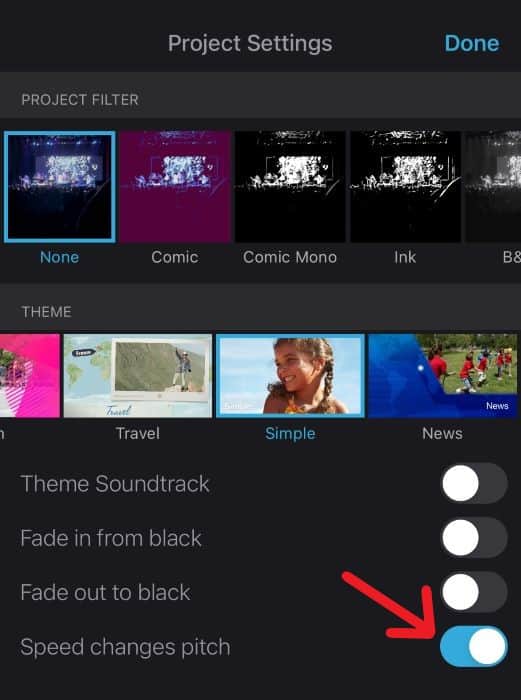
- Tap anywhere outside of the inspector to dismiss it when you are finished. Remember that if you want the audio to change with your speed, you’ll need to tap the gear icon (settings) and select Speed changes pitch (it should be on by default).


 NOTE
NOTE
Getting it All Together
While this may sound a bit confusing, I promise it makes more sense while you are using iMovie. It may take a bit of practice to get your editing skills where you want them, but once you have these skills down you’ll be creating the shots you want in no time. Remember you can use these tricks to slow down footage in iMovie as well. Being able to combine both of these, you can create some really cool and dynamic shots for your video.
You may also want to know how to trim a video in iMovie on Mac, iPhone and iPad.