
Although it was announced on September 16, some users report they can’t get macOS Sequoia to install on their Macs. Here’s what to do if you are having trouble updating to macOS 15.
1. Check If Your Device Supports macOS Sequoia
The first thing to do is check if your Mac supports macOS Sequoia. The list is pretty simple: all iMac Pros, all MacBooks from 2020 onwards, and all other Macs from 2018 onwards. If your computer isn’t on that list, you can’t install macOS Sequoia—officially.
Use OpenCore Legacy Patcher

In case your model didn’t make the cut, there’s still a way to update it. OpenCore Legacy Patcher, OCLP for short, is a tool that allows older Macs to run newer macOS versions.
Using OCLP to update your Mac to a version it doesn’t support officially is pretty straightforward. Be sure to check our guide to get a walkthrough of the process.
2. Check Your Internet Connection
It’s always a good idea to check your internet connection. Confirm your connection is working, check if you don’t have a firewall blocking the download, and so on. It doesn’t hurt to check if Apple’s servers are working, too.
3. Make Sure You Have Enough Storage Space
Updating your macOS requires a lot of space. You’ll need about 15GB just to download the installer app, for starters. It will require another 15GB or more to decompress the installation files.
It’s recommended you have at least 50GB available on your disk before you try a system update. Therefore, check how much storage you have left in case you can’t install macOS Sequoia on your Mac.
The 2018 Mac Mini, the model with the smallest storage to support Sequoia, comes with at least 128GB of disk space. It’s a good idea to have at least that much left on your installation disk.
4. Repair Your Drive Using Disk Utility

While corrupt system files may not always prevent you from using your Mac, they might hinder OS updates. If you’re having issues upgrading to macOS Sequoia, repair your startup disk with Disk Utility, then run the installer again.
5. Sign Out From Your Apple Account Then Sign In Again
A messed up permission setting with your Apple Account may also prevent you from upgrading to macOS Sequoia. A few users on Apple’s support forums tried signing out from their Apple Account and then signing back in again. It was enough to allow the installation to go through.
6. Confirm You Have System Integrity Protection (SIP) Enabled
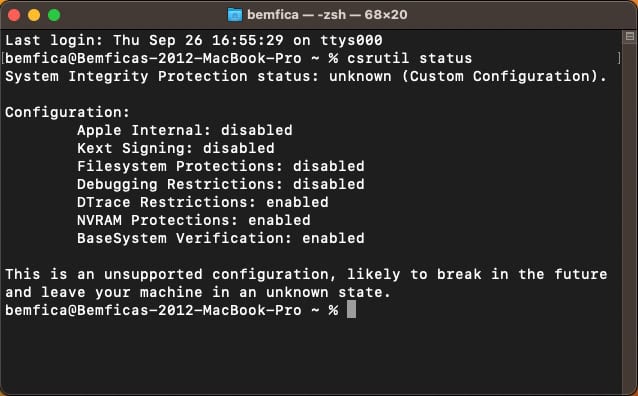
Some popular macOS apps, like TotalFinder, require disabling System Integrity Protection (SIP). This is a security feature of macOS that checks for changes in protected system files but limits customization. You can disable SIP with a few simple steps, but this may also prevent macOS updates from working correctly.
To check whether SIP is enabled, open a Terminal window and type the following, then press Return:
csrutil statusIt will display a list of features. If they all show as “enabled”, then SIP is turned on. If any of them show as “disabled,” use the instructions from Apple to restore it to the secure configuration. After that, check if you still can’t install macOS Sequoia on your Mac.
7. Try To Install Using A USB Stick

Sometimes, a macOS update may fail from inside the current macOS installation, but it works if started from a USB stick. You can create a bootable macOS installer using Terminal, so grab a spare thumb drive and give it a go.
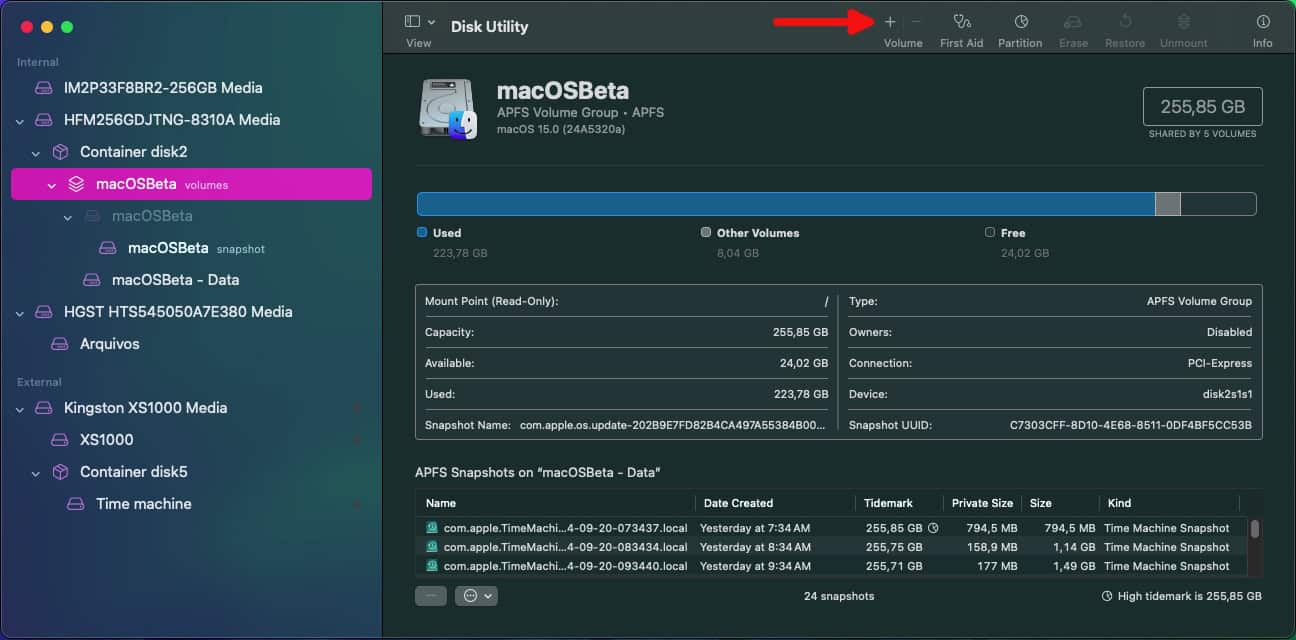
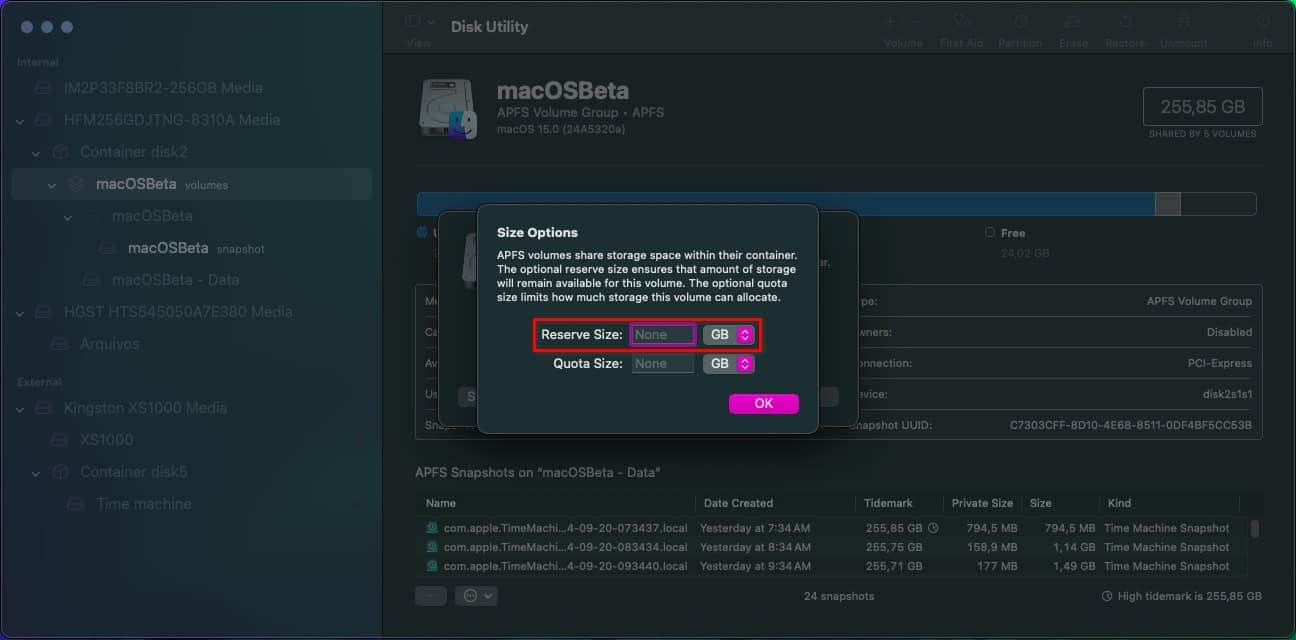
8. Make a New APFS Volume
If you have enough storage space available, try making a new APFS volume and installing macOS Sequoia on it. You can then restore a Time Machine backup and use your Mac just as if you had updated as usual. If everything works, you can delete the old volume to free up space or keep it around, just in case.
Here’s how to create a new APFS volume:
- Open Disk Utility and select your internal disk.

- On the top menu, click the “+” icon over Volume.

- Name your new volume and click Size Options.
- Set a minimum disk size under Reserve Size. For macOS Sequoia, you’ll need 128GB or more.

9. Install to a Different Disk
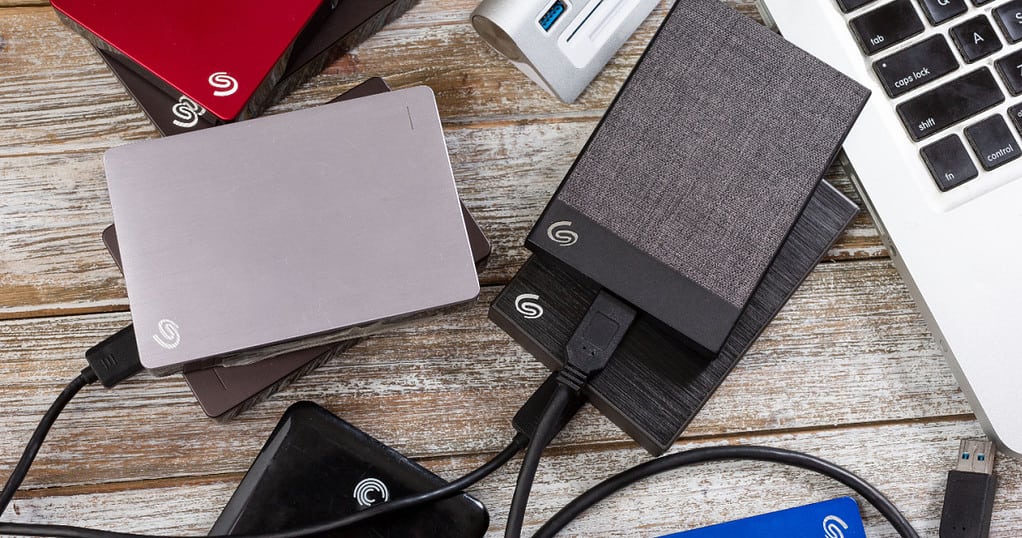
Similar to the above, if you can’t install macOS Sequoia on your internal disk, you can try using an external one. For Macs with multiple drive bays, like Mac Pros, you can have more than one internal disk, so this also applies.
Usually, the macOS update app formats a disk when it detects there’s no other macOS installation on it. However, it doesn’t hurt to format the drive using Disk Utility, just to be sure.
To do that, open Disk Utility and select the drive you’ll install macOS Sequoia. Remember to select the disk itself, not the volume. To make sure you’re choosing the right one, on the menu bar, go to View > Show All Devices. With that out of the way, do the following:
- Click Erase on the top menu.
- Name your disk.
- Select the APFS file system and the GUID Partition Map.
Then, open the macOS Installer and point it to your newly-formatted disk.
With all of the above, you should have a working macOS Sequoia installation in no time. In case you’re still over the fence on whether the update is worth the hassle, check our list of the best macOS 15 features.