Citrix Receiver lets you access applications and programs on your Mac through a secure remote device, but it’s an older program that was replaced by Citrix Workspace back in 2018. If you haven’t used it in a while or have switched to the newer app, it might be taking up extra space and causing problems. In both cases, it’s better to uninstall Citrix Receiver from your Mac to prevent any potential issues.
The problem, however, is that removing this tool from a Mac isn’t that simple. It can leave behind stubborn leftover data that need manual removal. This is especially common with older versions of the automatic uninstaller (like v11.x).
But don’t worry! In this guide, I’ll show you the exact steps to remove Citrix Receiver completely from your Mac.
How To Remove Citrix Receiver From Mac
Uninstalling Citrix Receiver for Mac completely is a two-step process. First, you’ll have to run the official uninstaller provided by Citrix. Second, you’ll have to scan Finder for any files that the automatic uninstaller missed and remove them manually.
Step 1: Use the Offical Uninstaller
Time needed: 5 minutes
Follow these steps to run the Citrix uninstaller:
- Open the Downloads folder.
- Look for the original installer file used to install Citrix Receiver on your Mac. It will typically be named CitrixReceiver.dmg or CitrixReceiverWeb.dmg. If it’s not there anymore, go to the Citrix website and download the installation client for Mac from there.
- Double-click the CitrixReceiver.dmg (or CitrixReceiverWeb.dmg) file. This will mount a virtual disk image on your desktop.
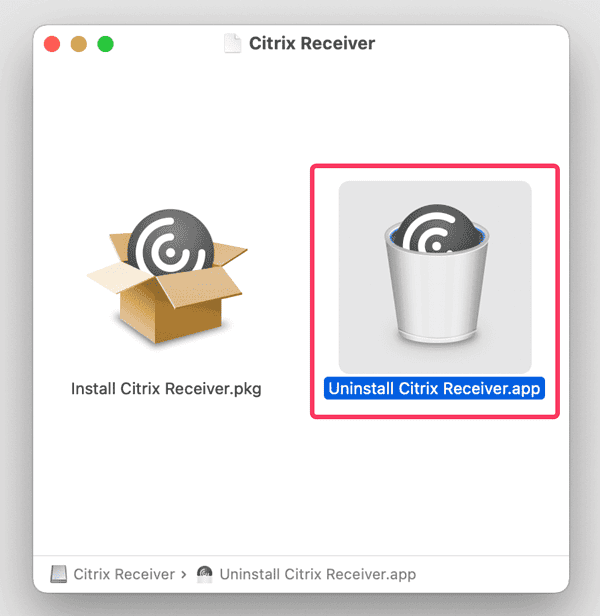
- Once the disk image is mounted and opened, select the option that says Uninstall Citrix Receiver.
- The uninstaller will likely display a series of dialogs guiding you through the removal process. Carefully read each dialog and follow the on-screen instructions.
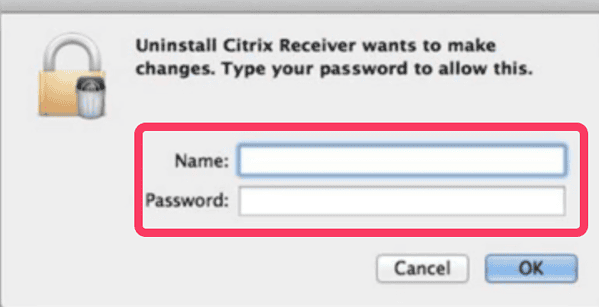
- At some point, you might be prompted to enter your admin username and password. Enter your credentials and click the appropriate button to continue.
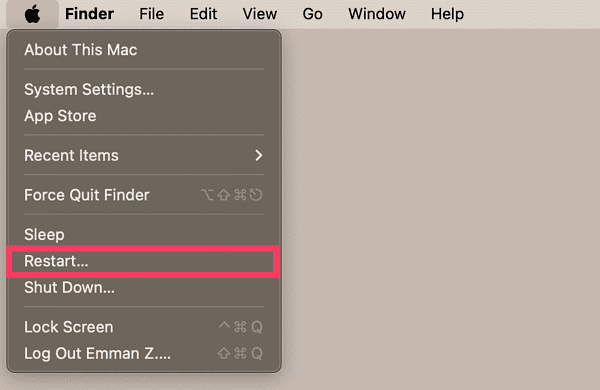
- Restart your Mac by clicking the Apple menu icon in the top-left corner and selecting Restart from the menu.
Step 2: Manual Removal of Files
Now, on to the second step: manually deleting additional files after using the automatic uninstaller.
Erasing the main application might leave some leftover files behind. You need to remove these associated files manually to ensure permanent deletion.
- Open the Applications folder on your Mac.
- If you see an application named Citrix Receiver.app, drag it to the Bin.
- Open the Library folder. This is the system Library folder, not the one inside your user folder.
- Look for the following files and move them to the Trash if you find them:
/Library/Internet Plug-ins/CitrixICAClientPlugIn.plugin
/Library/LaunchAgents/com.citrix.AuthManager_Mac.plist
/Library/LaunchAgents/com.citrix.ServiceRecords.plist - Navigate to the
Users/Sharedfolder. - Find and remove the folder named
/Citrix/ReceiverIntegration. - Now, open a new Finder window. In the search bar at the top right corner, type
~/Library(including the tilde symbol ~) and press Enter. This will open your user Library folder. - Look for the following files and move them to the Bin if you find them:
/Internet plug-ins/CitrixICAClientPlugIn.plugin(everything inside the Citrix Receiver folder, including CitrixID, Config, and Module)
/Application Support/Citrix Receiver/Preferences/com.citrix.receiver.nomas.plist
/Preferences/com.citrix.receiver.nomas.plist.lockfile
/Preferences/com.citrix.ReceiverFTU.AccountRecords.plist
/Preferences/com.citrix.ReceiverFTU.AccountRecords.plist.lockfile - Open the
~/Applicationsfolder (tilde symbol refers to your user folder). - Look for any applications you added to your virtualized workspace using Citrix Receiver. These might have names unrelated to Citrix. If you find any unwanted applications, drag them to the Bin.
- Navigate to the
/private/var/db/receiptsfolder. - Look for the following files and move them to the Bin if you find them:
com.citrix.ICAClient.bom
com.citrix.ICAClient.plist - Finally, empty the Bin to remove all the selected files permanently.
As a more efficient alternative, most users recommend trying a trusted cleaning app if you’re trying to get rid of leftover files or any unnecessary files from your Mac. For instance, Intego Washing Machine offers resource management tools to keep your system clutter-free and ensure a smooth performance with minimal effort.
Clear Records Generated by Follow Me Data
Follow Me Data is a feature of Citrix Receiver that helps maintain a consistent workspace across devices. It remembers your apps, data, and all customizations.
If you’ve uninstalled Citrix Receiver, you’ll also want to remove the Follow Me Data and its associated information. For this:
- Open Finder and navigate to the following folders to clear their contents:
~/Applications/Citrix/FollowMeData
~/Library/Application Support/ShareFile
/Library/PreferencePanes/FMDSysPrefPane.prefPane - Now find and delete the following files that contain installation details and user data:
/private/var/db/receipts/com.citrix.ShareFile.installer.plist
/private/var/db/receipts/com.citrix.ShareFile.installer.bom
/private/var/db/receipts
com.citrix.ShareFile.installer.plist
com.citrix.ShareFile.installer.bom
Optional: You can also delete the ~/ShareFile folder in your user directory (use the tilde symbol ~) if it exists.
Once you’ve moved all the items mentioned above to the Bin, empty the Bin to permanently remove them from your Mac. This should ensure there are no remaining traces of Citrix Receiver or the Follow Me Data feature.
That’s it! You’ve completely uninstalled Citrix Receiver from your Mac. If you want to install the newer version, make sure to restart your Mac before installing it.


