
One of the first things you might have noticed after updating to macOS Sonoma is the low mic volume. You may have also tried adjusting your input volume to no avail. The audio issues on your Mac can be attributed to system bugs on the Sonoma 14 update. Your Mac’s speakers aren’t necessarily busted. I listed a few troubleshooting steps to rectify the issue, from making system tweaks to adjusting your settings. Here’s what to do.
Four Ways to Fix Low Microphone Volume on macOS Sonoma 14
1. Reset Your Core Audio Daemon
If you’re encountering low microphone volume when you update to macOS Sonoma, your Mac’s core audio daemon might have been affected. The core audio daemon, also known as “coreaudiod,” is a background process on your Mac that handles all audio-related tasks. These include audio playback, managing external audio devices, and recording sound.
Time needed: 1 minute
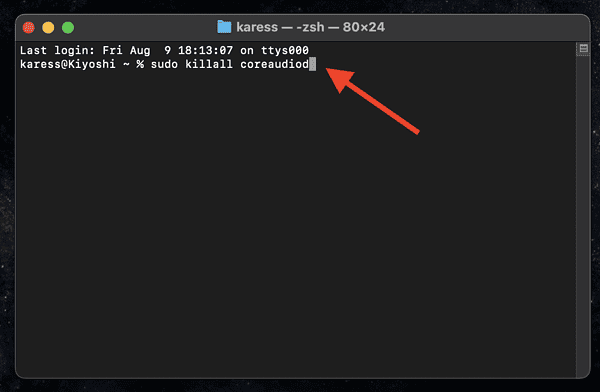
If coreaudiod is having issues, you’ll need to reset the API on Terminal. To do that, follow these steps:
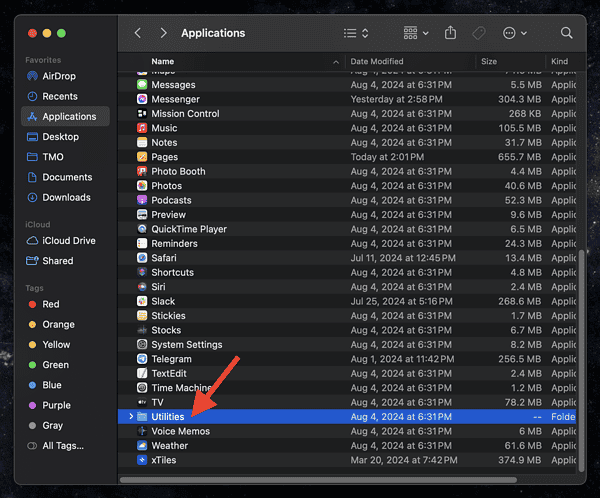
- Open Finder and locate the Applications folder.

- Navigate to Utilities.
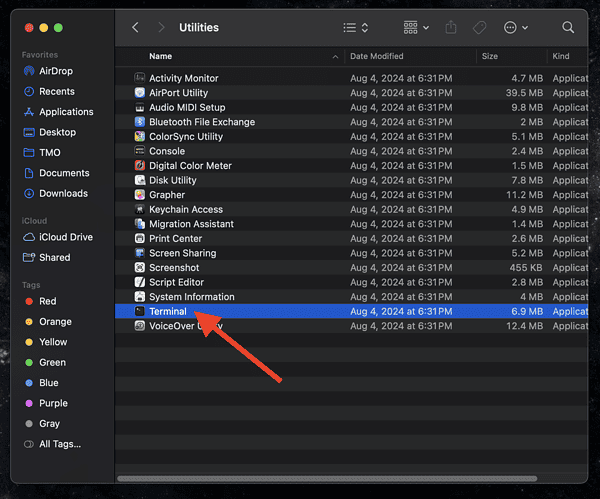
- Open Terminal.

- Type sudo killall coreaudiod, then press Enter.


 NOTE
NOTE
2. Revoke Microphone Access on Apps
Another fix to low mic volume in Sonoma is adjusting your microphone settings. Some apps may interfere with your overall audio input, even when the apps aren’t being used.
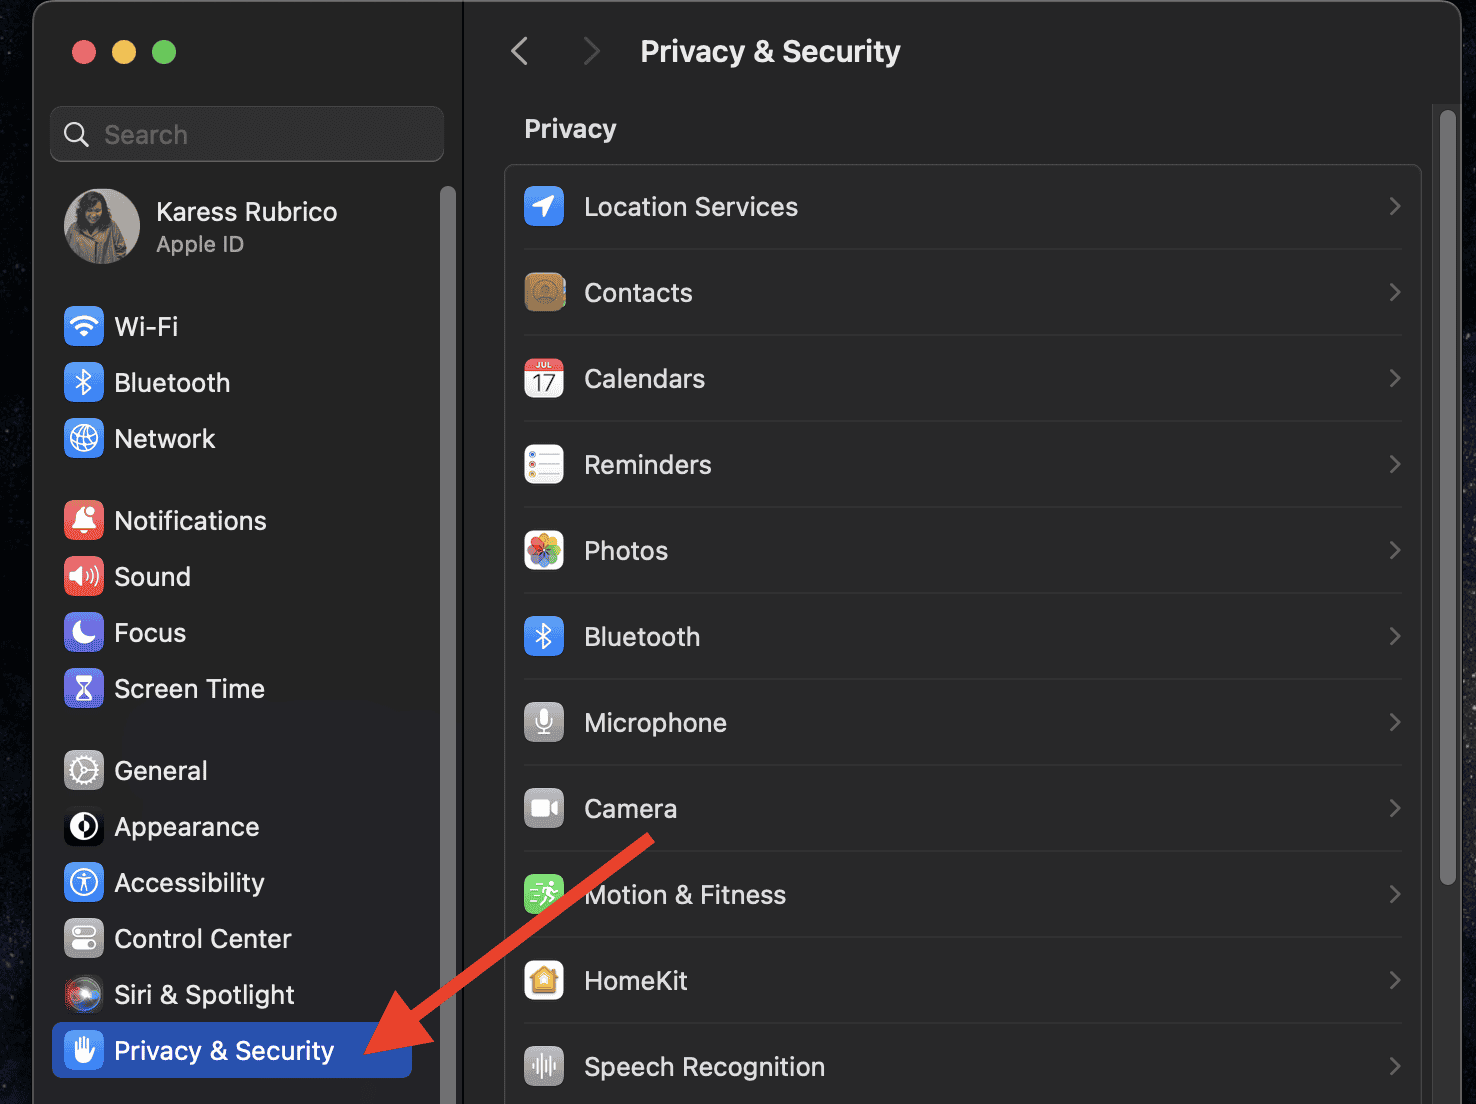
- From System Settings, click on Privacy & Security.

- Select Microphone.
- Toggle off all the apps that require access.


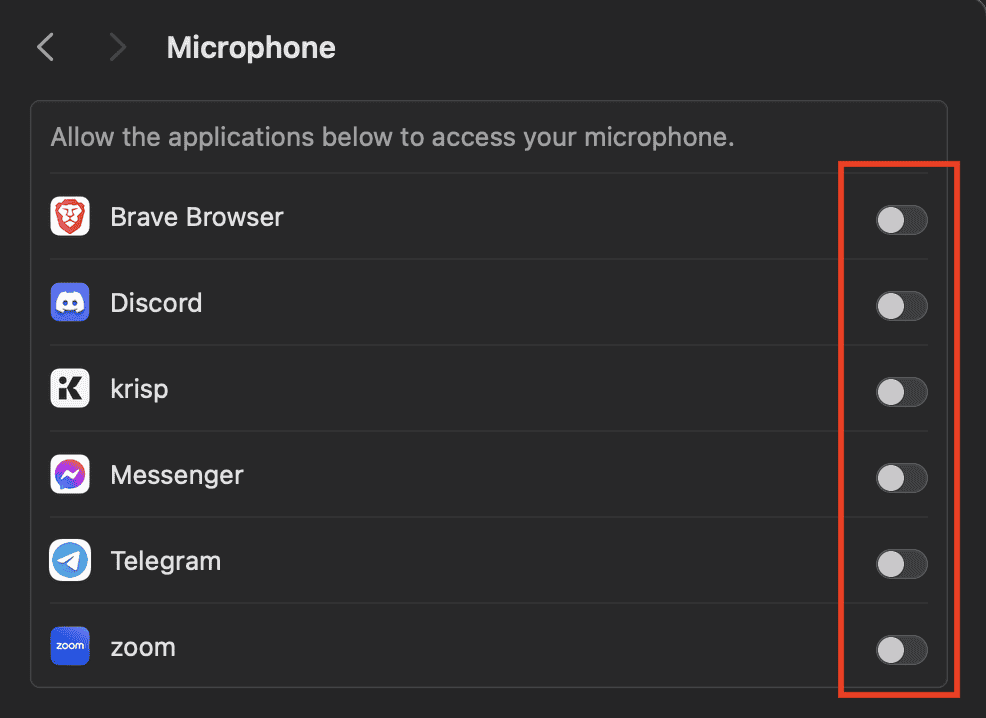
Your apps will request Microphone Access the next time you use them. You can grant permission once you start using the app again.
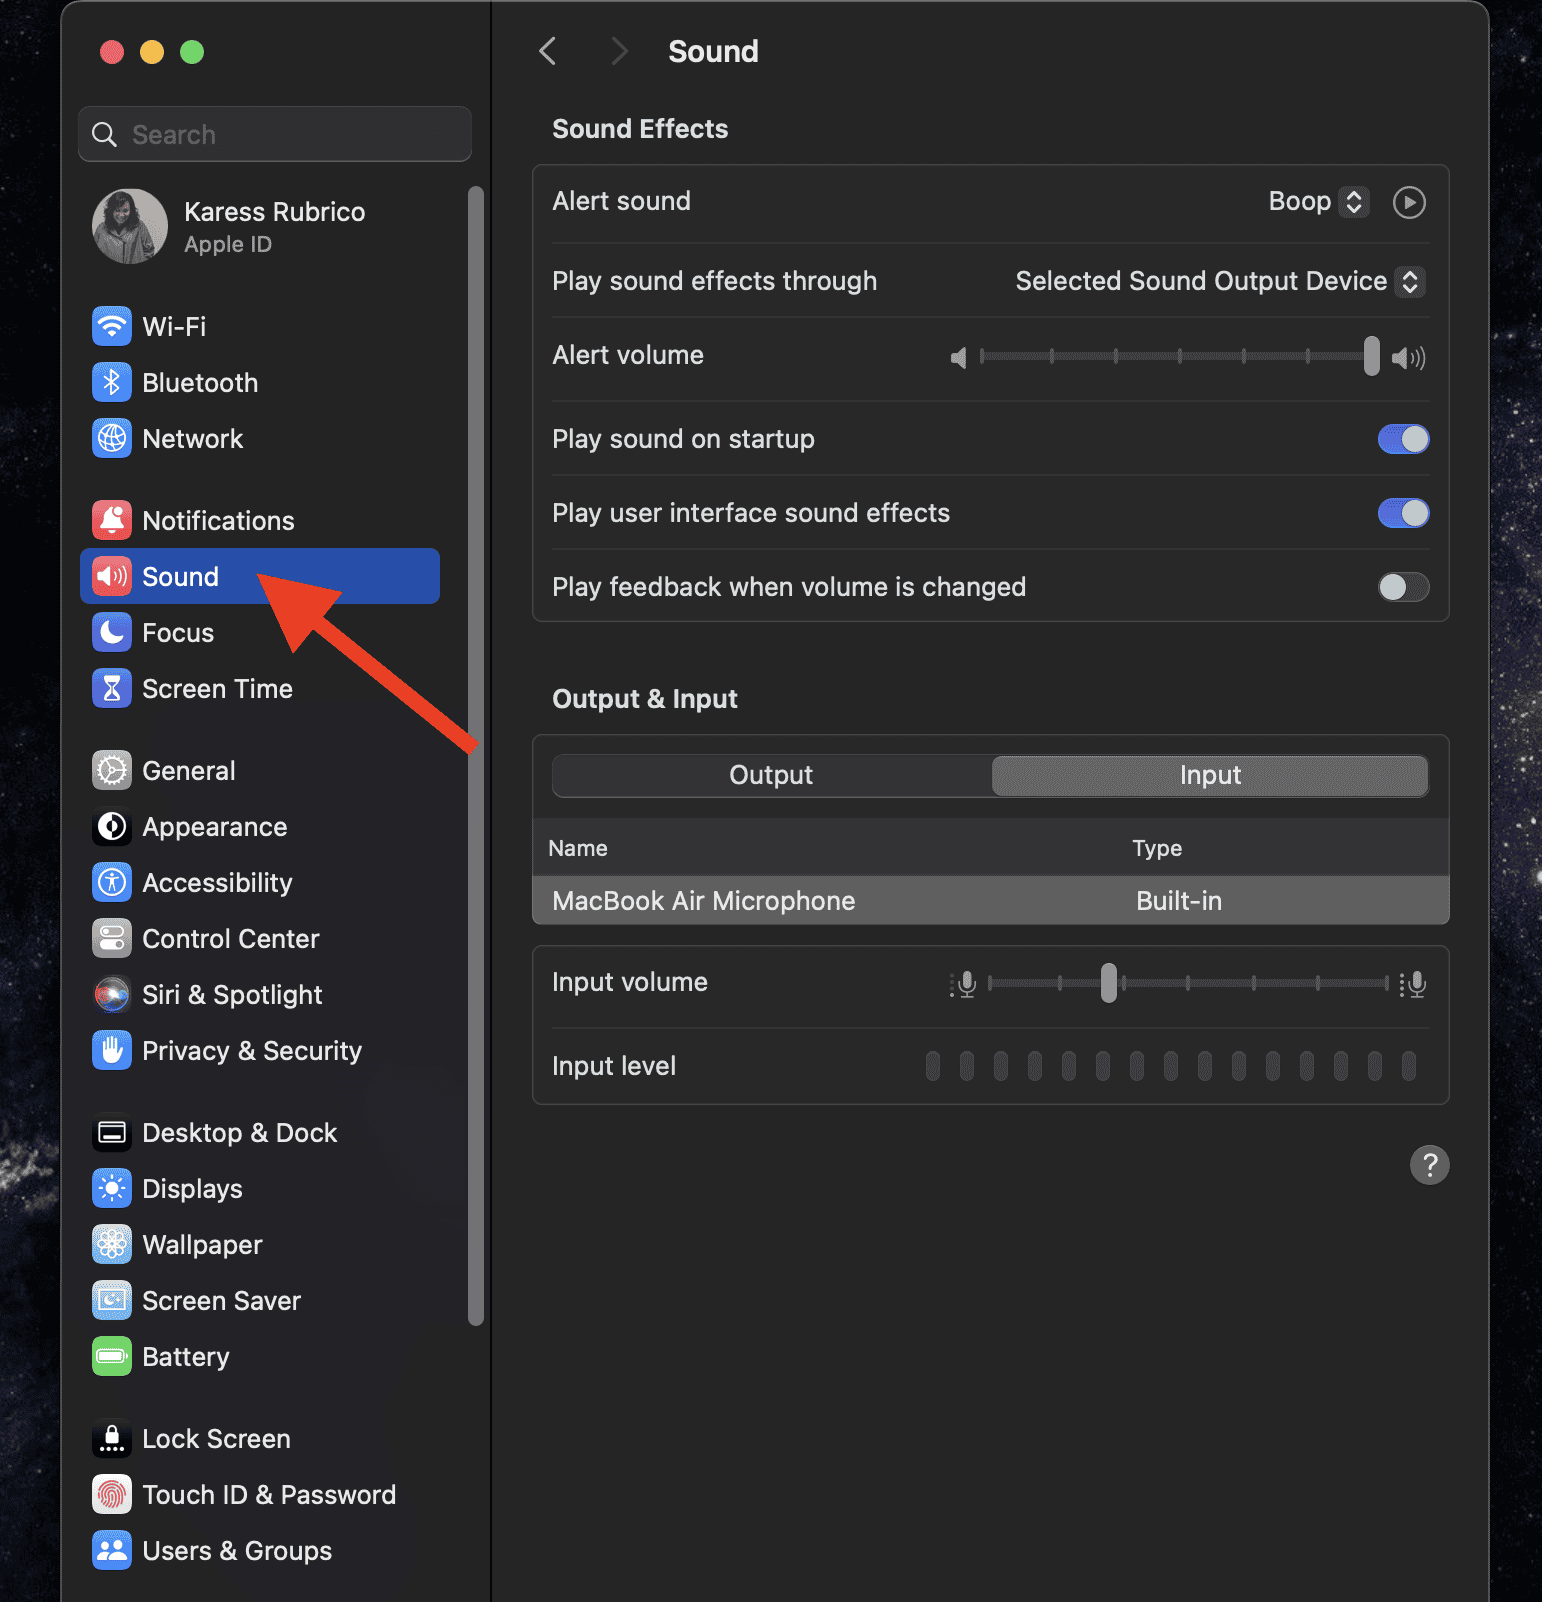
3. Make Sure Your Microphone isn’t Blocked
If you typically use your loudspeaker on your MacBook, check to see if there’s anything blocking your microphone. The mic is located on the left side of the left Shift key.
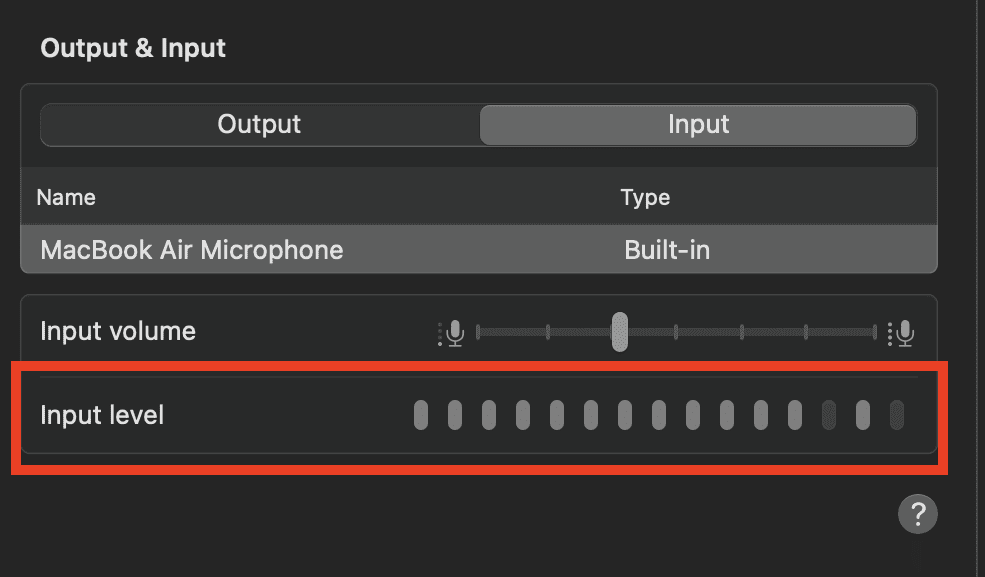
- From Settings, click on Sound.

- Select Input.
- Run your finger over the holes beside the left Shift key. You should notice the Input level reaches 100.

 NOTE
NOTE
4. Restart Your Mac
Something as simple as rebooting your computer can resolve the poor microphone issues on your Mac.
To restart your computer, click on the Apple logo in the upper left-hand corner of your screen. Scroll to Restart…, then click Restart.
Once you’ve restarted your Mac, check to see if you’re still having any microphone volume issues.
Contact Apple Support if you’re still encountering low mic volume on your Mac. If you’ve also encountered Touch ID problems after updating to macOS Sonoma, you may also want to check out these easy fixes.