
Are you tired of opening your web browser whenever you want to use ChatGPT? You won’t have to do that anymore because the official ChatGPT app for Mac is finally here. This tutorial shows you how to install it on your device and set up your account, plus some tips to maximize its features.
Install and Sign Into ChatGPT
Time needed: 3 minutes
ChatGPT is available as a desktop app for all Macs running on Apple Silicon chipsets (sorry, Intel Mac owners!). Follow these steps:
- Visit OpenAI’s ChatGPT on your desktop page and select Download. Next, go to your Mac’s Downloads folder and double-click the downloaded DMG (disk image) file.

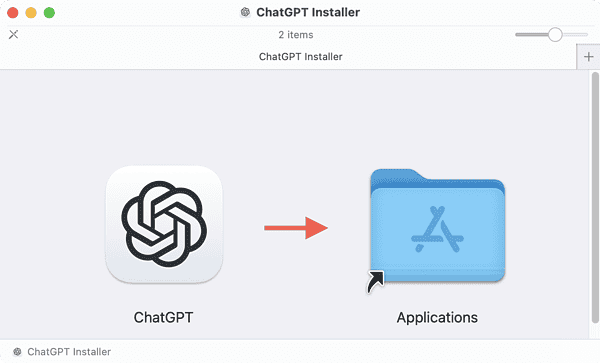
- On the ChatGPT Installer that shows up, drag the ChatGPT icon into Applications.

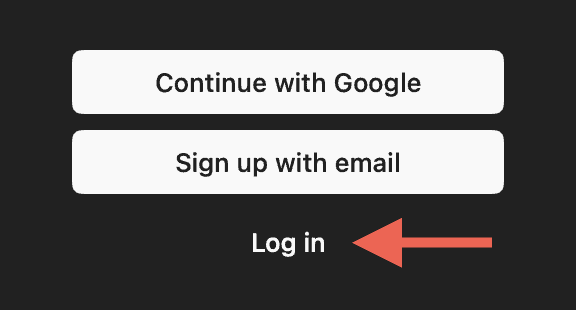
- Launch ChatGPT from the Applications folder or Launchpad and sign in with your Google or OpenAI account. If you’re using ChatGPT for the first time, select Sign up with email to set up a new account.


How ChatGPT Looks on Mac
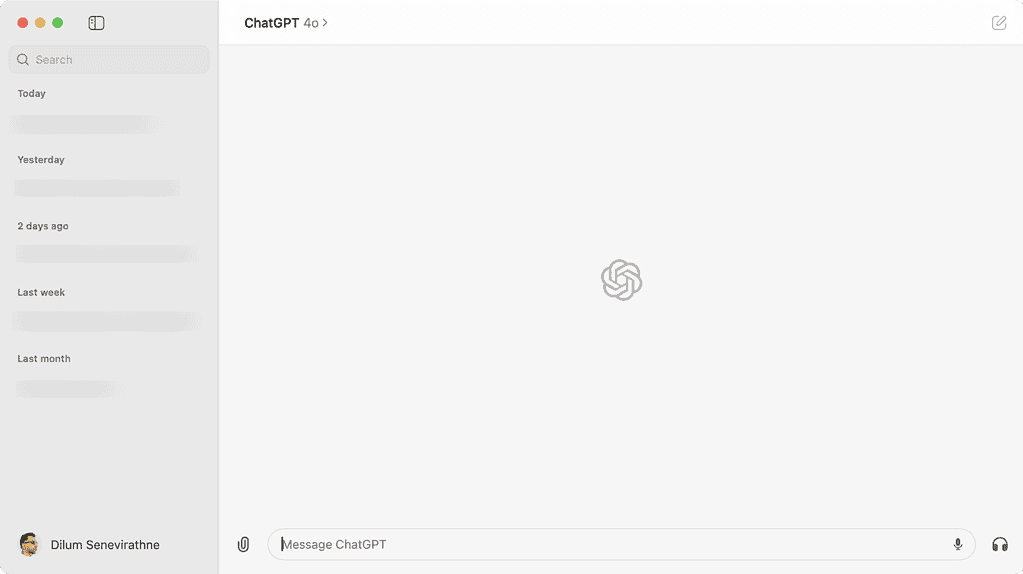
The ChatGPT app looks similar to the web version, except for the smaller font style and a few minor changes to the user interface. As you’d expect, the history panel is on the left (select the Show/Hide Sidebar icon if you can’t see it), while the input box and response area are to the right.
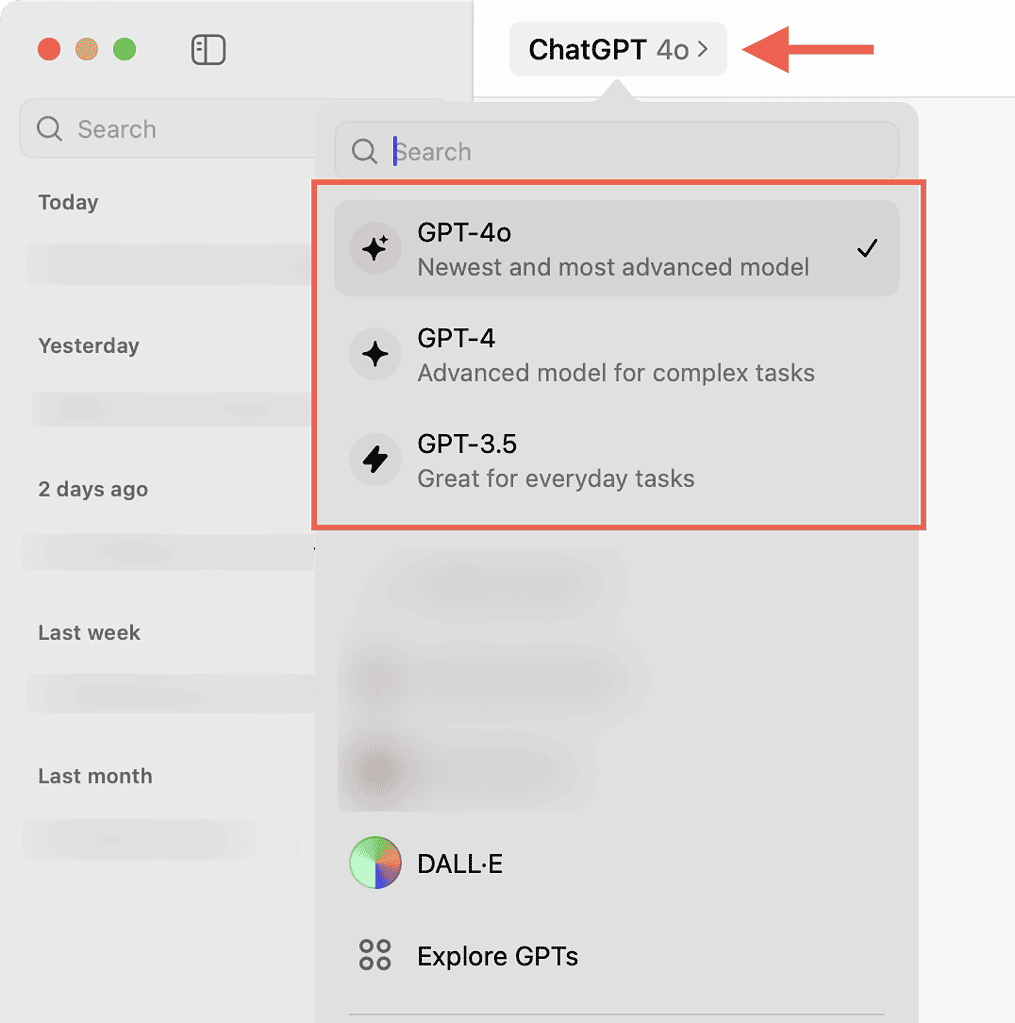
The default language model is visible on the top—selecting the arrow icon next to it opens a drop-down that lets you switch between the GPT-4o, GPT-4, and GPT-3.5 models. Links to the GPT store and your pinned GPTs are also present on the same menu.
Type something into the input box and press Return to start a conversation with ChatGPT. Use the New Chat icon at the top right to start a new chat while already in a conversation.

 NOTE
NOTE
If you want to continue a previous chat, select it from ChatGPT’s history panel. There’s also a Search field at the top where you can search for words and phrases within conversations. If you want to share, delete, or rename a chat, Control-click it on the history panel and use the relevant contextual option.
Upload Documents and Images
The ChatGPT desktop app for Mac lets you talk to documents and images. To attach files to your prompts, select the Paperclip icon on the left corner of the input area and choose Upload Photo or Upload File. Alternatively, drag and drop items from Finder or the desktop into ChatGPT’s input box.

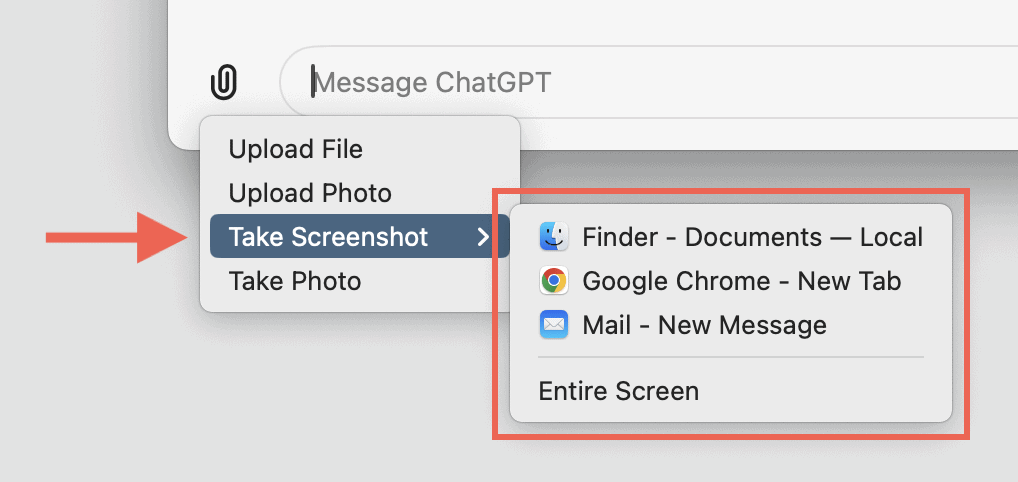
Take Screenshots With ChatGPT
Screenshots can give ChatGPT more context and information, which is why the ChatGPT app has a built-in feature that can quickly grab and attach snapshots.
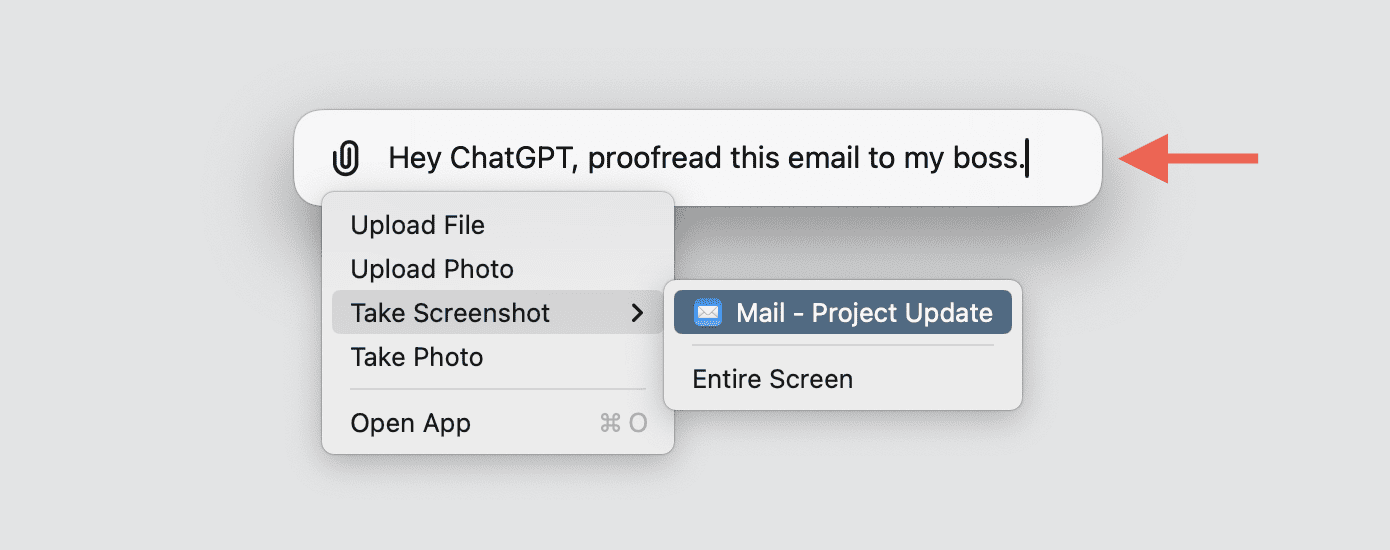
Start by selecting the Paperclip icon. Then, point to Take Screenshot and choose the name of an app to take a screenshot of its window or the Entire Screen option to capture the entire screen.
The Chat Bar in Action
You can start a new conversation in ChatGPT without leaving your current application by invoking the Chat Bar. Here’s how to use it:
- Press Option + Space on your keyboard to bring up the Chat Bar.
- You can instantly start typing in your query through Spotlight.
- Select the Paperclip icon to add files, images, or screenshots (optional) and press Return.

The full ChatGPT window will appear, and you can continue your conversation there.
Configure the ChatGPT App
To get the most out of the ChatGPT app on your Mac, you need to configure it. Start by opening the ChatGPT app and selecting ChatGPT > Settings on the menu bar. You can then see your account and subscription details and various other options.
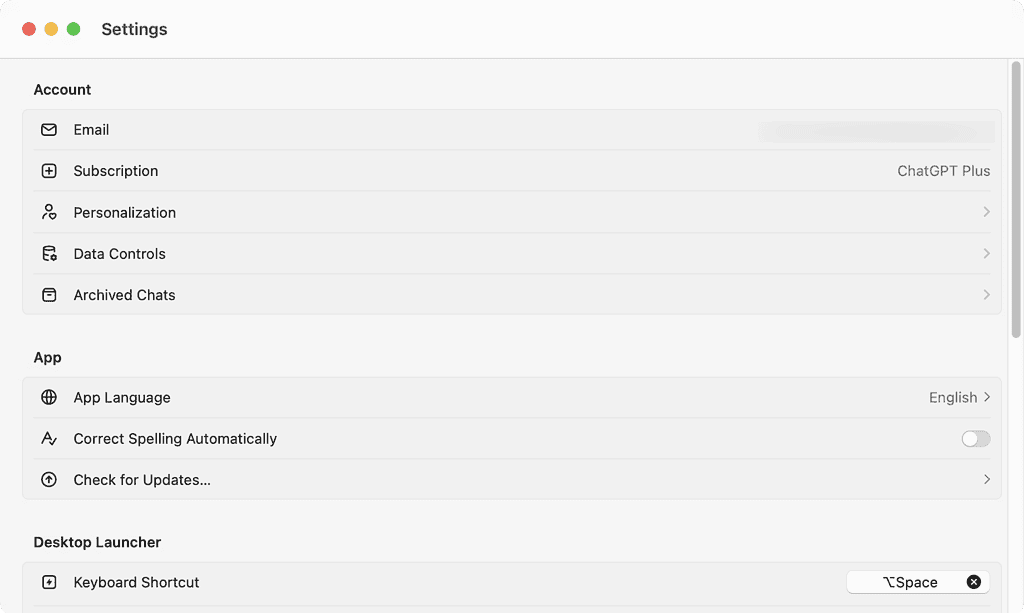
We recommend that you check out the following:
Personalization
The Personalization area provides a sub-option called Customize ChatGPT. Select it to enter information about yourself, such as your name, occupation, and interests. You can also specify how you want ChatGPT to respond to you (e.g., call you by name) and determine if new chats should have web browsing, image generation (DALL-E), and code interpretation capabilities.
Next, turn on the toggle next to Memory if you’d like ChatGPT to record interesting facts from your chats for future conversations. You can also select Manage Memory to delete anything you don’t want it to keep.
Data Controls
If you’re conscious about your privacy, Data Controls can help prevent OpenAI from using your data to train its language and image generation models. You can also archive all chats, export your data, and delete your account.
Keyboard Shortcut
You don’t have to stick to the default Option + Space keyboard shortcut to invoke the Chat Bar. Select the Delete icon next to Keyboard Shortcut and bind a new shortcut.
Keep ChatGPT on Top
Enable the toggle next to Keep ChatGPT on Top to make the ChatGPT app float over other applications. You should then have a much easier time talking to ChatGPT while working on other tasks.
Voice
If you don’t like ChatGPT’s default voice in voice conversations, select Voice and pick an alternative voice.
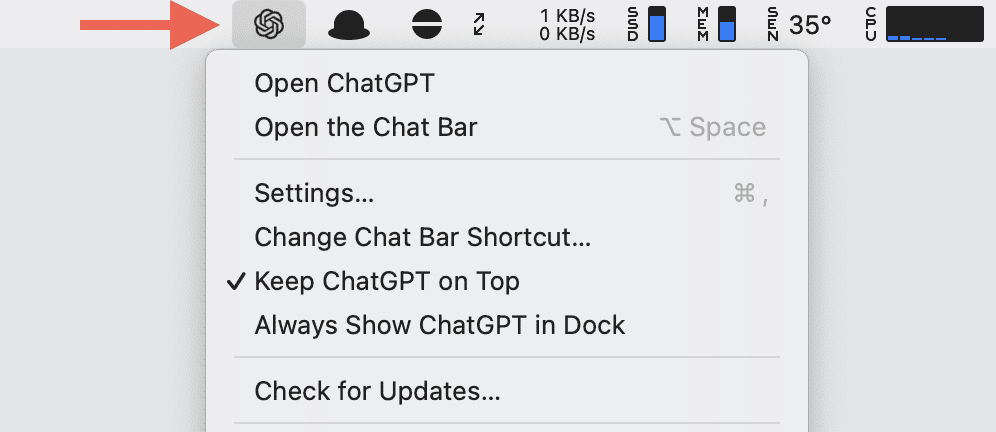
ChatGPT Lives on the Menu Bar
ChatGPT is always available on the Mac’s menu bar, giving you access to quick actions like opening the ChatGPT app interface, the Chat Bar (if you find keyboard shortcuts challenging), and the app’s Settings panel. It also provides a handy Check for Updates option that you can select to scan for app updates from OpenAI.
That pretty much sums up what the ChatGPT app offers on the Mac. Sure—it’s not exactly the app that was shown in the OpenAI demo in May, especially when it comes to voice conversations. However, additional features should become available over the next few months, so don’t forget to check for updates regularly. You can also try third-party ChatGPT desktop apps for the Mac in the meantime.