
You might want to completely uninstall Adobe Creative Cloud from your Mac for several reasons. Maybe you no longer need it to manage Adobe software, or perhaps it’s because you’re troubleshooting an issue.
The problem, however, is that removing Creative Cloud isn’t as simple as dragging and dropping it into the Trash. But don’t worry—this guide will show you the exact process you need to follow.
The Adobe Creative Cloud Uninstall Process
Adobe Creative Cloud is a complex program that integrates with various Adobe apps, so you can’t remove it without first uninstalling all other Adobe software on your Mac. And even after that, you can’t simply move Creative Cloud to the Trash to get rid of it. Instead, you must use a dedicated uninstaller from Adobe that automatically shuts down related processes before removing the application.
However, the Creative Cloud Uninstaller doesn’t do a good job. It leaves behind loads of cached data and support files you must manually remove to avoid clutter and potential conflicts with other software (or with Creative Cloud itself if you plan to reinstall it).
How to Uninstall Adobe Creative Cloud
The following instructions will help you completely uninstall Adobe Creative Cloud from your Mac.
1. Uninstall All Adobe Apps Related to Creative Cloud
Time needed: 3 minutes
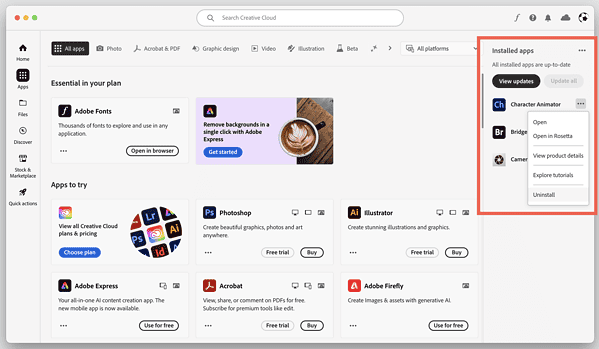
Before removing Creative Cloud, you must uninstall all Adobe applications you’ve installed through it. To do that:
- Launch the Creative Cloud app from your Applications folder or the menu bar.
- Select Apps on the sidebar—a list of installed Adobe applications should appear on the right.
- Hover over an app—e.g., Adobe Premiere Rush—and select the horizontal ellipsis (…) next to it.
- Choose Uninstall and wait until Creative Cloud trashes the application.

- Repeat for every other Adobe application on the list.
 NOTE
NOTE
2. Download and Run the Creative Cloud Uninstaller
Once you’ve removed the Adobe apps, you can start uninstalling the Creative Cloud application. Here’s how:
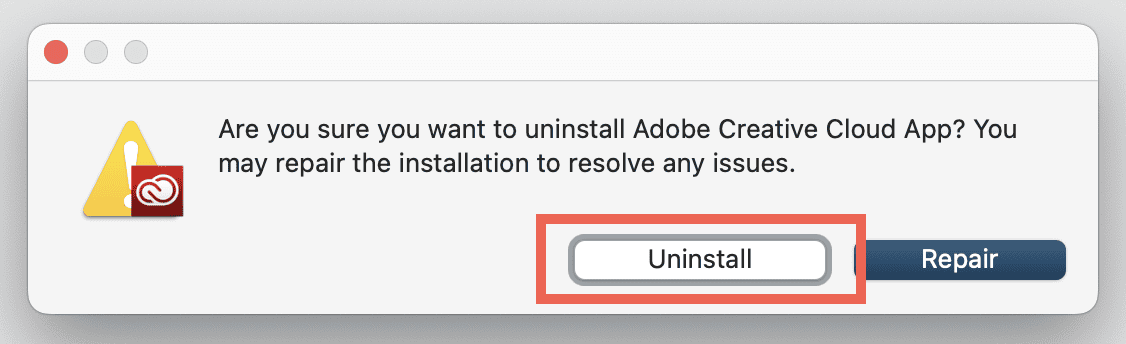
- Visit Adobe’s Uninstall the Creative Cloud desktop app page, scroll down to the Uninstall on macOS section, and download the Creative Cloud Uninstaller.
- Visit your Mac’s Downloads folder and double-click the downloaded disk image (DMG) file inside.
- Double-click the Creative Cloud Uninstaller icon inside the disk image and enter your Mac’s user account password.
- Select Uninstall on the pop-up window.

- Wait until the CC Uninstaller removes Creative Cloud and select Close.
3. Remove Creative Cloud Leftovers on Mac
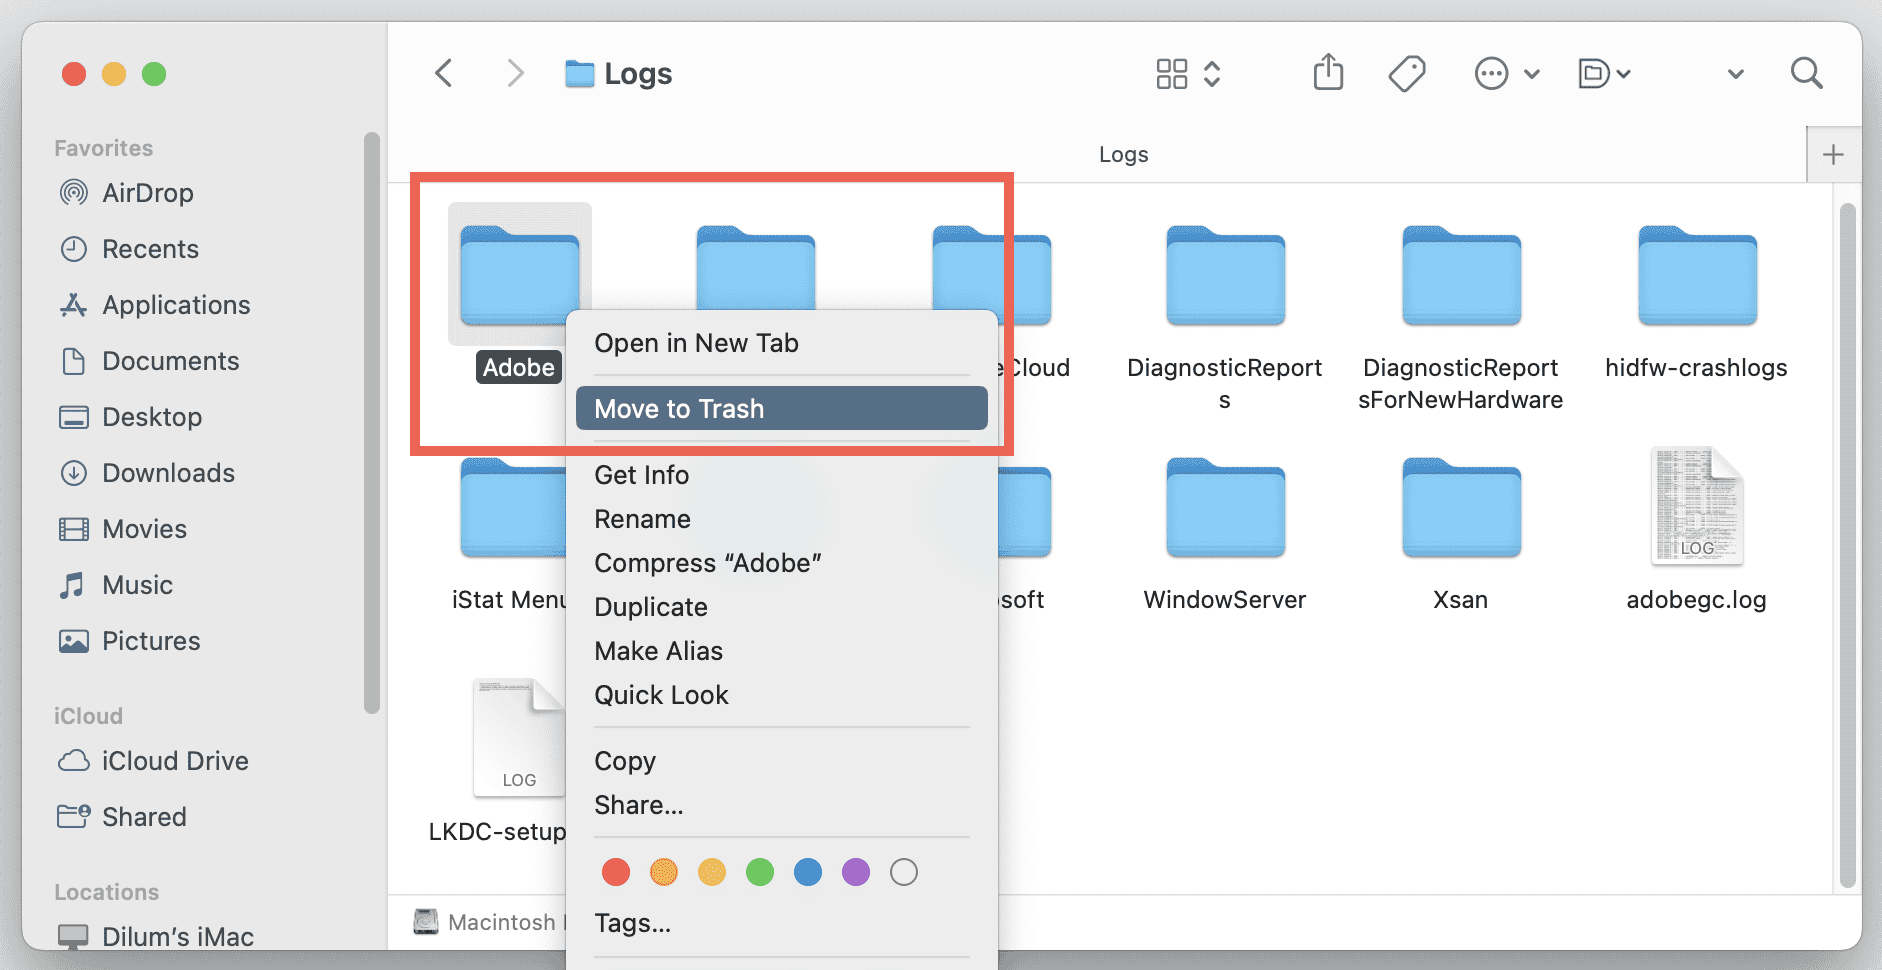
To thoroughly uninstall Adobe Creative Cloud, you must spend a few minutes locating and deleting various leftover files and folders related to the installation. To do that:
- Open Finder and select Go > Go to Folder on the menu bar.
- Visit the following paths one by one and delete any Adobe-related files or folders inside:
/Library/Application Support/
/Library/Preferences/
/Library/LaunchDaemons/
/Library/PrivilegedHelperTools/
/Library/Logs/
~/Library/Application Support/
~/Library/Preferences/
~/Library/Caches/
- Control-click the Trash icon on the Dock and select Empty Trash to permanently remove the deleted items.
If you’d like an easier way to ensure no leftovers are cluttering your system, you can try a handy cleaning app like Intego Washing Machine. It will scan unnecessary files, including the Adobe ones, and remove them to keep your Mac clean and running smoothly.
➡️ Try Intego Washing Machine here
That’s it! You’ve completely removed Adobe Creative Cloud from your Mac. If you’re troubleshooting Creative Cloud, make sure to restart your Mac before reinstalling it.