
Among the main causes of a slow Mac is a malfunctioning process or an app that’s consuming excessive resources. One example is nsurlsessiond, which may be the culprit of high CPU and bandwidth
In such situations, it’s normal to fear your Mac has been infected with viruses, and how to fix it. I have two good news for you: it’s not a virus, and it’s relatively simple to fix nsurlsessiond issues.
What Is nsurlsessiond?
In short, nsurlsessiond is usually related to iCloud Sync. That process is used by macOS, iOS, iPadOS, and other Apple Operating Systems (OSes) to keep files synced across devices.
For the long answer: NSURLSessionD stands for NextSTEP URL Session Daemon. Here’s what each one means:
- NextSTEP: an old OS that is the base of present-day macOS.
- URL: simply put, internet links, like www.macobserver.com.
- Session: when you log in to an app/website, you start a session. It ends by logging out. So, a session is everything done while logged in.
- Daemon: a type of system process that can trigger the start or end of other processes.
Doesn’t explain much, right? To keep things short, NSURLSessionD is one of the ways OSes perform actions related to online accounts on Apple devices. Developers tend to use other ways, that they design for their own apps, so not many processes use nsurlsessiond.
Is nsurlsessiond a Virus?
No, it’s not. It’s a built-in way to manage online data on Macs (and other Apple devices, though those don’t have a native Activity Monitor).
What Causes nsurlsessiond High CPU Usage?
There are a few possibilities. In most situations, nsurlsessiond starts having a high CPU usage because of some iCloud misconfiguration. In more complicated cases, however, the issue may appear because of a corrupted file or folder. More rarely, system permissions may be changed after an OS update, affecting nsurlsessiond.
Quick Tip:
If you’re experiencing high CPU, GPU, or RAM usage on your Mac and cannot fix it, most users recommend trying a trusted optimization app. For instance, Intego Washing Machine offers resource management tools that will help you minimize the risk of slowdowns and ensure a smooth performance.
What To Do if nsurlsessiond Is Causing High CPU Usage?

Being a native macOS process doesn’t mean nsurlsessiond is immune to malfunctioning. The usual main symptom is using a lot of data, but nsurlsessiond may cause high CPU usage as well. Here are five ways you can fix this.
1. Wait a Bit
That may seem silly advice, but nsurlsessiond issues tend to go away by themselves. Since the culprit is usually iCloud Sync, just let it finish syncing whatever it is syncing, and it’ll be done. It usually settles after a couple of minutes.
2. Turn iCloud Sync off Then On Again
If you haven’t been using anything related to iCloud, but nsurlsessiond keeps misbehaving, the process may have gotten stuck. Most of the time, disabling and re-enabling iCloud Sync solves this.

To do that, open System Settings (System Preferences on macOS Monterey and older) and click on your photo. It’ll open your Apple ID (or Apple Account, as it has been renamed recently) settings. Go to iCloud > Apps using iCloud. If needed, click the “Show All” button. Disable all the apps and services on the list.

Then, open the Messages app. Go to Settings (Command + “,” — the comma key) > iMessage, and make sure “Enable Messages in iCloud” is NOT selected.

After that, open the Activity Monitor, type nsurlsessiond on the search bar, select the process, and click the X icon near the center of the top menu. It’s not the red X button to close the window. A dialog will pop up asking you to confirm you want to quit the process. Select “Force Quit”. In case there’s more than one nsurlsessiond process, close all of them (you can select multiple processes with Command + click).
After doing the above, go back to your iCloud settings and enable the apps and services that were active previously. If “Enable Messages in iCloud” was selected before, you can check the box again now.
3. Sign Out Then In Again From iCloud
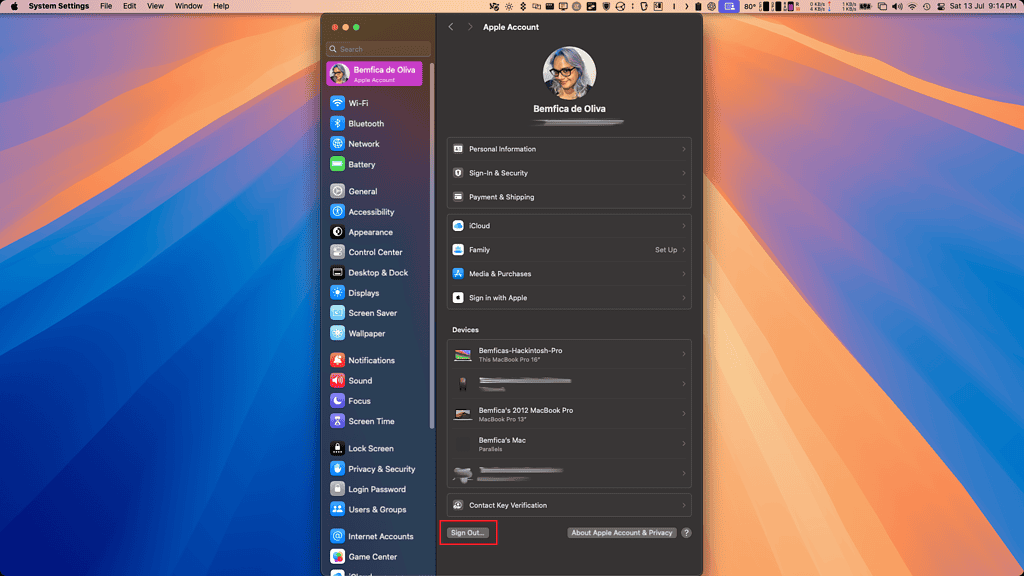
If the above didn’t work, you can try signing out from iCloud and then signing back in. This process is simpler but may prove cumbersome if your Mac deletes your synced files, contacts, and passwords quickly.
To do that, go back to your iCloud settings and click the “Sign Out…” button on the bottom. A dialog will open asking you whether to delete or keep a copy of your iCloud data. Unselect all items listed and click “Continue”. After that, quit the nsurlsessiond processes in Activity Monitor and the high CPU usage should be gone. You can sign in to Apple ID and enable iCloud again after that.
4. Delete Corrupted Files or Folders From iCloud
There’s a chance, however, the culprit is a corrupted file or folder on your iCloud storage. In this case, no amount of disabling/re-enabling syncing or signing out then in again to iCloud will suffice. You need to find which file or folder is getting nsurlsessiond stuck and get rid of it.

To do that, you need to open Activity Monitor and find the nsurlsessiond processes’ IDs. This number is a unique identifier for each process macOS opens since booting. The original nsurlsessiond process, which is causing high CPU usage, is the one with higher “% CPU” or “CPU Time” values. Take note of the PID for this process.
After that, open a terminal window and type the following command:
sudo fs_usage ####Where #### is nsurlsessiond‘s PID. You’ll need to provide your account’s password. This command shows a list of files nsurlsessiond is currently using. If the process is stuck with a corrupted file, it will keep appearing. Take note of its location.
If it’s an important file, I recommend you make a copy of it. You’ll need to use another device, though, since the file on your Mac is broken.
To delete the file, either navigate to its location using finder and remove it with Command + Option + Delete, or type the following command on the Terminal window:
rm -rf /path/to/fileWhere /path/to/file is the path displayed by the previous command.
5. Delete Corrupted Files or Folders From Your Computer
If even the above doesn’t solve your issue, you may have an issue with file permissions or ownership. This usually happens after a macOS update. The issue means the system got “confused”, thinking the iCloud folder on your Mac doesn’t “belong” to you. This prevents your user account from downloading new files to it.

To confirm if this is the issue, open a Finder window and navigate to /var/log/asl. There should be dozens of files there. Double-click any of them, which will open Console with the logged messages. Check if you have messages similar to the ones found by this user on Apple’s support forums:
libcoreservices: __makeDirectory: 405: mkdir: path=/var/folders/zz/******/0/ mode=0755: Operation not permitted.Where ****** is a random folder name created by the system, it’s a long name with letters and numbers.

Check a few of the log files just to be sure, in case you don’t find this message in the first one. Also, to be extra safe, type the following command in a Terminal window:
ls -la /var/folders/zz | grep nsurlsessiondAnd confirm the folder listed has the same name as the one in the error messages. If you find the error message, with a folder name matching the above command’s output, type:
sudo killall -9 trustdWhere #### is the trustd PID. You’ll likely need to type your account’s password again. After that, you’ll need to delete the folder, so macOS rebuilds it with the correct permissions. To do that, type:
sudo rm -rf /var/folders/zz/*******Where /var/folders/zz/******* (without the /0/ in the end) is the path displayed in the error messages. This will delete the corrupted folder, and macOS should make a new one right after that.
Optional: Free Disk Space After Fixing the High nsurlsessiond CPU Usage

If you had to use solutions #4 or #5, it’s likely that you’ll also need to clean up your log folder. That’s because, other than causing high CPU usage, nsurlsessiond creates thousands of error messages when it faces ownership issues. The same might happen if it has to deal with corrupt files and folders.
To do that, simply delete all log files inside /var/log/asl using Finder, or type the following command on a Terminal window:
sudo rm -rf /var/log/asl/*.aslYou’ll likely need to type your account’s password once more.
iCloud Sync Fixes Can Be Easy — or Not
iCloud Sync is supposed to be a convenient way to share files between all your Apple devices. If it misbehaves, though, the nsurlsessiond process may wreak havoc on your computer, causing high CPU and data usage.
Since the fixes may involve dealing with system files and folders, some people may feel insecure about breaking their Mac. If you feel the same way, I suggest reaching out to Apple Support.