
It has been days since I wiped my MacBook Air 2017, and I’ve been trying to install macOS Sierra back since. However, I keep getting the error message “The recovery server could not be contacted”. It has been an extremely frustrating experience. Nothing worked for quite a while.
After extensive research and trying several different approaches, I finally found several effective ways to work around this error. Here’s what to do if you encounter it too.
What Does the “The recovery server could not be contacted” Error Mean?

This error typically implies that your system can’t establish a connection with Apple’s recovery servers, which is essential for accessing recovery tools and installation files. It often occurs after users attempt to reformat their Mac. The issue can stem from several causes, such as incorrect date and time settings on your system, network problems, or recovery partition complications.
How to Fix “The Recovery Server Could Not Be Contacted” Error on Mac
1. Enter Recovery Mode Properly
One common reason for encountering this error is improperly entering Recovery Mode.
Typically, just pressing the Command + R keys will bring up Recovery Mode, allowing you to reinstall the same version of macOS that’s currently on your device without affecting your files. This is useful if you just need a straightforward factory reset.
However, if you’re looking to install the latest version of macOS or if your Mac’s recovery partition is corrupted or missing, you’ll need to use the Command + Option + R keys instead. This combination ensures your Mac connects to Apple’s servers to download and install the most up-to-date macOS version available for your device.
2. Install macOS Using Bootable Installer USB
If the above method doesn’t work, try installing MacOS using the bootable USB installer. This method is especially useful if your internet connection is unstable or the recovery servers are down.
- Download the macOS installer.
- Make sure you have at least 32GB storage and then connect the USB.
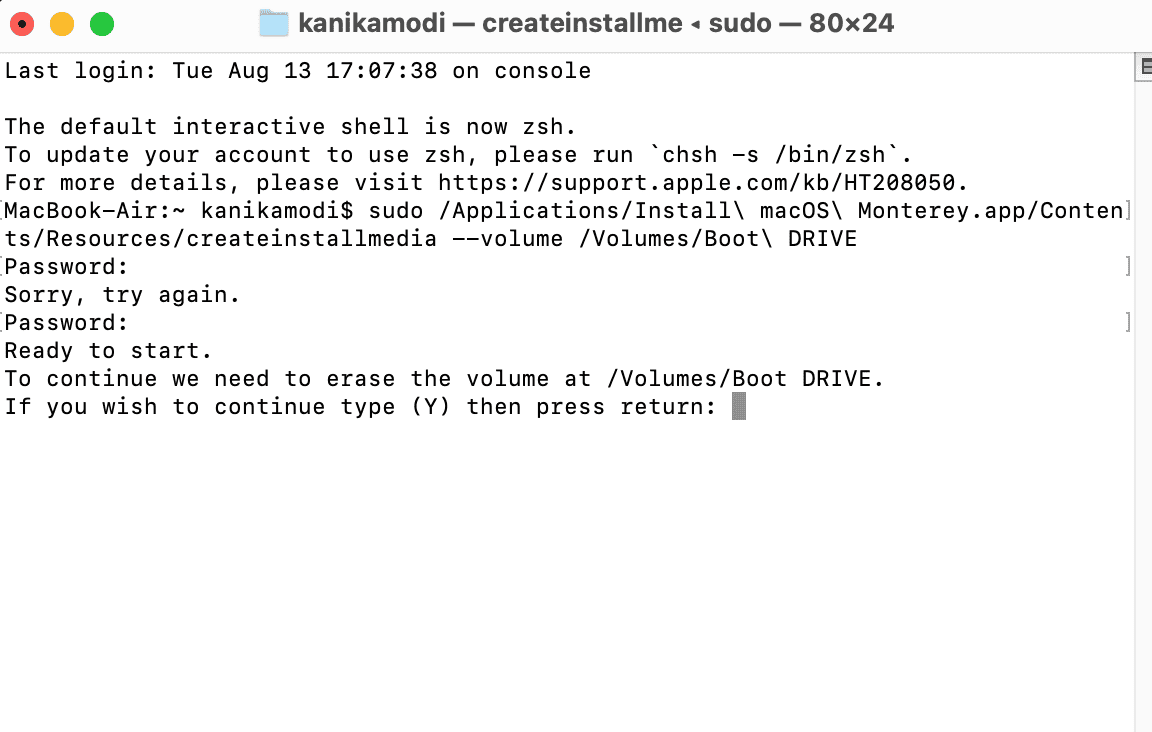
- Now, launch Terminal.

- Copy-paste the following command and hit Return.
sudo /Applications/Install\ macOS\ [Version].app/Contents/Resources/createinstallmedia --volume /Volumes/MyVolume - Here, replace [Version].app with the proper macOS version name and MyVolume with the name of your volume.

sudo /Applications/Install\ macOS\ Monterey.app/Contents/Resources/createinstallmedia --volume /Volumes/macOS Installer - Enter your system password and follow the onscreen instructions. Your USB installer is now created and ready to install the macOS.
- Now, eject the USB from your Mac and reconnect it.
- Press the power button and hold the Option Key.
- Click Install macOS and follow the on-screen steps to install macOS safely.

3. Change SUS URL
Try updating your SUS URL directs your Mac to a different Apple server for the recovery process. This is particularly useful if the default server is down, experiencing heavy traffic, or if your network configuration blocks access to the standard server.
- Restart your Mac.
- Immediately press and hold the Command + Option + R keys to enter the Recovery Mode. Make sure you are connected to the internet.
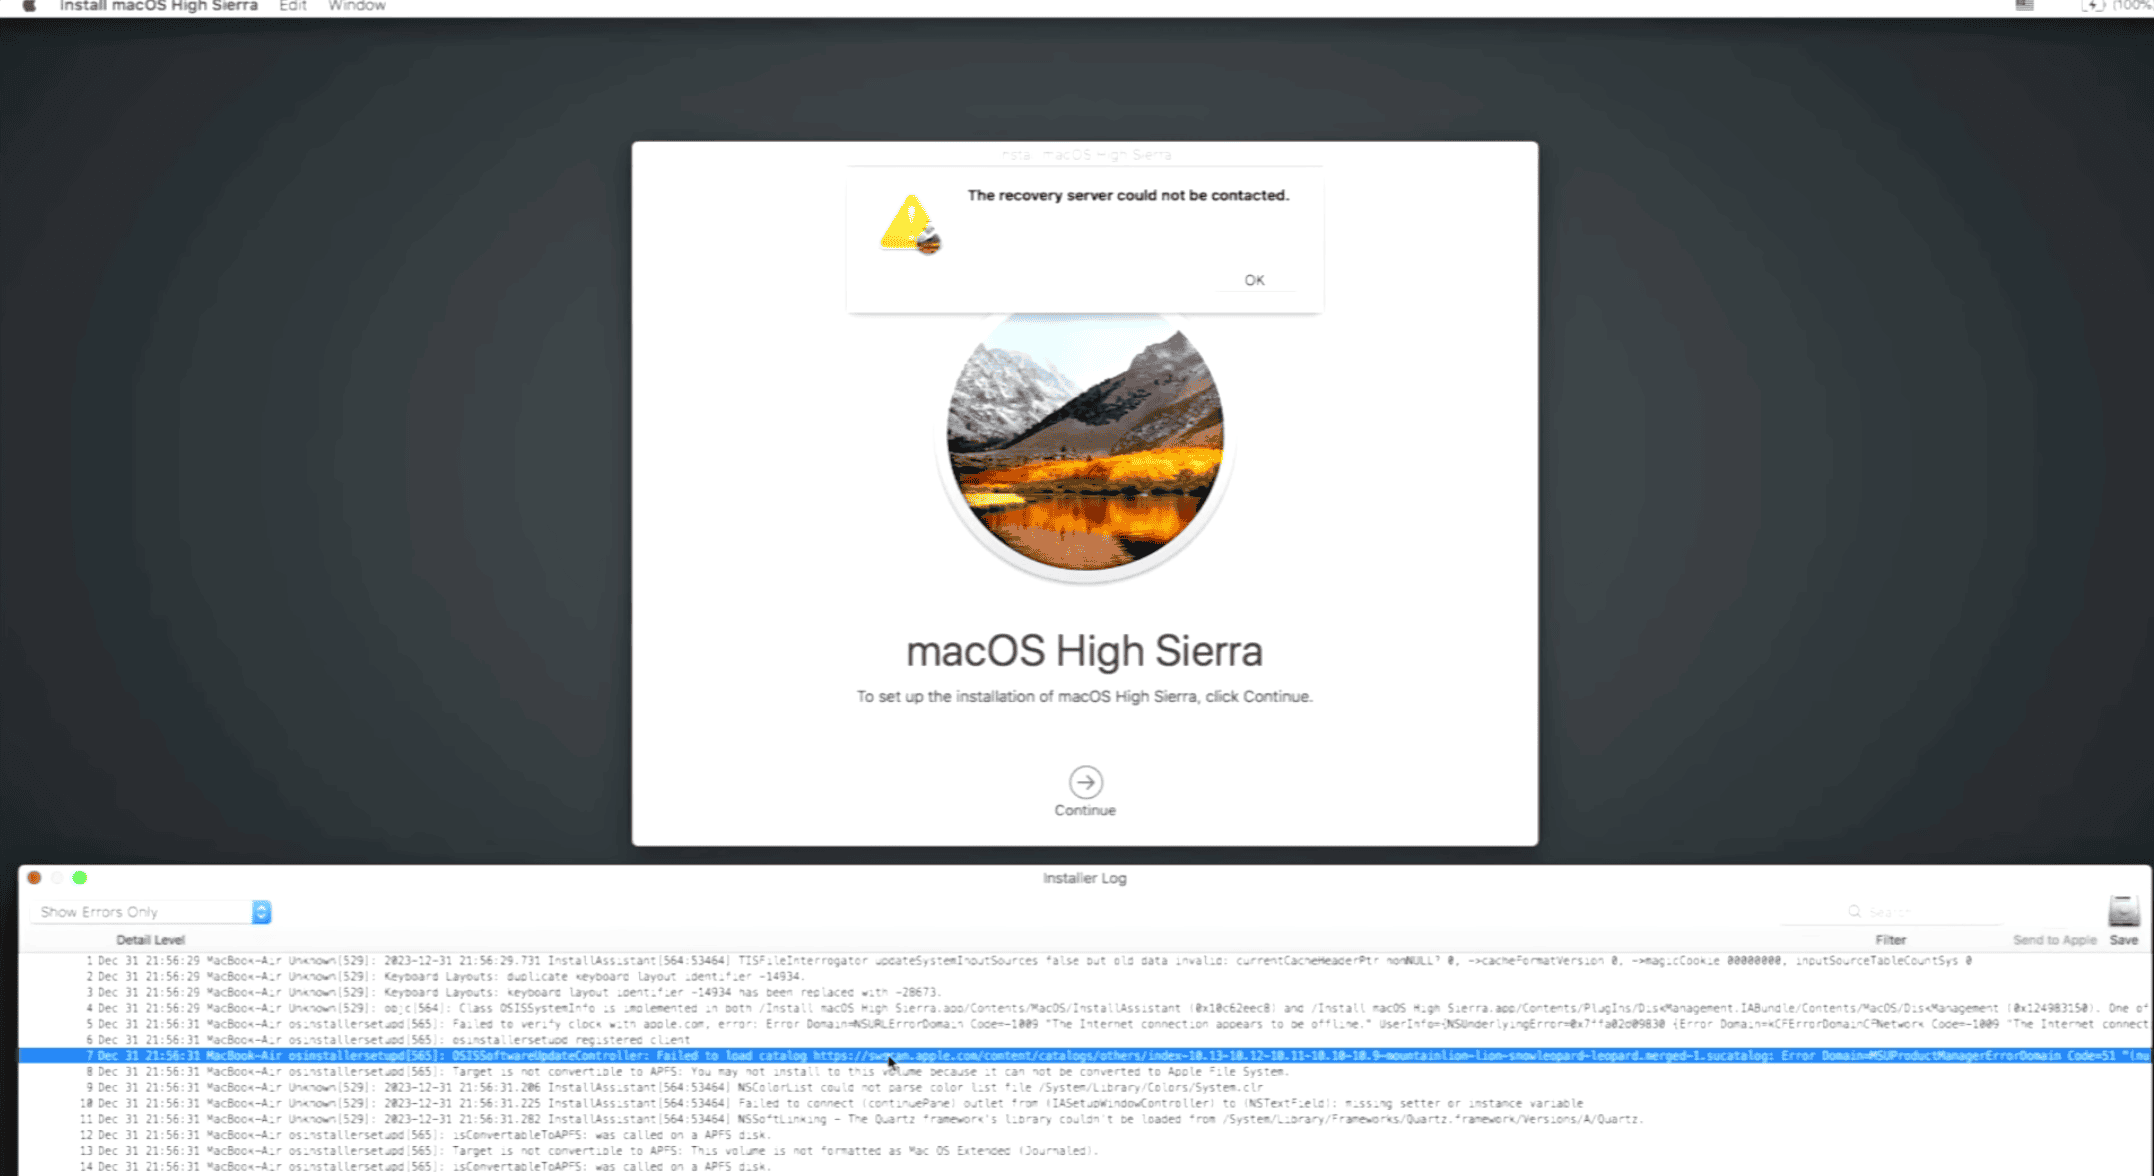
- Click on Install macOS to open the installer window.
- Now, go to the Window menu on the top and select Installer Log.
- To get the URL, click on Continue and wait for a few seconds for the error to show up in the log.

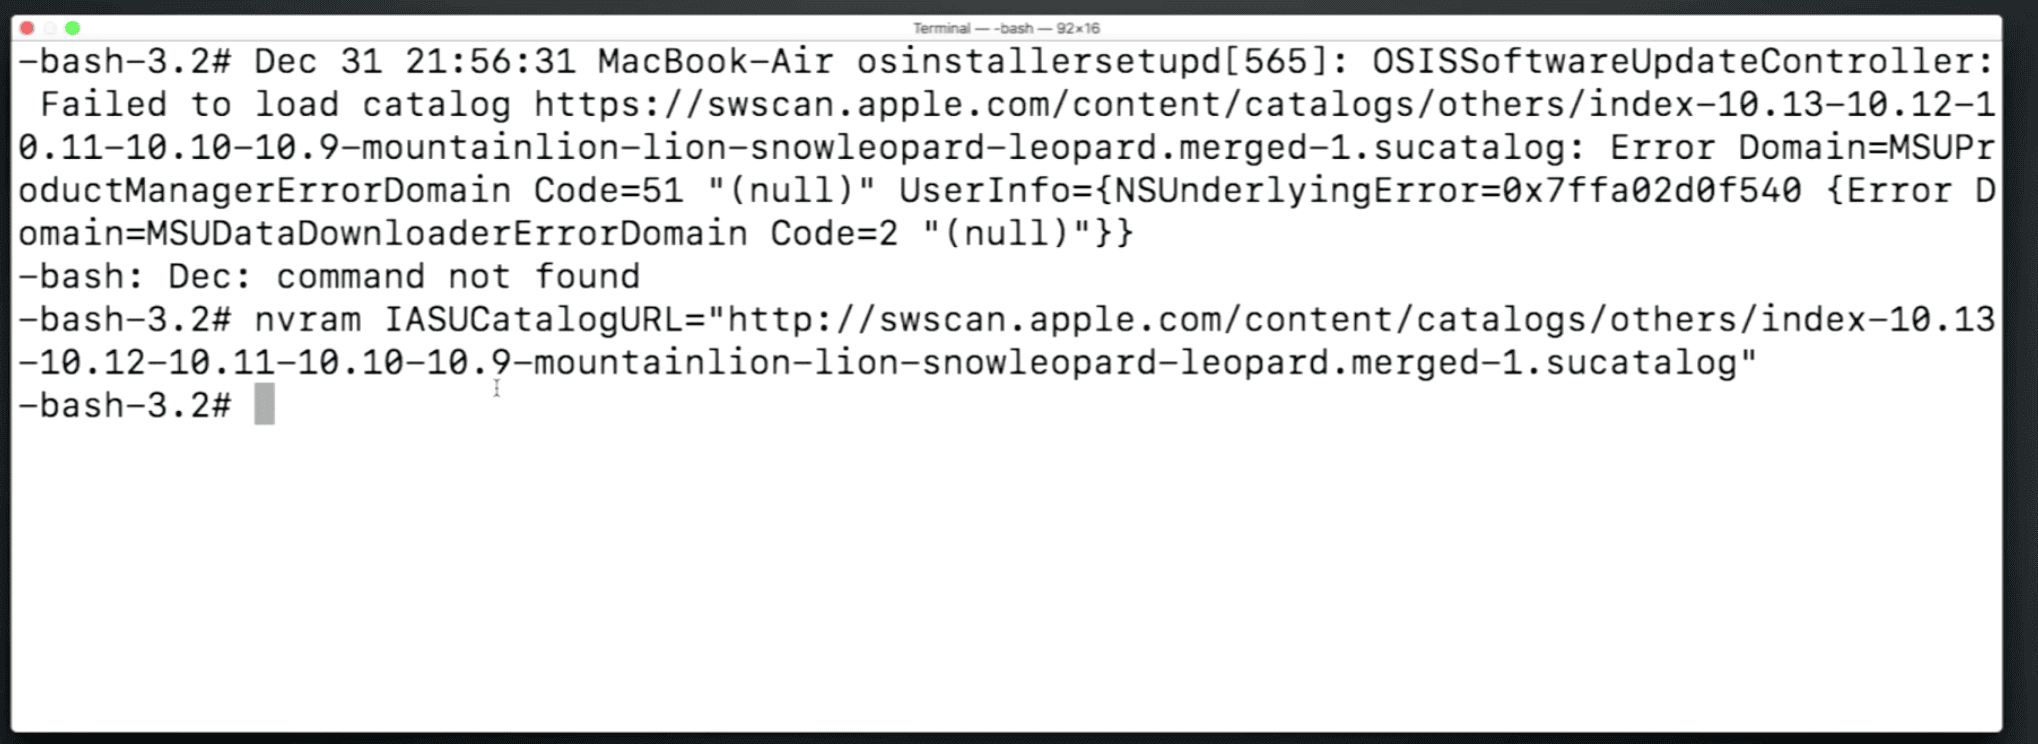
Source: YouTube - Scroll to the top and search for these lines: Failed to load catalog https://swscan.apple.com/content/catalogs/others/index-10.13-10.12-10.11-10.10-10.9-mountainlion-lion-snowleopard-leopard.merged-1.sucatalog: Error Domain=MSUProductManagerErrorDomain
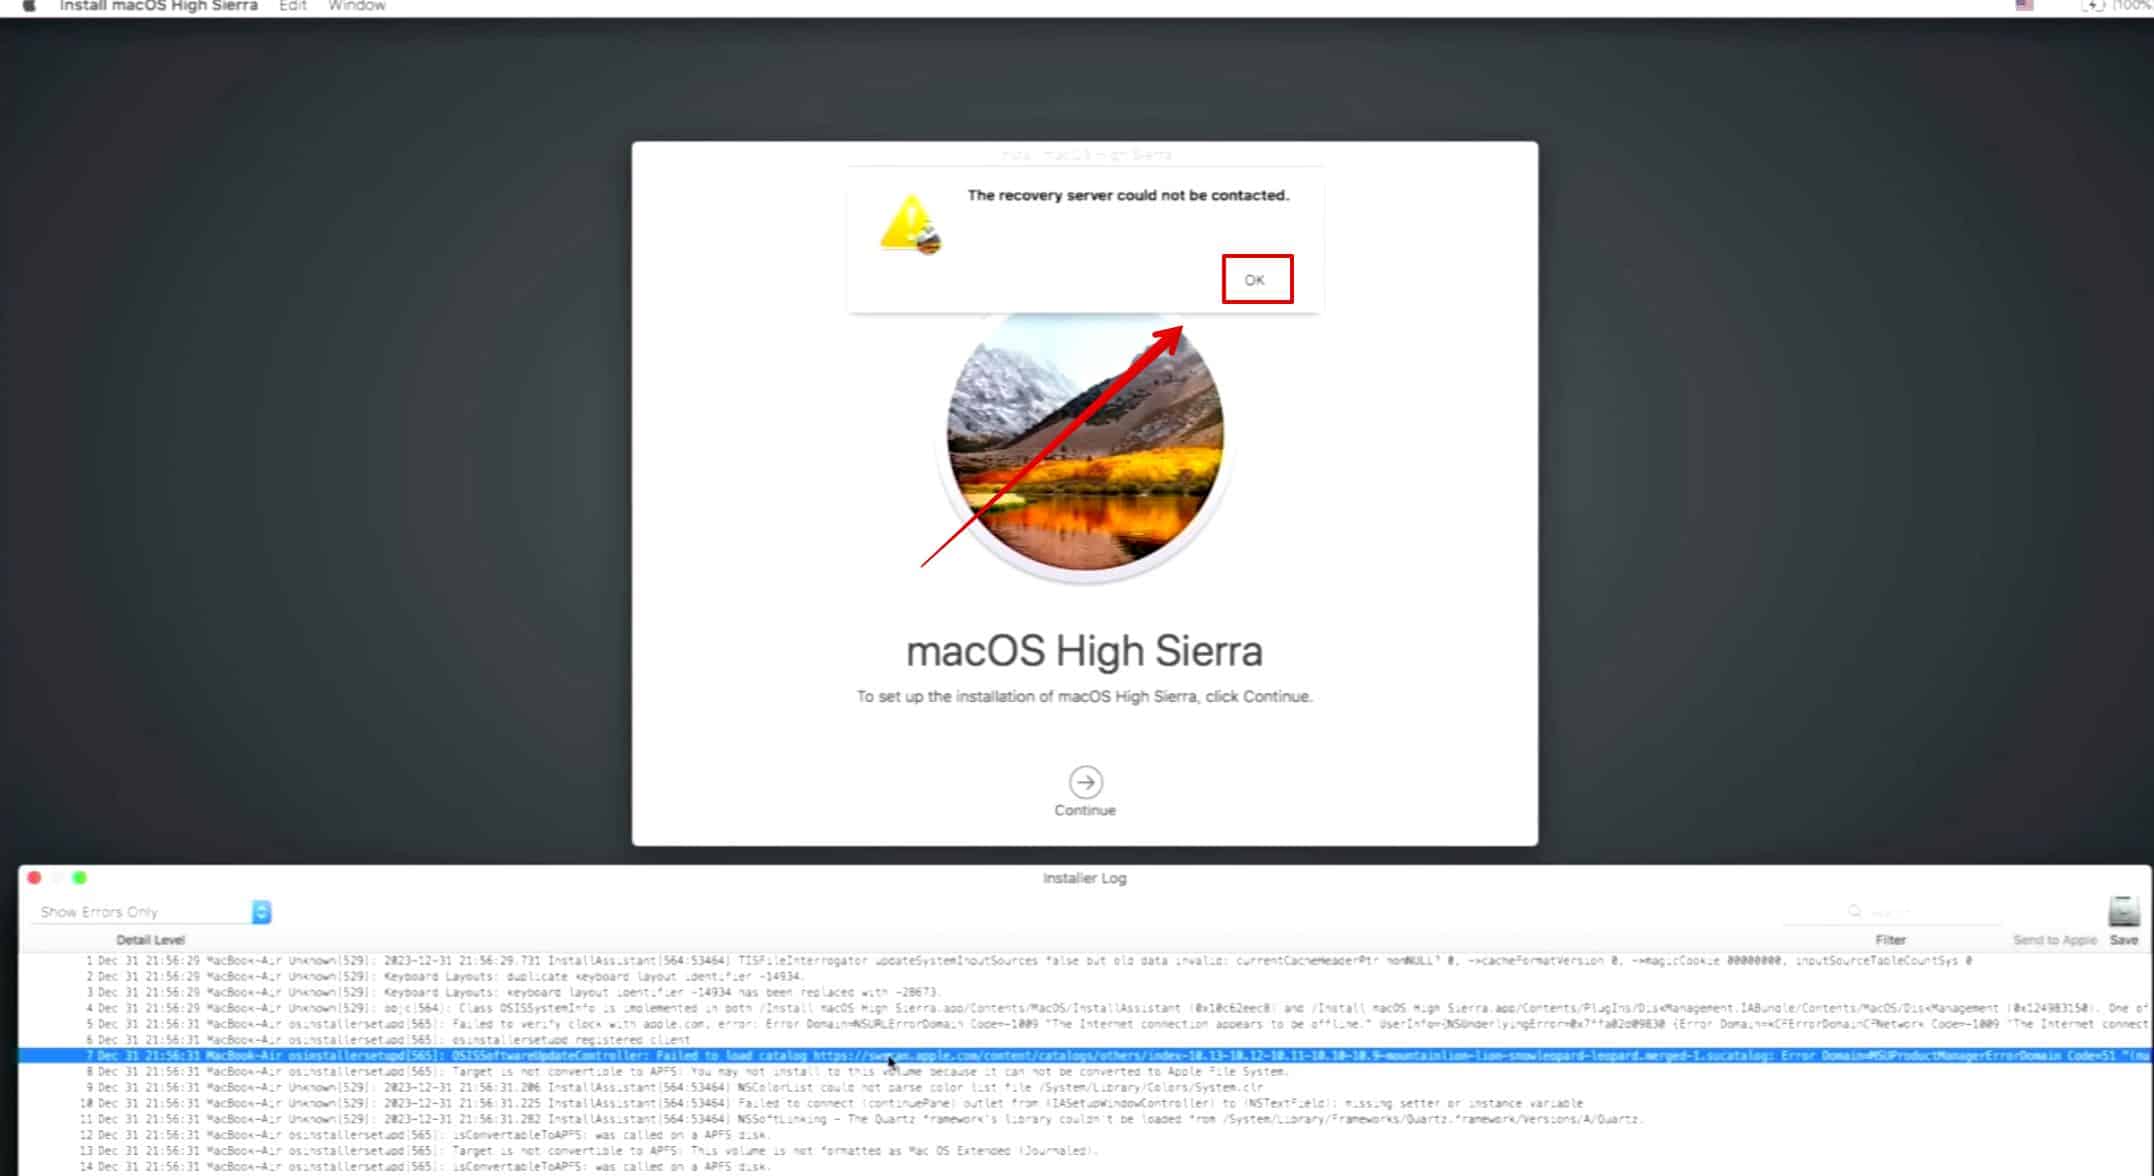
- Use Command + C to copy the entire error message above.
- Click on ok to get back to the main recovery menu.
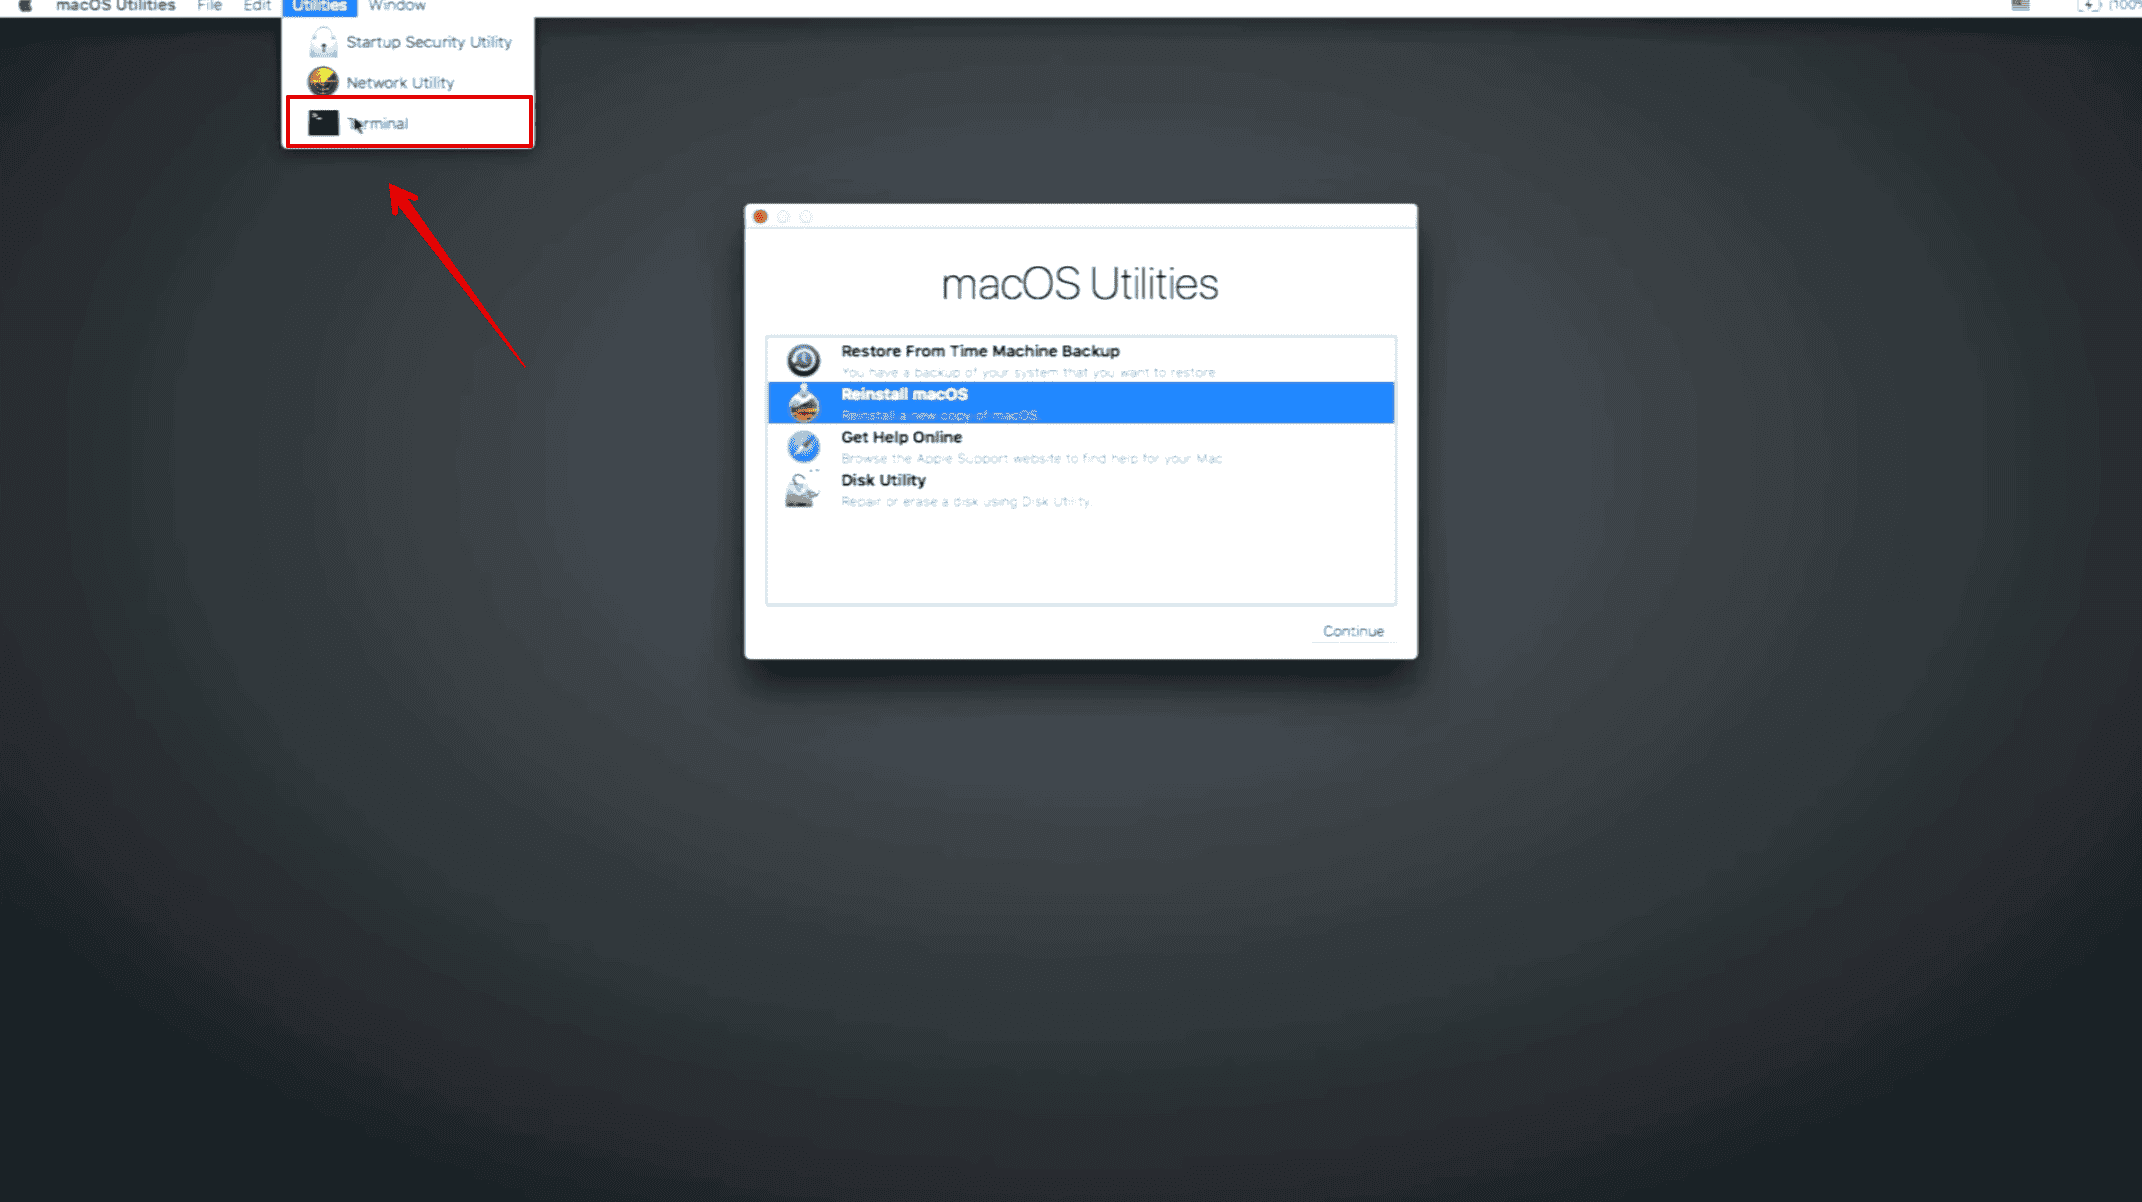
- Here, on the top, open Utilities and click on Terminal.

- Paste the error message you copied from above into the terminal.
- Look for this URL and copy it or you can copy it from below.
https://swscan.apple.com/content/catalogs/others/index-10.13-10.12-10.11-10.10-10.9-mountainlion-lion-snowleopard-leopard.merged-1.sucatalogNext, this is the command you need to paste on the terminal:nvram IASUCatalogURL="http://swscan.apple.com/content/catalogs/others/index-10.13-10.12-10.11-10.10-10.9-mountainlion-lion-snowleopard-leopard.merged-1.sucatalog"
- Here, we have added the command “nvram IASUCatalogURL=” and removed the s from the “https” of the URL.
- Hit Return, head back to the main menu, and try installing the macOS again.
4. Check Internet Connection
You need a stable internet connection for Internet Recovery mode to function properly. Without a stable connection, your Mac won’t be able to access Apple’s servers to download the necessary recovery tools. To secure you’re connection, click on the Wi-Fi icon in the top-right corner of the screen and join a network.
5. Check Date & Time
Incorrect date and time settings can prevent your Mac from establishing a secure connection with Apple’s servers.
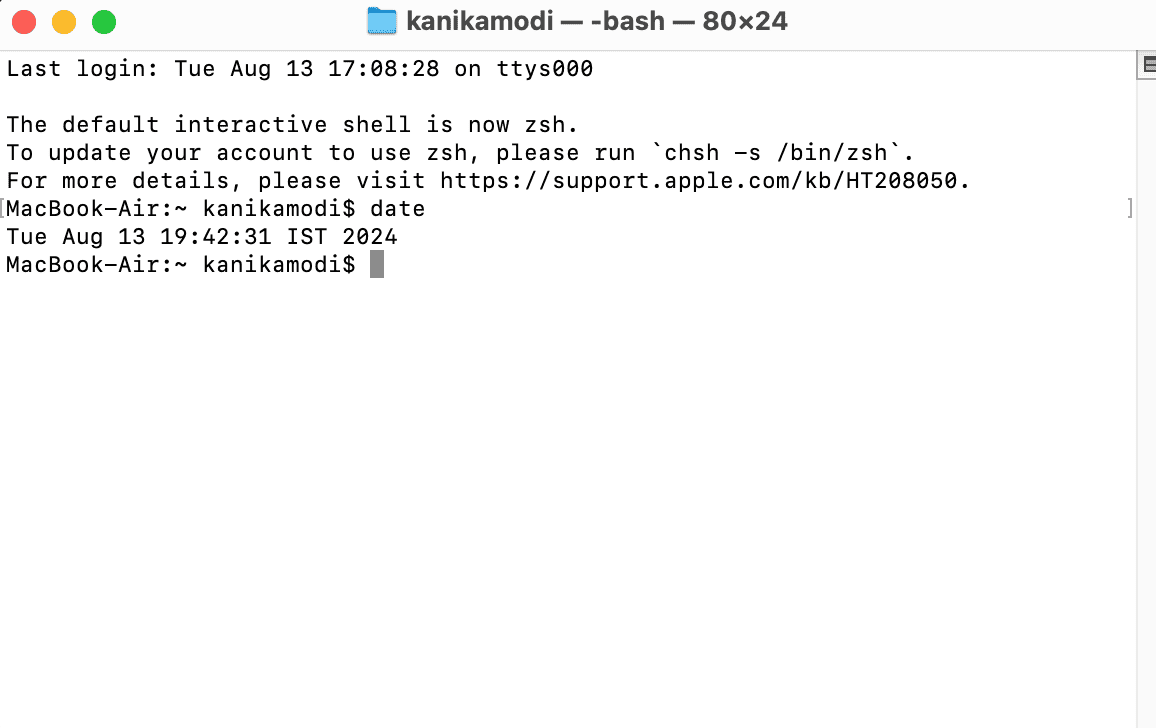
- Go to Utilities and click on Terminal
- Type the date and hit enter.
- Check if the date and time are correct.

Following the above methods can fix the error. However, if nothing seems to be working, you might have to contact Apple Support for further assistance.