Even though macOS supports a wide range of apps, you may need (or want) to run one that’s exclusive to the Android OS. It can be a mobile game, a social network, or even a dating app. Sometimes the mobile version is just better than the desktop one.
There’s now a solution for this roadblock: use an Android emulator on your Mac. Apple has recently been loosening the restrictions on emulation. You’ll find that there are now several ways to run Google’s Operating System (OS) applications on the entirely different environment of a Mac. Let’s dive in.
BlueStacks
The easiest way is to use BlueStacks. It’s one of the oldest Android emulators, available not only on macOS but on many other OSes.

The installation process for BlueStacks is pretty straightforward. Download the .DMG file from the app’s site, run the installer, and allow it to install some system extensions. You’ll need to restart your Mac after that.

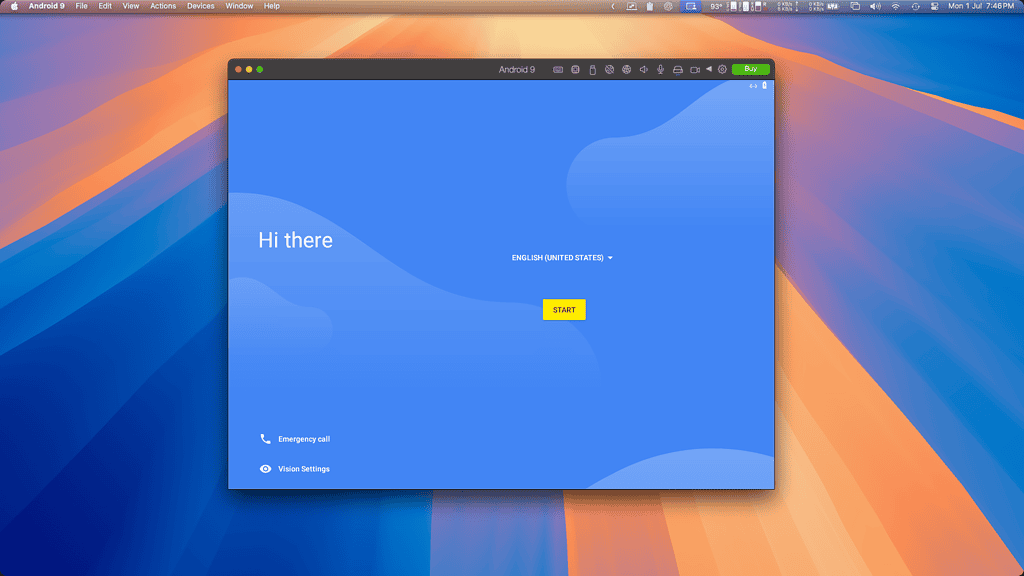
When you first open BlueStacks, it’ll require an initial setup like any Android device. After that, you can choose apps on the App Center tab, or directly on the Google Play Store.
Android Studio Emulator for Mac
To keep things short, we have an article on how to download and install Android Studio on your Mac. Head there for detailed instructions, and then we’ll follow with the emulator part.
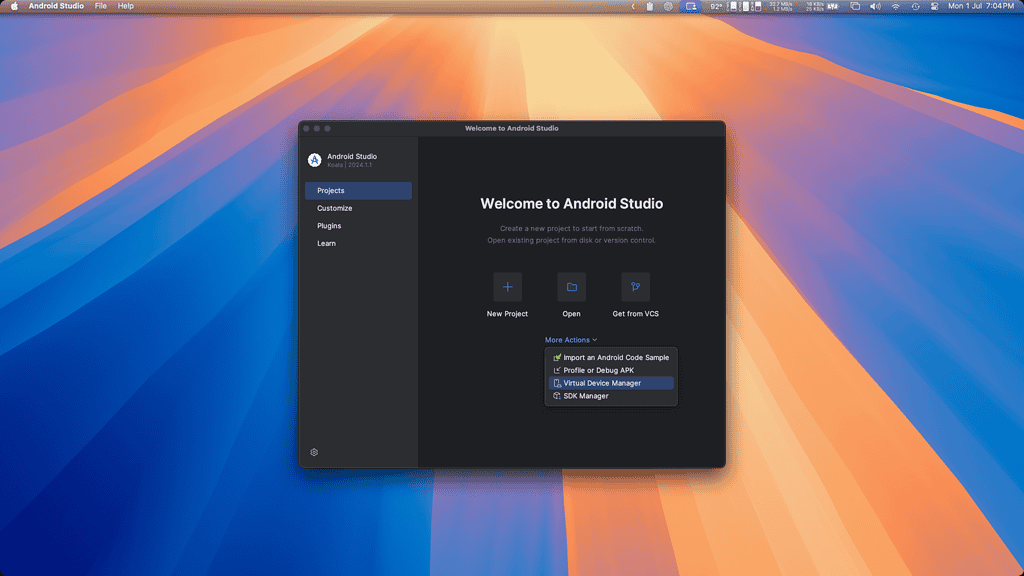
When you open Android Studio, the emulator won’t be readily displayed. Click on the More Actions drop-down menu and select Virtual Device Manager to open the Mac Android emulator.
The list will likely have a virtual device already set up for you. However, there’s a chance it’s a flagship and recent model, which your computer may have a hard time emulating.

If that’s the case, click the plus sign (+) on the top menu and select a model better suited for your hardware. There’s a list including actual and generic phones, tablets, and even a desktop virtual machine.
After choosing the desired model, you likely won’t need to bother with any additional settings. Just click Next through the following steps. You can change the default display orientation in the final screen, if you want to, and then click Finish.
Back to the list, select your newly-created virtual machine, and click the Play button. After a brief first boot, the home screen should appear, with no initial setup needed. From here, you can use it as if it were an actual Android device.
Virtual Machines
Lastly, you can use a virtual machine app that supports Android emulation. There are a few of those, and we even have a comparison of the best macOS virtual machine apps.
Android Emulator on Mac With Parallels Desktop
For this how-to, I chose Parallels Desktop. It’s a paid app, but you can get a 14-day free trial on the company’s site. If you only need an Android emulator on your Mac for a few days, it’s a practical solution.
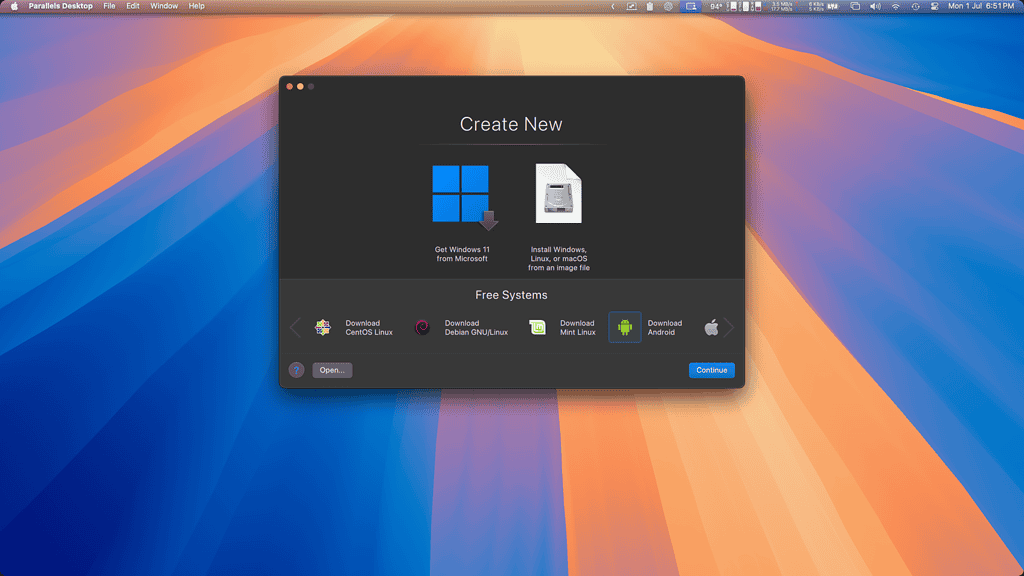
When you first open Parallels Desktop, it displays two large buttons to install Windows or select another OS from a disk image. Ignore those and head to the list right below them. Scroll until you find Android and select that option.
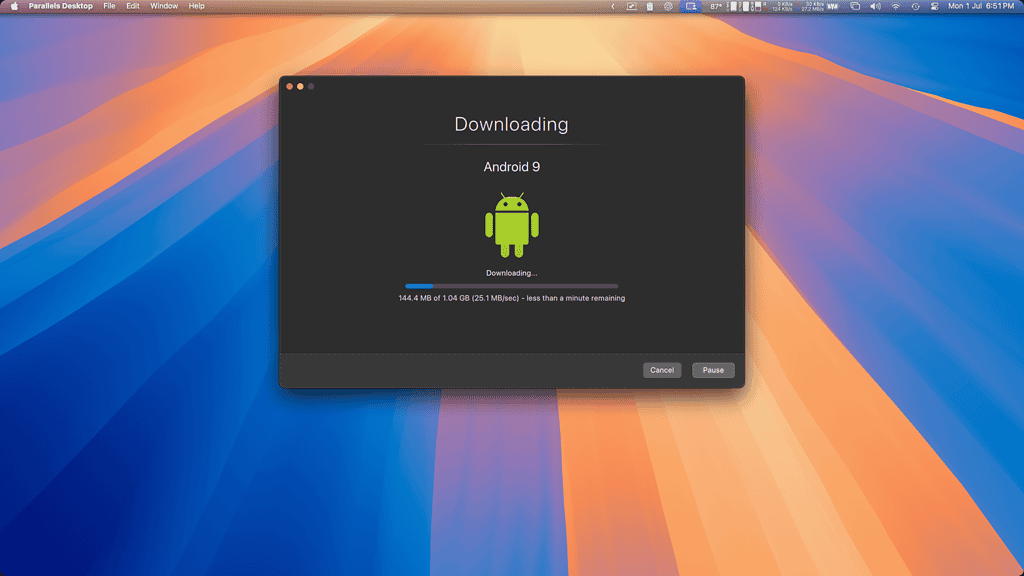
On the next screen, click “Download”. Parallels sets up the virtual machine automatically after downloading, but you can change the hardware configurations later.
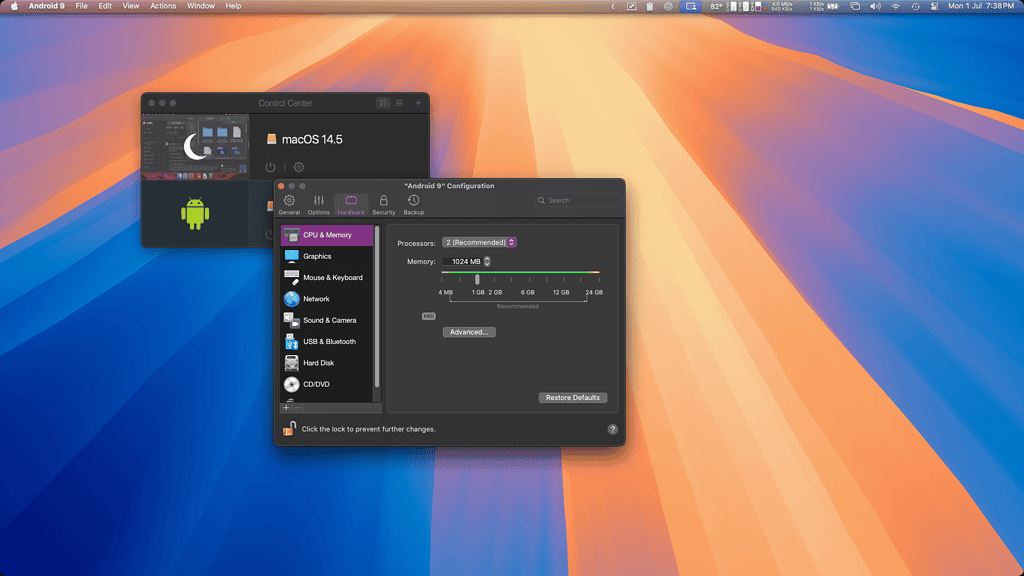
To do that, right-click the Parallels Dock icon and select Control Center. It should display a list of your installed virtual machines. Keep in mind that you can’t change an emulator’s specifications while it’s running. If you have paused your VM, you’ll need to resume it and shut it down.
To change the hardware, click the gear icon below your VM’s name, which will open the Settings menu. Navigate to the Hardware tab and tweak things as you need. To start your Android emulator, close that menu and click the power icon on the Control Center Android entry.
Unlike Android Studio, the Parallels emulator for Mac doesn’t come pre-configured. You’ll need to go through the usual Android initial setup.
Each type of user has specific needs. If you just want to use one or a few Android apps, BlueStacks is the most straightforward way of doing that. If you need an emulator for development, Android Studio is likely the best alternative. If you want to have an Android environment handy, then a virtual machine is the way to go.