
Have you been bombarded with scary pop-ups claiming your Mac is infected with a virus—or multiple viruses? If yes, let me tell you there’s nothing to worry about. That’s because, in reality, these pop-ups are almost always scareware scams. These deceptive messages are a common ploy used by cybercriminals to scare you into downloading harmful software.
Luckily, you can protect your Mac from these pop-ups — and you don’t even need to be a tech expert to do so. This article will guide you on how you can remove these persistent ‘Your Mac Is Infected With 3 Viruses’ pop-ups. I’ll provide clear, straightforward steps to safeguard your system and restore peace of mind. Let’s start.
Quick Tip:
If you’re concerned about add-ons, plugins, or extensions that can create pop-ups and potentially compromise your data, the best solution would be an app with robust defense. For example, Intego can protect sensitive data by blocking digital intruders, thanks to its proactive monitoring that allows you to browse the web with your privacy intact.
How To Remove the ‘Your Mac Is Infected With 3 Viruses’ Pop-up Alert Manually
Here are the steps you need to take to remove this malicious pop-up. Make sure to follow these instructions precisely and sequentially.
1. Stop Suspicious Processes
Time needed: 5 minutes
Follow these steps to stop unusual background processes:
- Open Finder on your Mac.
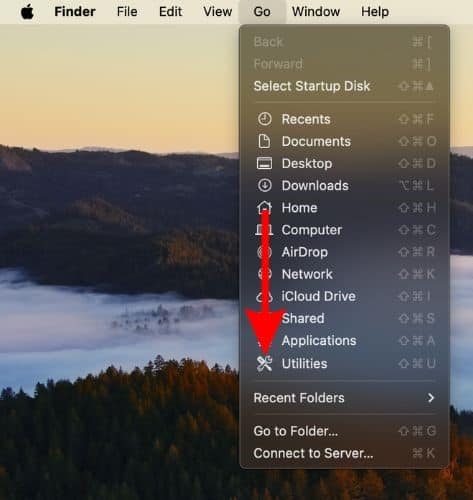
- Click on Go from your Mac’s Finder menu and choose Utilities.

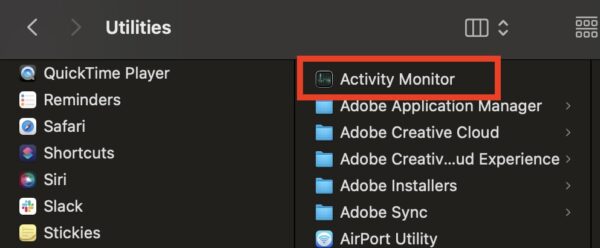
- Locate the Activity Monitor icon among the utilities and double-click to open it.

- Within the Activity Monitor, scrutinize the list of processes for suspicious entries. These are often unfamiliar and consume excessive system resources. Remember, the name of a malicious program might be misleading, so trust your instincts when determining which processes to terminate.
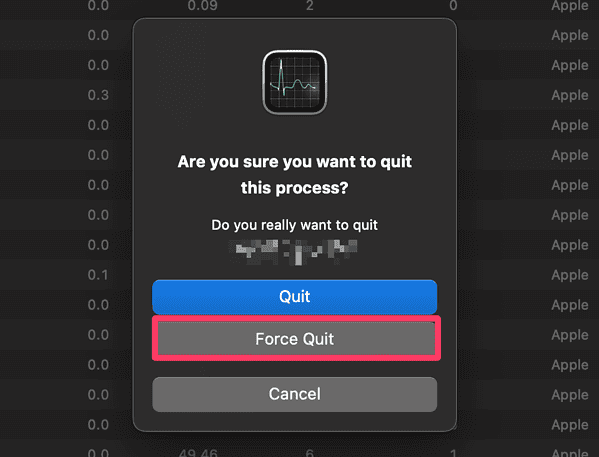
- Once you’ve identified a suspicious process, select it and click the Stop button in the top left corner of the Activity Monitor window.

- If prompted to confirm quitting the process, choose Force Quit.


2. Clean LaunchAgents
Next, you need to clear LaunchAgents:
1. Return to the Go menu in Finder and select Go to Folder (or use the keyboard shortcut Command+Shift+G).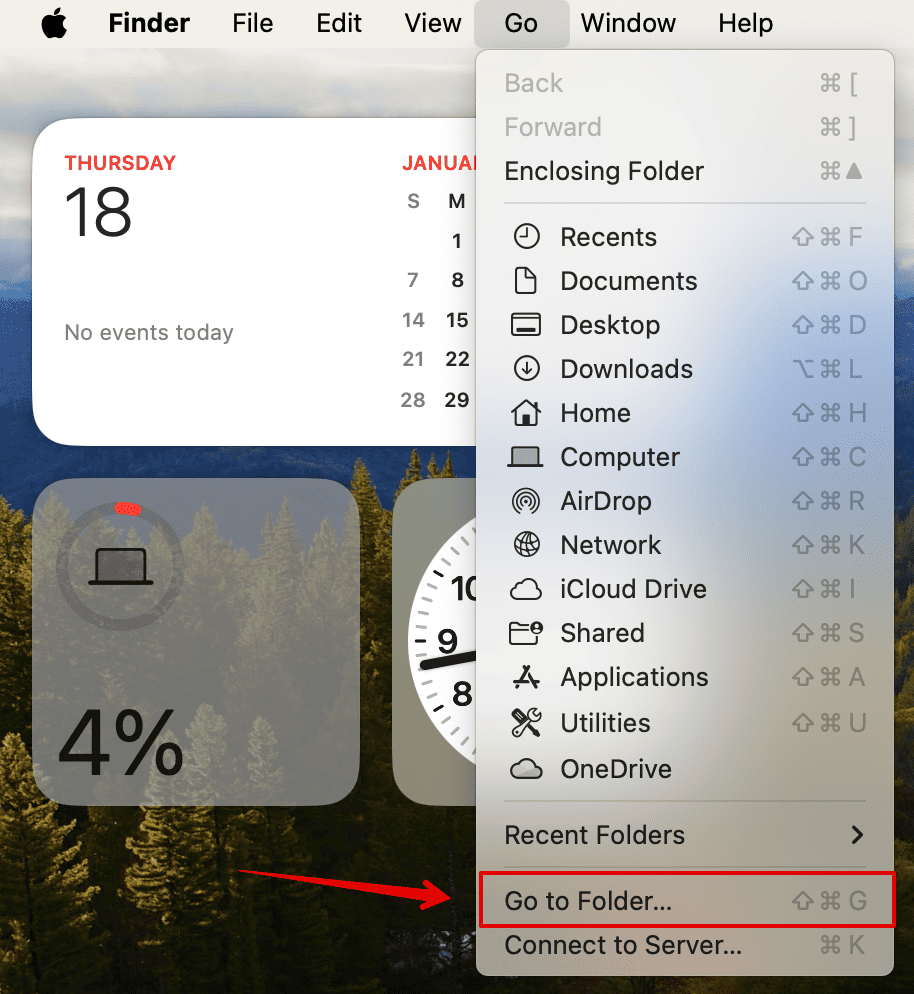
2. Type /Library/LaunchAgents into the folder search box and click on the Go button.
3. Carefully examine the contents of the LaunchAgents folder for questionable files. Malware-generated files often have innocuous-looking names. Prioritize recently added files that appear out of place.
Some common examples of malicious LaunchAgents linked to widespread Mac infections include com.pcv.Prams.plist, com.updater.mcy.plist, com.avickUpd.plist, and com.msp.agent.plist.
4. If you find any suspicious files, move them to the Bin.
3. Clean Application Support
You also need to access Application Support in order to delete any sketchy programs:
1. Use the Go to Folder function to navigate to ~/Library/Application Support (note the tilde symbol).
2. Inside the Application Support directory, identify and delete any newly created folders that appear suspicious. These folders typically have names unrelated to Apple products or legitimate applications.
Examples of known malicious folder names include Mac Cleanup Pro, IdeaShared, and ProgressMatch.
4. Clean User LaunchAgents
Clear LaunchAngents again, but this time, you have to look inside your user profile:
1. Again, use Go to Folder and type ~/Library/LaunchAgents (including the tilde).
2. This will display LaunchAgents specific to your current user account’s Home directory. Look for files associated with the “Your Mac is infected with 3 viruses” alert and move them to the Bin.
5. Clean LaunchDaemons
The next step is to search for files having malicious names:
1. Type /Library/LaunchDaemons in the Go to Folder search field.
2. Within the LaunchDaemons directory, search for files used by the malware to persist. Common examples include the com.Applauncher.plist, com.startup.plist, and com.ExpertModuleSearchDaemon.plist.
3. Remove the suspicious files immediately.
6. Uninstall Malicious Apps
Once you’re done deleting unusual files, you also need to look out for MyWay virus in the Applications:
1. Open Finder and select Applications.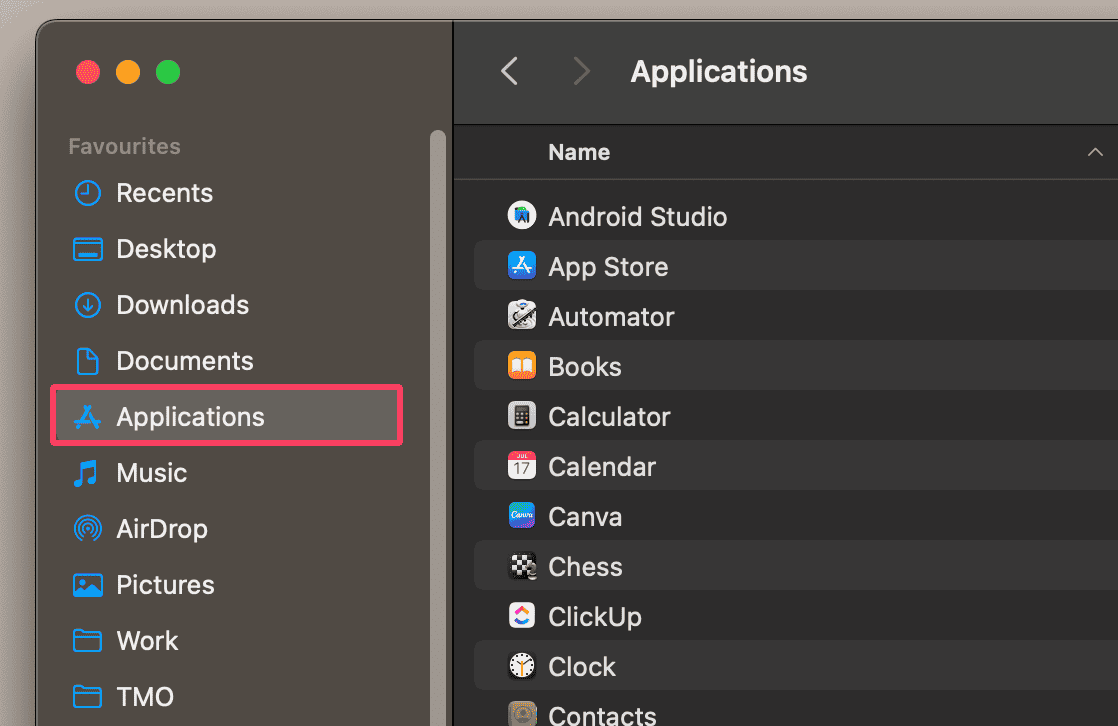
2. Identify any application that doesn’t belong and move it to the Bin.
3. If prompted for an administrator password, provide it.
7. Remove Login Items
Search for unwanted apps in the Login Items:
1. Access System Settings from the Apple menu.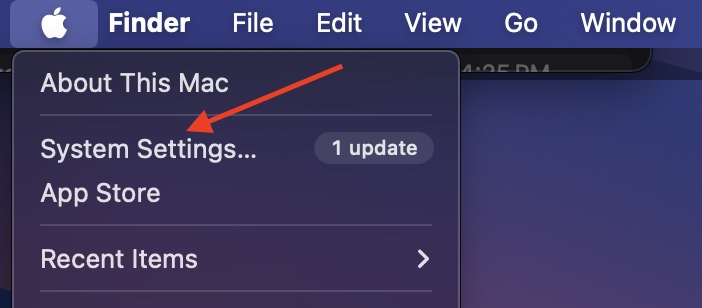
2. Click on General.
3. Select the Login Items tab.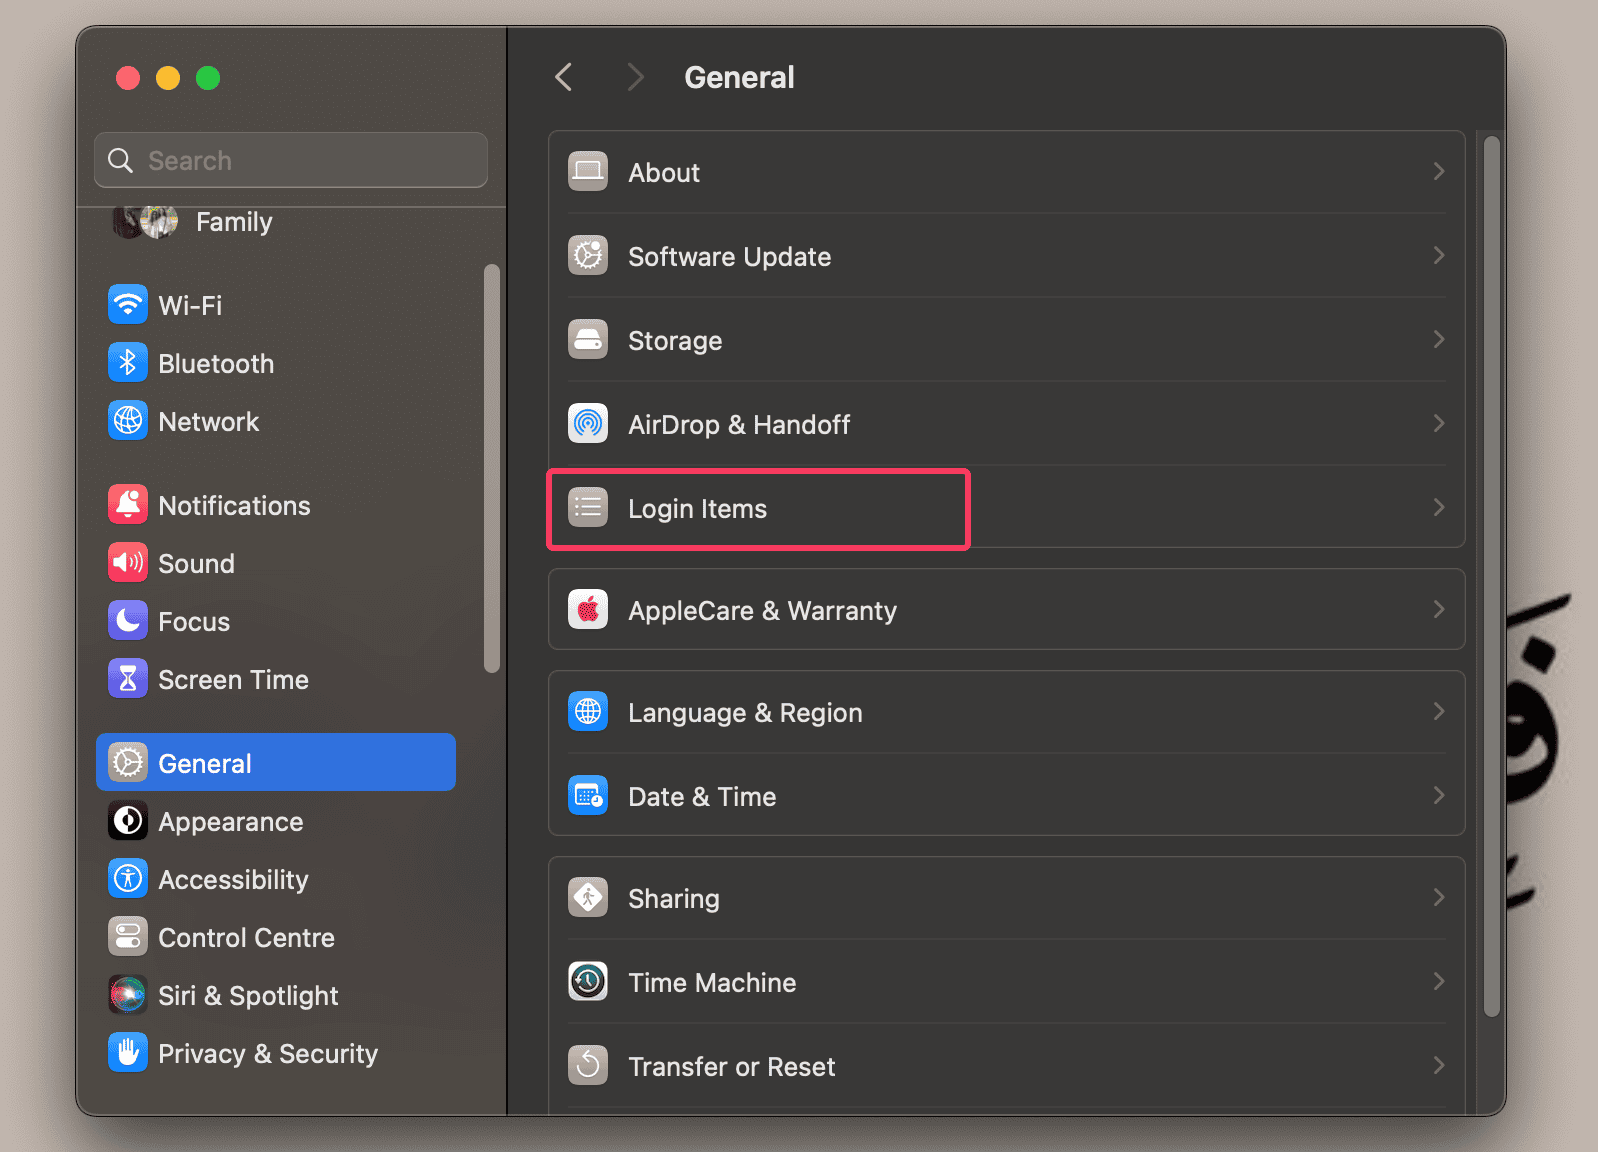
4. Review the list of items that launch at startup. Locate any potentially unwanted applications and click the “-” (minus) button to remove them.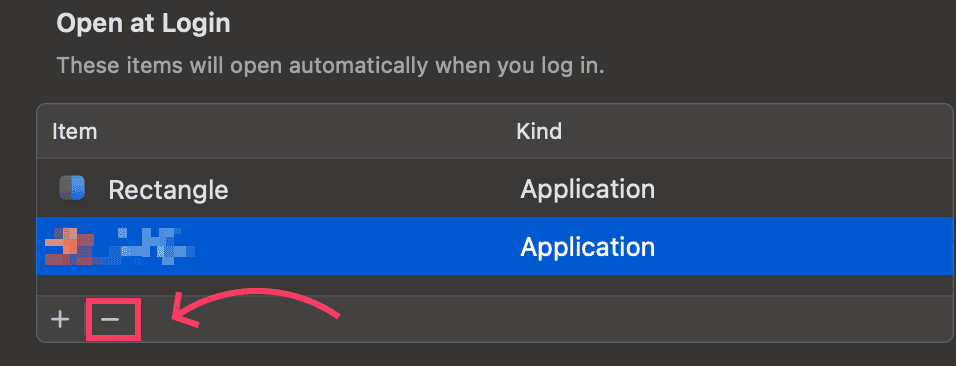
8. Remove Profiles (If Applicable)
You also have to make sure that there are no extra or suspicious profiles:
1. Finally, choose Privacy & Security within System Settings.
2. Scroll down, and under the Others section, click on Profiles.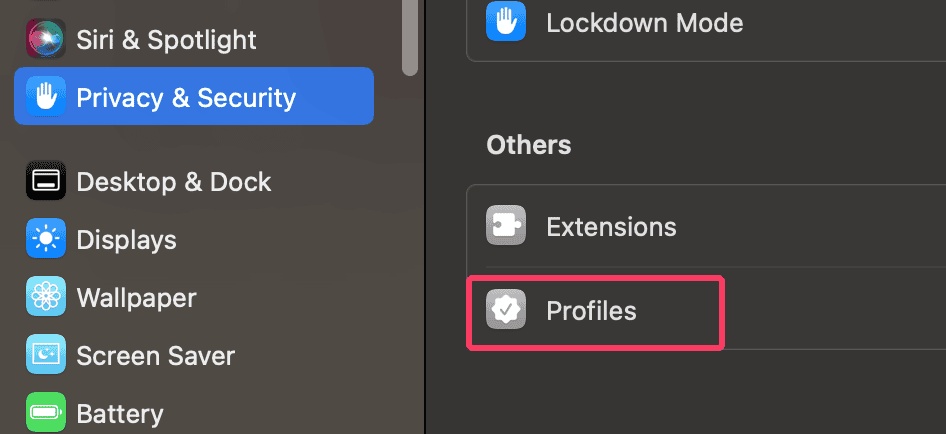
3. Check the left-hand sidebar for any malicious profiles. Examples of adware-created profiles include TechSignalSearch, MainSearchPlatform, AdminPrefs, and Chrome Settings.
4. Select the suspicious profile and click the minus sign at the bottom to delete it.
Remove ‘Your Mac Is Infected With 3 Viruses’ Popup Warning Alert in Web Browsers
If your Mac is infected and compromised by adware, the infection may persist within your web browsers even after removing the main application and its system components. It takes control of your web browser settings. So you must restore your browser to its default state to remove this virus effectively.
⚠️ Warning: Unfortunately, these steps will erase your web browser’s personalized settings, browsing history, and temporary website data. However, it is necessary to eliminate the harmful interference.
Safari
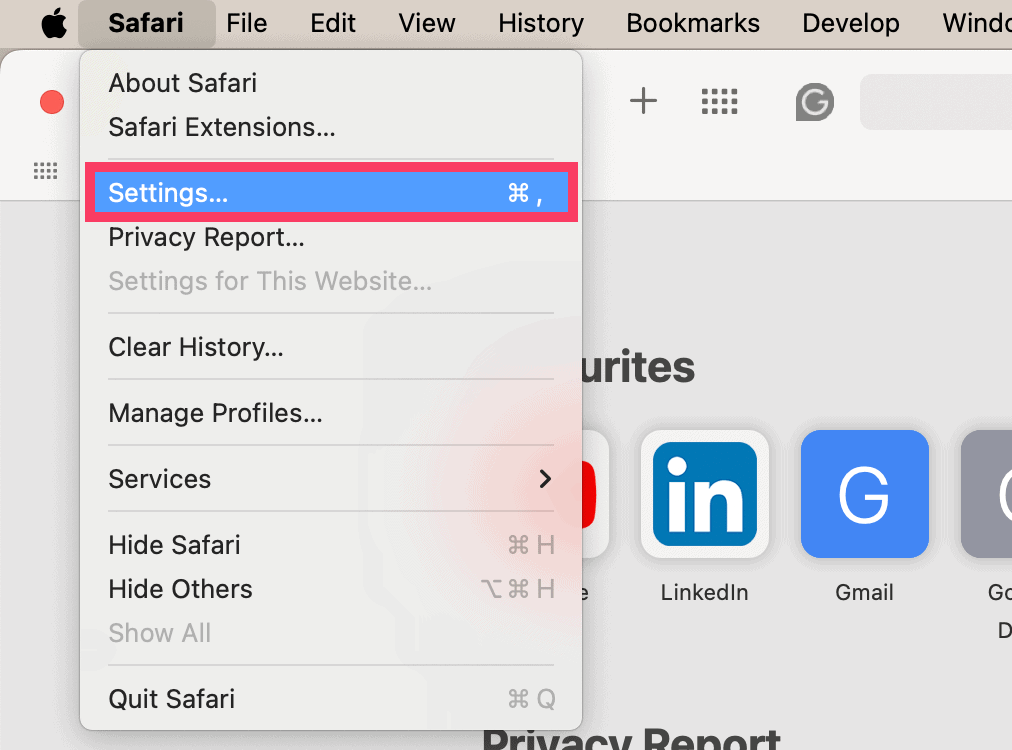
- Open Safari and click on the Safari menu at the top left of your screen.
- Select Settings.

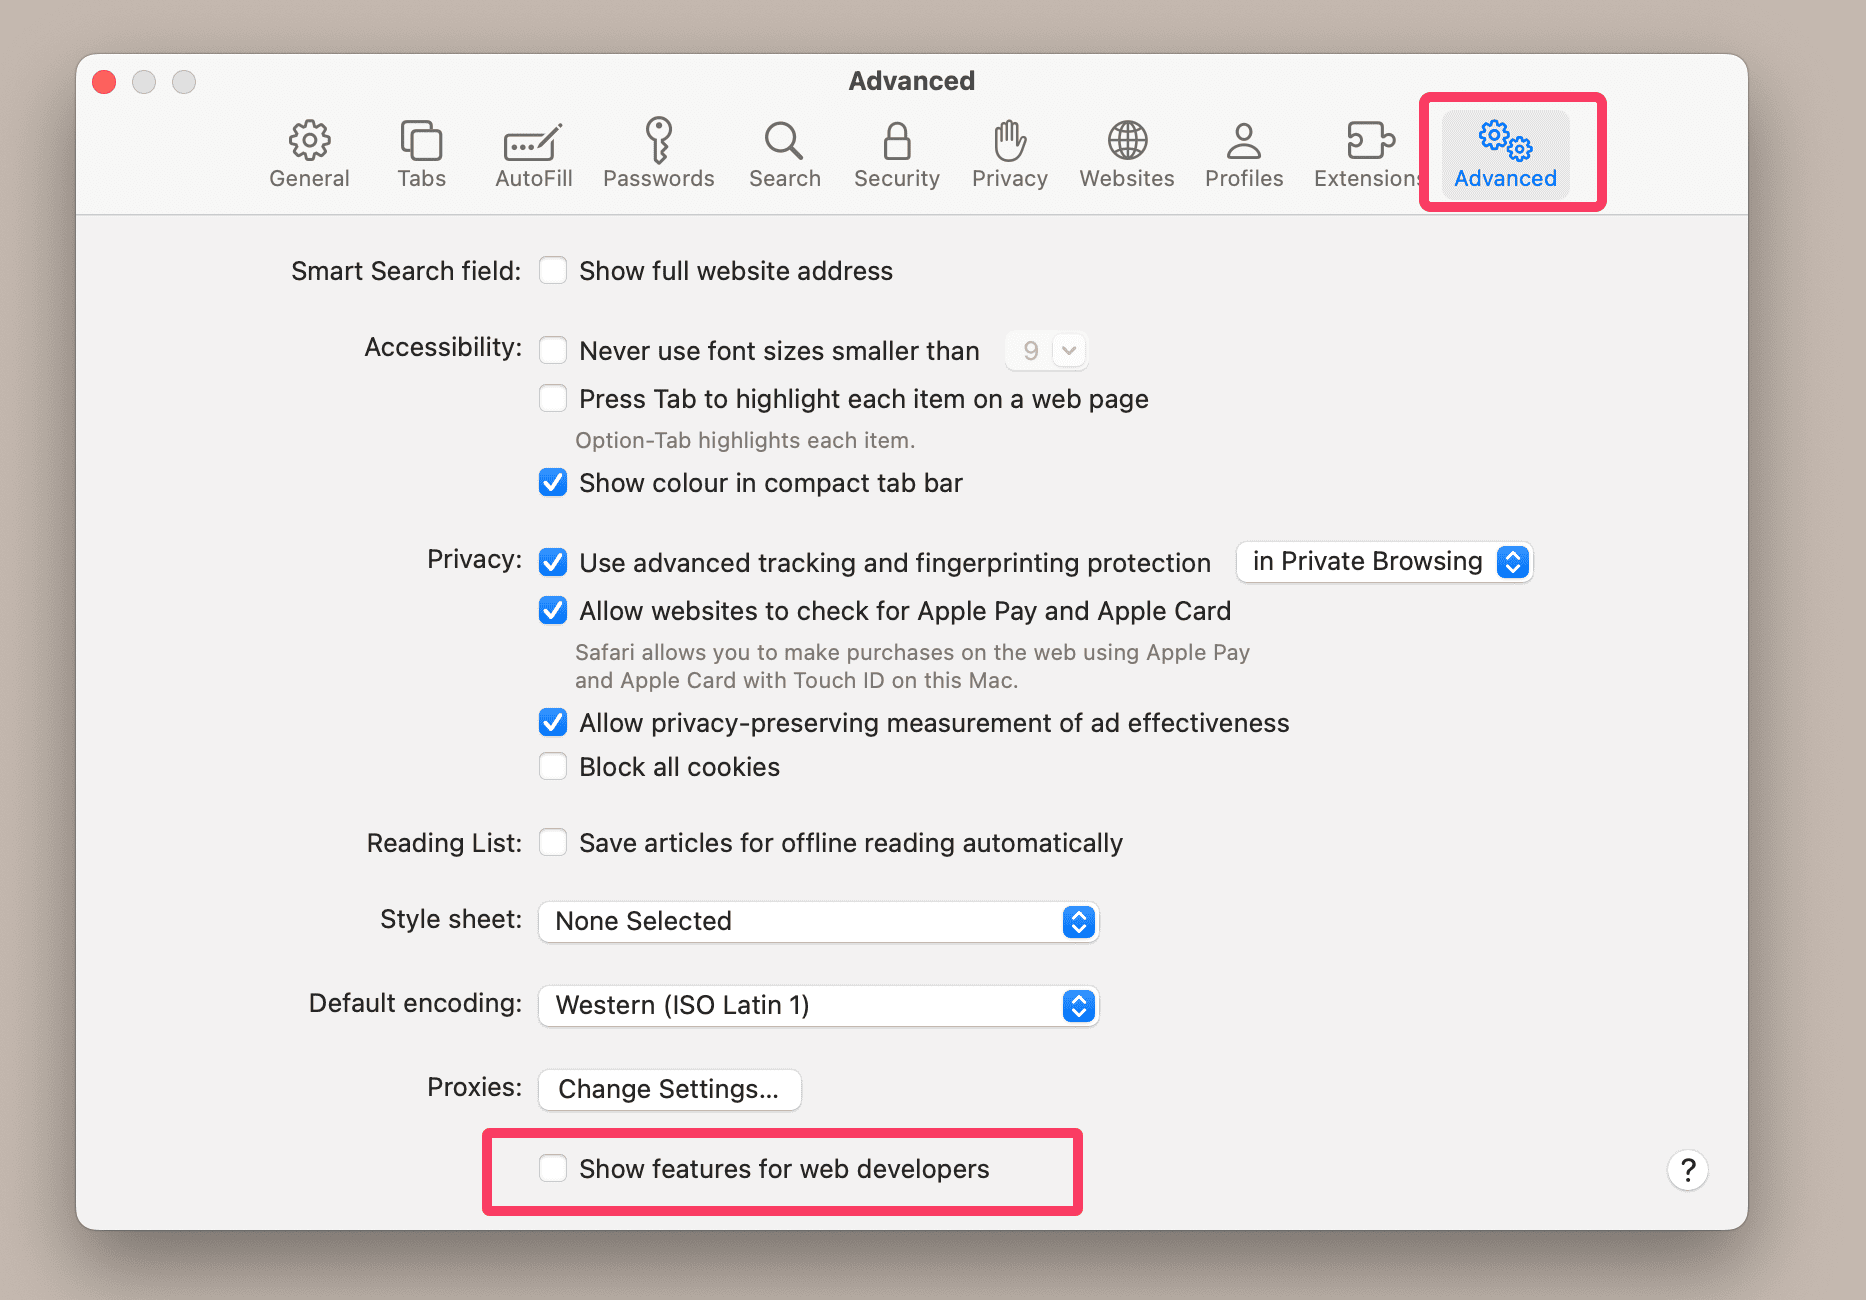
- Go to the Advanced tab in the Settings window.
- Check the box that says “Show features for web developers”.

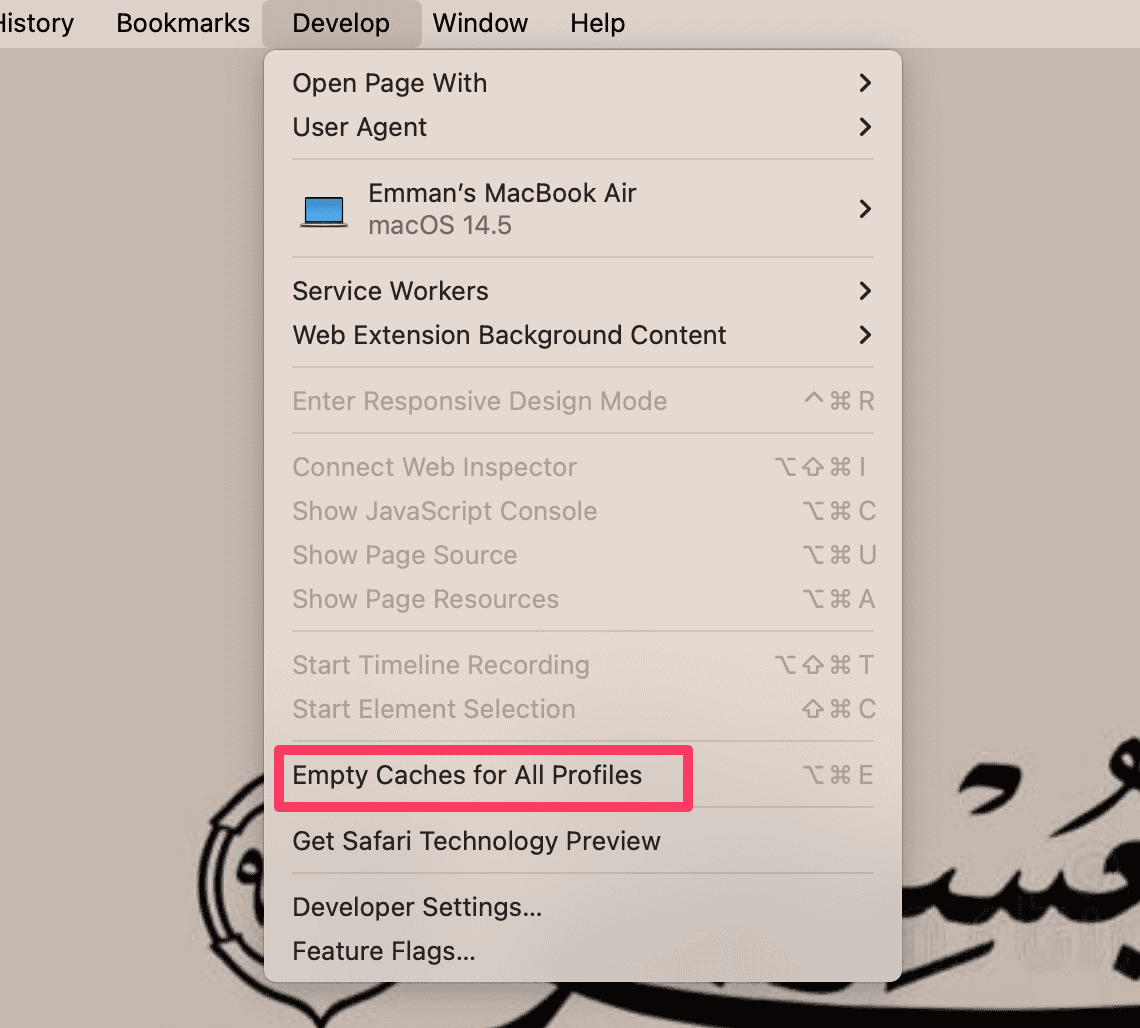
- Click on the Develop menu that appears in the menu bar.
- Select Empty Caches for All Profiles.

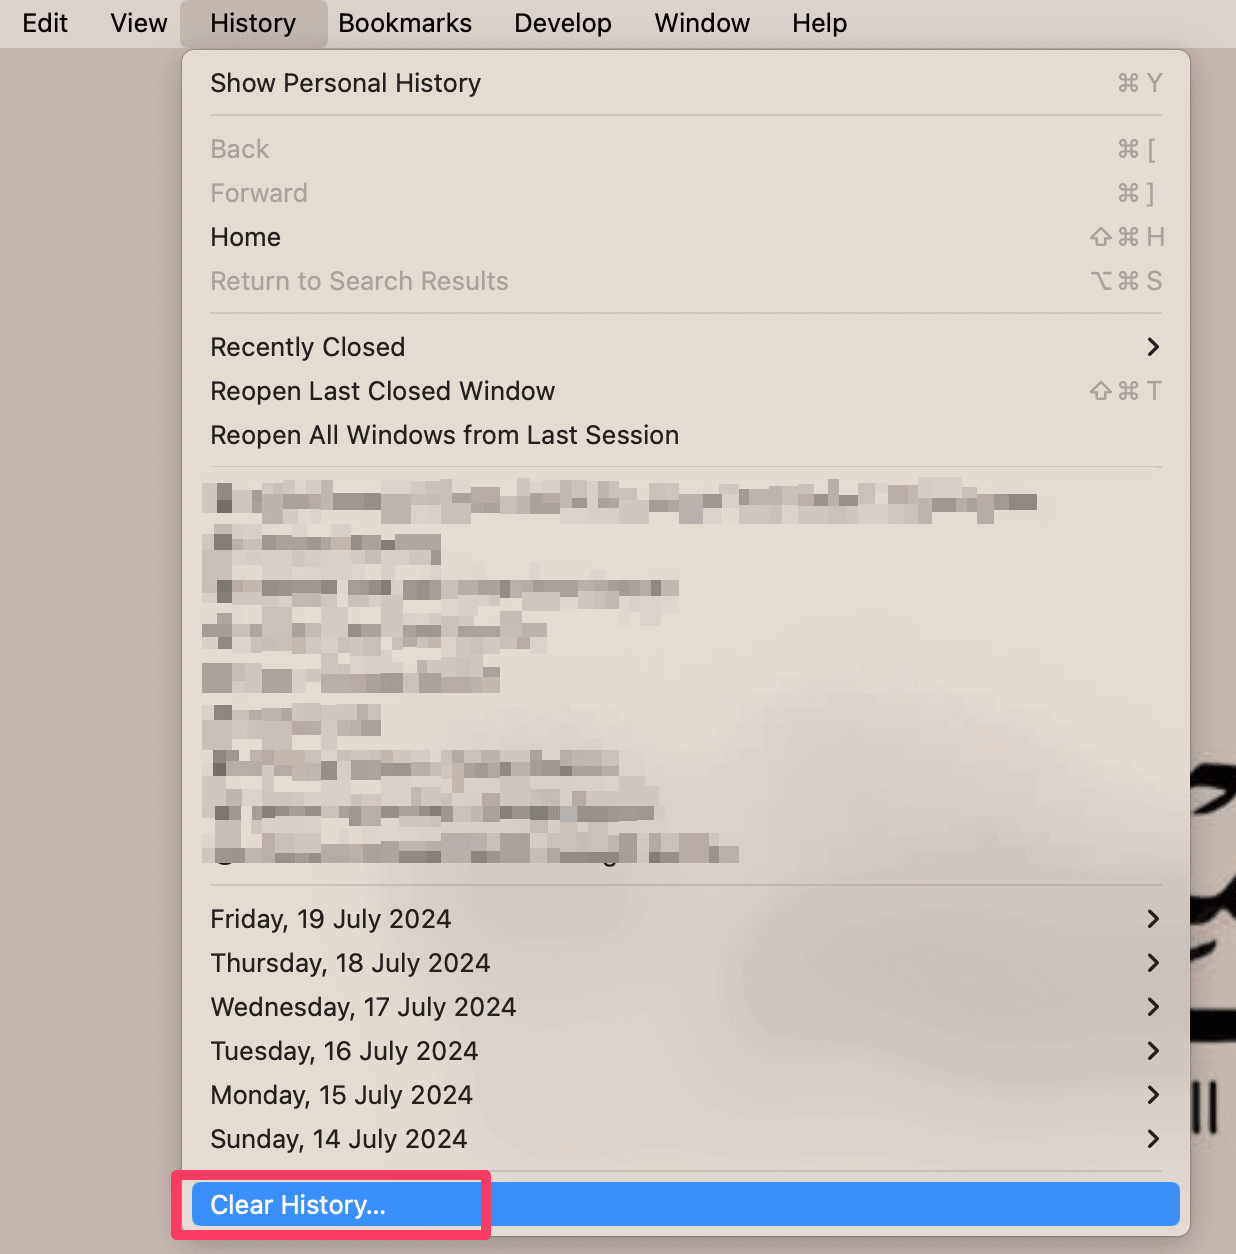
- Click on the Safari menu, then select History and Clear History.

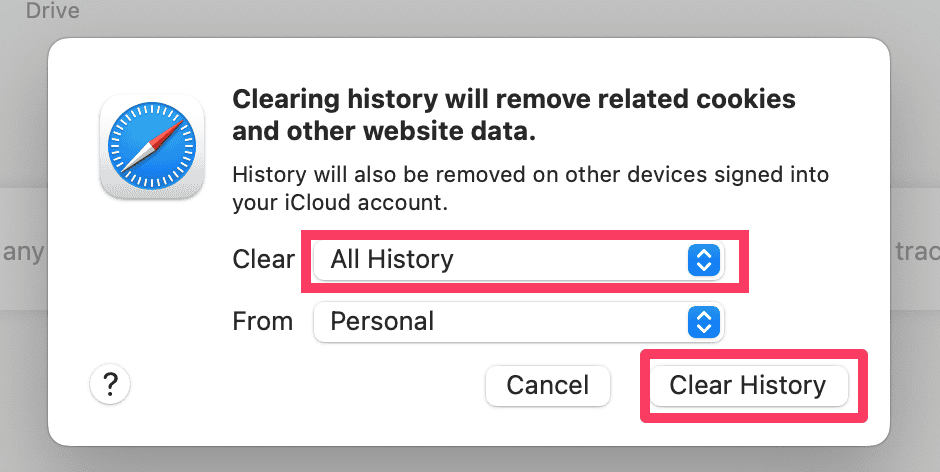
- Ensure All History is selected and click Clear History.

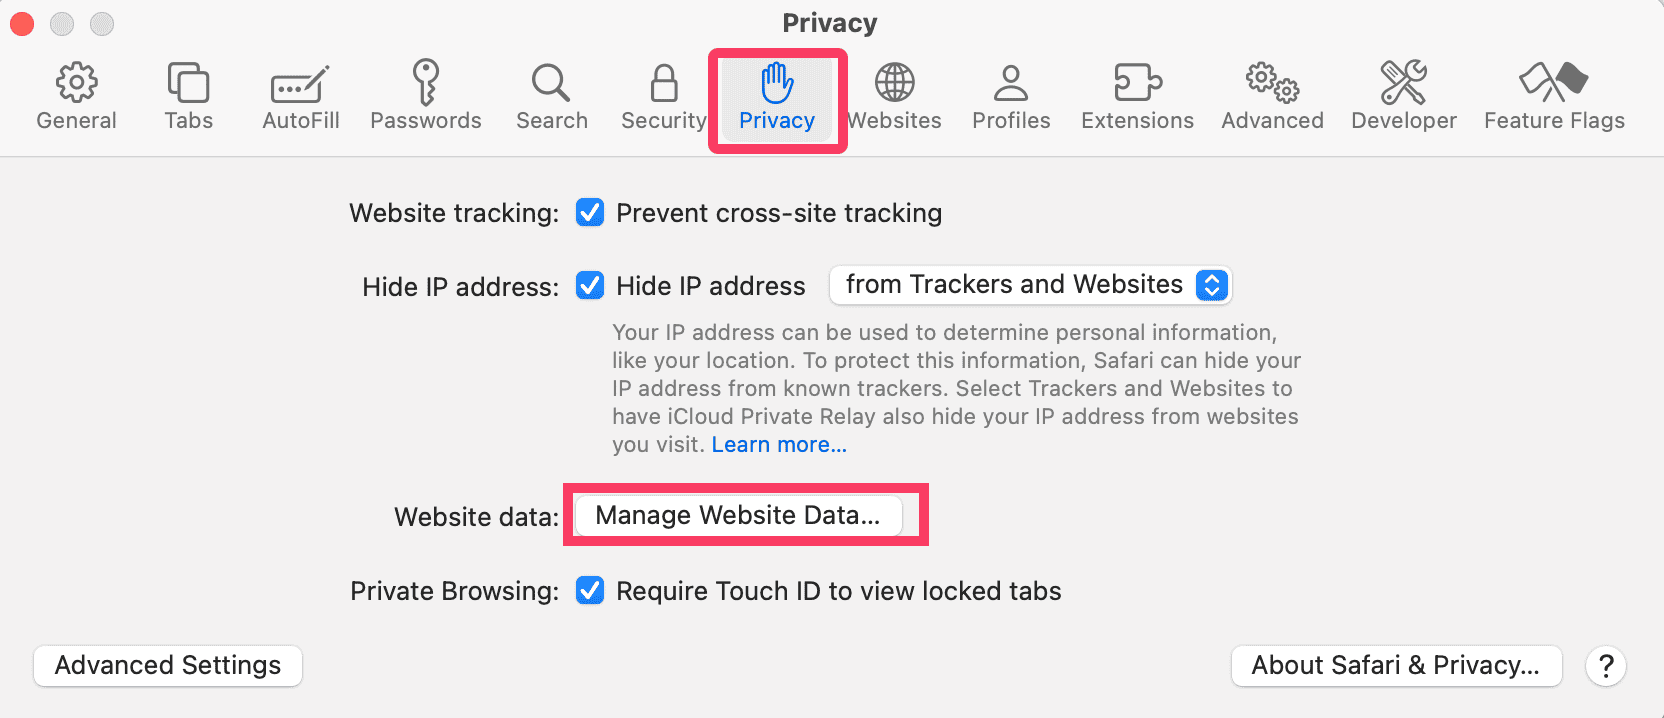
- Go back to Safari Settings and click on the Privacy tab.
- Click on Manage Website Data.

- Click Remove All.
- Close Safari entirely and reopen it.
Google Chrome
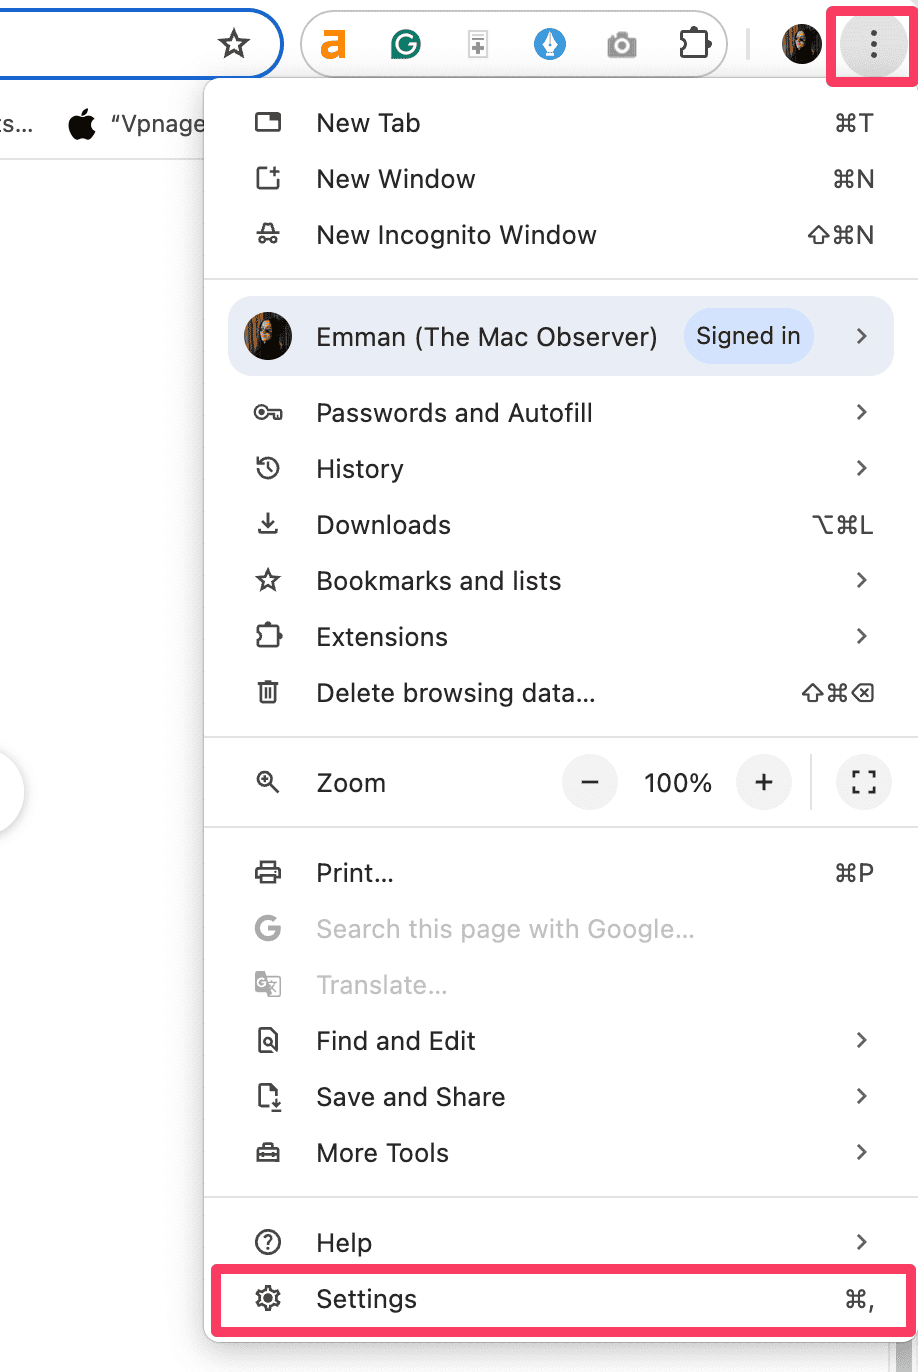
- Open Chrome and click on the three dots (⁝) in the top right corner of your Chrome window.
- Select Settings.

- Scroll down to the Reset settings section.
- Click Restore settings to their original defaults.

- Confirm the reset when prompted.
- Close Chrome entirely and reopen it.

Mozilla Firefox
- Open Firefox and go to Help – Troubleshooting Information (or type about: support in the address bar and press return).
- Click on the Refresh Firefox button.
- Confirm the changes and restart Firefox.
 NOTE
NOTE
And that was it! You’ve successfully removed the “Your Mac Is Infected With 3 Viruses” pop-up from your Mac. If you continue to experience this issue or believe your Mac is still compromised, consider seeking help from a professional or contacting Apple Support. Likewise, you might want to know how to remove hackers from your iPhone.