Taking screenshots on an iPad is a simple click of the button. However, recording the screen requires a couple of extra steps.

Screenshots
Let’s deal with the easy thing first. To take a screenshot on the iPad simply press the power button and the Home button at the same time, then release. Click on the image that has been taken, which appears in the bottom left-hand corner, allows you to edit it.
Recording Your iPad Screen
To record your screen on the iPad, and all the subsequent actions you take, you need to first add the record function to the control center. Do this by going to Settings > Control Center > Customise Tools.
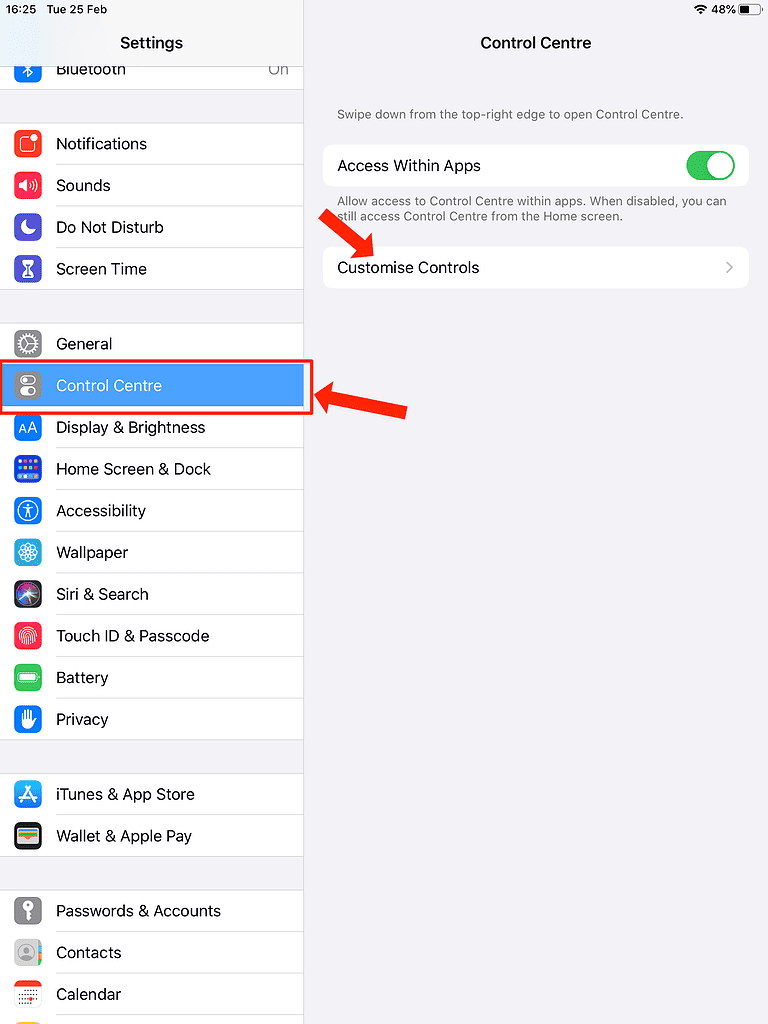
Then select Screen Record from the More Controls list.
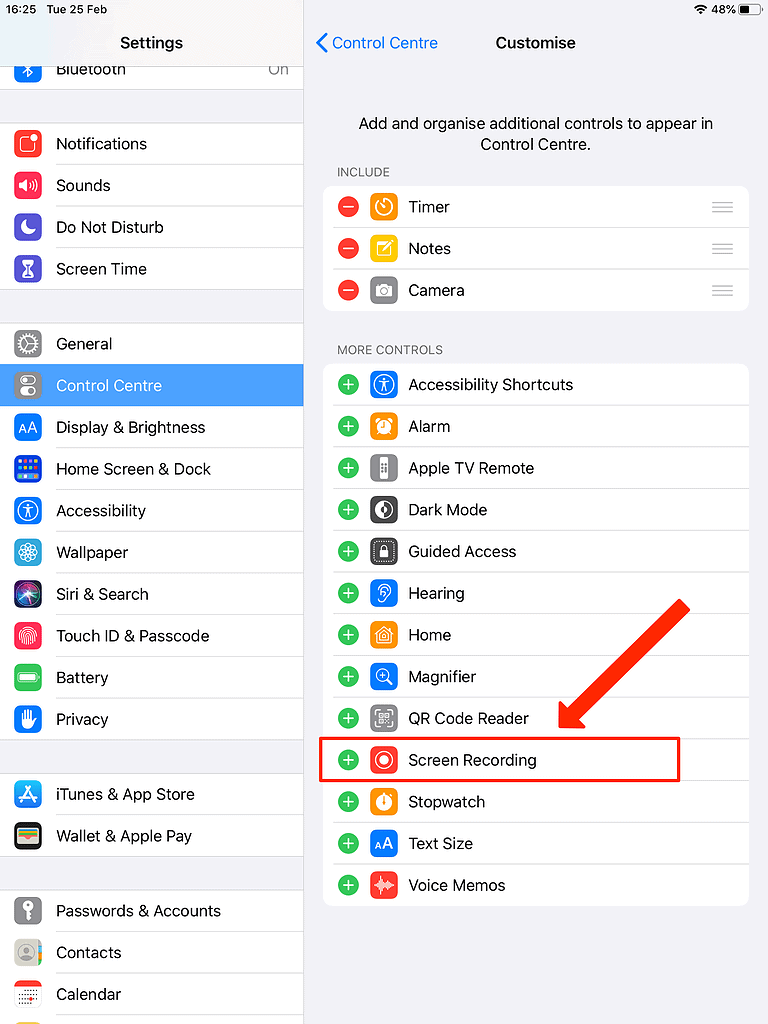
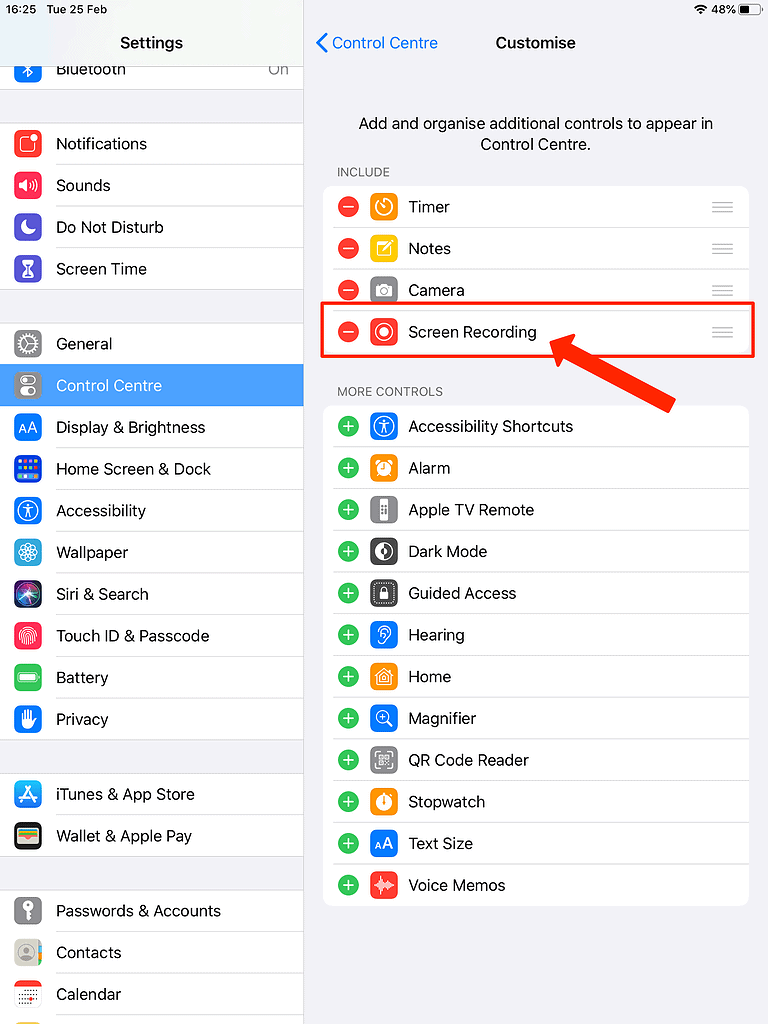
That adds it to the Include list, meaning it will be available in your Control Center.
When you’ve done that and you’re ready to record, access the control center by dragging down from the top-right corner. The record button should now be there. Press that, and record away.
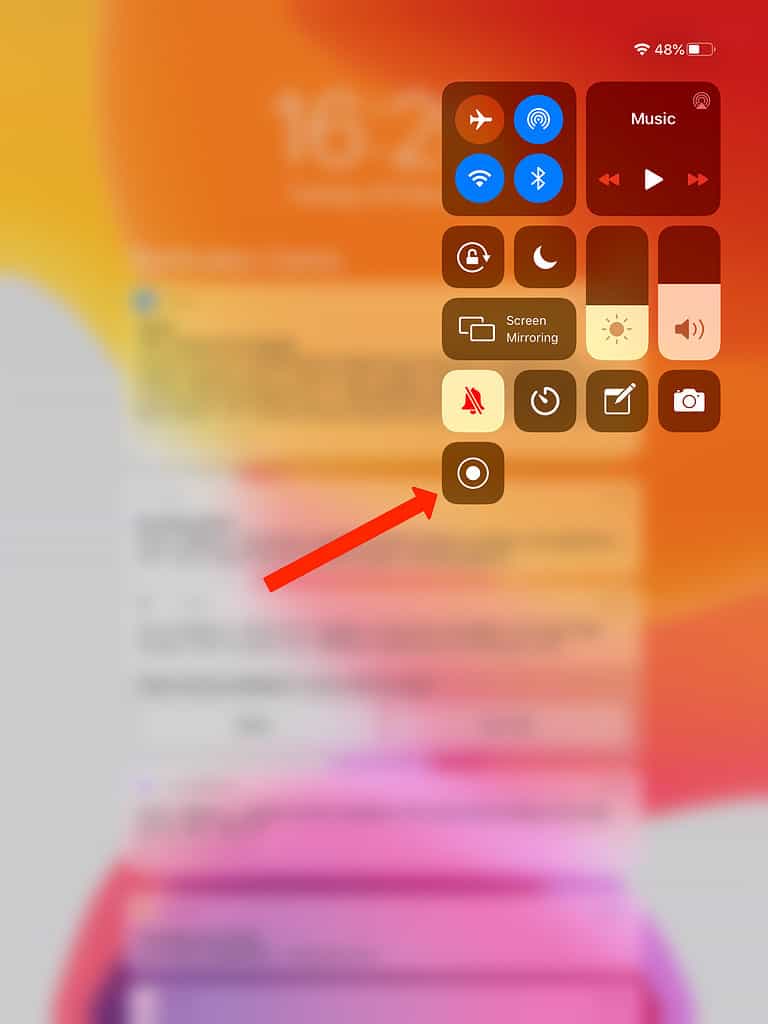
To stop recording, pull up the control center and hit the record button once again. The video is automatically saved in photos.

Thanks a lot!
Charlotte:
Thanks for that, especially the tips on recording.
You can also take a screen shot (at least on the 2018 iPad Pro, but I assume any using iPadOS), using the Apple Pencil, by starting in the lower corner of the iPad and moving the pencil upward and diagonally (eg from lower left to upper right corner). It takes the screen shot and then gives you options, including edit or bin, as to what to do with it and store it. For users with the Apple Pencil, they might find this quicker and more reliable than manipulating the buttons.
Oh cool! Thanks. I’m going to check that out with my Logitech Crayon and see if it works!