Did you know users are able to change their macOS user account name in Ventura? Sometimes, change can be a good thing. Maybe you purchased a used device, or maybe you misspelled your name on accident. Whatever the case, changing your macOS user account is easy, but users must still take precautions.
Before you can change the name of your user account, you may need to complete additional steps beforehand. Be sure to read this entire how-to before proceeding.
How to Rename a macOS User Account in Ventura
First, be warned that doing this incorrectly can damage your account. Doing this incorrectly can also prevent users from logging back into the account. To ensure things go smoothly, make a backup of your device before forging ahead.
Most importantly, your home folder and your macOS user account must both be the same. Before you can change either name, you must have a second administrator account.
How to Make a New Administrator Account
To make a second administrator account, follow these steps:
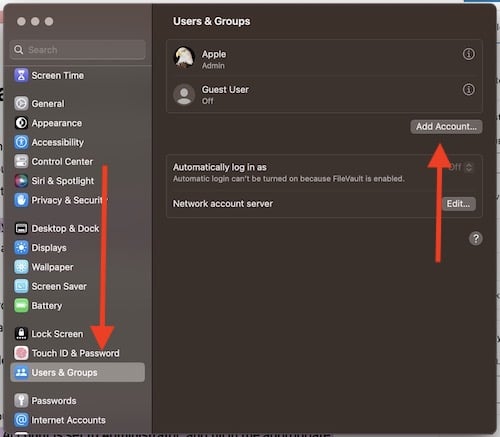
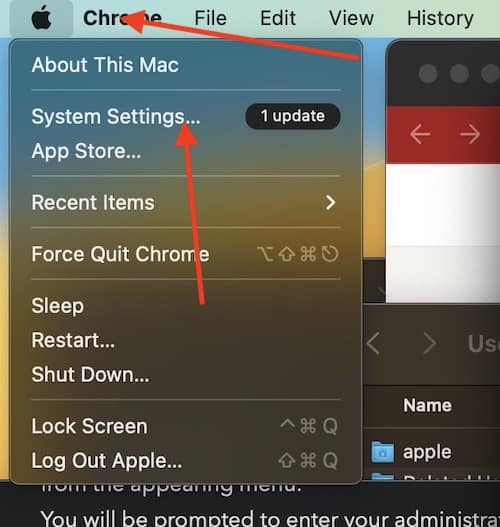
- Go to the Apple menu in the top left corner and select System Settings.
- Go to Users & Groups.
- Click Add Account.
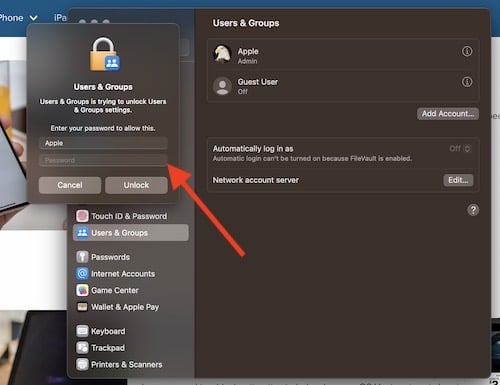
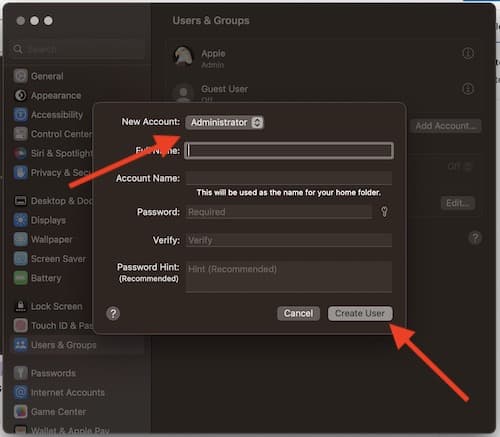
You will receive a prompt to enter your administrator password. - In this section, make sure the New Account is set to Administrator, and fill in the appropriate information. Then select Create User.
Once you have done this, you will be able to rename your home folder.
How to Rename the Administrator Home Folder
To rename the home folder, follow these steps:
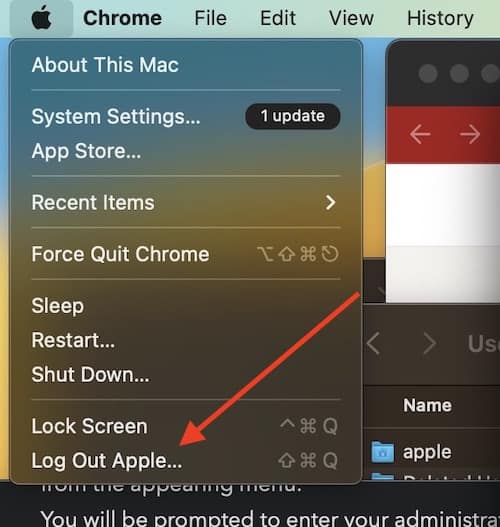
- Log out of the account you are renaming. Go to the Apple Menu and select Log Out.
This will close all applications, and log you out of your Apple account. - Log into the other account you just created.
- From your startup disk, open the Users folder.
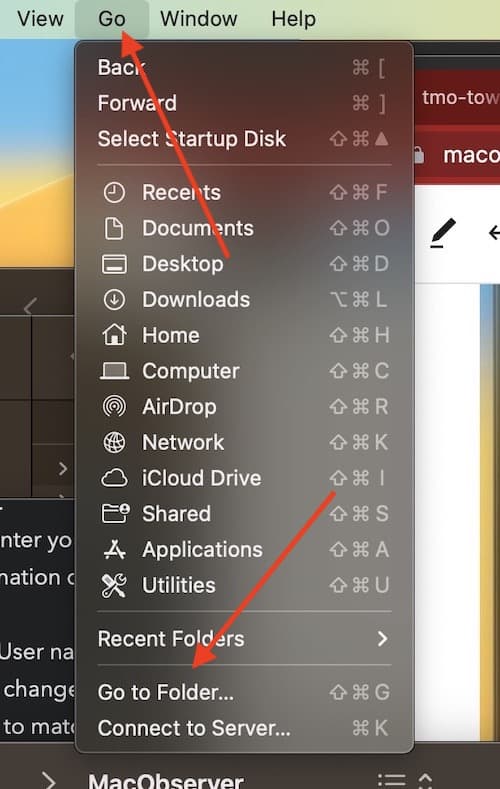
This contains the folders for all users on your device. You can find this quickly from the Go section in the finder menu. Simply use Go > Go to Folder and enter “/users”. - Once you have found the folder, you can rename it.
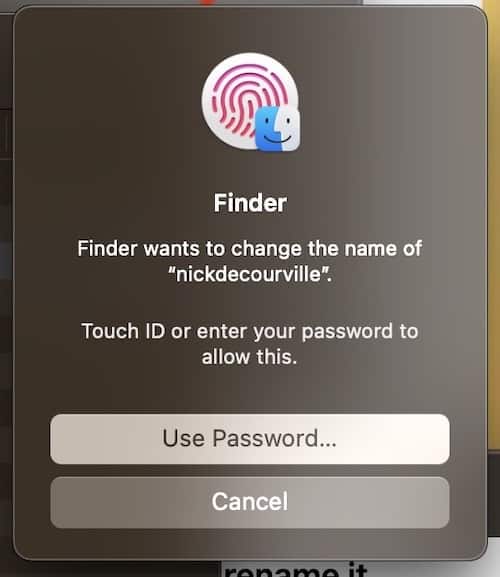
Do not use spaces. Once done, you will be asked to enter the name and password of the administrator account that you used to login. It is also worth noting that if you are sharing the folder, you will need to stop sharing it to rename it.
Once this is done, you are now be able to change the name of your macOS account.
How to Change the Name of Your macOS Account
You will need to remain logged out of the account you are renaming. Within macOS Ventura, follow these steps to change the name of your macOS account:
Time needed: 25 minutes
Follow these steps to change the name of your macOS user account.
- Go to the Apple menu and select System Settings.
- Go to Users & Groups from the sidebar.
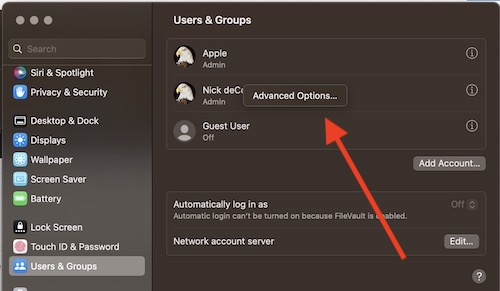
- While pressing and holding the Control key on your keyboard, click the name of the account that you’re renaming.
- Choose Advanced Options from the appearing menu.
- You will be prompted to enter your administrator user name and password.
Input the information of the new account, not the account you are renaming.
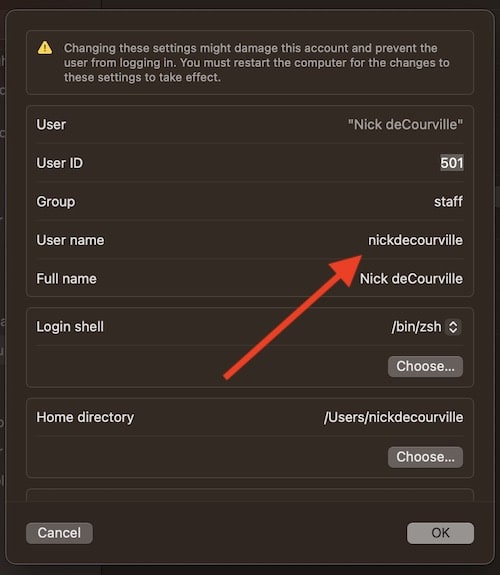
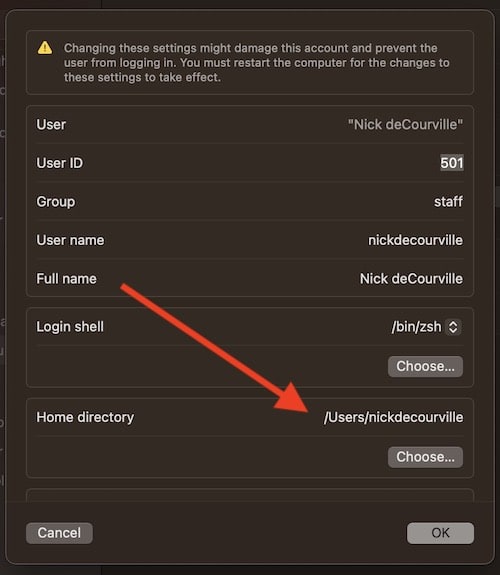
- You now update the “User name” field to match the name of the new home folder.
You can also change the “Full name” field as well. The Full name field does not need to match the User name field. You are also able to use either name when logging in, or while making any other changes that require a user name and a password.
- Users should also note that the user name is viewable in the path for the “Home directory” field.
Users will likely need to scroll down to see this field, but this name also needs changed. Rename the Home directory field to your new user name, but be sure to not remove the “/Users/“ from the patch.
- Click OK.
You should then restart your Mac and log in to the newly renamed account.
Again, make sure that you have a backup of your system before doing this. It may also be easier to simply just create a new administrator account and work from there, but these steps will give you the tools to rename your macOS account and home folder.
Be sure to follow The Mac Observer for more tips and tricks.

