Now that iOS 16.1 is released, we’re able to take advantage of the new iCloud Shared Photo Library feature. This allows you to invite your friends and family to view, contribute and edit photos easier than before. The feature does require some setup, so here’s how to get it up and running.
Turning On iCloud Shared Photo Library on Your iPhone
To start using your iCloud Shared Photo Library, you need to make sure your iPhone is running at least iOS 16.1. Check that by going to Settings > General > Software Update and installing the update, if you haven’t already. Once that’s done, you can begin setting up the shared library.
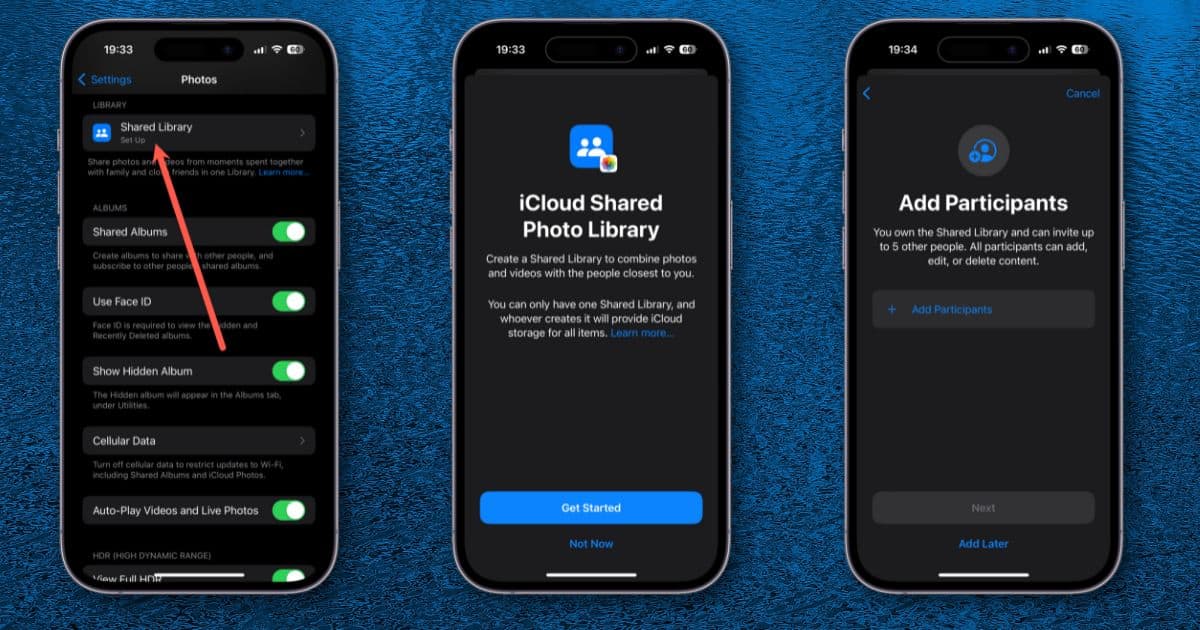
For this, you’ll go to Settings > Photos, and look for Shared Library. If you have’t already configured it, the entry will say “Set Up” in smaller, lighter-colored text. Tap that button to proceed.
Next, you’ll be greeted by a screen that tells you a bit about the feature and its limitations.
You can only have one Shared Library, and whoever creates it will provide iCloud storage for all items.
So, make sure whomever in your circle of contacts is setting it up has the most iCloud storage.
The next few screens will walk you through adding people to your shared library. You can invite up to 5 people, other than yourself.
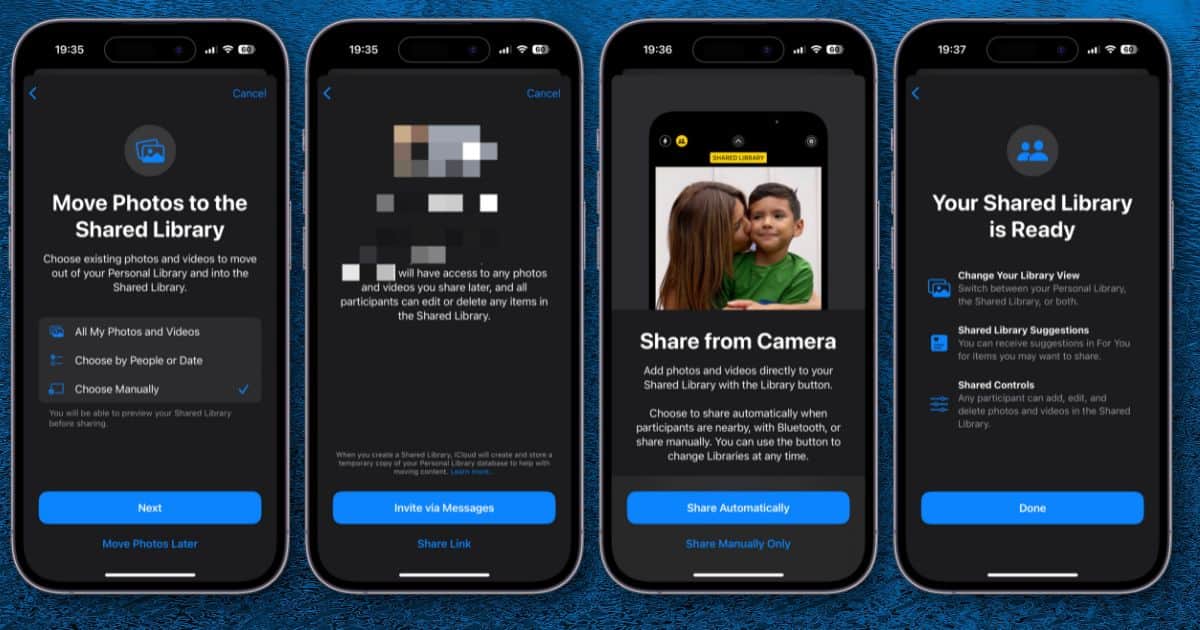
You’ll also have an option to move all of your photos and videos to the shared library, choose which ones to transfer based on people or date, or choose manually. You can also elect to move photos later.
Next, you’ll send out the invitation to the folks you want to share with. You can do so through Messages or by copying and sharing a link. After that, you can choose to share from Camera automatically, when participants are nearby, or manually.
Changing Sharing on Photos or in Your Camera Mode
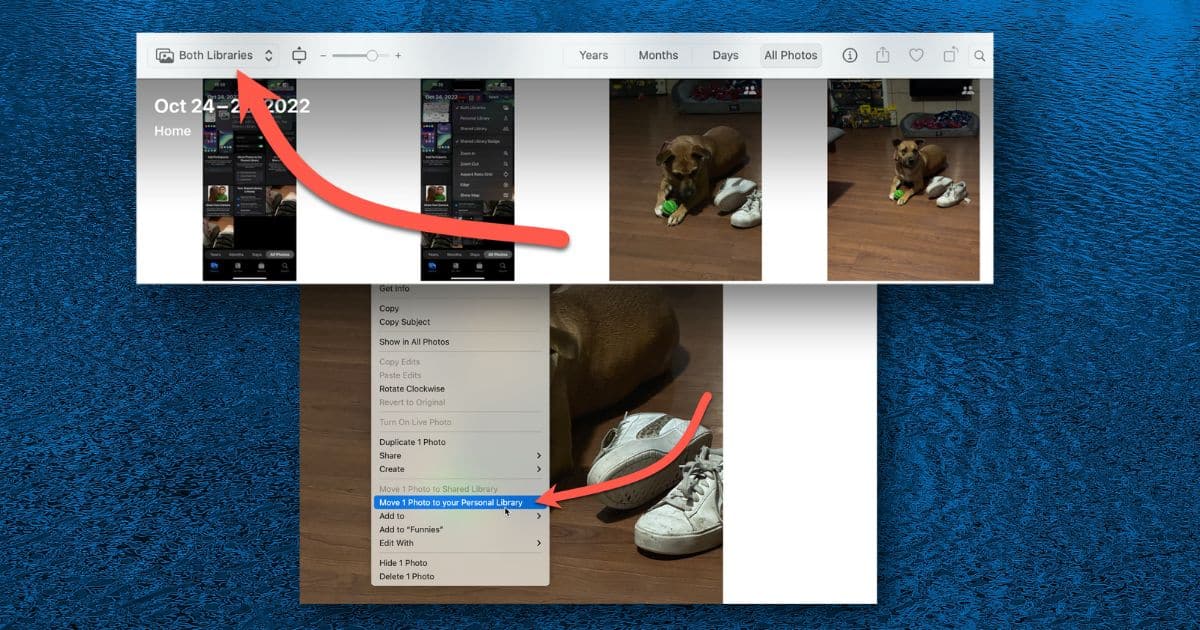
Once you start sharing photos, you’ll have new options in both the Photos and Camera app. One, in Photos, allows you to switch your view between showing just your personal photos, only your shared library or both.
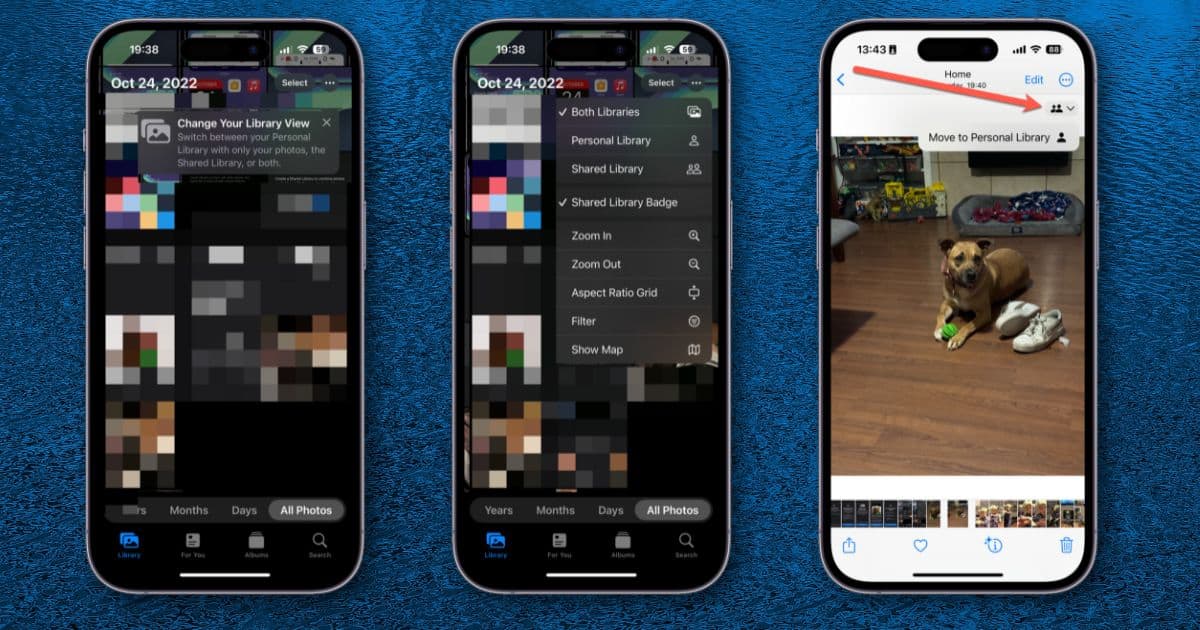
When you open a picture in Photos, you’ll also find an option to move that image between your personal and shared libraries. This way, you can manually choose whether a particular photograph is shared with your group or just in your personal library.
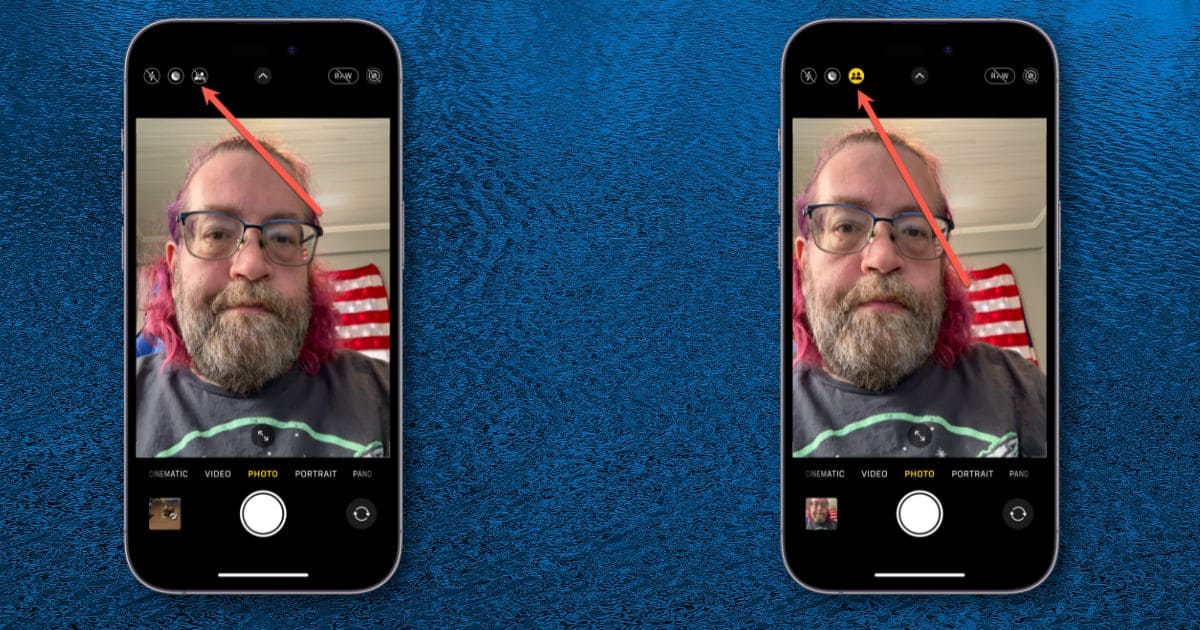
Within the Camera app, you’ll be able to change which library your photos save to. If you decide you need to adjust this, look in the upper left corner of the app. If the icon showing two silhouettes of people is yellow, you’re saving to the shared library. Simply tap that icon to change.
Your iCloud Shared Photo Library on macOS
Note that all of your photos, shared and otherwise, will also show up in the Photos app on macOS Ventura. Just as on the iPhone, you can change which library you see and move photos between your personal and shared libraries. The images below demonstrate that.
What do you think of the new iCloud Shared Photo Library feature? Is six participants enough, or should Apple consider expanding that? Let us know in the comments.
