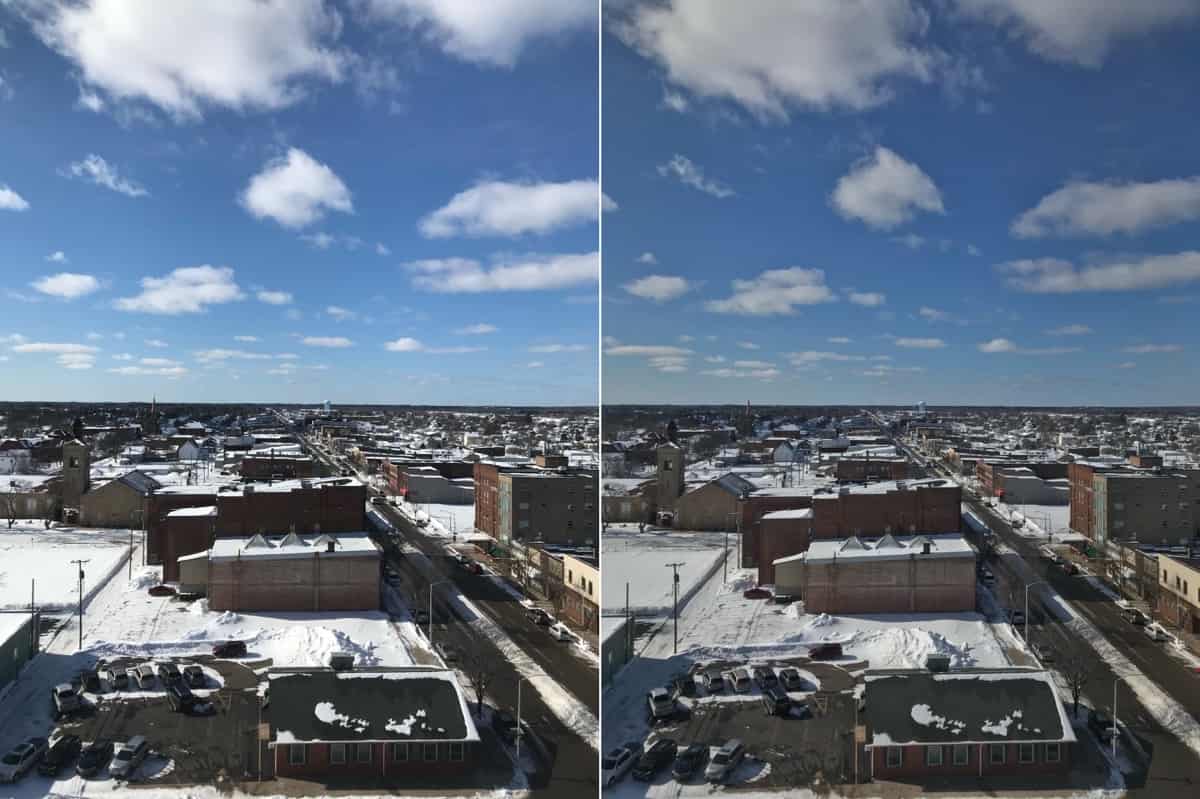
I was recently challenged by some of my colleagues to come up with a photography tip. Not just any tip, but something simple people can do to improve their photos. In my opinion, that’s HDR mode.
HDR
I started using High Dynamic Range (HDR) mode for all of my photos roughly six months ago, and I immediately started noticing an improvement. HDR is a simple way to balance your highlights and shadows in a photo, and helps prevent clipping.
Clipping, sometimes called “blown out” is when the white areas of your image become overexposed and lose all detail, and become a solid patch of white. Unless you’re shooting in RAW, it’s impossible to recover clipped highlights. Shadows can also become clipped and become a solid patch of underexposed black. Clipped highlights just tend to be more noticeable, as you can see in my photos below.

Shooting in HDR can also help you capture deeper, vibrant colors, to the point that you may not even feel the need to edit an HDR photo. In my experience some of them look that good, straight out of the camera. In some situations, like in that photo I took, HDR mode can make a photo look “flat.” In that case I go ahead and edit, like increasing the contrast or brightness.
When you turn HDR mode on, your iPhone takes three separate photos: One is underexposed, one with normal exposure, and one that is overexposed. The three photos are blended into one, and that is the final image that you see in Photos. This helps the camera capture as much detail as possible.
You can do this manually, just to see. Open the camera app and point your iPhone at something. Then, tap on a bright area of the screen. The rest of the photo will darken, except the highlights, and you’ll see great color and detail. You can tap on a dark area of the screen and brighten the shadows and see more detail. HDR mode just does this for you.
To shoot in HDR, just open the camera and tap HDR at the top. You can set it to Auto, On, or Off. If you go into Settings > Camera, there’s a toggle to Keep Normal Photo. This will save the regular photo in addition to the HDR photo.
Further Reading
[iOS 11: How to Turn On the Long Exposure Live Photo Effect]
[5 Photo Retouching Apps for iPhone to Remove Unwanted Objects]
