Date and Time Stamps on photos are not a new feature or concept. Even the yesteryears roll films featured time and date stamps. Unfortunately, iPhone still lacks a native or built-in timestamp for photos. It is fairly easy to add and edit date stamps on iPhone photos.
What is the Significance of Date and Time Stamp on iPhone?
Date and Time Stamp help us relive our memory and connect the dots between pictures. You can check the date several years from now without opening the picture settings. The direct date stamp is super useful when viewing images outside iPhone, such as a SmartTV.
How to Add Date/Time Stamps to Photos on the iPhone?
The best way to add date stamps for photos is via third-party apps. We have tested multiple apps and, in the end, shortlisted two of them. Photomarks app is the best choice if you are looking beyond Date/Time stamping. You get features like batch watermark and text. However, DateStamper is a better alternative as it is free to use and offers basic set of features.
Time needed: 3 minutes
Here’s how you can download DateStamper and use it on iPhone Photos app.
- DateStamper is a free app that lets you add and edit date stamps in bulk. Follow the steps below to add Date and Time Stamps using the Date Stamper app.
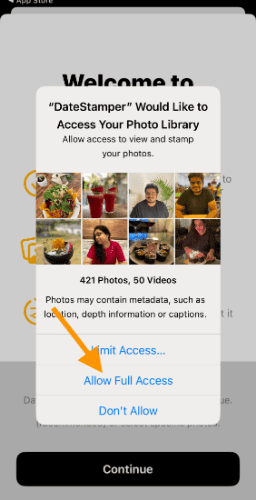
- Open the app and grant access to the photos. You can grant access to multiple photos or the entire camera roll.
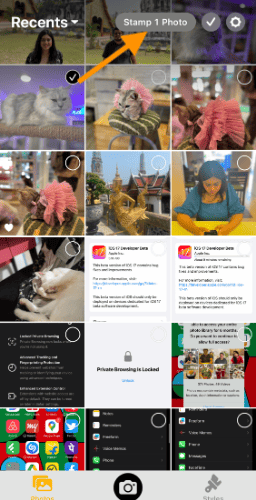
- The photos will now appear on the app. Tap and select the pictures for stamping.
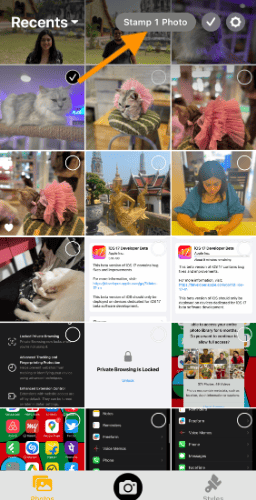
- On the top, you will see a button. It says Stamp Photos alongside a number of selected images. Tap the button.
- If iOS asks for permission to modify pictures. Select “Modify” to proceed.
- Thats all! Selected images now feature a date or a time stamp. Open the edited image. The date and time information is displayed in the bottom right corner.
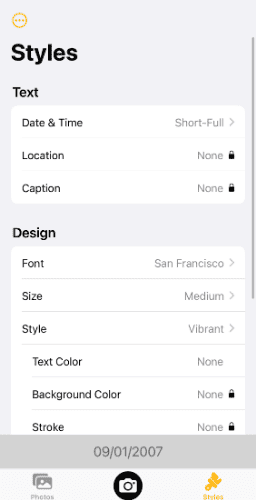
- Not happy with the font or display format? Open the Styles tab. Here you can change font, size, style and much more. Note that some features, such as background color, require a premium subscription.
Steps to Edit and Change Photos Date on iPhone
Due to incorrect date settings, photos are often labelled with the wrong day and year. Setting your iPhone back to the correct date is easy. But what about the photos that were dated wrongly? Thankfully, you can change the date on multiple photos at once. Here’s how to do it-
1. Open Photos app on your iPhone.
2. Tap and select the Photos you want to change the date.
3. Once selected, tap the More icon in the bottom right corner.

4. Swipe up till you see Adjust Date & Time and select the same.
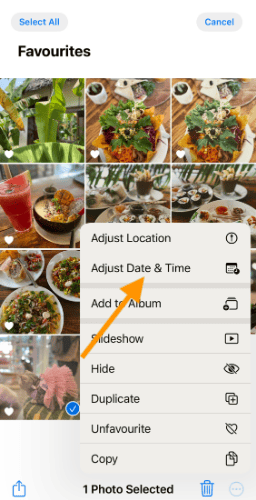
5. Use the calendar popup to select the appropriate time and date. Tap Adjust button on the top right corner to save the changes.
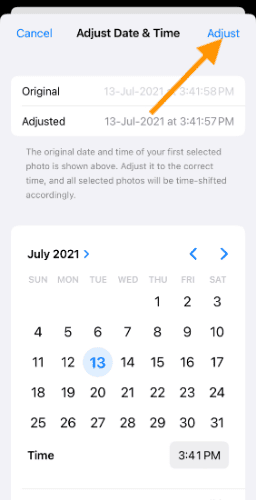
Voila! You have successfully changed the date for multiple photos. Follow the same steps for changing the date for a single image. Skip the second step, wherein you select multiple images.
Bonus- How to change image location on iPhone
All the pictures on your camera roll contain location information. It is very helpful to recall where you have taken the particular image. Sometimes, iOS captures incorrect location information. It could be due to reasons like connectivity issues and GPS glitches. When this happens, you can manually change the image location by following the steps below-
1. Select and open Photos.
2. Tap More(Three-horizontal dots at bottom right).

3. Select Adjust Location.
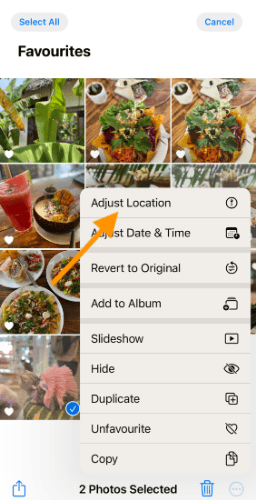
4. Search and select the new location.

5. Once again, open the image. Swipe the picture up. You can now see the new location.
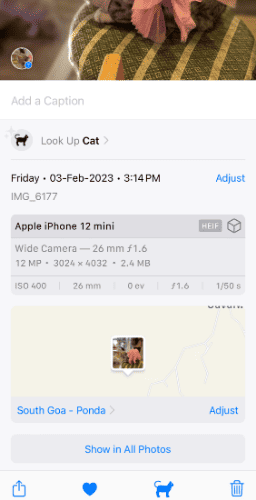
A picture is worth a thousand words
The adage is even valid in today’s digital world. Pictures taken on iPhone contain a ton of data, including time, date, location, and much more. Collectively it is called metadata. Proceed with caution while sharing your pictures on the internet. The metadata can give away much information that might attract the wrong type of attention.
We hope you have learnt how to add date stamps on photos, adjust date, and change location. Please let us know in the comments below if you have anything to add.

