
The key to keeping your Mac in tip-top shape is to manage the disk space efficiently. Proactively prevent redundant files and app logs from cluttering your system. While monitoring your macOS storage, however, you might wonder how System Data is hoarding so much space. What does it even do?
In all likelihood, this mysterious category has compelled you to clean up your machine. Follow along for the most effective ways to declutter.
What Is System Data in macOS, and What Does It Consist Of?
System Data (formerly called Other Data) refers to the cluster of files used by macOS and its applications. It consists of caches, log files, and VM files, among others. To be more precise, all the runtime system resources that can’t go into different categories, such as Apps and Documents, are stored in this specific cluster.

Notably, macOS saves this data as a catch-all for files and settings that play a pivotal role in helping the operating system and the applications run with the needed smoothness. Smooth functionality aside, it also plays its part in assisting the operating system to deliver a more personalized experience.
However, if you fail to keep track of its pileup, it won’t take long to gobble up large chunks of storage, clogging it up with a ton of redundant files. With clogged storage, your Mac will fall prey to several dreaded issues, including rapid battery drain and overheating.
1. Optimize Your Mac’s Storage
Time needed: 2 minutes
To keep your Mac’s storage neatly optimized and free from useless files or corrupted ones lurking around, you don’t need to look beyond macOS’ built-in storage optimization features. Follow these steps:
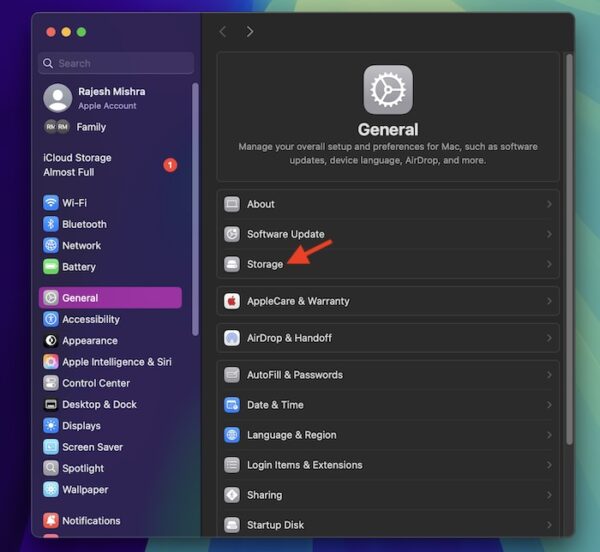
- On your Mac, launch the System Settings app. You can also click the Apple menu icon > System Settings.
- Now, click General and select Storage.

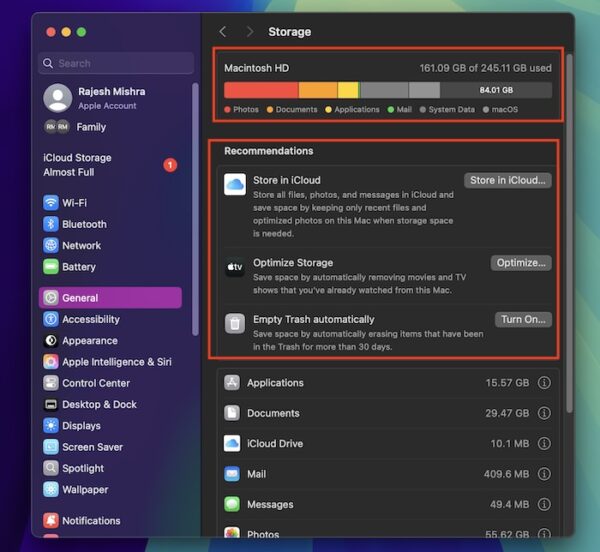
- Here, macOS displays a storage bar (right at the top) with different categories like Photos, Documents, Applications, System Data, Mail, and more.
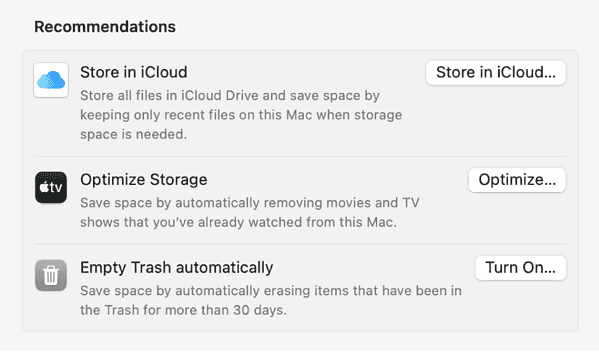
- Under the Recommendations section, you should see three notable options: Store in iCloud, Optimize Storage, and Empty Trash Automatically.

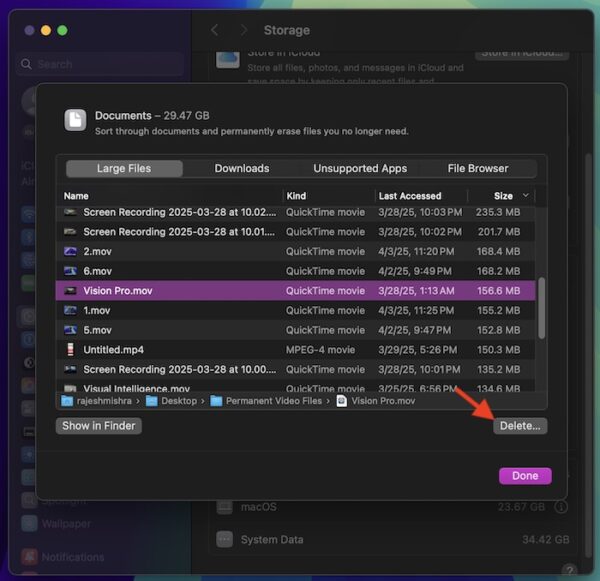
- Scroll down to see your list of apps and how much space they use.
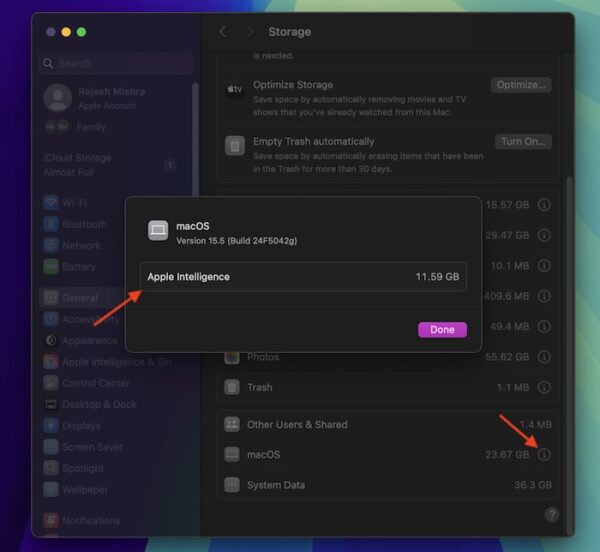
- To find out how much space each app has captured, hit the info button right next to the Applications category.

- Select the file you want to get rid of and hit the Delete button.

- At the bottom, there are three critical categories: Other Users & Shared, macOS, and System Data. See if System Data is now consuming less space.
 NOTE
NOTE
2. Clear Application Logs on Your Mac
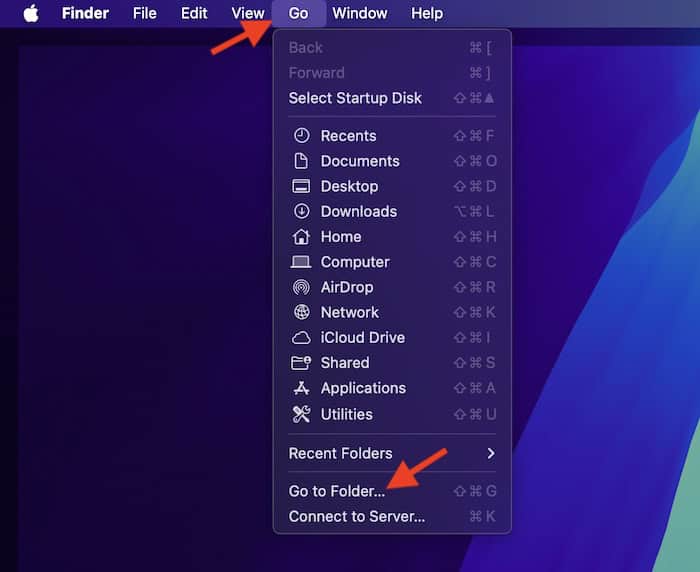
To me, the most efficient way to wipe out the pileup of application logs is via Finder. Although this process is slightly hidden, you can get through it without any hassle.
- To get going, open Finder > hit the Go menu at the top > and navigate to “Go to Folder…”.

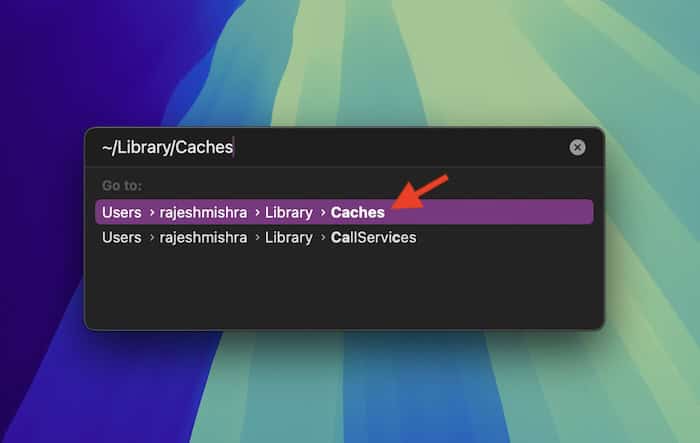
- Now, enter “~/Library/Caches” and press the Return key.

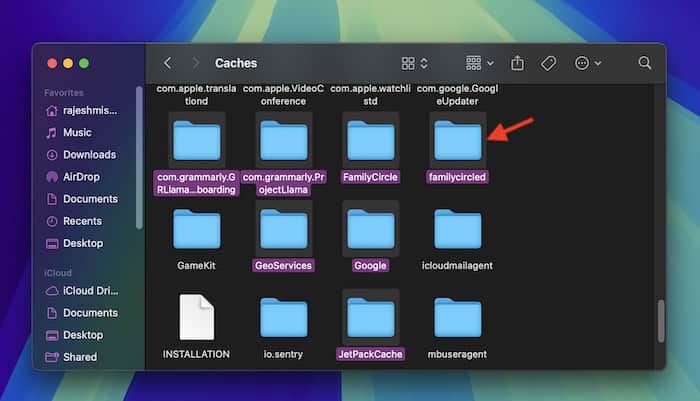
- Next up, select all redundant folders or files and drag them all to the Trash. If prompted, be sure to authenticate using Touch ID or by entering your Mac’s passcode.

3. Keep a Tab on the Downloads Folder
If you regularly download images and background assets or install apps for work or testing, your Downloads folder can quickly get out of hand. To keep it from eating up valuable disk space, make it a habit to review and clear out anything you no longer need.
- Open Finder > Downloads.
- Highlight or select unnecessary files, control-click, and select Move to Trash.
- Empty Trash for permanent deletion.
4. Organize Time Machine Backups

If you use the Time Machine to back up your Mac, remember to review the backups at specific intervals and delete the older ones. Should you wish to optimize your Mac’s Time Machine further, consider storing backups on an external drive.
Other Helpful Tips to Keep System Data in Check
- Restart Your Mac to Clear the Temporary Files: To clear temporary files and even fix the random glitches, all you need to do is reboot your Mac (Apple menu > Restart).
- Update Apps: Outdated apps and weird issues go hand-in-hand. So, keep your apps updated (App Store > Updates tab) to ensure they don’t cause unexpected problems.
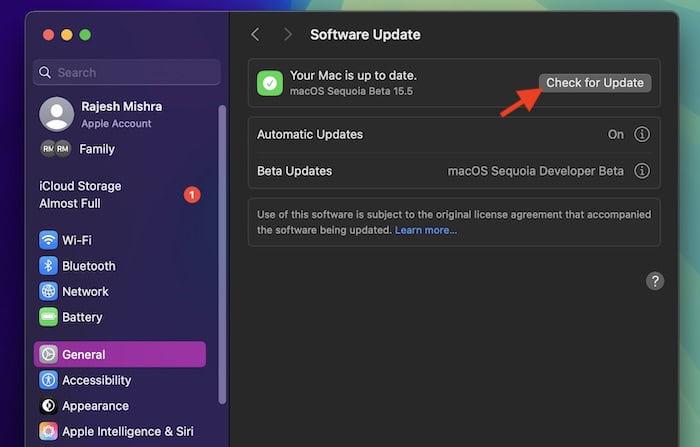
- Keep your Mac Updated: Running an outdated version of macOS, even when the latest update is readily available (System Settings > General > Software Update), is akin to inviting trouble with both hands.

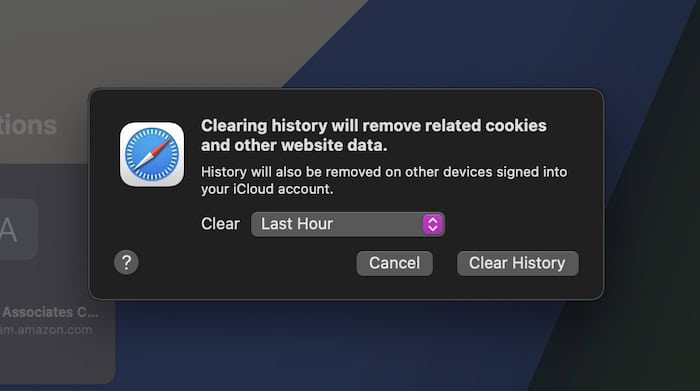
- Clear Your Browser Cache: Most browsers, including Apple Safari and Google Chrome, provide straightforward ways to clear the cache. Hence, try eliminating the cached data (from time to time) to ensure it can neither clutter your browser nor your device’s storage.

- Empty Trash: Even if the auto-trash feature is active on your Mac, taking a quick stroll in the “Trash” folder and emptying the already-deleted files will stand you in good stead.
Now, what if you need an all-in-one solution to clean your Mac? Well, in that case, a highly rated third-party storage cleaner can be the right answer. The ones that I have tried and found up to the mark are CleanMyMac and CCleaner Pro.