None of us want our private data to fall into the wrong hands. However, most of our online activity is always being tracked. Especially through emails that use different methods (tracking pixels, invisible pixels, etc.) to gather your personal information like IP address, etc. To prevent this from happening, Apple introduced the Mail Privacy Protection feature at Worldwide Developers Conference 2021.
The Mail Privacy Protection feature hides your IP address and also the Mail activity. Which doesn’t allow the email senders to track the email activity. The feature is available on iPhones, iPads, and Macs running on iOS 15, iPadOS 15, and macOS Monterey and above. Read along to learn how to enable Mail Privacy Protection and everything about the feature.
What is Mail Privacy Protection in Apple Devices?
The first time you open the Apple Mail app, you will be greeted with a Mail Privacy Protection pop-up with two choices. You can either choose, Protect Mail activity, or Don’t protect Mail activity. It is not enabled by default and you have the option to enable or disable it whenever you want. So, let’s look into what happens once you decide to protect your mail activity by enabling Mail Privacy Protection.
Apple explains Mail Privacy Protection as a feature that hides your IP address so senders can’t link it to your other online activity. The sender won’t be able to determine your exact location because your IP address is masked. Moreover, it also prevents senders from checking if you’ve opened the mail or not, let alone tracking which device was used and how many times you view the mail. Now that we’ve understood what Mail Privacy Protection does, let’s dive in deeper and understand how it works.
How does Apple’s Mail Privacy Protection work?
Once you’ve enabled Mail Privacy Protection, the Apple Mail app downloads all your mail and its remote content in the background by default. It does not matter if you open the email or not. All of this happens through two different entities. One of which knows your IP address and the other the remote Mail content.
None of these entities have the information required to identify you (through your IP) and the remote mail content you receive. Due to this, the sender of the email cannot track your location, your device, or even if you’ve opened the email or not. To take this protection up a notch, you could use a VPN too.
It would help if you kept in mind that the Mail Privacy Protection feature only works when you’re using the Apple Mail app. It doesn’t matter which email service you use as long as you’re using the Apple Mail app. However, the feature is unavailable for other popular email client apps like Gmail, Yahoo, etc.
How to Enable Apple Mail Privacy Protection on iPhone and iPad
Apple Mail Privacy Protection is available on iOS 15/iPadOS 15 and above. The first time you open the Apple Mail app, a pop-up asks if you want to enable this feature. Simply select the Protect Mail activity option. You have the option to enable or disable Mail Privacy Protection at any time on your iPhone or iPad.
Time needed: 1 minute
Simple Steps to Enable Mail Privacy Protection on iPhone and iPad.
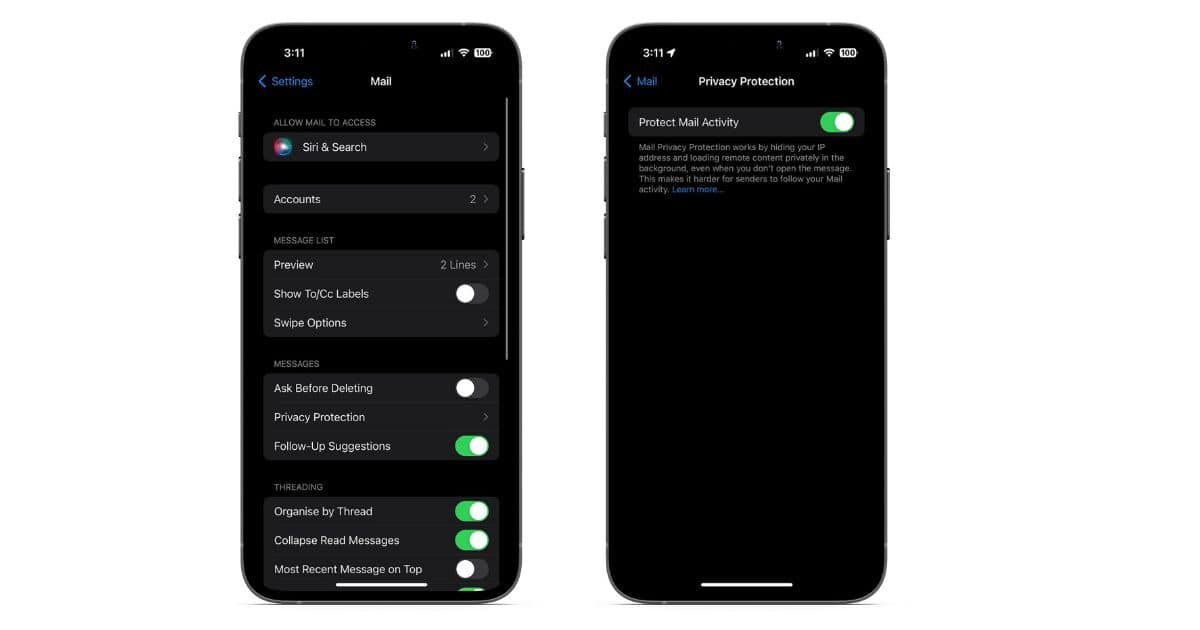
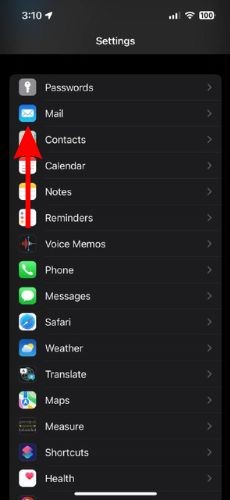
- Open Settings on your iPhone or iPad and head to the Mail option.
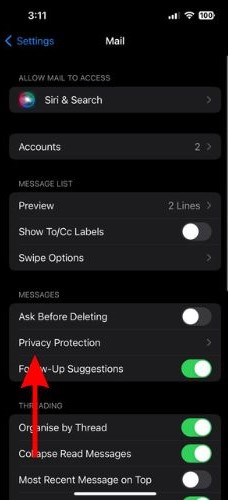
- Tap the Privacy Protection option located under the Messages tab.
- On the next page, enable the Protect Mail Activity toggle.
If you disable the Protect Mail Activity option, the Hide IP Address and Block All Remote Content options become clickable. Both of these features together make up the Mail Privacy Protection feature. However, you can also use them individually. The fact that Apple allows the user to decide which feature to use is commendable.
How to Enable Apple Mail Privacy Protection on Mac
Apple Mail Privacy Protection feature is only available on Macs running on macOS Monterey or above. Also, you have the option to enable Mail Privacy Protection when you open the Apple Mail app for the first time. If you didn’t know enough about the feature back then to enable it, now you do. Read along to learn how to enable the Mail Privacy Protection feature on your Mac.
1. Open the Mail app on your Mac.
2. Click the Mail option in the menu bar and select Settings.
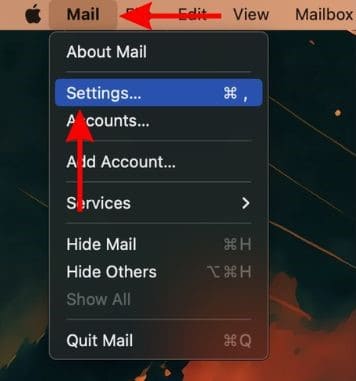
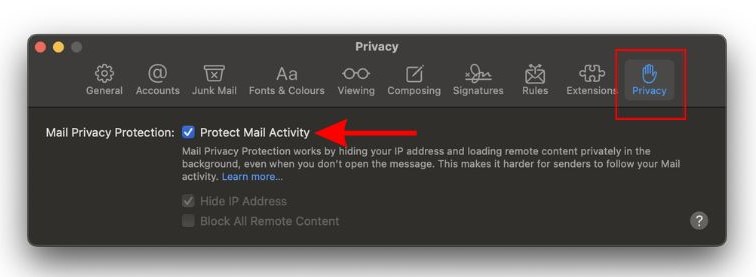
3. Now, head to the Privacy tab and select the checkbox beside the Protect Mail Activity option.
Use Apple Mail Privacy Protection at All Times
Apple Mail Privacy Protection feature can help you keep your data safe. In this day and age where privacy is slowly becoming a myth (or maybe it already is), we should take every measure to secure what we can. The feature also impacts email marketing as these companies cannot effectively track their metrics.
Regardless of all this, it’s a welcome move by Apple that helps its users. So enable Mail Privacy Protection on your devices as it is a great privacy feature. Remember that this feature only works in Apple Mail and not other email apps. If you have any doubts, please let us know in the comments and we’ll get back to you at the earliest.
