Among Apple’s many products and services, Apple Books is probably the most underrated. I mean, given the Cupertino-based tech giant’s ecosystem and user base, this service could have given Amazon’s Kindle eBook marketplace a run for its money a long time ago. Sadly, Apple seemed to have other priorities. However, for those who plan to try using Apple Books to beef up their reading habits, now is probably the best time to do it. And the first thing you need to know once you’ve decided to use it is to know how to authorize a computer in Apple Books.
Let me walk you through the steps to authorize your Mac to make purchases from the Apple Book Store. I’ll also give you a rundown on some other important things to know before using Apple Books.
How to Authorize Computer for Apple Books
Authorizing your Mac does not just mean allowing it to make purchases from the Apple Book Store. By doing so, you are also permitting your Mac to download past purchases from the Audiobook Store or Audible websites. Apple allows its Books customers to authorize up to 5 computers and up to 10 iOS devices.
Remember, then, that when you authorize a Mac in Apple Books, you’re actually adding it to the list of authorized computers and iOS devices for your Apple ID in general. So, when Apple tells you that you’ve authorized your computer, that applies to your Apple ID as a whole. That means when you authorize your computer for Apple Books, it will add to the number of authorized devices for other services under your Apple ID.
Time needed: 1 minute
Here’s how to authorize your Mac in Apple Books.
- Open the Books app on your Mac.
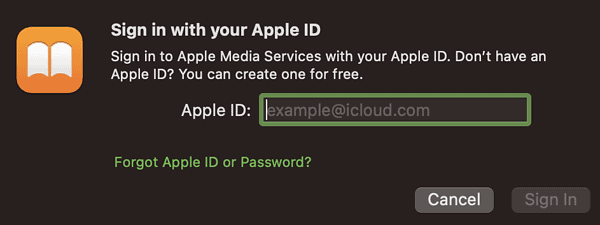
- Sign in with your Apple ID.
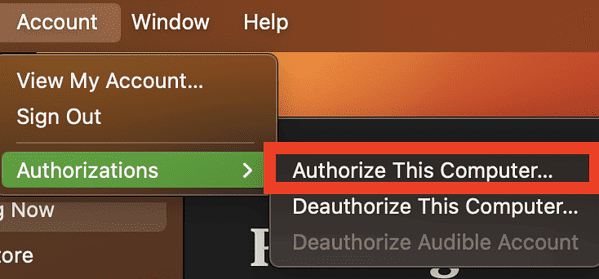
- Choose Account > Authorizations.
- Choose Authorize This Computer.
And that’s it. Your Mac can now download all the books you’ve purchased using any of your Apple devices. If you don’t have a need to remove it from the list, keep your Mac authorized. Apple Books will prompt you to authorize your computer before you can access your previous purchases from the Apple Book Store. If you are selling your Mac or giving it away to somebody else, make sure you deauthorize it first. This will prevent the next user from potentially accessing your Apple purchases such as eBooks. To deauthorize your Mac, go to Apple Books > Account > Deauthorize This Computer.
Why Do You Need to Keep Authorizing Your Mac for Apple Books?
From time to time, Apple Books may prompt you to authorize your Mac when you want to access a book you purchased, and yet you don’t remember deauthorizing the computer. This could mean that the file you’ve downloaded is corrupted. So, you’ll need to authorize your Mac again. If you still can’t access the book, try to delete it and redownload it.
How to Access Your Downloaded Books on iOS and iPadOS Devices and Mac
There are various ways that you can ensure that you can access your book collections on your iPhone, iPad, or Mac. This allows you to switch devices when reading a book, starting your reading from where you left on another device.
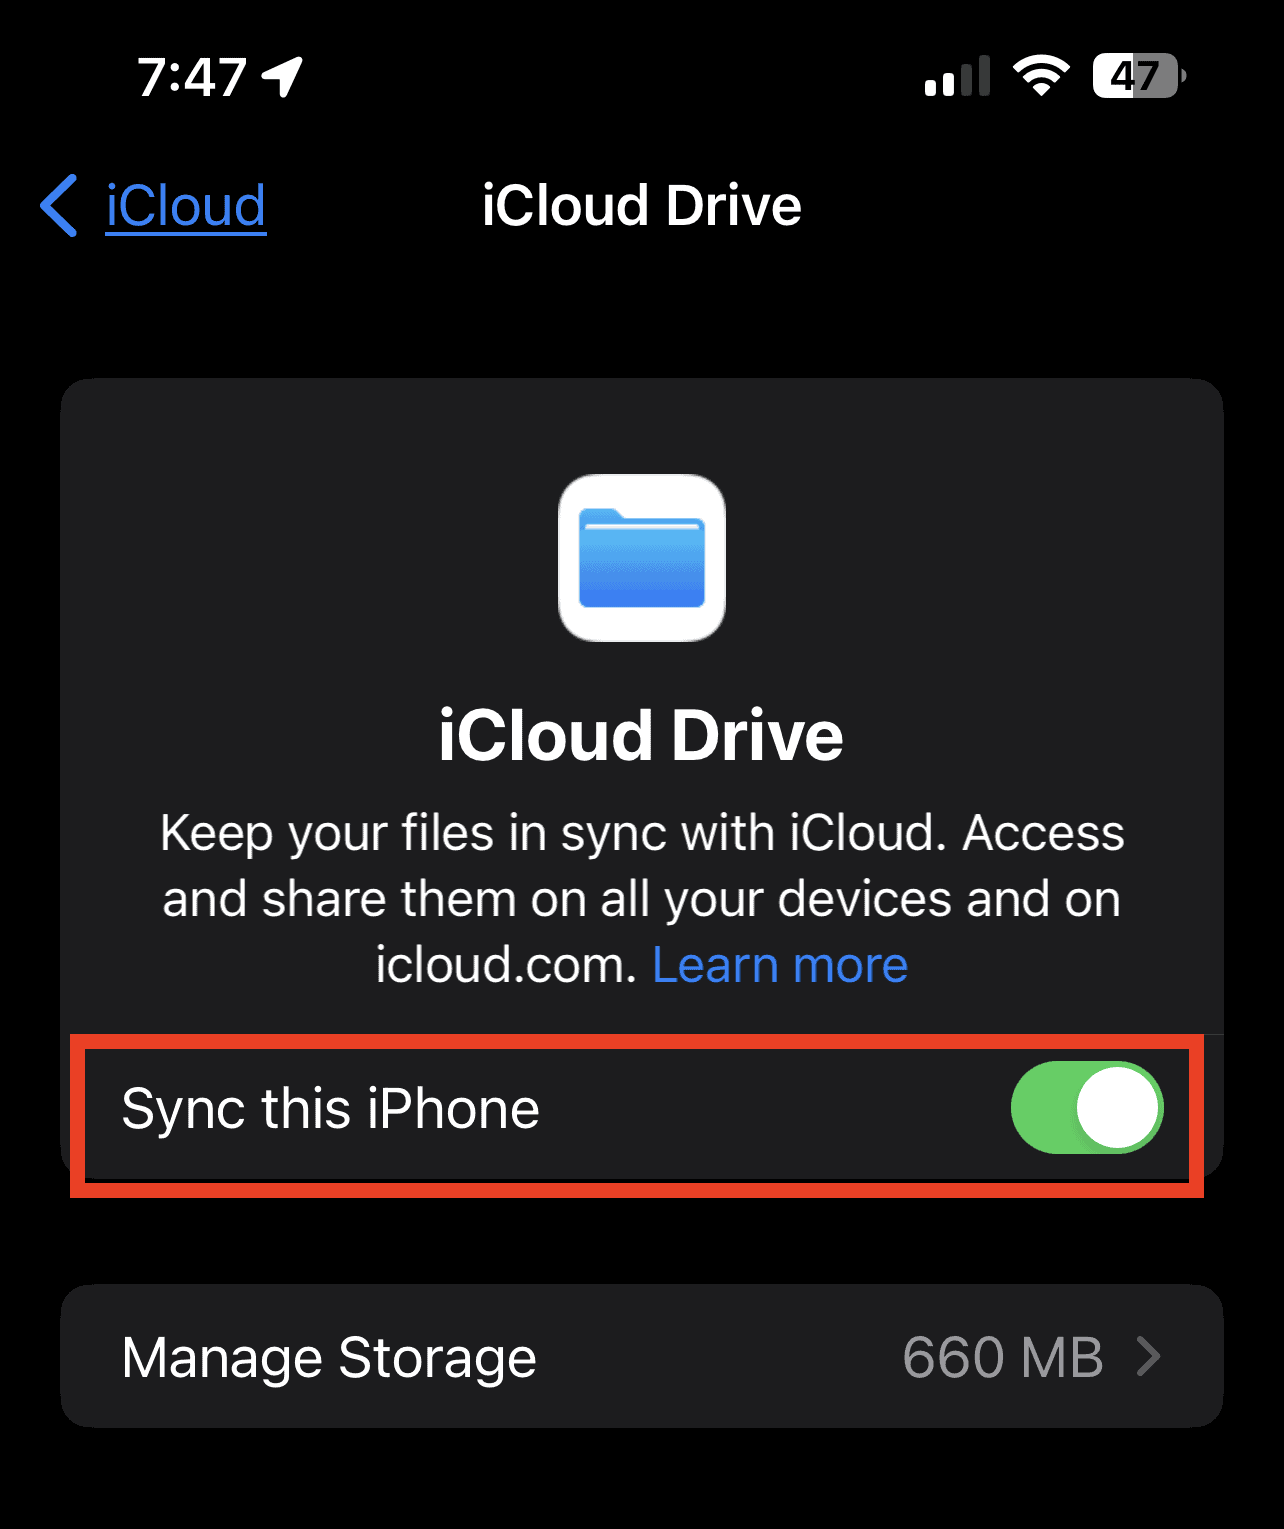
- To sync reading positions, bookmarks, notes, and highlights on your iPhone or iPad Apple Books app, simply go to Settings > Your Name > iCloud > iCloud Drive. Then, enable Sync this iPhone/iPad.
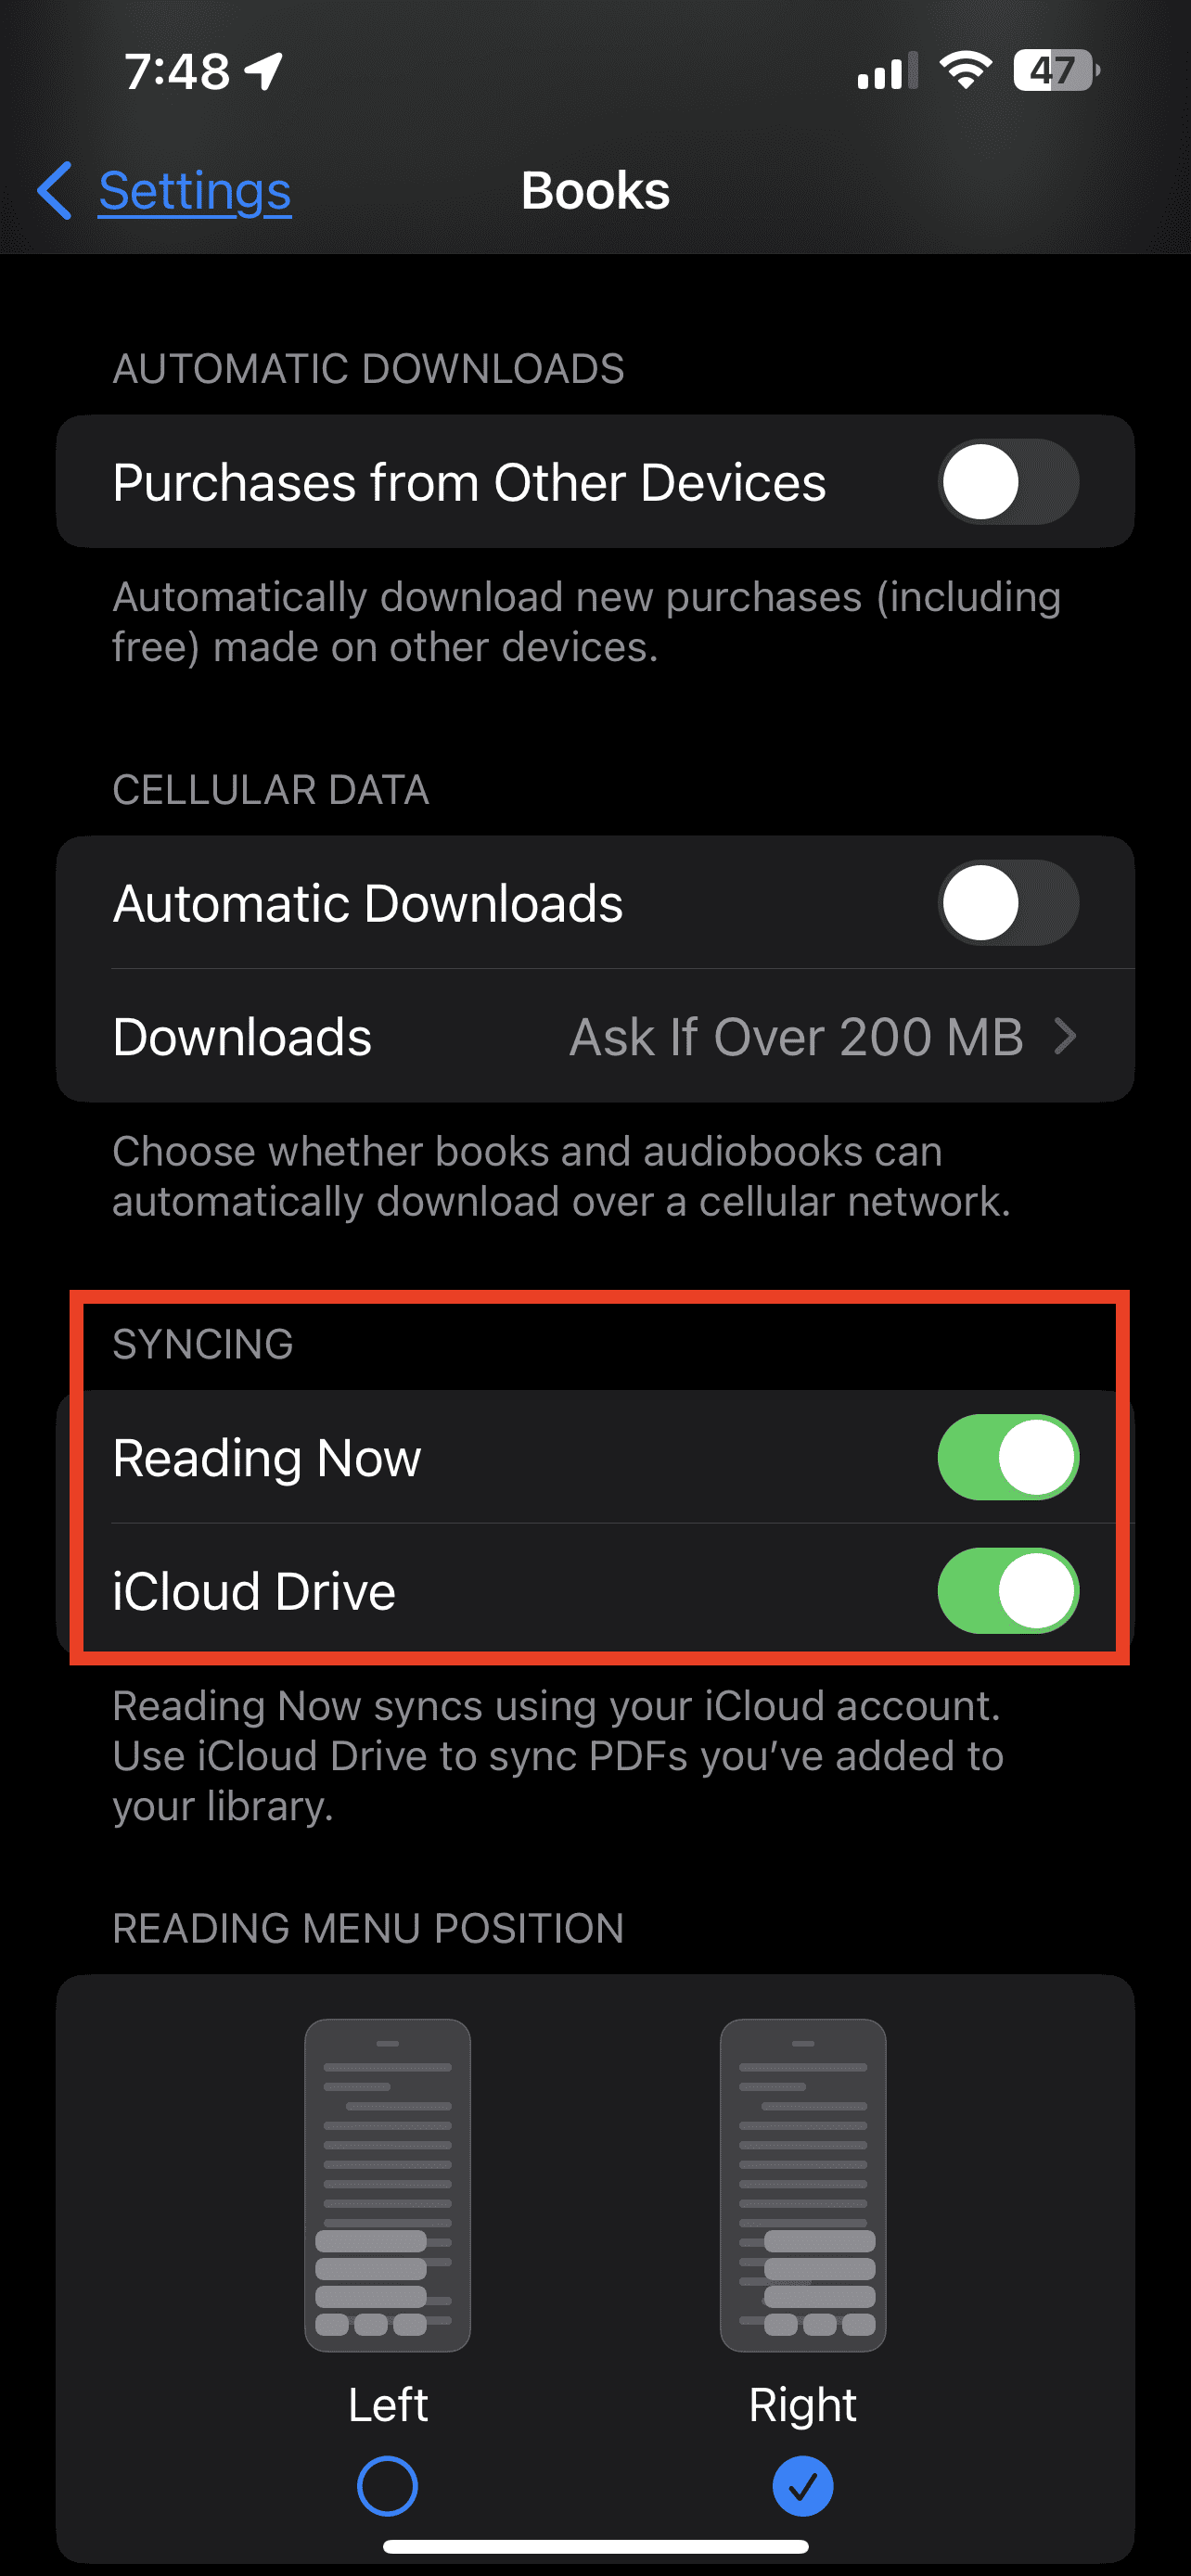
- To sync Reading Now, Library, and collections, enable Settings > Books > Reading Now and iCloud Drive.
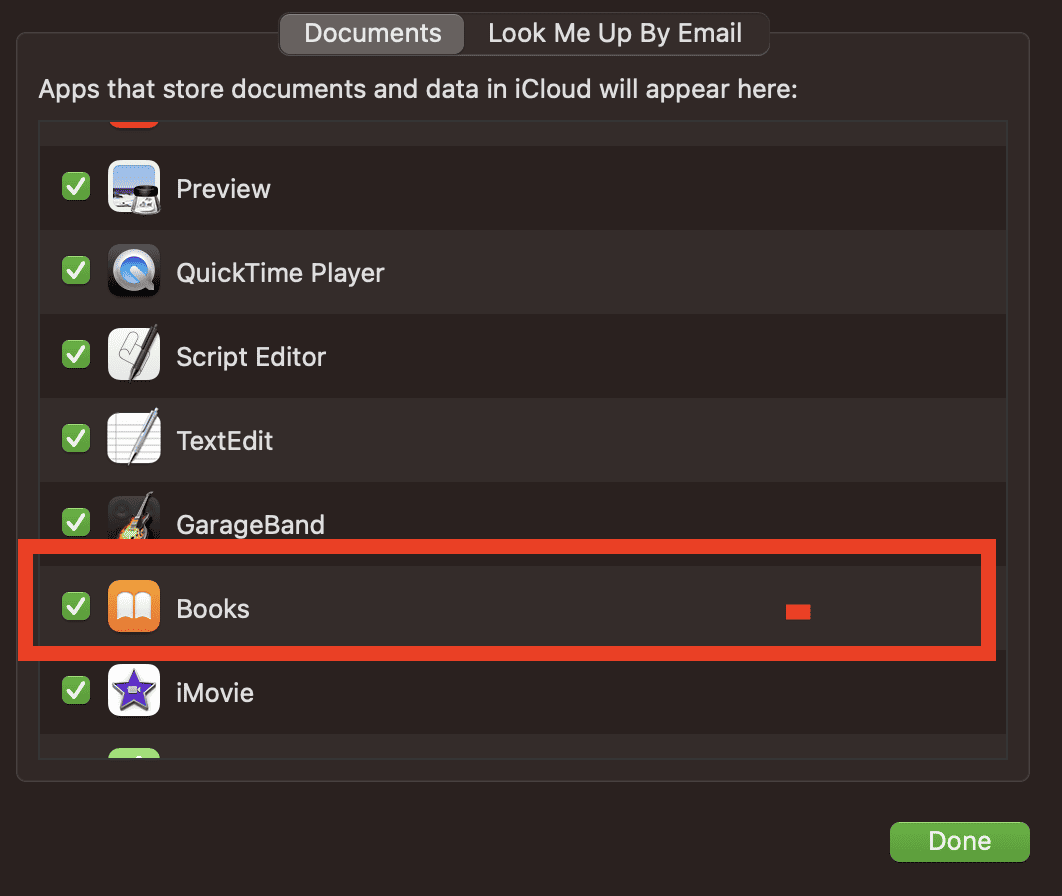
- To access your downloaded books on your Mac, simply go to System Settings > Your Name > iCloud > iCloud Drive > Options. Then, click Documents > Books.

