Taking off an Apple Watch band to change it should be rather simple. However, there are some reasons why this might not always be the case. Additionally, there’s a lot of reasons a user may want to change their band: maybe you found a new one that you simply adore, or maybe it is simply time to change the band in general.
Whatever your reasoning, I’ll show you how to remove your Apple Watch band, as well as some reasons why it may get stuck in the first place.
Before You Begin
When it comes to your Apple Watch band, there’s a few things you should know, especially if you are in the market for a new one. When it comes to buying a new band, make sure that you are buying the one that is appropriate for your Watch. So long as the sizes are compatible, you are able to use a band that’s meant for the first-generation Apple Watch with any other watch, so long as the sizes are compatible.
Essentially, always check the sizes.
When it comes to Watch bands, 38mm, 40mm and 41mm will work with each other. Additionally, 42mm, 44mm and 45mm bands will also work with each other. Lastly, 49mm are compatible with 44mm and 45mm and vice versa.
With this knowledge, you should be able to ensure that you have the band that is right for you. If you are buying a new Watch band for the first time, I would recommend doing it in person, and seeing if the salesperson will allow you to try it before you buy it.
How to Change Your Apple Watch Band
To change the band on your Apple Watch, follow these instructions.
How to change your Apple Watch band.
- To begin, place your Apple Watch face down on a clean surface. Ideally, something that is lint-free, such as a micro-fiber cloth.
- If your band has a Link Bracelet, separate the band into two pieces using the quick release button.
Scroll down for further details.
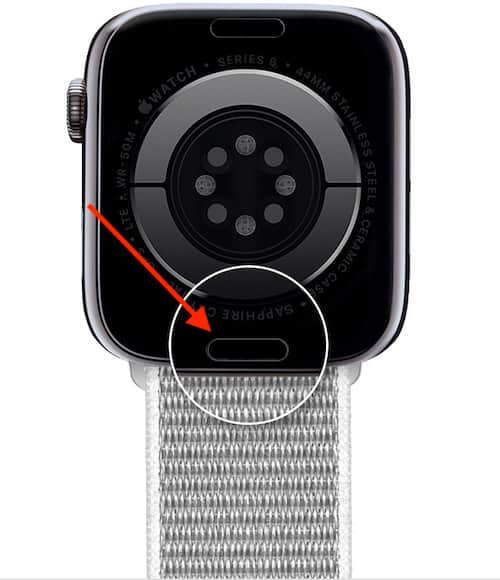
- On the backside of your Apple Watch, you will find a band release button. Hold down this button, then slide your band across to remove it.
You may need to try again, and ensure that you are holding the button down.
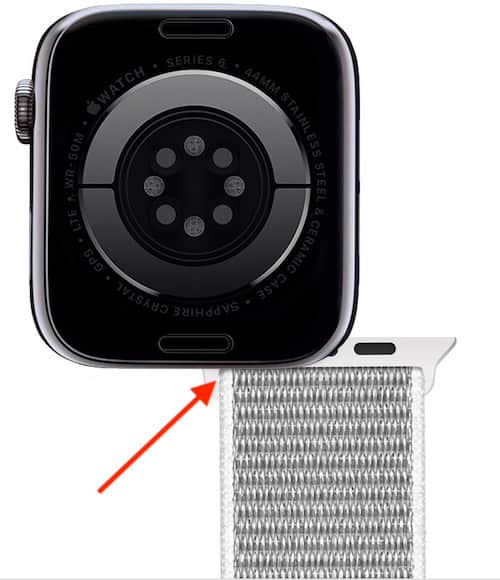
(Photo Credit: Apple.) - When putting on a new band, ensure that the text is facing you when you put it on. Then, slide the band into the Watch until you hear a click.
(Photo Credit: Apple.)
Solo Loops, Braided Loops and Milanese Loops
For those with a Solo Loop or a Braided Solo Loop, you will be able to take off the band by stretching it over your wrist and then sliding it off.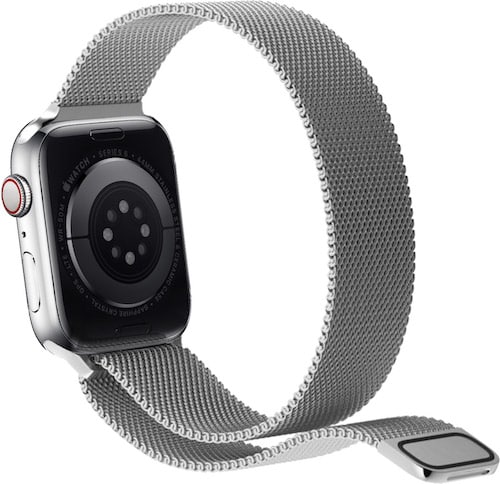
A Milanese Loop. (Photo Credit: Apple)
If you are in possession of a Milanese-Style Loop, since 2018 and beyond, the Milanese loop features a redesign that allows users to open the band by sliding the magnetic closure through the connector, otherwise known as the lug. Earlier models of this band will not have the closure sliding through the lug.
Considering the Apple Watch Ultra
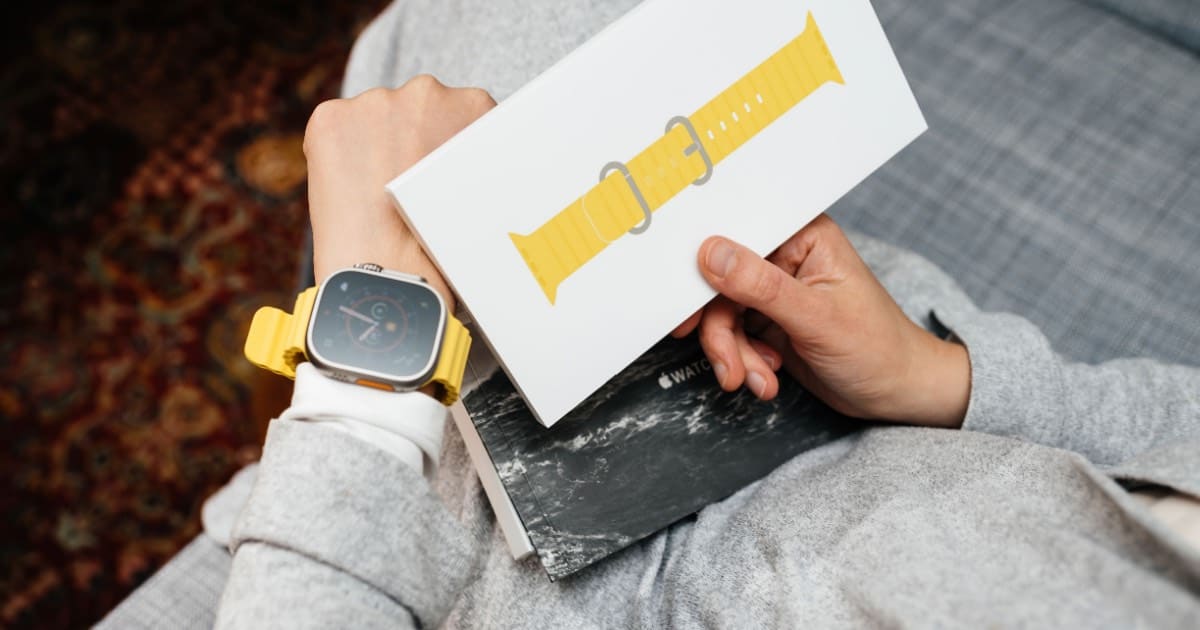
There are also some things users should know if they are using an Apple Watch Ultra. Concerning this device, the Ocean Band, Alpine Loop and Trail Loop are all 49mm that are specific to the Apple Watch Ultra. These specific bands are for strenuous activities, such as running, hiking, kiteboarding, diving and more.
It is important to note that 45mm watch bands will work with the Apple Watch Ultra, but it is highly recommended that you only select them for everyday use. You should also be aware that it is recommended that if you want to use the Braided Solo Loop or the Solo Loop bands with your Ultra, you may need a smaller size than you anticipated due to the largeness of the Ultra. It is highly recommended that you try the bands before you buy them.
Remove a Link Bracelet
If you have a Link Bracelet, you must separate it into two pieces before you are able to remove the band from your Watch. It is highly important to know that when you are removing the band that you are careful not to force or twist the band. This will ensure that you do not damage the band or clasp.
To properly remove a Link Bracelet, follow these steps:
- Close the butterfly closure.
Fold it in, one side at a time, until you feel and hear a click.
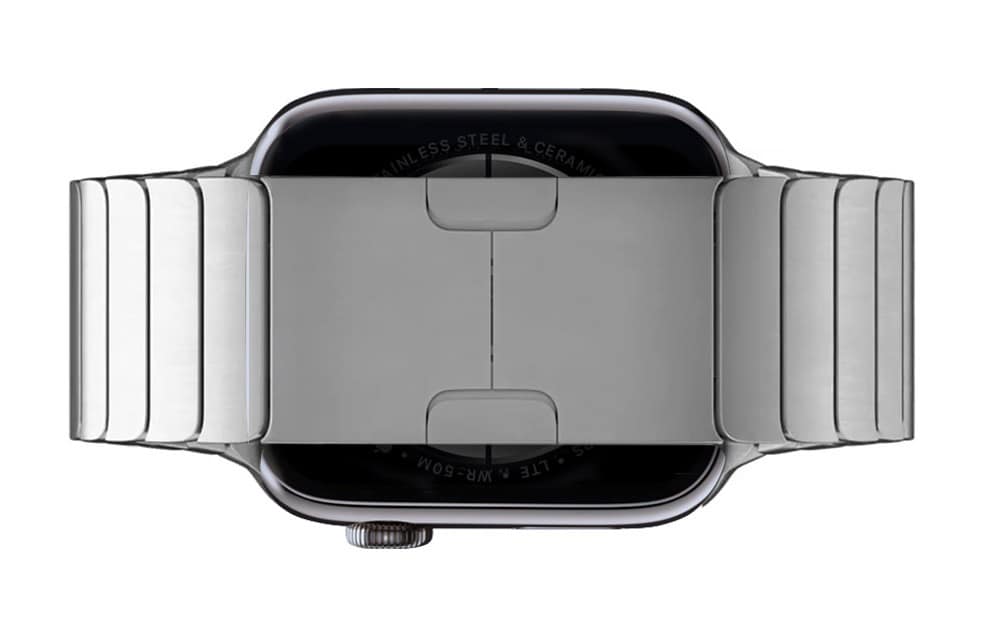
(Photo Credit: Apple.) - Then, hold down the quick release button for the bracelet.
You will find the quick release buttons on the inside of the bracelet. It is only necessary to hold down one.
(Photo Credit: Apple.) - Now, gently pull the links apart.
While pulling on the links, hold down the release button. The band should be separated into two pieces before you remove it from the Apple Watch.
(Photo Credit: Apple.) - To separate the band from the Watch, hold down the device’s release button.
This is the button that is on the device itself, not the release button that separates your links.
(Photo Credit: Apple.)
A Note on Bands and the Apple Watch
It is also important to note that you should never force a band into the slot. If you are trying a new band and don’t hear a click, slide the band left to right. If the band is properly installed, it will not slide until you hold down the release button. Should you find that the band is sliding, do not wear your Apple Watch.
If you are still having issues locking your band, center it and then push it into place. You should also carefully wiggle the band up and down.
What to Do if Your Band is Stuck
At the same time, there may be instances where your Apple Watch band is stuck to the device. This can be a rather typical problem, especially for a device that is so close to your skin. As you continue to wear your device, it is probable that it will start to build-up materials from your skin, causing the underside of your Watch to get dirty.
If your band isn’t separating from your Watch, you may want to try cleaning the underside of your device. To do this, I would recommend using our good friend isopropyl alcohol. With it being relatively easy to find either around your house or at a store, it can be incredibly useful for cleaning the gunk from an Apple Watch. Of course, there are some thing you should know before moving forward.
- Use isopropyl sparingly: a little goes a long way!
- Do not soak your Watch in isopropyl.
Again, a little goes a long way. You will be using a Q-tip to dab the device with isopropyl. - Do NOT use lubricants, such as WD-40. It will make your Watch band smell bad. Isopropyl is safer, though, if you’re not comfortable with isopropyl or don’t have any, warm water is also fine.
Using this method, you should be able to get your Watch band unstuck from the device. To begin, set your Apple Watch on a flat surface, just like you were removing the band in the first place.
From here, dip a Q-tip gently into your isopropyl. Again, do not use a lot. Once you have your Q-tip, gently glide it over the button releases for your band. Try your best to really hit the cracks and crevices of the device.
Once you get it unstuck, it is also wise to clean the area where the band itself resides.
Conclusion: Change the Band on Your Apple Watch
Changing an Apple Watch band can bring a new personality to your device. It can also be useful if you have the Apple Watch Ultra and you want to change your bands from something dressy to something for the extreme outdoors.
Whatever your reasoning, changing the band of an Apple Watch should be easy. However, if you are having difficulties, try out some of these steps to ensure that your Watch band isn’t dirty, or simply not locking properly.
