In an increasingly globalized world, the ability to alternate between languages on your MacBook can prove immensely beneficial. Whether you’re engaging with multilingual content or communicating with international friends, adapting your MacBook’s language settings is an essential skill. Follow along as I show you the step-by-step process of changing the language on your MacBook and how to get back to English, or your previous one.
How Do You Switch Between Languages on a Mac?
Time needed: 2 minutes
To transition between languages on a Mac, you must add the languages you wish to use to your preferred languages list. Following that, you can select which language to use as the system language and which language to use for individual apps. Here are the steps to follow:
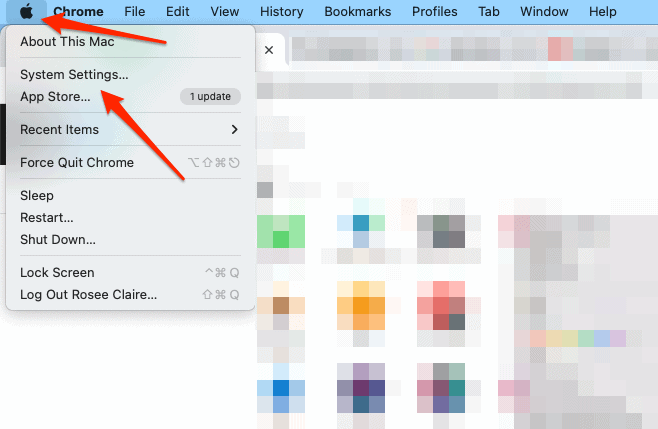
- Go to Apple menu > System Settings.
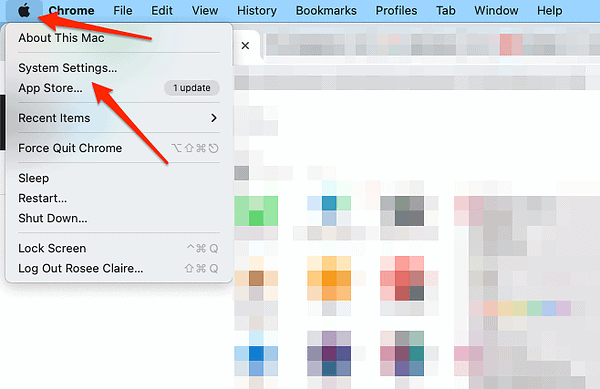
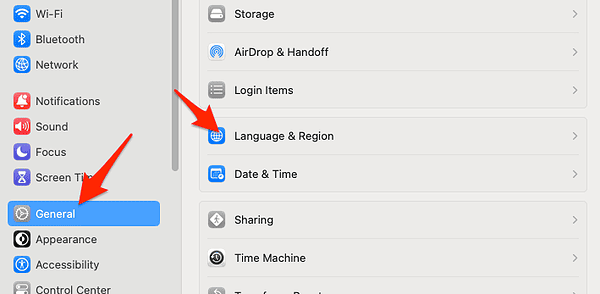
- Next, click General from the sidebar then select Language & Region.
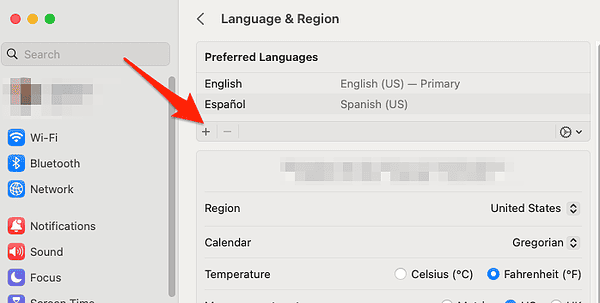
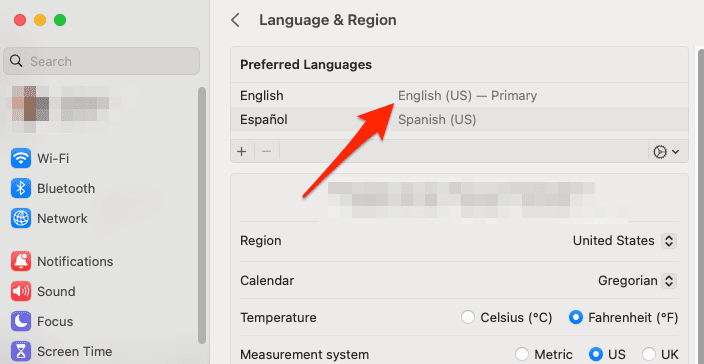
- Under Preferred Languages, click the Add button (+), choose one or more languages from the list, then click Add.
- To change the language on your MacBook, drag a language to the top of the languages list.
If your MacBook or apps support the primary language, menus and notifications will appear in that language. If not, the next language in the list will be used, and so on. - Restart your Mac for the changes to take effect.
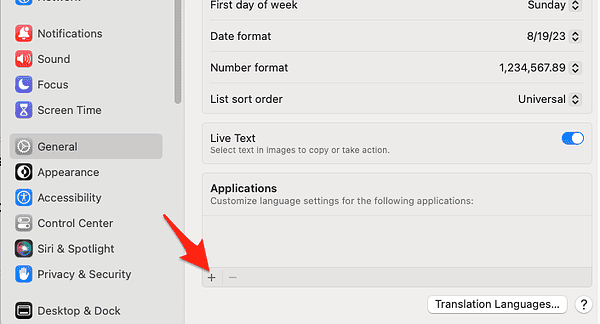
- If you want to change the language for a specific app, scroll down and click the Add button (+). Select the app and the desired language.
- If the app is open, you may need to close and reopen it to see the change.
For an even greater typing experience, check out how to turn on the keyboard light on Mac.
How Do I Get My Mac Back to English?
In case you unintentionally changed your MacBook’s system language and wish to revert it back to English, follow these steps:
- Go to Apple menu > System Settings.
- Click General > Language & Region.
- Under Preferred Languages, drag English to the top of the languages list. You may need to restart your Mac to see the change in all applications.
Another important skill you should master is keyboard shortcuts. Not only do they increase your productivity and efficiency, but they can also relieve the strain that is placed on your wrist from continuous clicking and scrolling. Take a look at our guide on command Y and other keyboard shortcuts you should know to find out more.
How Do I Change the Language on My Mac Keyboard In Windows?
For those who have are running Windows with a Mac keyboard, such as through Boot Camp or virtualization, the steps to change the language are pretty easy. Here’s what to do:
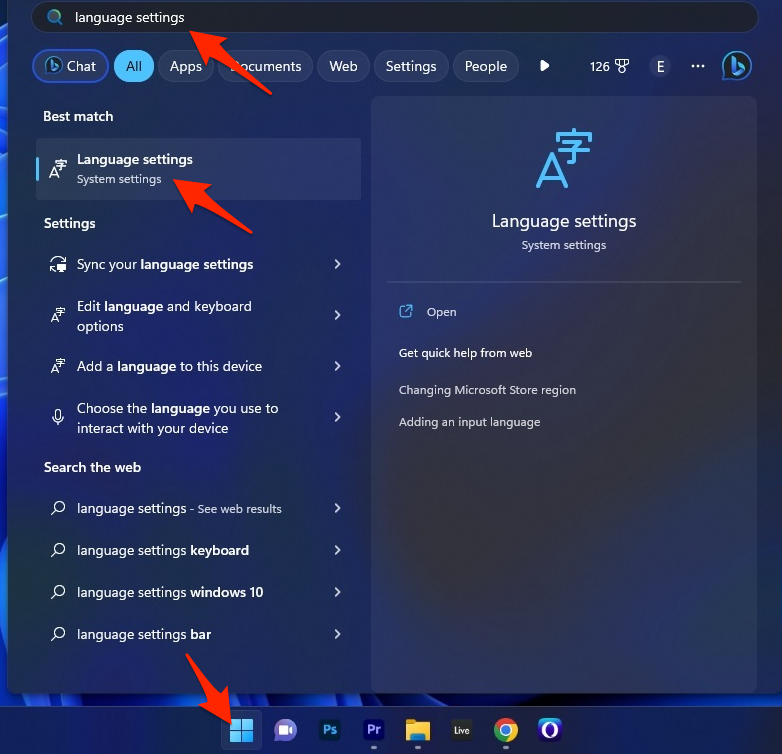
- Click the Windows button then type Language settings and open the first result.
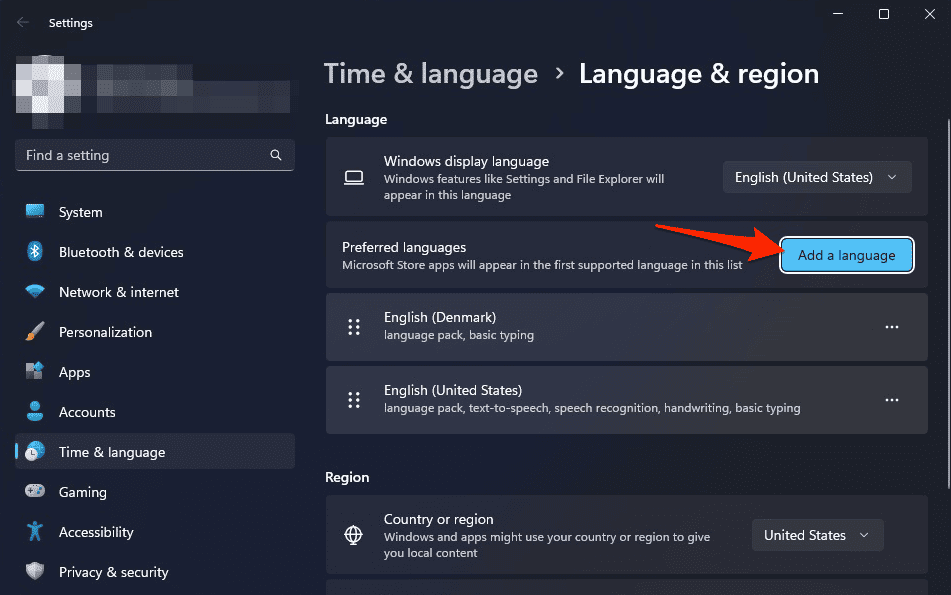
- Next, click the Add a language button then select the desired one.
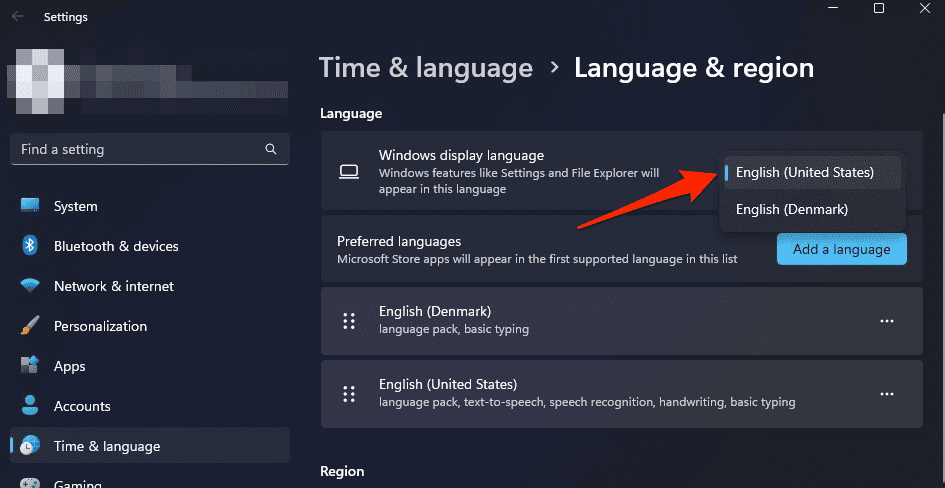
- Lastly, click the drop-down menu next to the Windows display language in order to change the Mac Keyboard language, as well as the display language.
In case you’re looking for ways to get Windows on your MacBook, we’ve got your back! Check out our post on various ways you can install Windows on your Mac to enjoy both OSs to the fullest.
How Do I Change Language Settings?
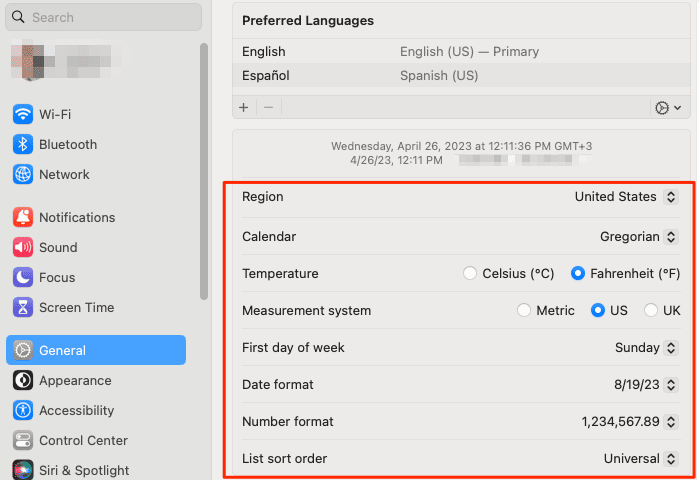
To adjust other language settings on your Mac, such as date format, number format, calendar type, temperature format, measurement system, list sort order, term of address, or translation languages, use the options in Language & Region settings.
Changing your MacBook’s language settings can be an invaluable skill. This article has outlined the necessary steps to switch between languages and address common inquiries regarding language settings. With this knowledge at your disposal, you can confidently navigate your MacBook’s language settings and communicate effectively across linguistic barriers.
For those who want to change their language in order to get access to certain characters, note that you can also find international characters under the emoji keyboard. Thanks for reading!
