Need to fix Chrome not working after macOS 14 Sonoma update? Browser users online are experiencing two issues with Chrome after upgrading to Sonoma, and fortunately, both issues have a solution. While there’s plenty to enjoy with macOS Sonoma, a faulty app isn’t one of them. Whether you’re using an Intel Mac or Apple silicon, there’s an answer for you. Take a look at our complete list of solutions.
How To Fix Chrome Not Working After macOS 14 Sonoma Update
Before looking at more advanced solutions, be sure to try these more simple solutions first.
- Check Google Chrome for an update: Open the app and click the three dots in the top-right corner. Then navigate to Help > About Google Chrome. You will see a software update if one is available.
- If you’re experiencing internet connection issues: try turning off the “Limit IP address tracking” option. Go to System Settings > Network > [Network You’re Using] > Details for this feature.
- You may also try: Some are reporting that downloading the latest version of Chrome and installing it fixed their issue. When downloading it, ensure that you select Replace for your current version.
- Some users may want to consider: moving back to macOS Ventura.
For those that are having issues with Chrome not working after upgrading to macOS Sonoma, there seem to be two major issues users experience: Chrome not connecting to the internet and the app not displaying anything. Let’s take a look at each.
How To Fix Chrome Not Displaying After Sonoma 14 Update
 NOTE
NOTE
Time needed: 10 minutes
If you are experiencing an issue where Chrome is not displaying after moving to macOS 14 Sonoma, uninstalling and reinstalling the app may just do the trick.
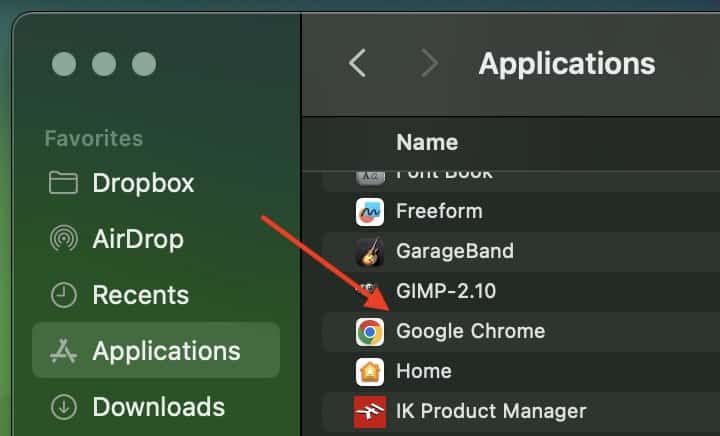
- We’ll uninstall the app first. Find the Google Chrome app.
Note: It is likely in your Applications folder. You can also use the Finder search bar to search for Google Chrome.
- Drag the app to your Trash.
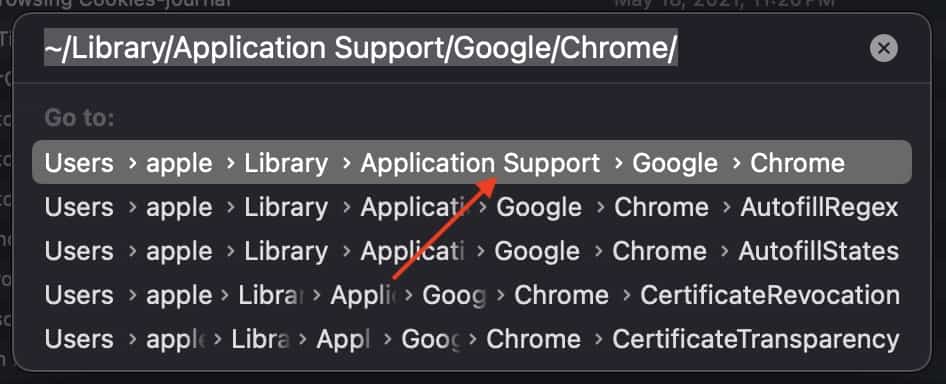
Optional: You may also want to delete your profile information. Navigate to Go > Go to Folder from the menu bar and enter
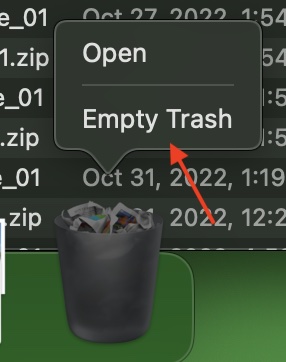
~/Library/Application Support/Google/Chromethen select Go. Select and drag all of the folders to your Trash. - Empty your Trash by right-clicking the icon and selecting Empty Trash. Restart your machine via Apple > Restart from the menu bar.
- You can now install the latest version of Google Chrome.
Note that this process is different from simply reinstalling a fresh copy of the app, as you are removing the previous version.
How To Fix Chrome Not Connecting to Internet After macOS Sonoma Update
 NOTE
NOTE
If you are having issues connecting to the internet with Chrome after the macOS Sonoma update, many are saying that uninstalling the app and installing the beta version of Chrome has helped tremendously.
- First, make sure to quit Chrome. Right-click on the app if it’s in your Dock and select Quit.
- Open Finder and navigate to the folder that contains the Google Chrome app.
Note: It’s likely in your Applications folder. If not, search for Google Chrome using the search field in Finder. - Drag the app to your Trash.
- Optional: you can also delete your profile information. This contains things like your history and bookmarks. From the menu bar, navigate to Go > Go to Folder and enter ~/Library/Application Support/Google/Chrome and hit Go. Select all of the folders and drag them to the trash.
- Empty your Trash and restart your machine.
- You can then install the latest Google Chrome Beta software.
Why Is Chrome No Longer Working On My Mac?
Most of the time, Chrome is not working on your Mac because you need to update the app. Clicking the three dots in the top-right corner of the app and navigating to Help > About Google Chrome will let you know if you need an app update. It may also be a small bug or glitch that’s giving you issues. Concerning the upgrade to macOS Sonoma, there may be an issue in the upgrade itself causing a problem.
Conclusion
While it is likely that this issue will be fixed in a future update, users may want to know what to do if Chrome isn’t acting appropriately. Though going back to an earlier version of macOS may be a solution for some, others will likely want a more direct solution. Fortunately, installing a different version of Chrome or reinstalling Chrome seems to do the trick.
If you have any solutions we missed or any feedback you want to provide on macOS Sonoma or Google Chrome, let us know in the comments.


