Recents folder on Mac is a great way to access the files you last worked on before closing your Mac. As useful as it is, at times, it can cause problems too. Especially, if you’re presenting your screen to your colleagues, etc. I’m sure none of us want to reveal what we do on our computers to others. Read along to learn how to clear the Recents Folder on Mac.
What is the Recents Folder in macOS
There are many options like Applications, Desktop, etc., under Favorites in the sidebar of the Finder. Any apps, folders, or files located within these options are stored in these locations. However, any file or folder located within the Recents or Recent Folder is not stored in it.
The Recents Folder is just a smart folder (using built-in Spotlight Search) that displays recently accessed files or folders. However, if you delete any of the contents from the Recents Folder, you will delete it from the storage.
So, even if the Recents Folder is cluttered with files you don’t want to be displayed, you cannot delete these files. However, you can follow certain steps to hide the Recents Folder altogether.
How to Clear Recent Folders on Mac Finder Menu Bar
Time needed: 1 minute
Steps to clear Recent Folders on the Finder menu bar
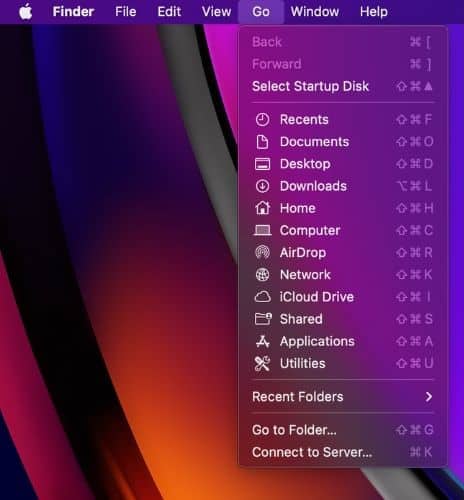
- Click the Go option on the Finder menu bar on your Mac.
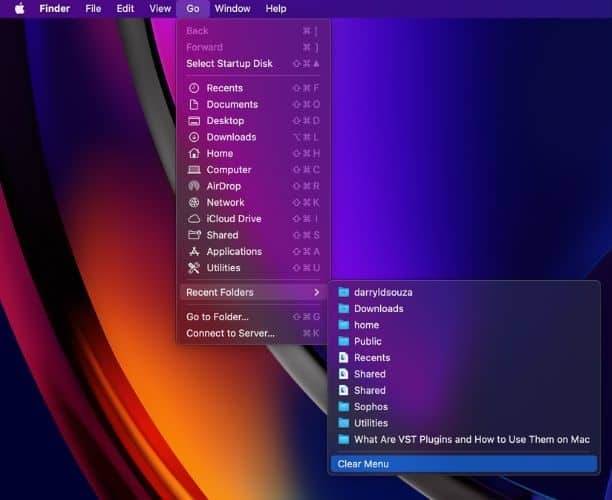
- Select the Recent Folders option from the list and click the Clear Menu option.
You’ve successfully cleared all the files and folders from the Recent Folders list.
How to Clear Recents in Finder Sidebar
Does your Mac open the Recents tab whenever you open a new Finder window? You’re not alone as that is Finder’s default setting. If you go out with your Mac or do not want anyone poking their nose in your business, removing the Recents Folder from the Finder sidebar is the best option. So, you no longer have to Clear Recents or the Recents Folder on Mac. Rather, you can get rid of it for once and for all. Here’s how to remove the Recents Folder from the Sidebar on Mac.
1. Open Finder on your Mac.
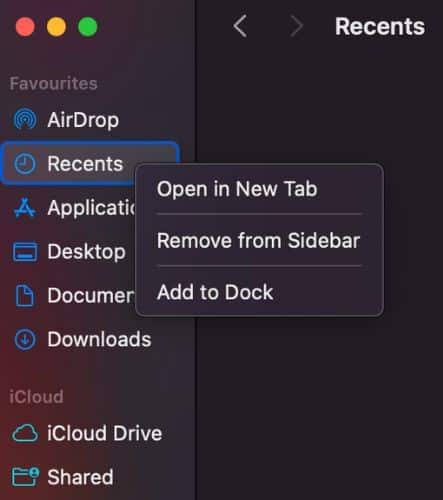
2. Control-click or right-click the Recents option from the sidebar and select the Remove From Sidebar option.
However, the Recents Folder makes files quickly accessible, and not everyone might like the idea of removing it from the sidebar altogether. So, if you want to keep the Recents Folder in the Finder sidebar, but do not want to land on it every time you open a new Finder window, follow the below steps to change the default settings.
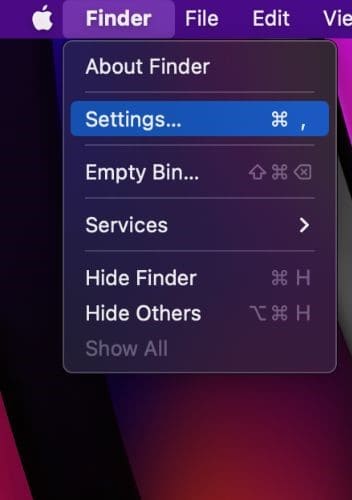
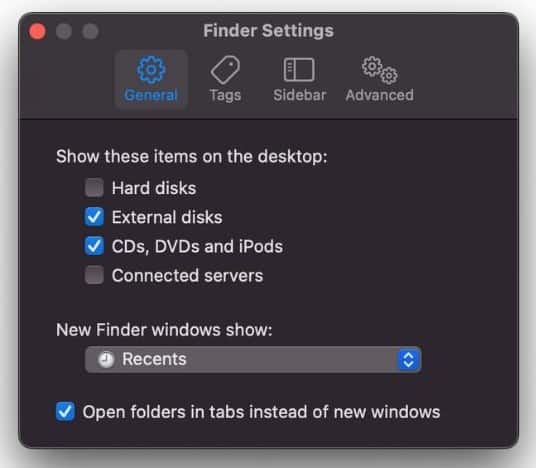
1. Click the Finder option in the Finder menu bar on your Mac.
2. Select the Settings option from the list.
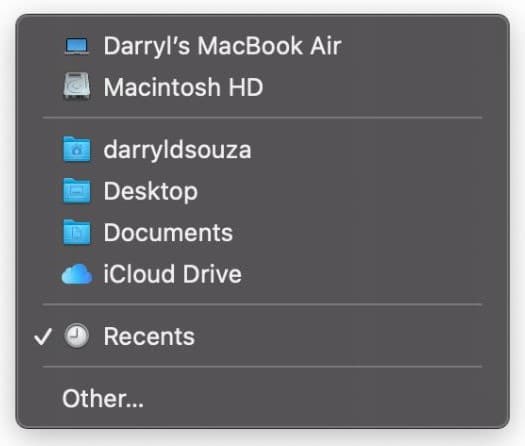
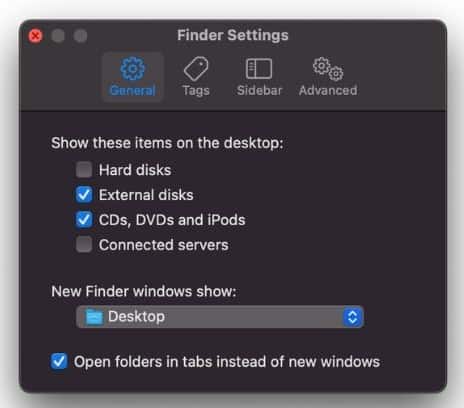
3. Now, head to the General tab and click the drop-down list below the New Finder windows show: option.
4. Here, select any option from the list else apart from Recents.
5. Once you’ve made the change, click X to close the Settings window and save the changes.
How to Prevent Files and Folders From Appearing in the Recents Folder on Mac
Another approach towards preventing files and folders from appearing in the Recents Folder is to deny access to your device’s Storage to Spotlight. In doing so, you will revoke access from Spotlight and it won’t be able to search and index your latest activity in the Recents Folder. You won’t have to clear Recents or the Recents Folder on your Mac at all. Here’s how you can prevent Spotlight from accessing your primary hard drive (Mac Storage).
1. Open System Settings on your Mac.
2. Click the Siri & Spotlight option from the sidebar.
3. Now, scroll down on the right and click the Spotlight Privacy button.
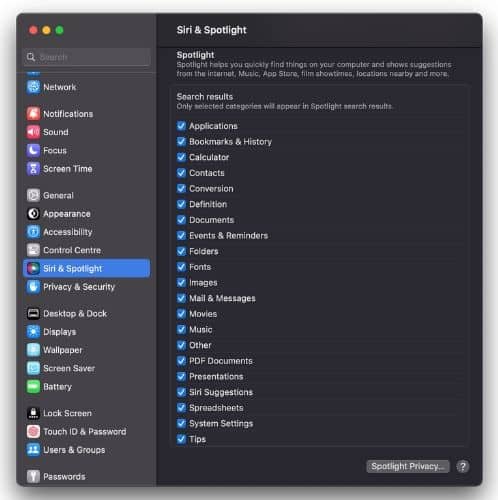
4. On the pop-up, click the + Add button.
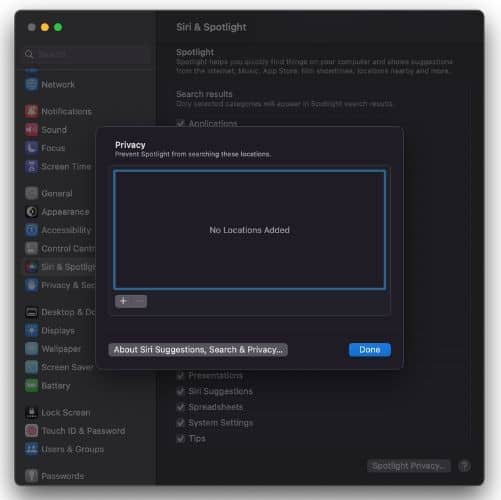
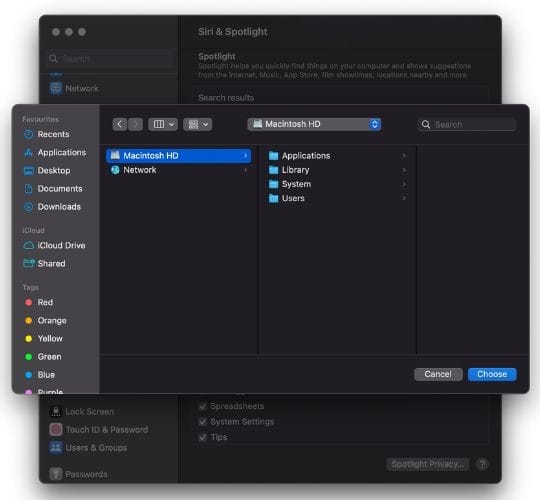
5. Click the drop-down list at the top of the window.
6. Browse your Mac and select the Macintosh HD option and click the Choose button.
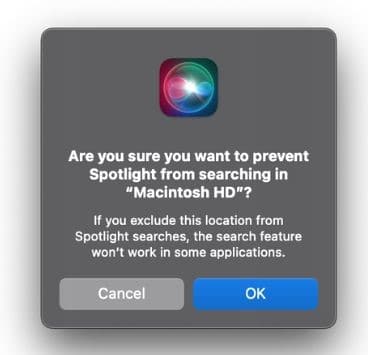
7. Click OK on the pop-up to confirm your selection.
8. Finally, click the Done button to save the changes.
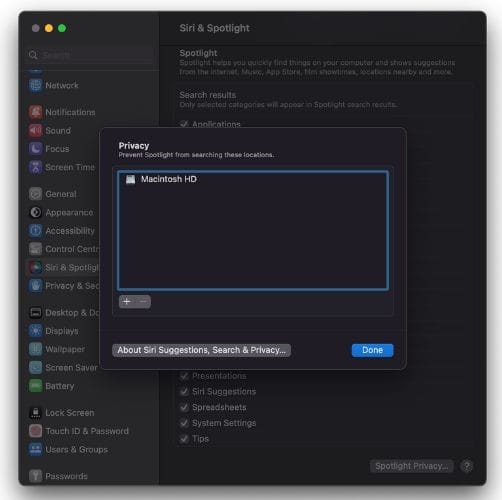
You can also deny access to Spotlight to an individual folder using the same steps instead of the entire storage. It will ensure that only files from a certain folder won’t be displayed in the Recents Folder but everything else will.
Other Ways to Clear Recents Folder on Mac
Apart from the above-listed methods, there is another method using which you can hide files on your Mac. All you have to do is rename the file and add a “.” before the file name. Doing so will hide the files from Spotlight and these files won’t appear in the Recents Folder.
However, the downside of using this method is that you must remember the file’s location to access it. While you can even use the Command + Space + “.” shortcut to access these files, it becomes a lengthy process. Moreover, you must rename these and remove the “.” to open a file. Since that is a lot of work, we do not recommend it. However, you can surely give it a try if it suits your needs.
FAQs
Click the Go option in the Finder menu bar > Click Recent Folders > click Clear Menu and done. You’ve successfully cleared your Finder history on Mac.
Click the Apple Logo in the menu bar > Click Recent Items > scroll down and click Clear Menu. You’ve successfully cleared recents in Finder on Mac.
Follow these steps to exclude a folder from Recents on Mac.
Open System Settings on your Mac > Click Siri & Spotlight > Click Spotlight Privacy > Click + Add button > Select the folder you want to exclude from Recents > Click Choose > Click OK > Click Done.
The Recents Folder is the default configuration of the Mac Finder. So, whenever you open the Finder, it will display the contents of the Recents Folder. To change this setting, follow the steps mentioned below.
Click the Finder option in the Finder menu bar > Click Settings > Click the General tab > Click the drop-down list below the New Finder windows show: option and select any option from the list else apart from Recents > Click X to close the Settings window and save the changes.

