The iPhone camera is an excellent and convenient tool for capturing high-quality photos. I would confess that it has replaced my heavy DSLR camera whenever my family goes on trips. As the saying goes, the best camera is the one that’s always with you. And yes, my iPhone is always with me. Since we’ve established that the iPhone camera is excellent as it is, it’s now up to us to use it properly when taking photos.
More often than not, though, we make mistakes when taking photos. One of those mistakes is capturing the subject off-center. Thankfully, you can easily edit your photo to correct the subject’s framing. That’s where knowing how to crop photos on the iPhone comes in handy. Read along to learn two methods of cropping photos on your iPhone.
How to Crop Photos on iPhone Using Preset Options
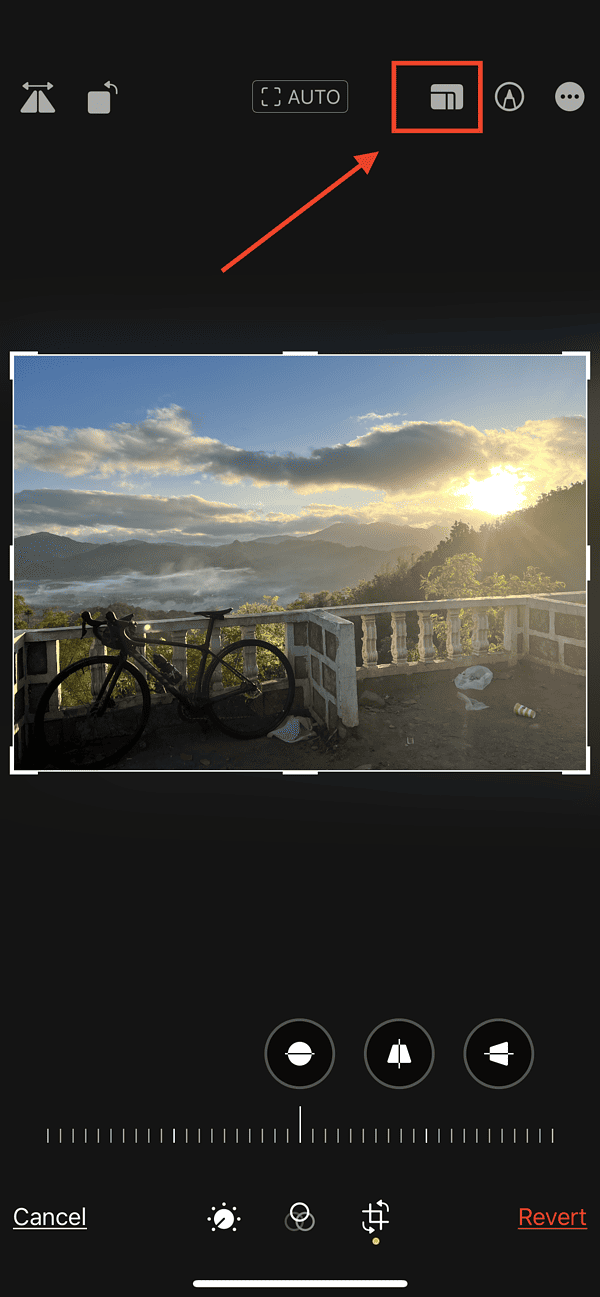
When it comes to cropping their photos, many iPhone users probably do so manually. There’s nothing wrong with that. But there is another way of cropping photos on your iPhone. See the steps below to crop your iPhone photo using the preset crop icon (the square with two arrows circling it).
Time needed: 1 minute
Here’s how you can crop photos on your iPhone using preset aspect ratios.
- Open the Photos app on your iPhone.
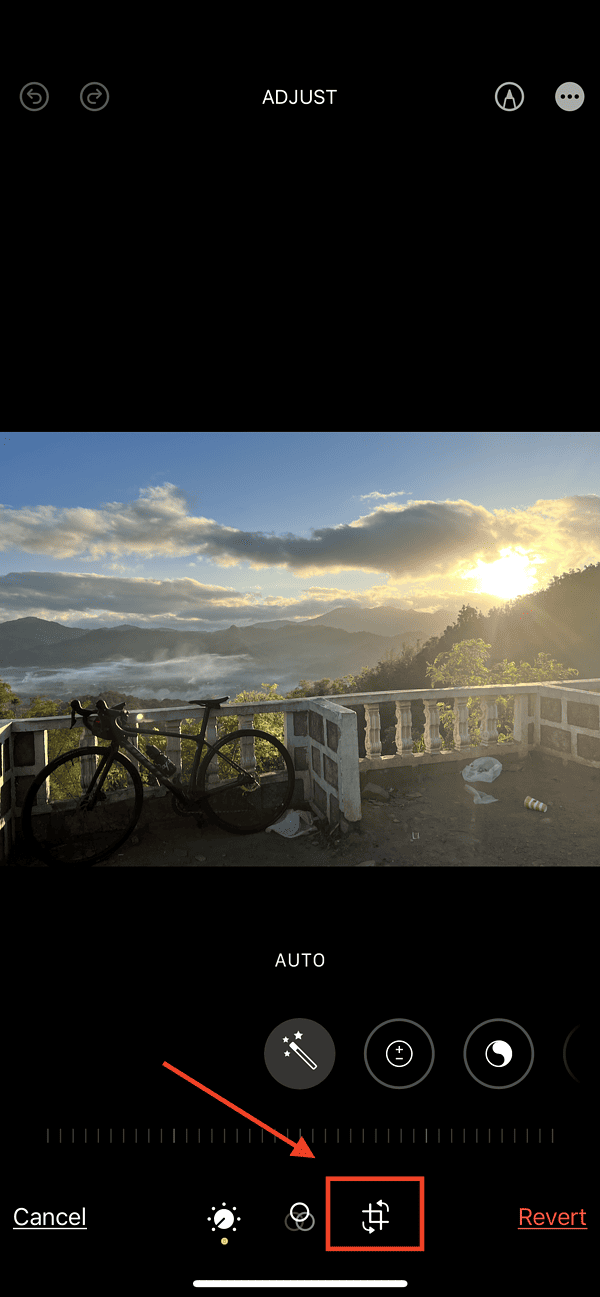
- Select the photo you want to crop, then tap Edit.

- Next, tap the Rotate/Crop icon.
- Tap the Preset Crop icon, then tap on the preset aspect ratio that you want to use.
- If you don’t want the cropping you did, tap Revert.
- Tap Done when you’re satisfied with the cropping.
How to Crop Photos on iPhone Manually
Next is the method used by many iPhone users to edit photos. If the first method doesn’t give you the results you’re looking for, you can try cropping photos on your iPhone manually.
- Open the Photos app on your iPhone, then select the photo you want to edit.
- Tap Edit.
- Tap the Rotate/Crop icon.
- Drag the rectangle corners to enclose the area you want to keep in the photo. You can also pinch in or out on the photo. This will adjust the zoom level so you can fine-tune the cropping.
- Tap Done.
You should note that when cropping photos on your iPhone, you can only remove parts from the four corners of the subject. You are not completely removing the background of the subject. If you want to completely crop something out of a picture on your iPhone, follow the steps in the next section.
How to Crop Something Out of a Picture on iPhone
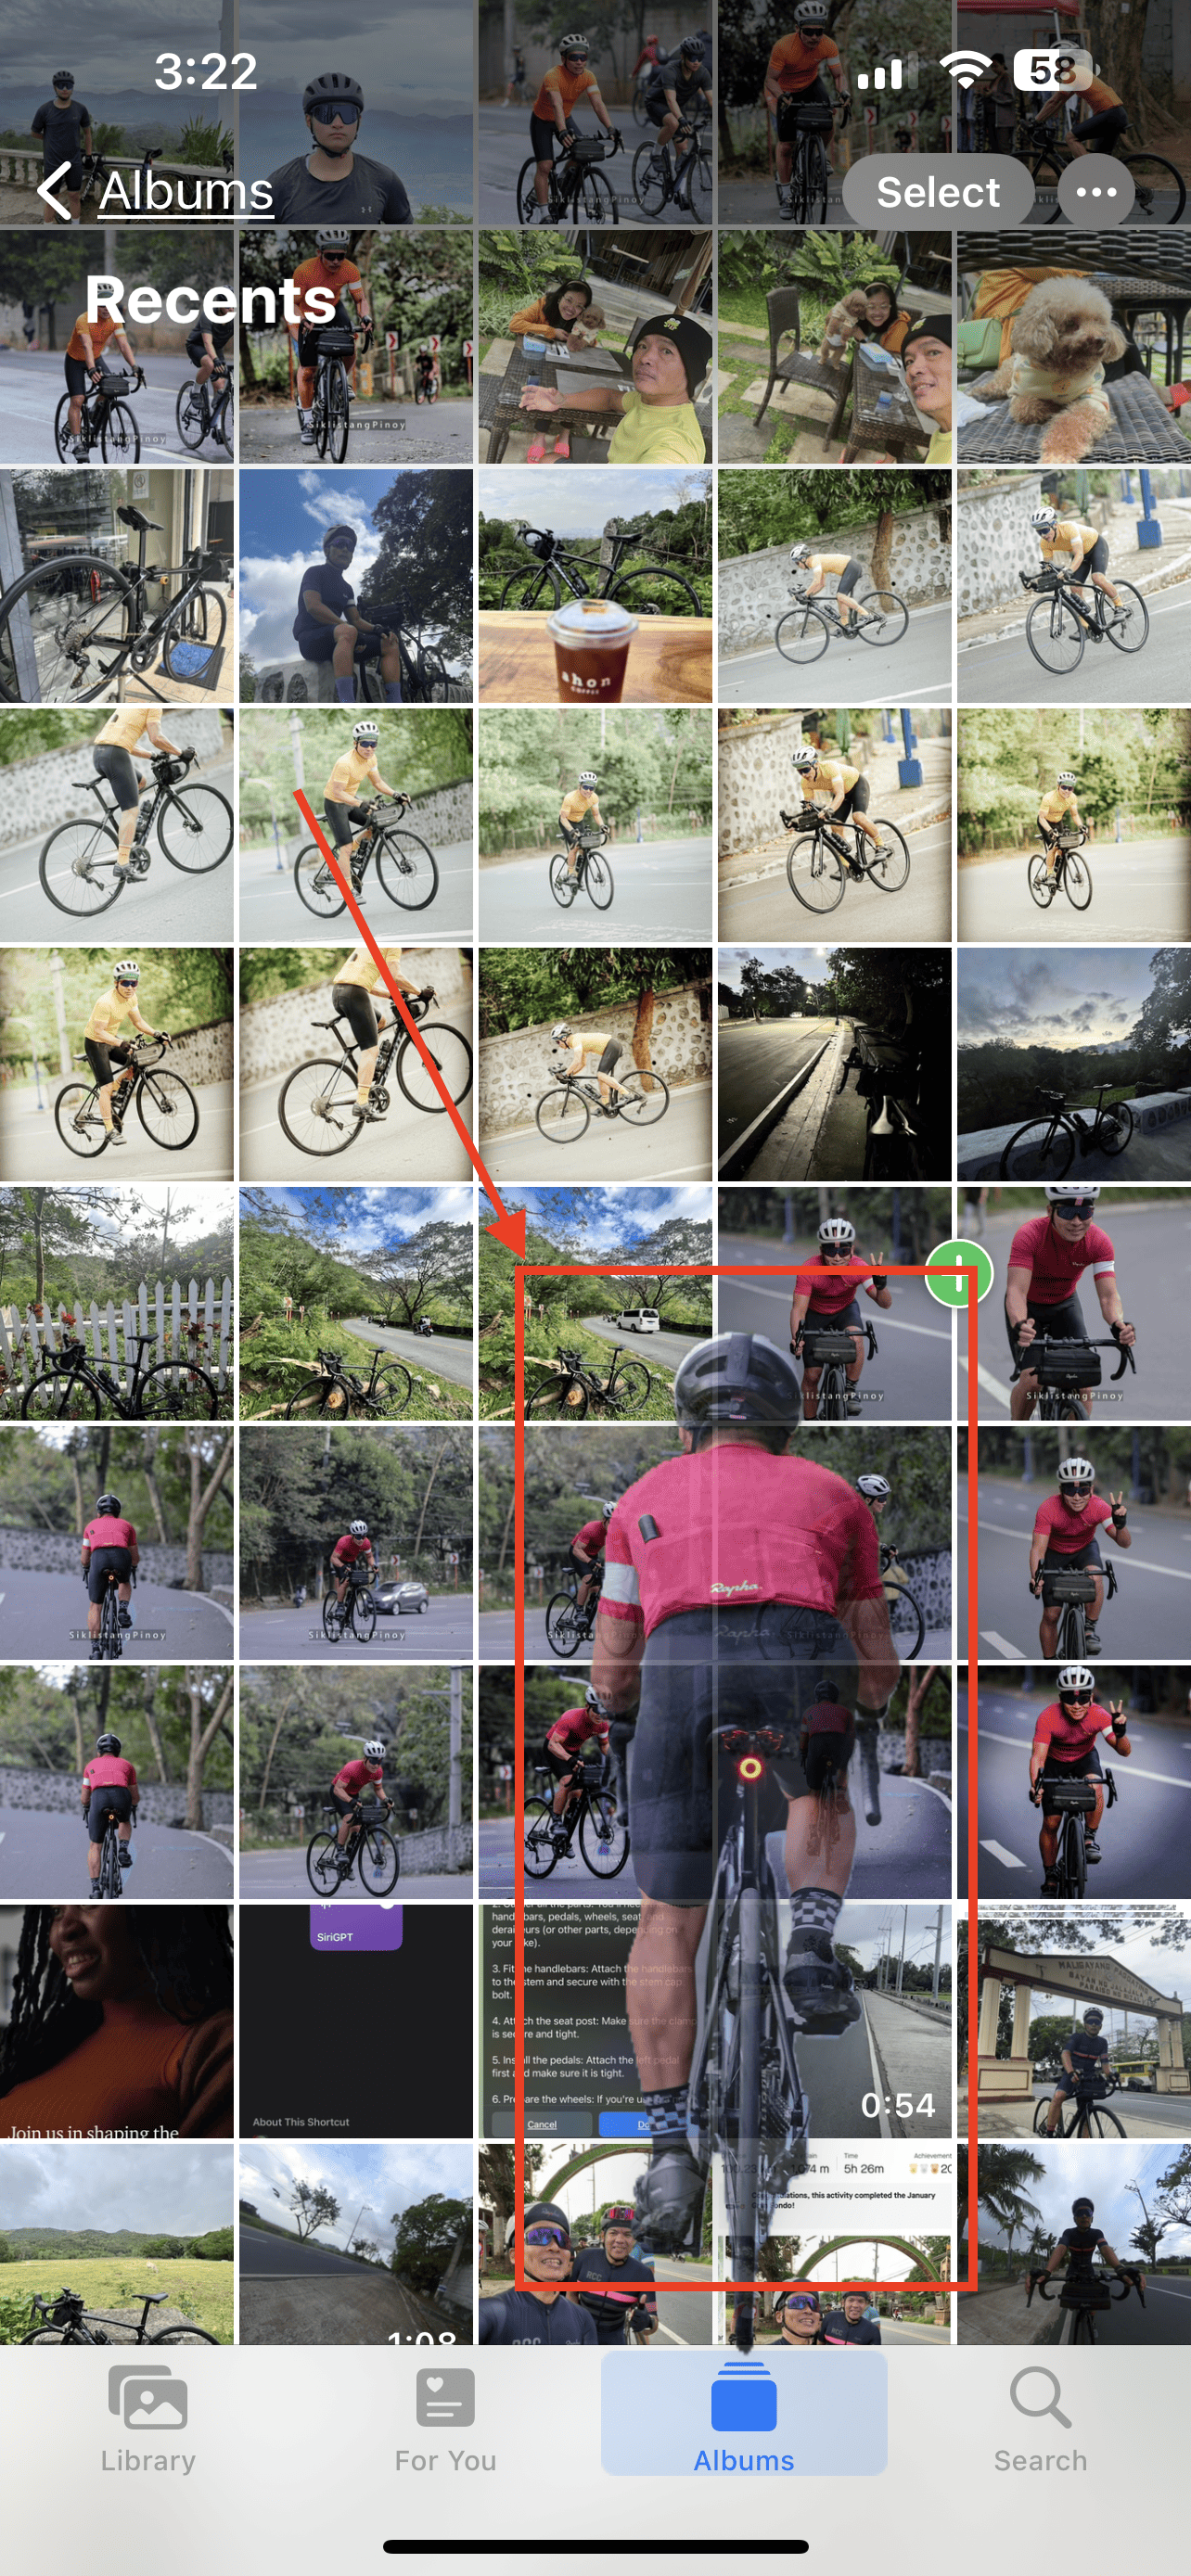
In iOS 16, Apple rolled out a new feature that lets users crop out the subject from a photo. Called the iOS 16 photo cutout feature, this lets you cut out part of a picture. By that I mean, those parts of the image that are not part of the subject. The nice thing about this feature is that it’s very easy to use. Note that it will only work if your iPhone is running iOS 16 or later.
Follow the steps below to crop something out of a picture on iPhone.
- Open the Photos app, then select the photo you want to cut the subject out of.
- Tap and hold on to the subject until you see an outline animation.
- When the subject lifts up from the background, use your second finger to minimize the Photos app and open another app.
- Release your finger to paste the cropped subject to the newly opened app.
You can also save the cropped subject into the Photos app as a new photo. While holding down the cropped subject, swipe down on the photo to close it. Next, lift your finger holding the subject to save it automatically into the Photos gallery.
Final Words: Using Third-Party Apps to Crop Photos on iPhone
Aside from the methods of cropping photos on the iPhone mentioned above, you can also use other third-party apps, such as Adobe Lightroom, to do the job. It’s a program that helps you not only crop photos but professionally edit them as well.
However, if you don’t want to install a third-party photo editor on your iPhone, then the Photos app’s tool should be enough.
However, if you want to crop and resize photos on your iPhone, I’m afraid you’re going to have to use third-party apps. The iPhone Photos app can only let you crop a photo and change its aspect ratio, not resize your image.


