Dolby Digital output turns your Apple TV 4K into a theater. It delivers rich, multi-channel audio with formats like Dolby Digital 5.1 and Dolby Digital Plus 7.1 that seamlessly integrate with soundbars and AV receivers. It’s reliable for the most part. But when glitches arise, troubleshooting can be confusing. It’s tough to pinpoint whether the problem lies with your Apple TV, external audio setup, a recent tvOS update, or even the streaming app itself.
If you’ve already confirmed that your equipment is compatible, software issues could be the culprit. Anything from tvOS update bugs to misconfigured settings can disrupt audio output. Follow these targeted troubleshooting steps to save time and get your Apple TV 4K’s Dolby Digital output back to its immersive best.
Why is Dolby Digital Output Not Working on Apple TV 4K?
Dolby Digital output typically fails on Apple TV 4K due to tvOS 18 bugs, audio settings misconfigurations, or app limitations. They disable surround sound and default to stereo. Physical issues like faulty HDMI cables and malfunctioning audio equipment can also disrupt signal transmission and further impact audio quality.
What to Do if Dolby Digital Output is Not Working on Apple TV 4K
1. Turn Dolby Atmos off and on Again
Time needed: 2 minutes
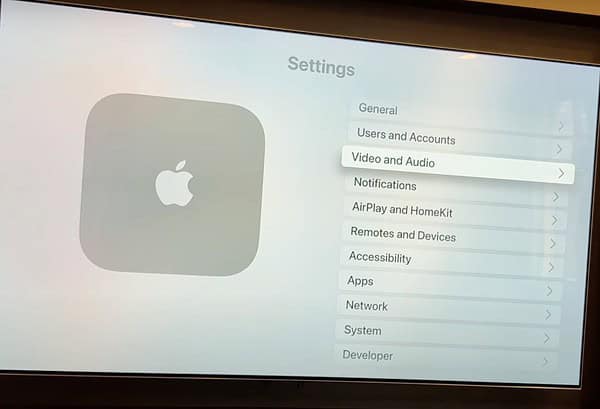
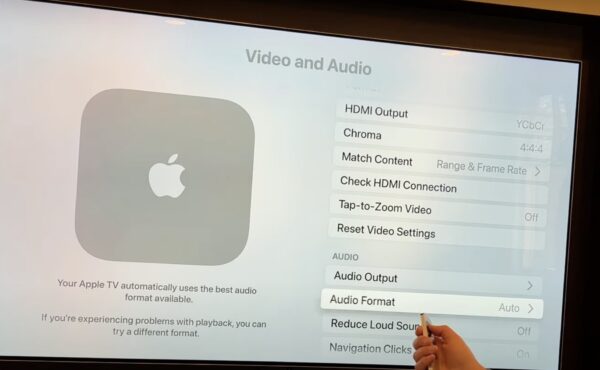
Turning Dolby Atmos off and back on is a quick way to recalibrate your audio settings. tvOS updates may occasionally jumble settings involving advanced audio formats. They cause minor miscommunications between Apple TV and external sound systems. A quick restart is a simple way to resolve minor glitches. Follow these steps:
- Navigate to Settings > Video and Audio.
Image Credits: Techtusiasm - Select Audio Format.
- Toggle Dolby Atmos off, then back on.
2. Check HDMI Cable Quality and Connection
Dolby Digital requires a steady, high-speed connection to relay audio without interruptions, and even minor wear can hurt audio quality. Issues often arise with older or substandard cables. Check for physical signs of damage, and if you find any, consider upgrading to a compatible, HDMI-certified cable.
- Test if the HDMI cable is securely connected to the Apple TV 4K and your audio receiver.
- Inspect the cable for any signs of wear or damage.
- Consider using a high-speed HDMI cable that supports Dolby Digital formats.
3. Select the Correct Audio Output Device
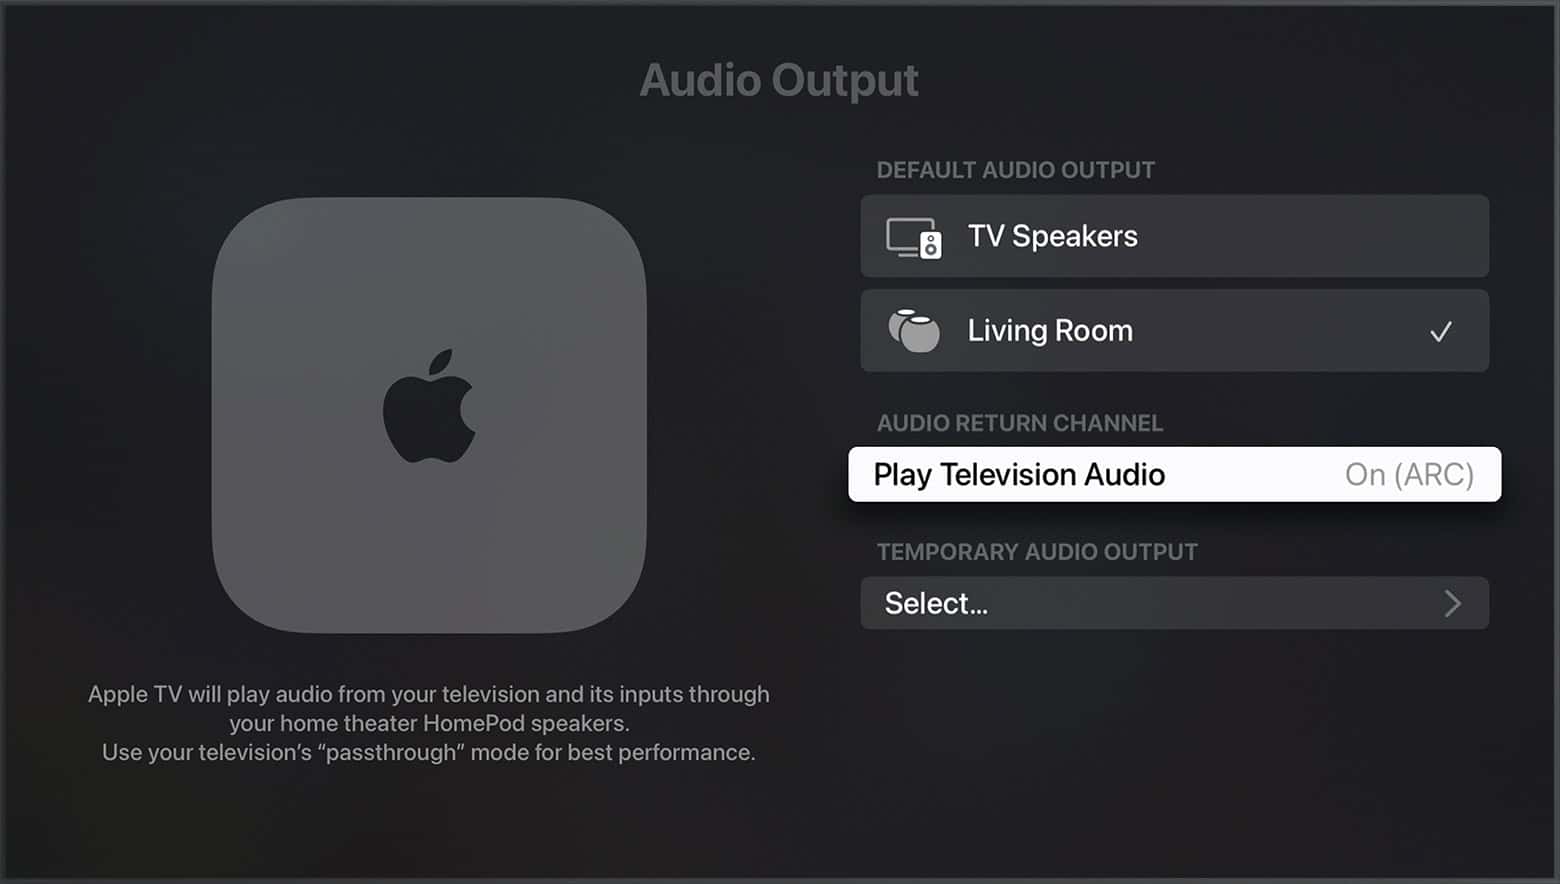
Sound might default to another connected system if you don’t set your Apple TV to output audio through the intended source. It’s easy to overlook this setting when switching between output modes (e.g., soundbars).
- During playback, swipe down on the remote to access the Info panel.
- Navigate to the Audio section.
Image Credits: Apple - Confirm that the desired audio output device is selected.
4. Manually Set Audio Format to Dolby Digital 5.1
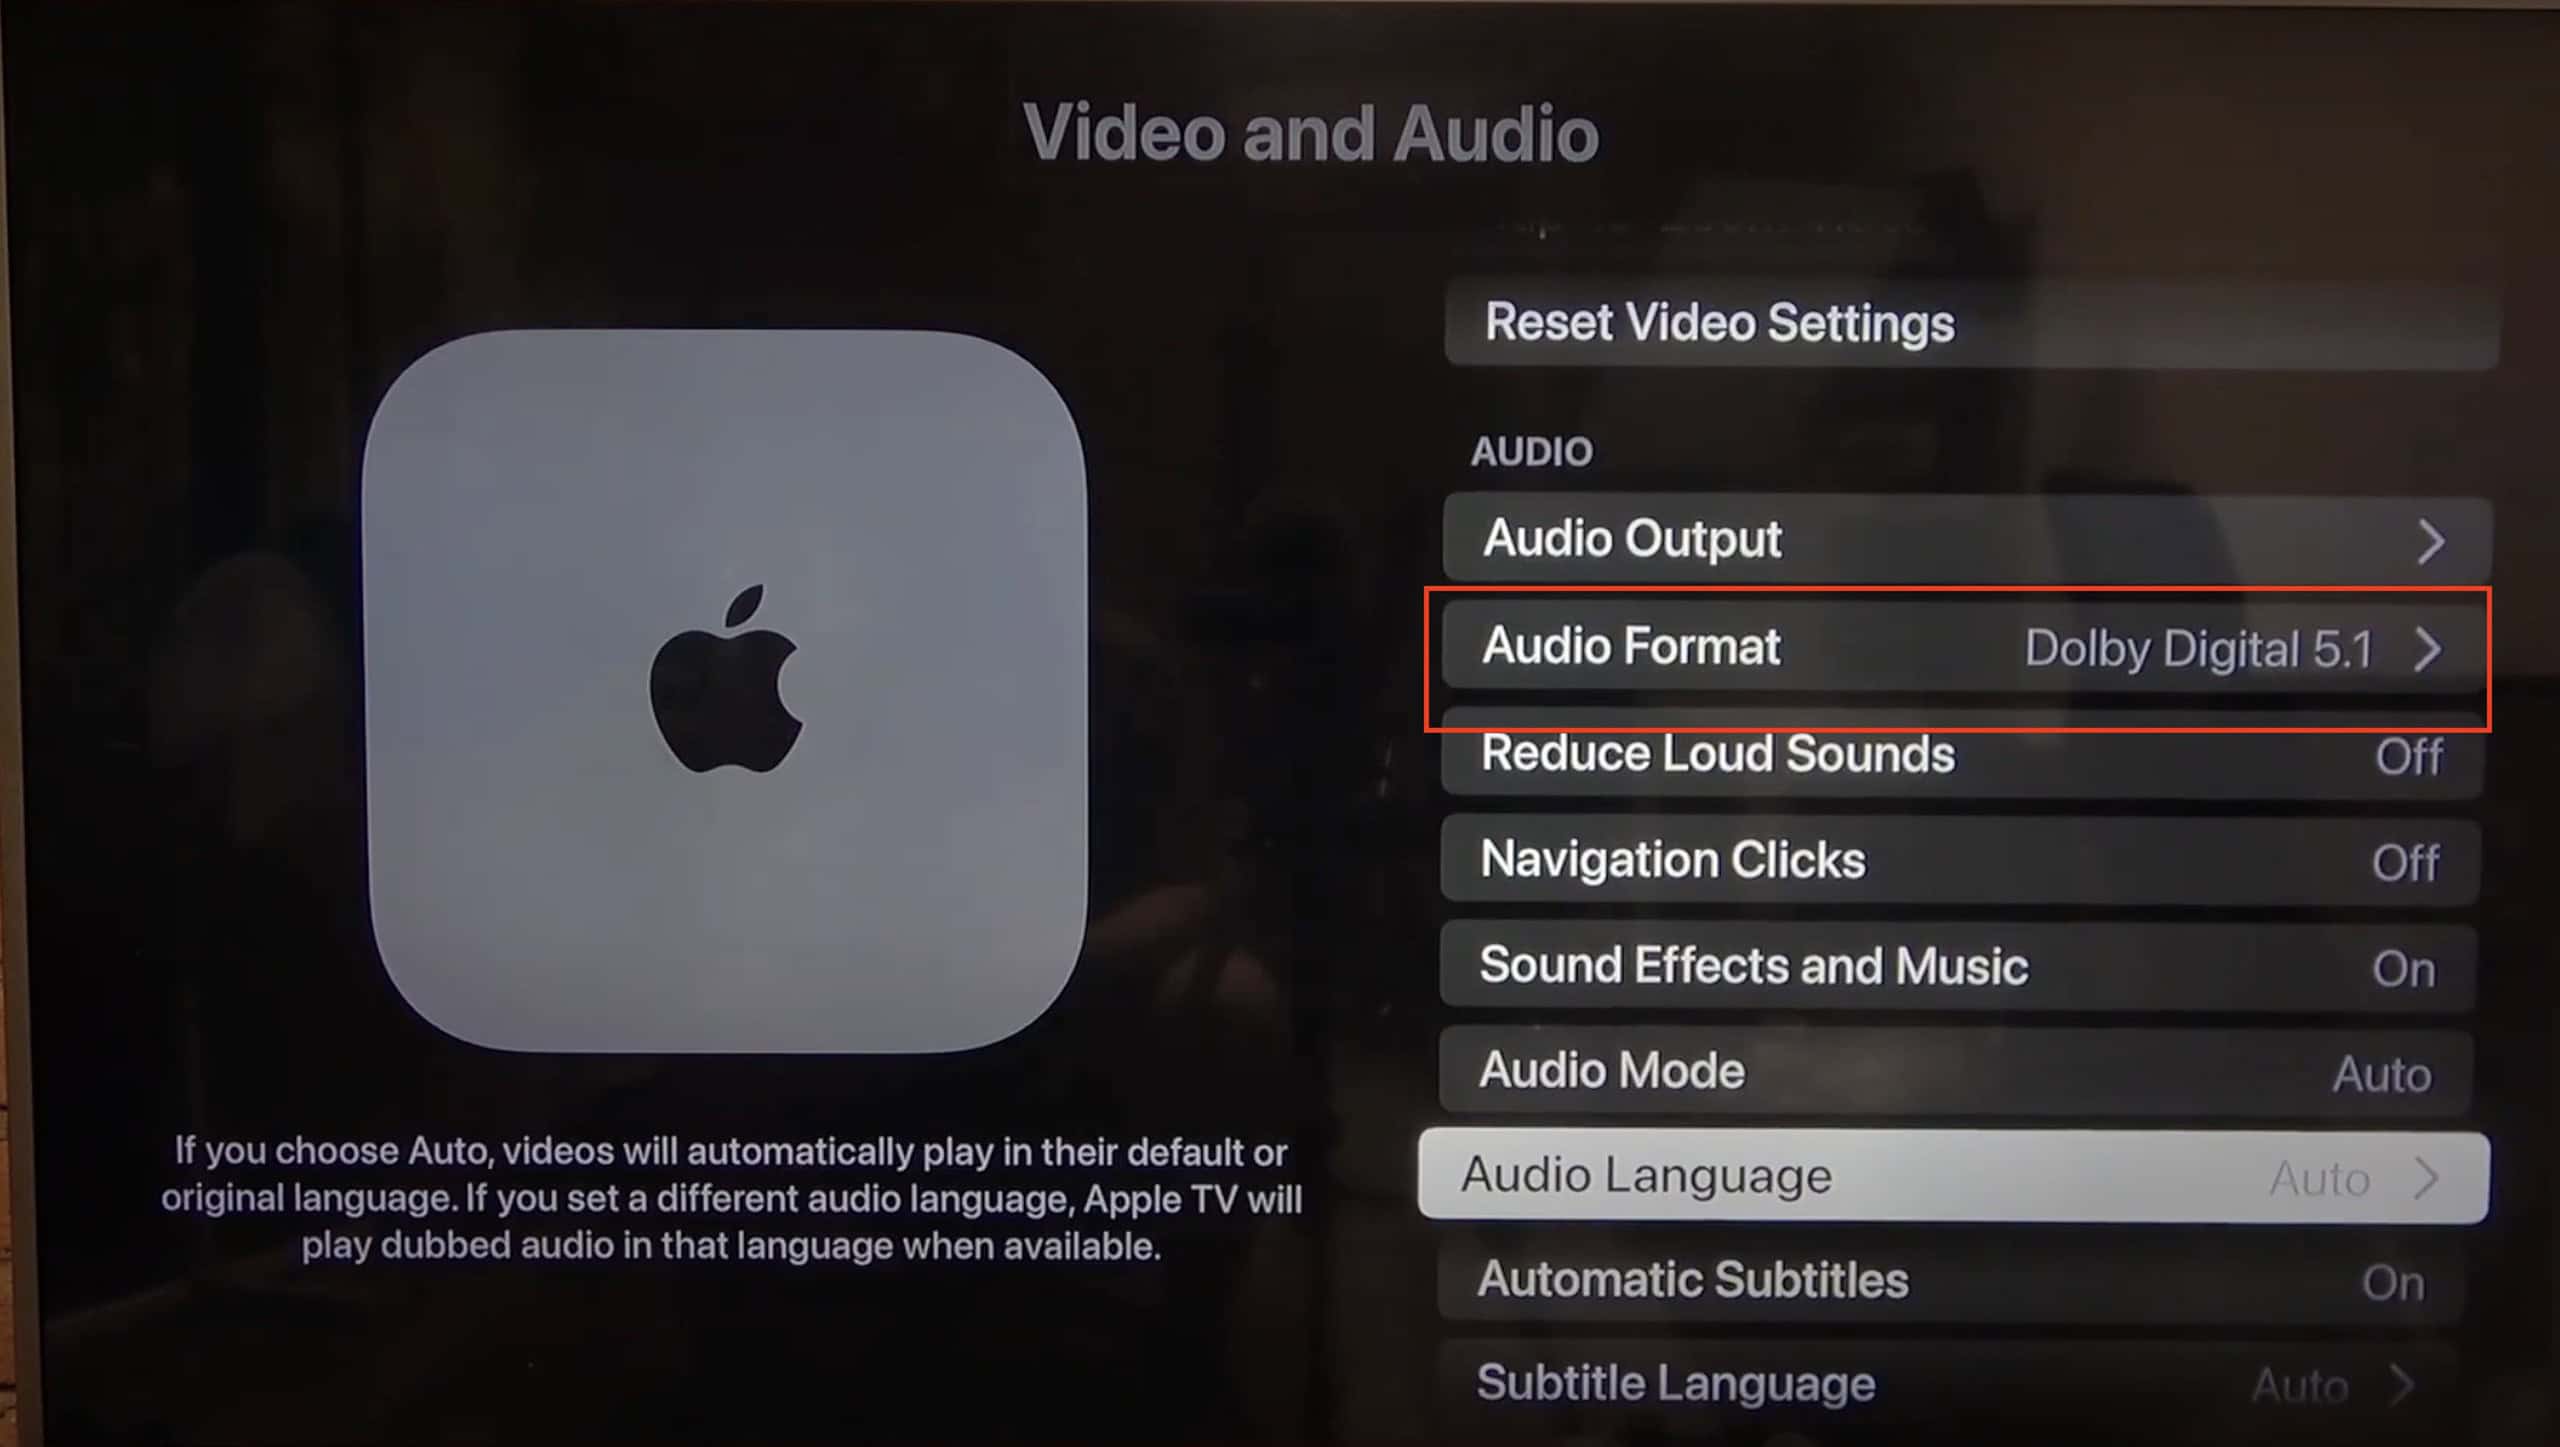
Automatic detection doesn’t always mesh well with third-party audio equipment. You can bypass your Apple TV’s default format selection by manually setting the output to Dolby Digital 5.1. It might help with older audio systems that don’t fully support Dolby Atmos yet.
- Go to Settings > Video and Audio.
- Select Audio Format.
Image Credits: HardReset Info - Choose Change Format and toggle it to On.
- Under New Format, select Dolby Digital 5.1.
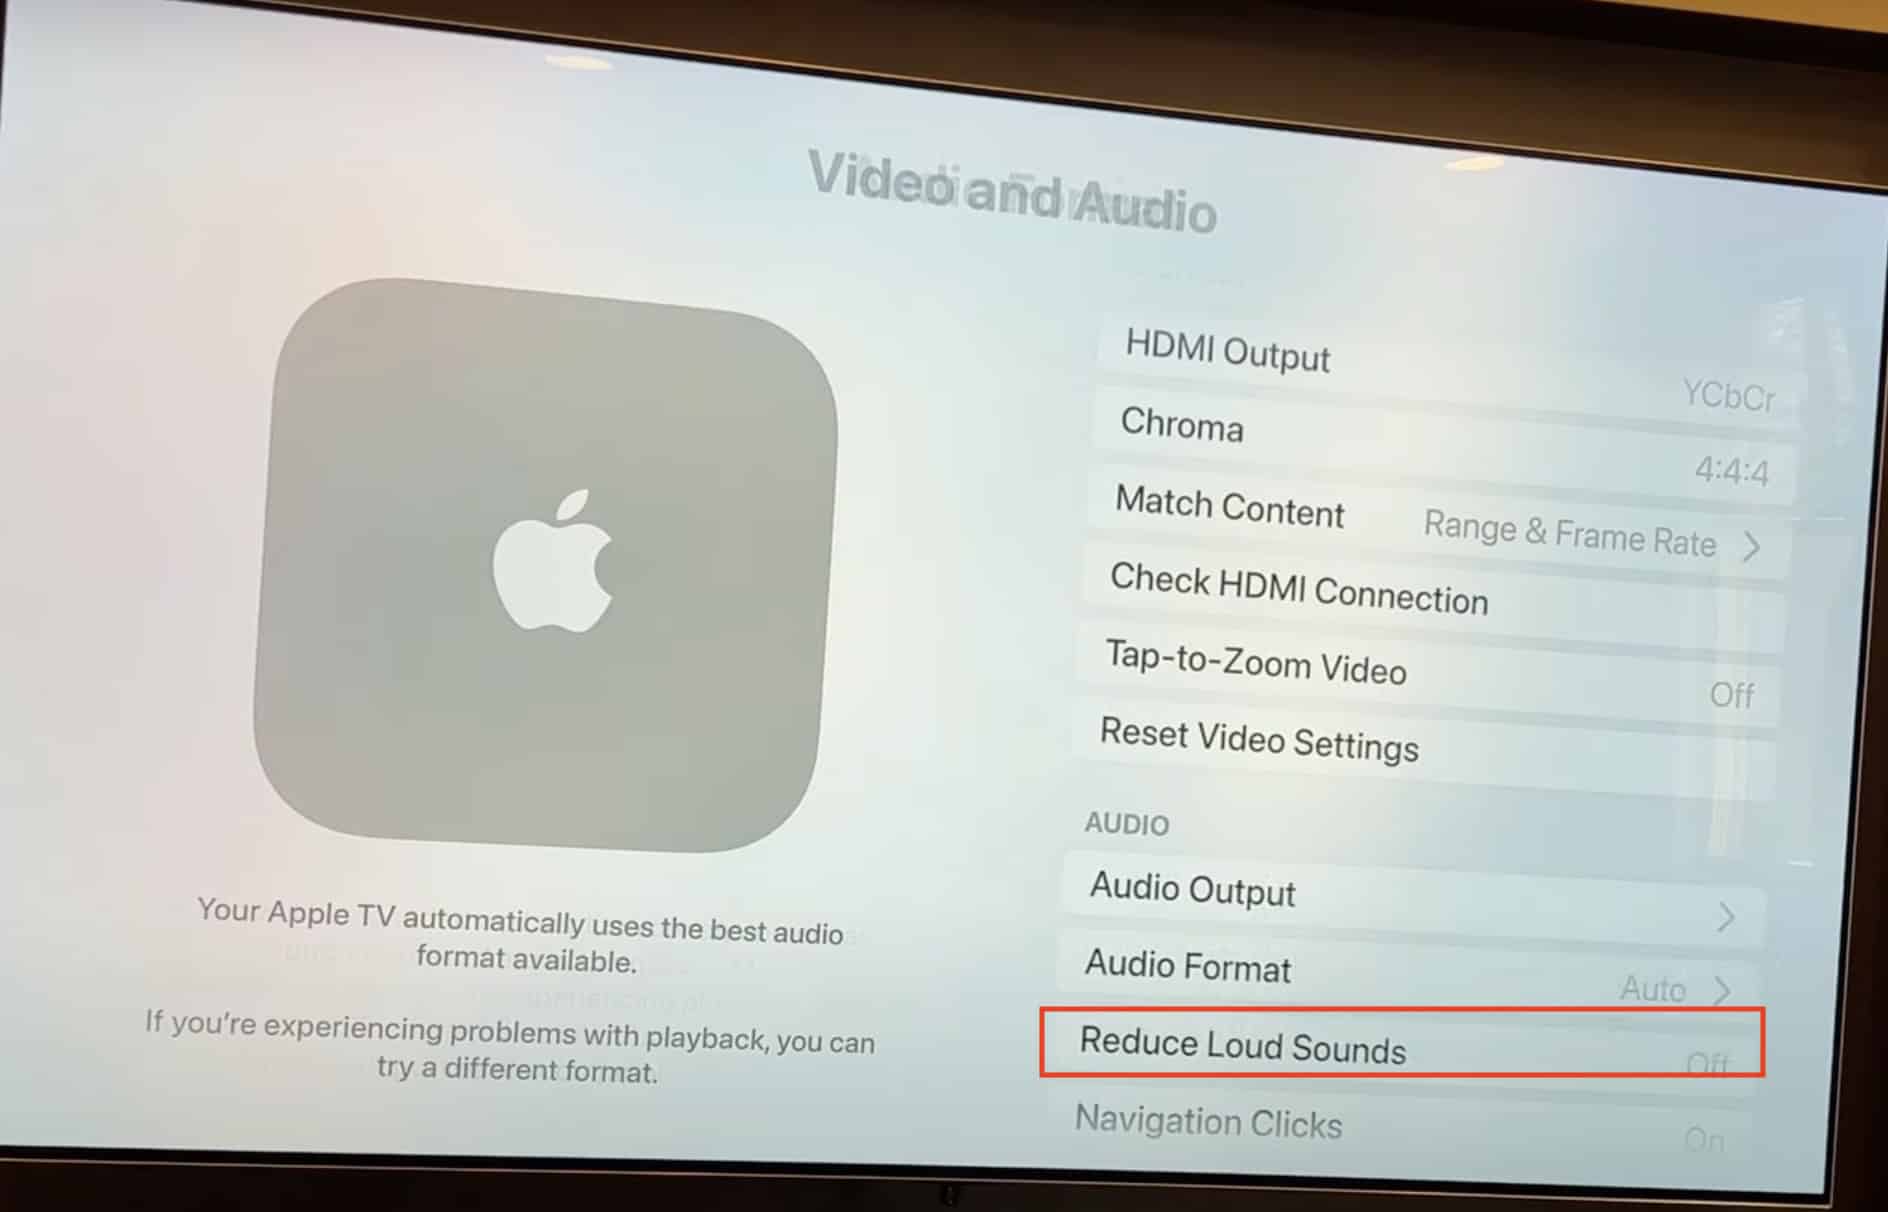
5. Disable Reduce Loud Sounds
Reduce Loud Sounds compresses audio and minimizes volume spikes. Although helpful with output regulation, it can interfere with dynamic file formats. Turn off this feature while you’re troubleshooting.
- Navigate to Settings > Video and Audio.
- Scroll down to Reduce Loud Sounds and turn it Off.
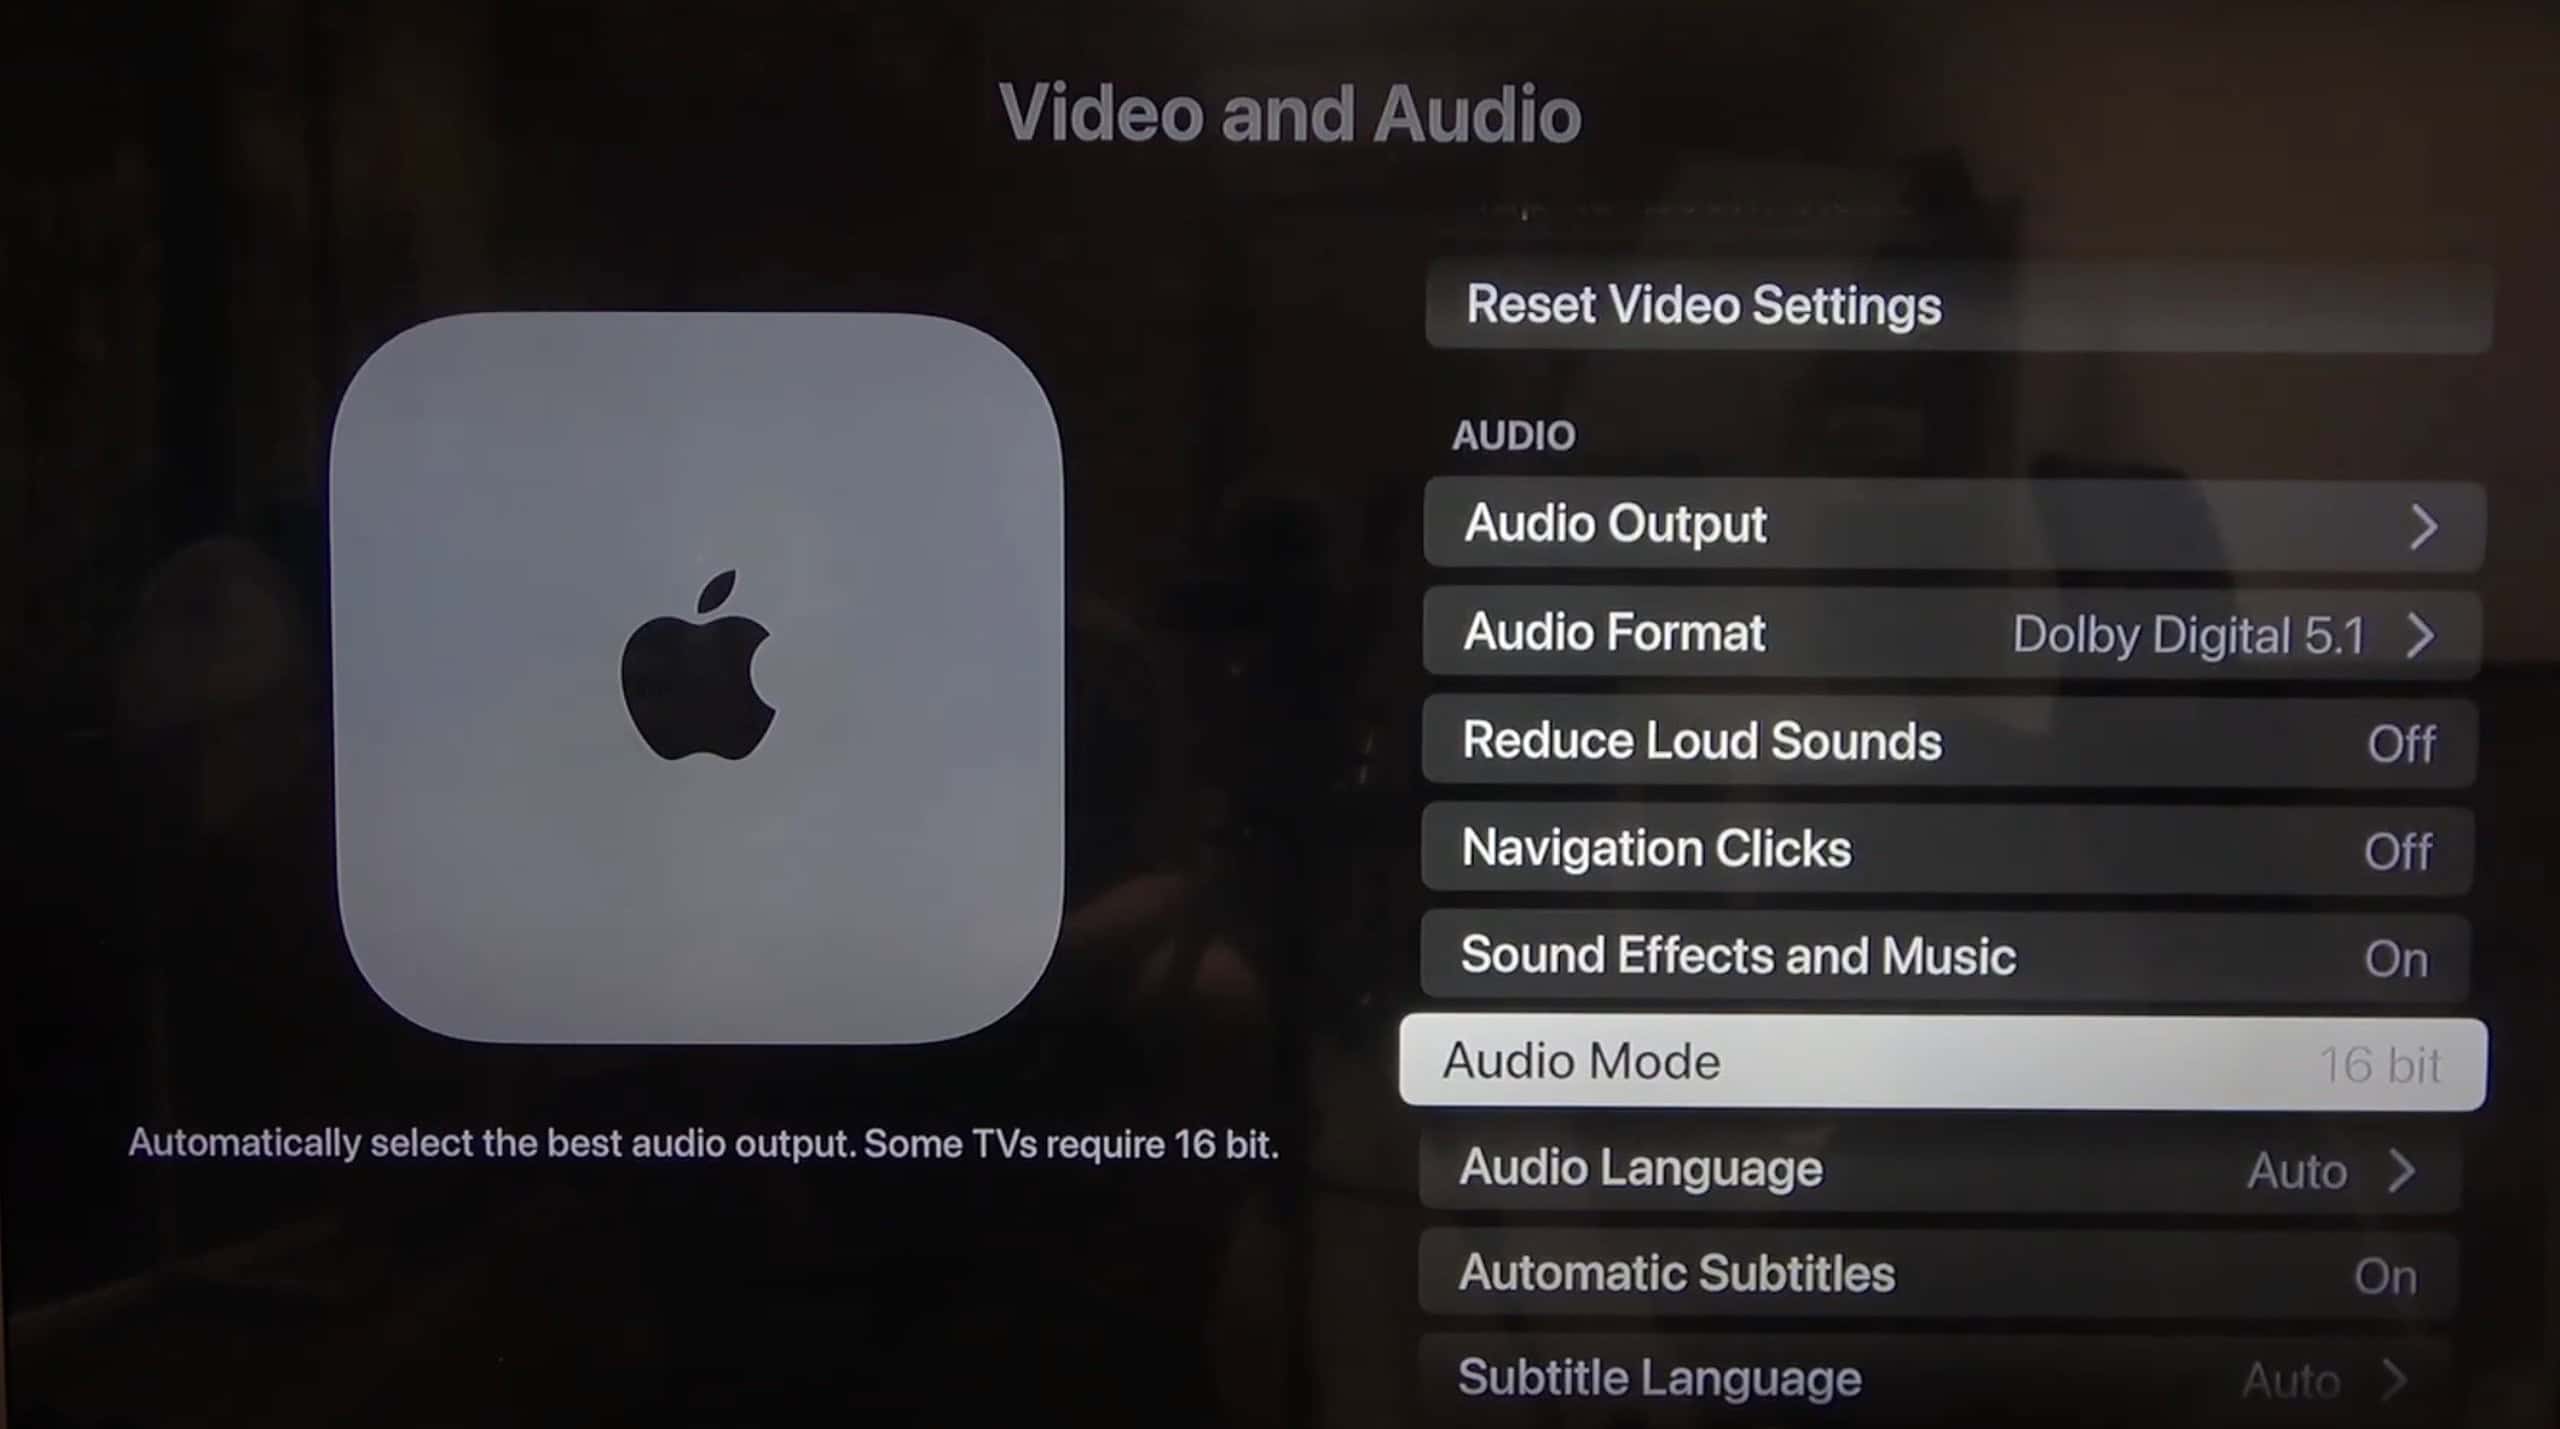
6. Adjust Audio Mode Between Auto and 16-bit
Try switching between Auto and 16-bit audio modes. It’ll help resolve compatibility issues with older audio systems that work best with a stable 16-bit signal. These pieces of equipment may struggle when Auto mode tries to push higher bit rates.
- Go to Settings > Video and Audio.
- Select Audio Mode.
- Toggle between Auto and 16-bit to determine which setting provides optimal audio output.
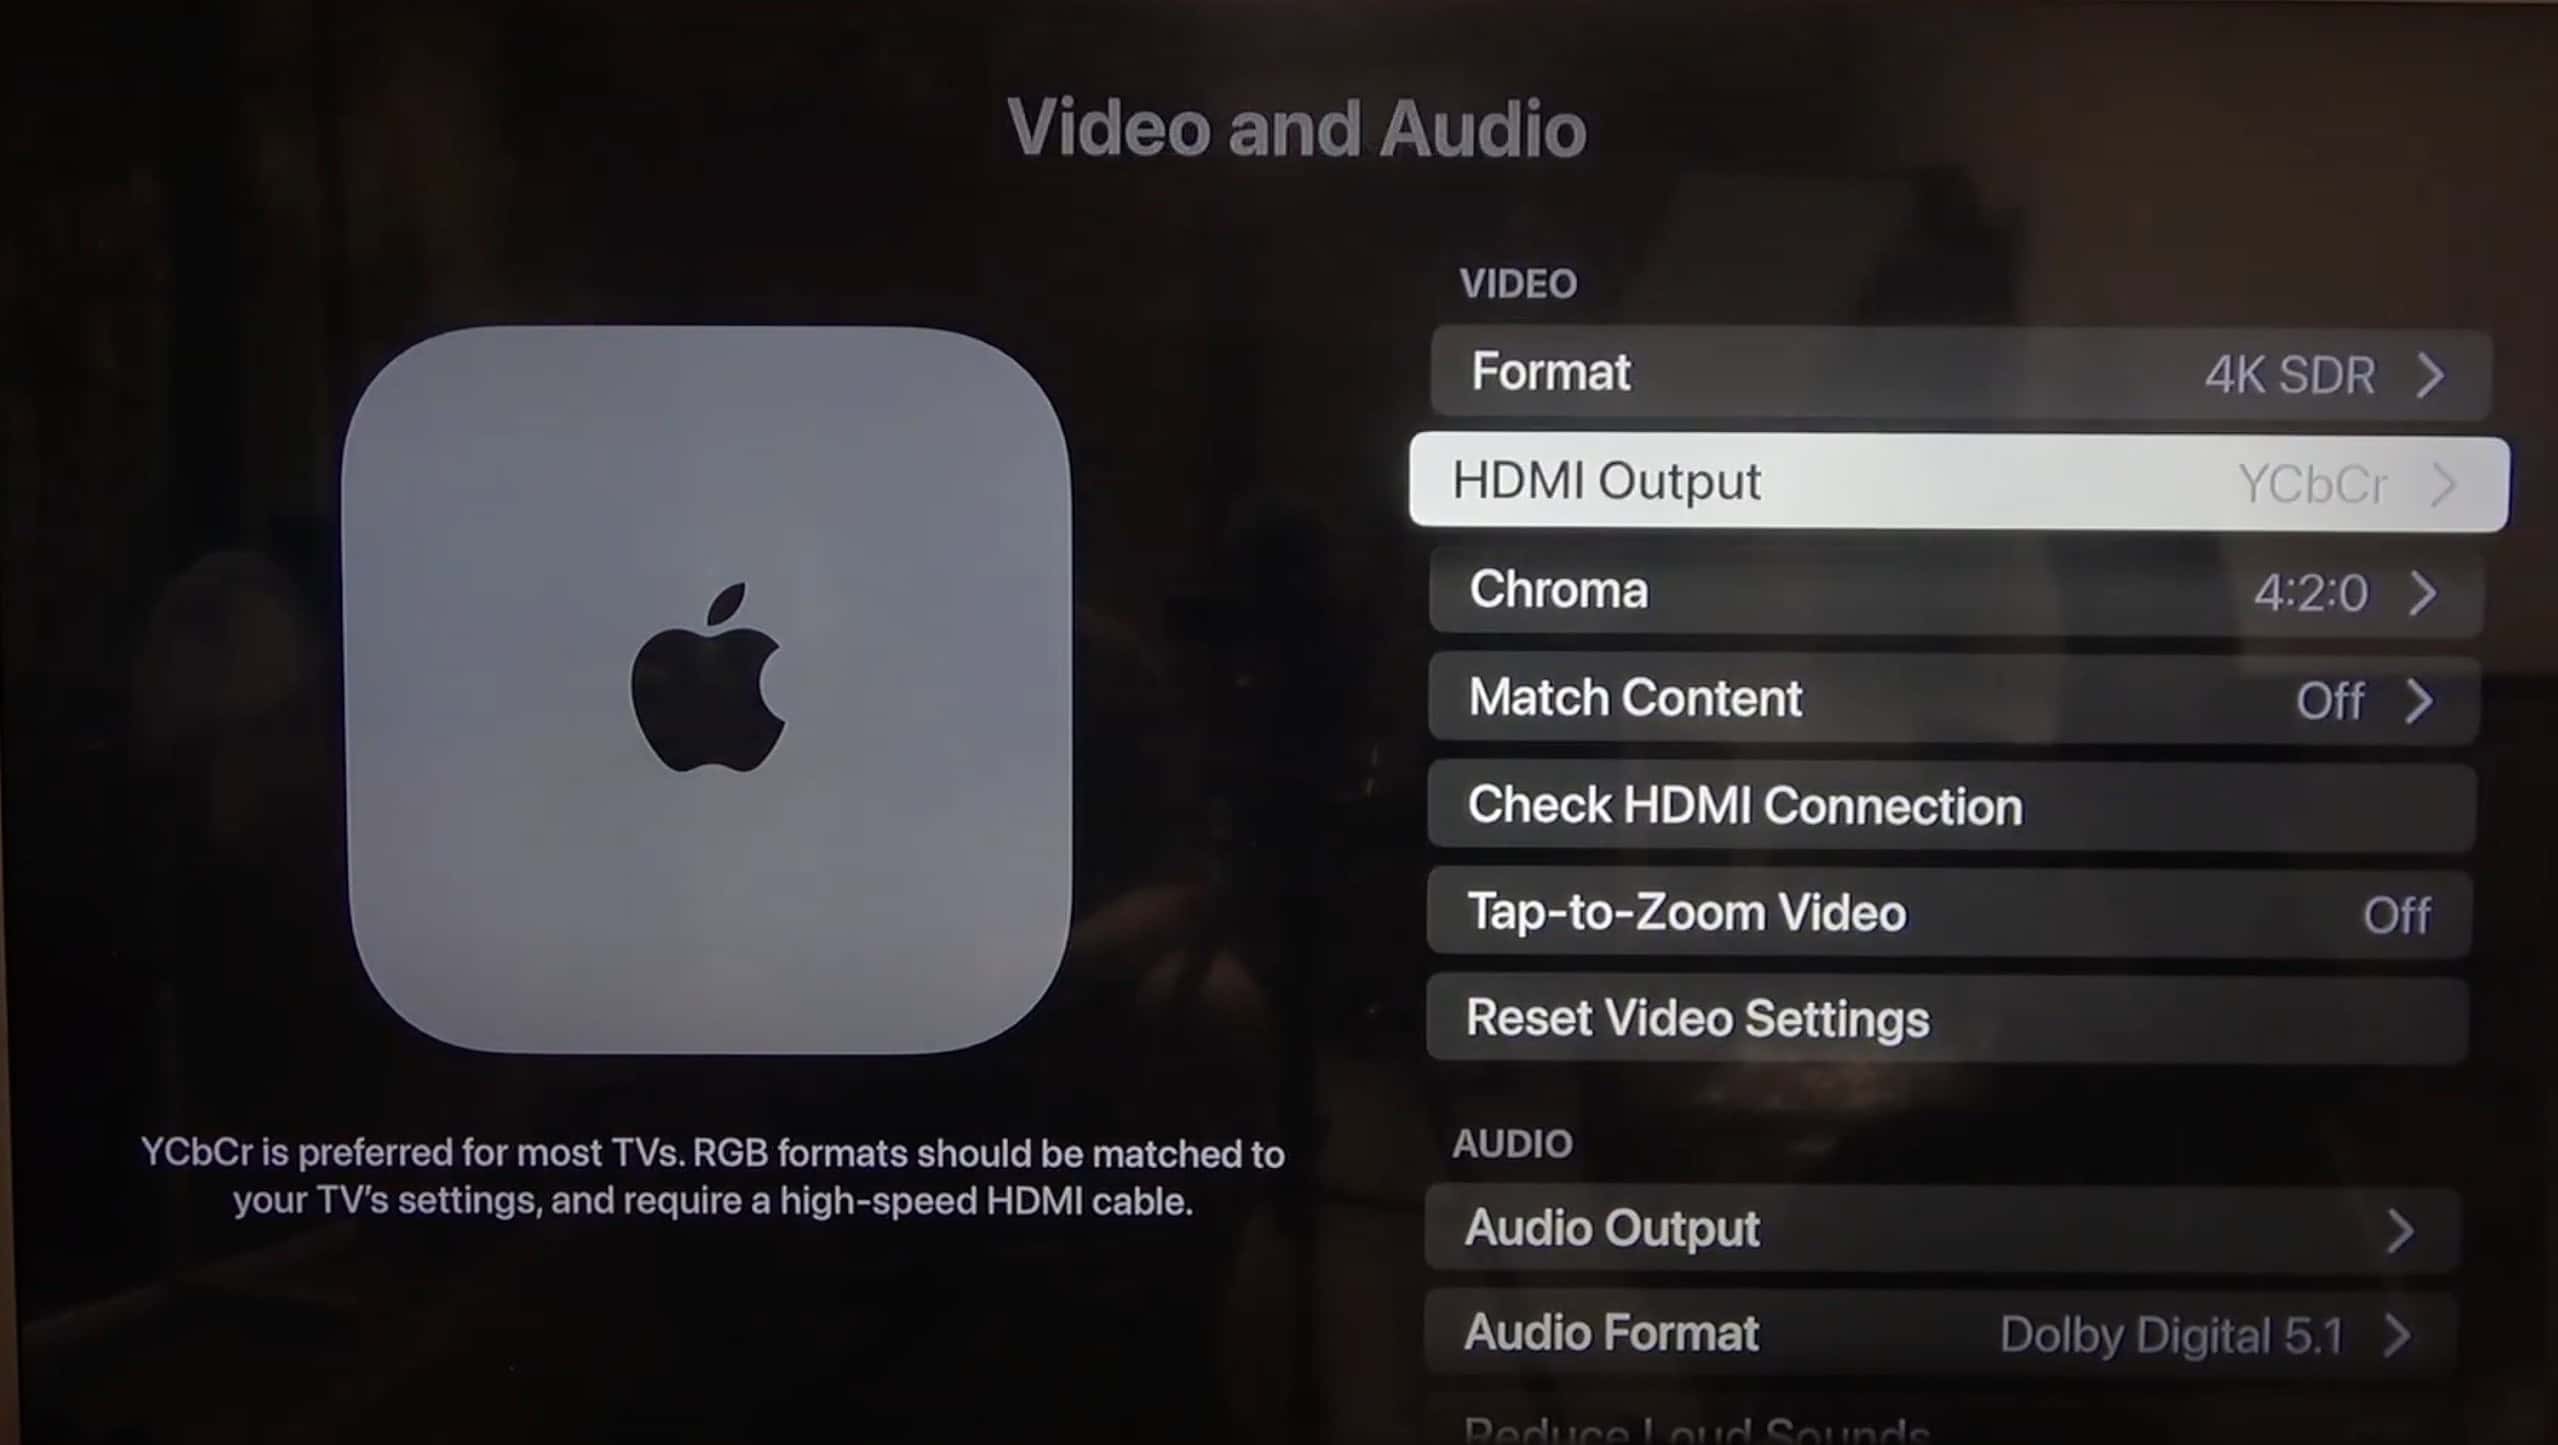
7. Set the Correct HDMI Output
Choose the correct HDMI output settings to maintain reliable signal transmission and compatibility with your display and audio equipment. Take YCbCr as an example. It generally suits home theater setups that prioritize audio clarity over pure color output.
- Navigate to Settings > Video and Audio.
- Under Format, select the resolution and refresh rate that match your TV’s capabilities.
- Scroll down to HDMI Output and choose YCbCr instead of RGB High or RGB Low.
8. Factory Reset Apple TV
A factory reset might be your last resort. Since you can’t pinpoint what’s blocking Dolby Digital output, revert everything to their default settings. It’s a quick way to clear hidden bugs and misconfigurations. Just remember to back up your data on iCloud first, or else you’ll lose it for good.
- Open Settings on your Apple TV and select System.
- Click Reset.
- Select Reset and Update.
- Confirm the action and wait for your device to restart.
If issues persist, contact your audio equipment manufacturer. They can help identify potential hardware defects or compatibility problems affecting your output. Additionally, reach out to Apple Support for assistance with underlying Apple TV-related concerns.

