With only a few gigabytes remaining on my Mac’s SSD (thanks to the size of the system files), I’ve often encountered the message “Your disk is almost full.” So, what I usually do is randomly select files to delete to free up some space and get rid of the annoying pop-up message. But then, it never really resolved the issue. So, what I did was to really take some time and carefully follow these four ways of finding large hidden files on my Mac. Read along if you have the same problem of running low on storage space on your Mac.
1. Delete Unnecessary Files on Your Mac’s Downloads Folder
Believe it or not, the most obvious place where you should look for large hidden files is in your Mac’s Downloads folder. That’s where most, if not all, of the files that go into your computer are saved. Whether browsing the web or sending files via AirDrop, files go into the Downloads folder.
So, for the best results, we suggest you try a comprehensive cleaning tool like Intego Washing Machine to erase all unnecessary files and other large elements that clog your Mac’s space, further visibly optimizing its performance.
2. Use Finder to Find Large, Hidden Files on Your Mac
Another way that you can find large hidden files is to use the Finder app on your Mac.
Time needed: 1 minute
Follow the steps below to find large hidden files using the Finder app.
- Launch the Finder app on your Mac.
- Click on the search bar in the top right corner.
- Type any symbol to reveal the “+” button just below the search bar.
- Click on the “+” sign.
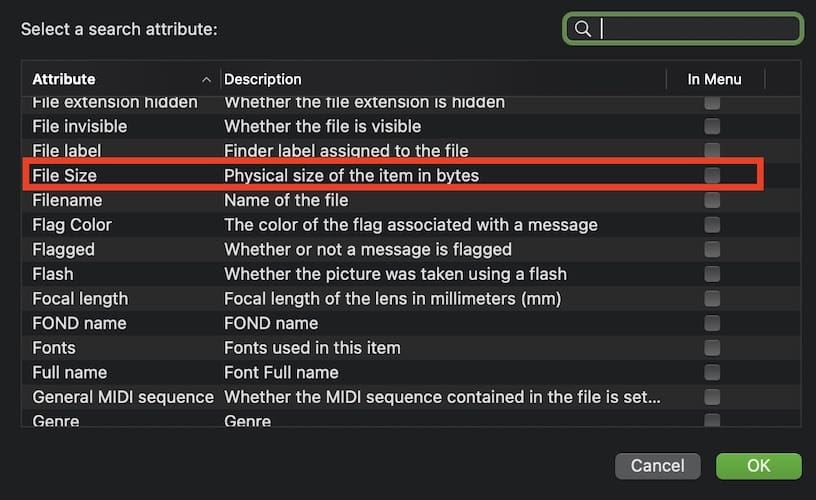
- Click Name > Other.
- Choose File Size in the next menu that appears.
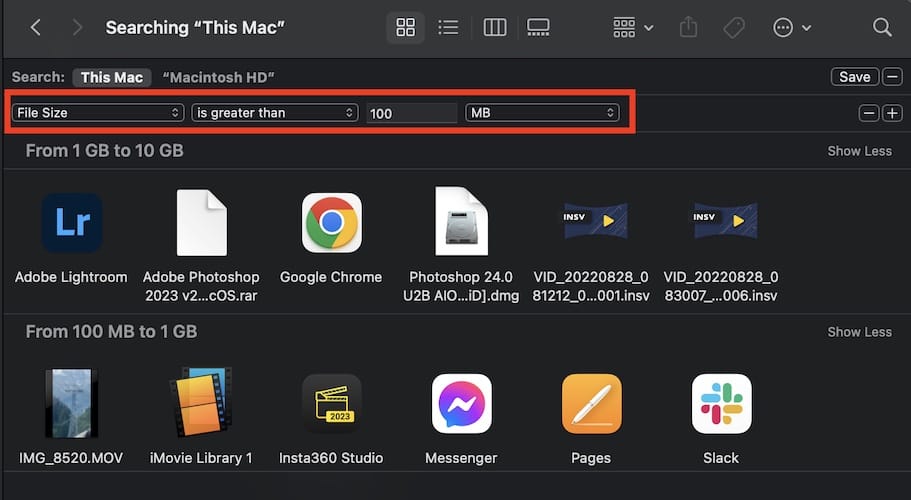
- Specify a file size that would tell your Mac to search for files exceeding that limit.
- Select This Mac to get a full list of results.
Although this is a proven method for your Mac to pinpoint large hidden files, it also has a downside. And that is, it will not tell you relevant information about the files. So, you are not sure whether it is safe to delete a large hidden file or not. Still, this is one route to take when you need to free up disk space before installing a new version of macOS.
3. Use Your Mac’s Storage Manager to Find Large, Hidden Files
Aside from the Finder app, you can also use your Mac’s Storage Manager to find large files. For those who are not aware, your Mac has a built-in Storage Manager. See below for the steps to use it.
- Click on the Apple Menu.
- Click About This Mac > More Info.
- Click Storage Settings.
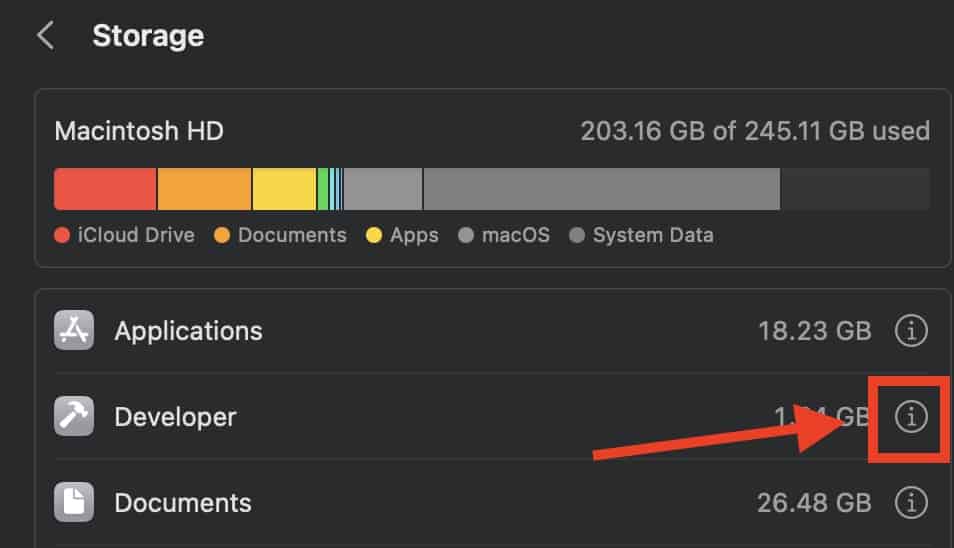
- From here you can see the different file categories and the storage size it takes up from your Mac.
- Click the “i” icon opposite the Category. to find large, hidden files that you no longer need and delete them.
4. Use the Terminal App to Find Large Files on Your Mac
For those who are adept at using the Terminal app, you can also use it to find large hidden files. See the below steps to do so.
- Launch the Finder app, then click Applications.
- Click Utilities > Terminal.
- Type the following on the command prompt: find ~/ -type f -size +(specify a file size limit), then press Return.
- To delete the large file, type: find -type f -name *.avi -size +(specify a file size limit) -exec rm {}, then press Return.
Final Words
There you have it. Some simple steps that you can do to check for large, hidden files on your Mac. By finding these files, you’ll be able to determine which of them you still need and which can be deleted to free up some space.
If you don’t want to go through the hassle of doing the abovementioned steps, you can always use third-party software that can scan through your Mac and automatically clean up files you no longer need. One of the most popular and effective is Intego Washing Machine X9.


Shoutout to OmniDiskSweeper. It’s been around for since the early days of Mac OS X. It’s freeware. https://www.omnigroup.com/more
A jewel for that, and free, is GrandPerspective
https://grandperspectiv.sourceforge.net