When reinstalling macOS, some Mac users experience an untrusted cert title error. Most of the time, this error is due to inaccurate settings. Continue reading to learn how you can fix this error and what you can do to avoid it.
Why Am I Getting an Untrusted Cert Title Error?
You may experience an untrusted cert title error while reinstalling macOS for several reasons including System Date and Time Settings that are inaccurate, your MacBook battery is damaged or outdated or you have a compromised security certificate. Avoiding having incorrect date and time settings can typically fix this issue. Fortunately, fixing the software issues can be rather easy.
How to Fix the Untrusted Cert Title Error on Mac?
1. Update Date and Time via System Preferences
Time needed: 4 minutes
One of the first things you should try is updating your Date and Time preferences:
- Navigate to the Apple logo in the top-left corner of your screen. Click it and select System Preferences.
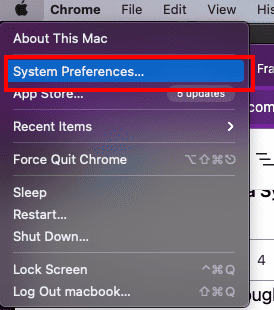
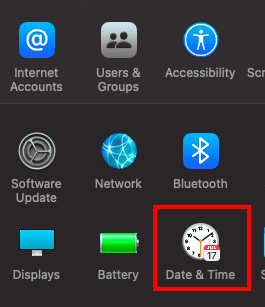
- Select Date & Time.
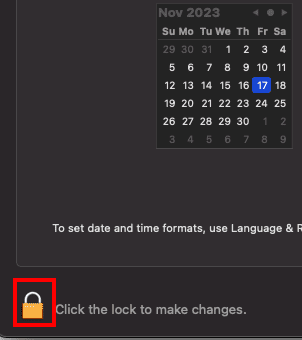
- Unlock your Mac by clicking the lock icon in the bottom left corner and entering your admin name and password.
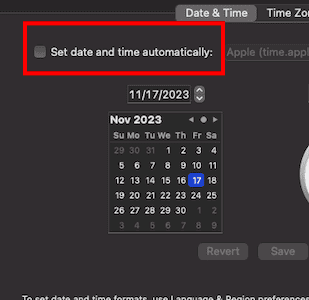
- Ensure that your device has the correct date and time. If it does not, uncheck Set date and time automatically. Enter the correct date.
2. Update Date and Time via Terminal
 NOTE
NOTE
You can use your Terminal to manually change the date and time settings. This will require being in Recovery Mode.
- First, enter Recovery Mode.
On Intel-based Macs: Enter Recovery Mode by holding the Command + R keys while your machine is starting up.
For Apple-based Macs: Hold the Power button upon startup. In both instances, release the keys when you see your startup options. - From the Recovery Mode screen, go to the Main Menu at the top and select Utilities.
- Click Terminal.
- Use the command date to check the date and time. If it is wrong you will need to fix it with the next steps. If it is accurate, you may need to consider other options.
- If you need to change the date and time, enter the following command:
date -u {month}{day}{hour}{minute}{year}You will need to replace the dates with the current information in a two-digit format based on UTC time. For example, December 22, 2023 at 12:42 p.m. would bedate -u 1222174223. - Check the date again using the fourth step. If it’s correct, restart your machine from the menu.
If these solutions failed to solve the issue, you may have a bad battery. Consider speaking with Apple Support for more options.
